Transcription
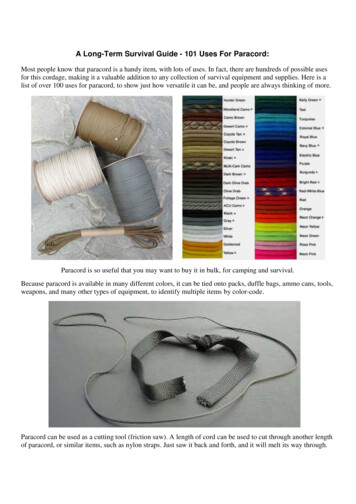
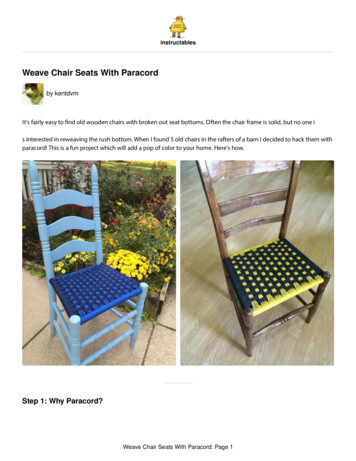
instructablesWeave Chair Seats With Paracordby kentdvmIt's fairly easy to nd old wooden chairs with broken out seat bottoms. Often the chair frame is solid, but no one is interested in reweaving the rush bottom. When I found 5 old chairs in the rafters of a barn I decided to hack them withparacord! This is a fun project which will add a pop of color to your home. Here's how.Step 1: Why Paracord?Weave Chair Seats With Paracord: Page 1
Paracord is short for parachute cord which was it'soriginal use. It's now available in a multitude of colorsand has a million uses. Comprised of multiple nyloncords it's amazingly strong, very durable, and easy toclean. Cost is not prohibitive either as repairing a chaircosts approximately 25. Paracord woven chairs wearwell and will look great for a long time.Flat bar for weaving cordhttps://en.wikipedia.org/wiki/Parachute cordElectrical tapeMaterials:Sand paperParacord - 275 feet depending on chair measurementsPolyurethane, chalk paint or other wood nishI'm using 550 paracord but smaller cord will work too.Step 2: Preparing Your ChairYour rst step is cutting out the nasty seat bottoms which is pretty easy. Sand your chair as needed to remove old nishand any rough spots. Apply polyurethane as I did on the chair above or use paint to add more color. Chalk paint is a greatoption for old wood as it requires less prep and bonds well (blue chair).Weave Chair Seats With Paracord: Page 2
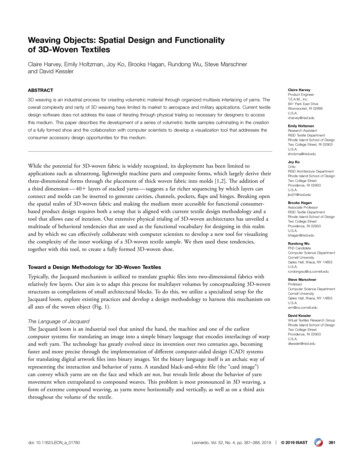
Step 3: Planning the WeaveThe only tricky part of this project is spacing the weave pattern evenly although it's pretty easy. Most chairs will be similarin size, however variations will a ect paracord usage. Start by measuring all four sides of your chair. The yellow & blackchair measured 10.5" on each side, 13" front and 11" back and required 110 ft of yellow cord and 165 ft of black cord. Thisis a good estimate for similar sized chairs. You can always add more cord on the bottom side so it's not critical to beexact.First.First nd out how many turns you'll be making on each side. In essence of time, I suggest wrapping around and aroundthe entire length of the back dowel, front dowel and one side to get an accurate count of turns. I tried to estimate this bywrapping a few inches and then multiplying by the length (pic 2). It didn't work very well. It's worth the time to quicklywrap each side and get a good count. Try to wrap evenly and snuggly for best results.Second.Lay out the "front-to-back" pattern (yellow). Using the number of turns on the front and back dowels, you need to (a)account for width di erence between front and back and (b) determine how many groups of 4 cords you will make.Account for width di erence. Since the front is wider you must add more turns on its left and right sides so the center ofthe pattern will run straight from back to front. Subtract the number of turns across the back dowel from those on theWeave Chair Seats With Paracord: Page 3
front dowel to nd the di erence between them. Divide this di erence by 2. This is the number of extra turns you needto make up on the left and right side of the front dowel so the center will be straight.Turns (front) - Turns (back) Extra Turns to be made on FrontExtra Turns / 2 Extra Turns on Left and Right sides of front dowelExample: On this yellow chair the front had 85 turns and the back 69 turns so I needed to account for a 16 turn di erence.Dividing by 2 meant 8 extra turns on each side of the front were needed for the center to be straight.85 - 69 16 more turns on the front than back16 / 2 8 extra turns on left side of front and 8 on right side of front.Look closely at the rst picture and compare the front and back patterns on each side. To make up 8 turns I either addedextra turns in the front or deleted turns across the back. Note along the back there are no "spacer" turns between thecords in the rst 2 groups of 4 long strands. Deleting these 6 turns and adding 2 extras in the front got my long strandsrunning perpendicular to the front & back dowels. If the front and back of your chair are the same length, i.e. the seat is asquare, then you can obviously skip this part.Determine the number of 4 strand groups. This should be done on paper using the turn counts you've alreadyestablished. See pic 3. I typically start with 2 "spacers" turns on the front and 1 in the back and then see how it turns out.The number of spacer wraps at the beginning and end is where you'll want to place extra turns so your pattern is even.Don't forget to include the extra turns on the front.A turn out of place here or there is not going to be noticeable but try to avoid it. On my yellow chair I didn't realize I hadmade a spacer turn in the wrong place until I started writing this instructable. One of the extra turns should be all the wayto the right, but it's hard to tell. Don't sweat little di erences. A good life rule!Last.Planning out the pattern for the side-to-side weaving (black) is simpler since the side dowels are the same length. Itypically don't put spacer turns on the sides so there are no gaps in the weave. Up to you. Use the turn count for the sidedowel you've already established and divide it by 4. If you have extra turns then use them as spacers either at the front orback.Grab some cord and let's get going!Weave Chair Seats With Paracord: Page 4
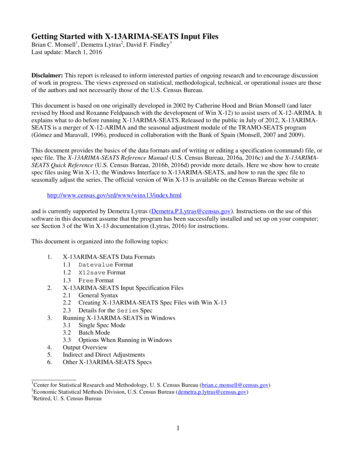
1 12 215 5 6 63 3 4 41. Notice there are no extra turns between the long strands2. Pattern repeated here with no extra turns between long strands.3. Extra turn4. Extra turn5. Extra turn which really be at the end on right side. Oops.6. Extra turn1. Notice there are no extra turns between the long strands2. Pattern repeated here with no extra turns between long strands.3. Extra turn4. Extra turn5. Extra turn which really be at the end on right side. Oops.6. Extra turn1. Not very accurate. Wrap the entire length for a better turn count.Step 4: Let's Get to Weaving!Weave Chair Seats With Paracord: Page 5
Grab 110 feet or more of paracord and bind it up so it'seasy to handle. I have tried several ways of bundling thecord and nd a rubber band works about as well asanything. I haven't tried rolling it into a ball like yarn butthat might work too. It just needs to be gathered up soit's easy to pass while you keep the cord snug on thechair frame.important. After cinching the clove hitch knot rotate it180 to hide the crossing strand. The clove hitch startsyou o with 2 turns in the front which is convenientwhen you are trying to add extra turns along the front.Leave a 12" pigtail so you can tie the other cord (black) toit when you start weaving side to -Clove.Tie your cord on the front dowel to get started. A clovehitch (pic 1) works well although the type of knot is notStep 5: The First Color WrapIf you haven't noticed this is a 2-layer weave where youwill be weaving an identical top and bottom layer.Normally you would only have one layer made byweaving the strands on the top and bottom together foryour seat. I didn't attempt this because paracord doesn'tstretch much and I was afraid it would be too tight toweave it at the end. As you'll nd, it gets hard to pass theparacord in this 2-layer pattern as the weave gets tighterat the end. Weaving 2 layers requires more cord, but it'seasier and faster to weave.After tying your knot, the rst pass (moving front toback) is on the bottom side. Passes on the bottom aremade moving front to back. Passes on the top are madewhen moving back to front. Now simply wrap thepattern you've already worked out on paper. Do notwrap the cord super tight! Taunt is good enough. Whenyou nish your passes tie it o and leave a 12" pigtail touse later.Weave Chair Seats With Paracord: Page 6
Step 6: Weaving the Second ColorWeave Chair Seats With Paracord: Page 7
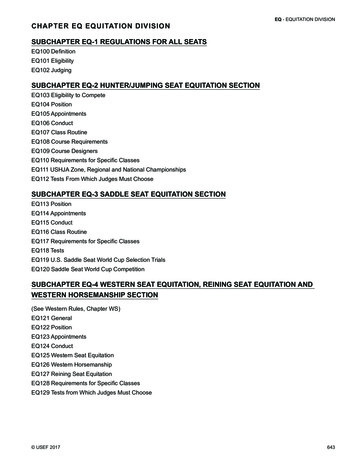
It is much faster to weave this seat if you use a bar, stick,wire or other long instrument to pass the cord. I foundan 18" x 3/4" aluminum bar which worked great. Insteadof drilling an "eye" for my needle I used electrical tape asa simple solution for attaching the cord to the bar (pic 4).This avoids passing a knot or double strands of cord asyou weave.Unless you enjoy pulling 165 feet of cord back and forththrough your weave start with around 60 feet ofparacord (or roughly 1/3 of what you estimate needing).When you run short of paracord tie on a new 60 footstrand so the knot will be on the bottom side of the seat.Here are a couple knot an-Knot/To begin make a clove hitch or other knot on the sidedowel at the same corner where you started the rstlayer. Tie a second knot to the pigtail you left from therst layer to secure both layers. Alternatively you cantape or nail the paracord to the inside of the dowel andwrap over it. Either seems to work well. On this chair Iforgot to leave a pigtail so I just taped it to the sidedowel where it would be hidden.Step 7: Weave AwayNow that you're tied on start weaving back and forth. Weave across the top and then weave back across the bottomlayer. As you can see in pic 4 the bottom looks just like top. When you get to the end tie o your second layer to thepigtail from the rst layer. And that's it!Weave Chair Seats With Paracord: Page 8
Step 8: Enjoy Your New Chair(s)Weave Chair Seats With Paracord: Page 9
I hope you found this instructable useful and that youwill give this a try. Once you do a chair you won't needthis guide any more as it's simple to learn the technique.A fun furniture hack with a big "Wow" factor. Your friendsand family will be amazed at how those old bustedchairs look now!If you nd this furniture hack worthy, please give me avote in the contest. My son is interested in woodworkingand I'd feel better if he was using a SawStop;) Lookingforward to your comments and questions.I did a basic figure 8 "weave" for the back. I found the paracord very tricky/twisty to work with, butwe eventually came to an agreement.How cool! Looks great. Really like the back.These instructions are great and I can't wait to give this a go. Literally just stumbled across thiswebsite (never heard of it before) but I can tell it's going to be a favorite of mine. I'll add somephotos of my outdoor round/bucket like seats (before and after pics of course) when they arecomplete. Very exciting. Now.how do I upload a profile photo?I used 2mm "Bonnie" craft cord, used in macremé. About 1/4th of the cost of Paracord at HobbyLobby. It's a very small rocker for toddlers, so I think the much lower tensile strength will not be aproblem. Came out great. Chair was mine as a child, then used by my kids as toddlers. NowWeave Chair Seats With Paracord: Page 10
redone to give to my granddaughter.Looks fantastic. I'll have to check out Bonnie cord. Certainly doesn't need to be as strong asParacord. Great heritage in that little rocker!Thanks for the comment. And especially thanks for the excellent instructions to do it.My first chair bottom! A small one for a grandchild. I had so much fun doing this, Thanks!Nice job! Looks fantastic!HiI have finished my first chair! Really pleased with it. I wrapped the back, front and side as yousaid but I still managed to get more wraps once I actually did the weaving but I think it worked outfine. I will use the count from the finished chair when I do the second one. I think it looks betterthan it did originally. Thanks for the instructionsI agree you improved that chair immensely! I am working on similar but mine has a few morecurves. Did you use any adhesive to keep the paracord fastened to the chair frame? With thecurves I have, it might be an issue with paracord sliding a bit. Did you have issues with cordsliding? It looks like you did not need to sand or repaint the chair frame. I need to repaint mine. Ireally admire your work on this project.Hi, thanks for your comments. I didn’t use any adhesive, the weave itself, once there was a fewlines of it on the chair, held it in place. I had to push it into place once a “4” section wascompleted. It was tricky threading all of the cord through the gaps but I tied it (with elastic bands)in three smaller bundles rather than one large one. I also used a small metal bar as my guiderthat I could bend slightly which made the weaving much easier towards the end. It was a flatfixing plate about 2mm thick - it got well bent as you can see from the photo. My chairs weremetal as they are outdoor chairs and they both were repainted before I did the weave. I am aboutto do an indoor on and that needs sanding and repainting first.I’d love to see your chair once you’ve done! Enjoy!Thank you for sharing your tips. I have 4 chairs so my first one will be where I learn the most!Beautiful work! I agree. I like the colors & weave better than original. Second chair will be abreeze. Thanks for sharing pics.Weave Chair Seats With Paracord: Page 11
beautiful work! Thanks for sharing, now with the policy "stay at home" because of COVID-19,plenty of time to try new things and fix chairs at home.The most well written set of instructions I’ve ever read. I look forward to trying this project. Pleasedon’t allow your son to use the tablesaw without a stop. I speak from experience as a Safety firstconsciousness. I am on a poster and have been out of work for year from a hand injury onI'm pretty thrilled with how my trash-picked footstool turned out. The bad news: working with justone color can be a little tricky and hard to see. The good news: it hides mistakes well.Very nice! I haven't tried a single color but plan to if I can keep the pattern straight;) Congrats ona great job!I made this for my great grand daughter out of PVC. She loves it. As you can see I haven't comeup with a suitable way to tie my ends but until I do she loves it. Any suggestions?Love it! PVC is such a good idea. What little girl wouldn't love a pink and purple chair made by hergranddad. I either knot the ends on the bottom side where the knots can't be seen or fuse piecestogether after using a lighter to melt the ends. Here's a video on how to join ends beforebeginning a project but you can do the same on your chair. Good work!Thanks for the instructions! I am not crafty and have never woven anything.Dragging the cord through the second layer was a pain (it kept getting so tangled). I started with alittle stool. I have three chairs to do still. Would a weaving shuttle help?I am very happy with how the stool turned out!IMG 0840.JPGCan this be done on cane seats? There are many small holes around the seats. I could canethem, but I LOVE what you did with the paracord.Thanks! I think it can be done depending on the frame. My guess is you could either wrap theparacord around the frame or thread it through holes drilled in wood. I've never tried it but I thinkit would work some trial and error. Hopefully someone else has some thoughts on this.Anyone have a video link where i can watch this being done the exact same way?Looks really good, thanks for getting into the math. I'm a weaver (4 harness Schacht) andweaving is Full of Math, where if you skip it you do NOT Get Results. I'm now looking for tips onmaterials that are really weatherproof for outdoor use. If you know anything.I might use seatbeltwebbing but I really like the color options of paracord.and for the bottom, do you think i can just do it back to front without doing the horizontals? Will ithold a person sitting on it well enough if I don't do both horizontal and vertical weave?I don't think that would work very well. I think it would hold a person, but over time would sag andprobably not be that comfortable. I would drill holes in the sides or router slots. You could drillholes in alternating in two rows for example.Weave Chair Seats With Paracord: Page 12
Cool, so glad I saw this post. You think I can weave only in one direction? I saw this chair in ashop window, and the raw chair is my project chair.For the back of the chair, absolutely. I like the way they did the figure 8 pattern.Made sort of a smaller version of this - I did a canoe seat. it wound up looking really good (I seethe mistakes I made, no one else does which is okay) and is more comfortable to sit on than theoriginal wicker/rattan seat that was in there originally. Thanks for the great Instructable to help meget through it!Excellent! Glad it was helpful. That's a perfect place for paracord.Finally got around to getting a picture. It's not perfect, but at least now I know what to do whenthe other seat goes! Thanks again.very nice job. looks great.Wow that looks great. Nicely done!Hitting roadblocks. I realized you can't do this with any old chair. If it has a back that connectswith the back horizontal piece, you can't skip that whole space. Duh, I feel stupid. I'm trying tothink of a way to salvage the project. Maybe add a bar to the back and weave off that?Suggestions welcome.make a straight line on front back and sides of chair drill hole's that line up on all 4 sides feedcord through the holes you will get the same effect as wrapping around the dowel on the otherchair.I'm finishing two old rockers. Chose paracord for the backs and seats. Just started and it isworking fairly well.Any suggestions for joins. I've been knotting without much grace.Hard to hide knots on the back. You could simply heat both ends and join them. I always feel likeI need knots but I've never had one come apart that I remember. Melted paracord holds well.I am finishing 4 old mismatched chairs and will paint them all one color. Contemplating using thisfor the seats.I wanted to let folks know that, just like old paint, old stain often has lead in it. I just sanded up astorm without realizing this. No mask either :(Weave Chair Seats With Paracord: Page 13
Thank you for sharing that. Fortunately old stain contains much less lead than paint and it is lesscommon that it contains lead, but you don't know?Nice idea! yet another use for paracord.This is so cool! I love paracord but I still want to stay away from it for a while after my lastparacord project. Thank you so much for sharing this!Thanks! I think I speak for everyone in asking for a few more details about your last d-Hammock-3.This was my last project. I completed itover 6 months ago and I still have nightmares about weaving it. But it honestly turned out great!Well done! It's in my favorites. Completely understand.I would like to do a chair that is somewhat like a sling chair, no separate back. Would I do it sideto side first, then top to front dowel? It has sun damaged wide plastic strips. The chair is light,wood and was oh so comfy.I think you could do it either way. My first thought is it would be easier to do it the same way. Topto bottom the long way and then weave side to side. But you may be right when consideringweaving around the legs, arm rests, etc. Weaving top to bottom could be easier because youavoid these obstacles. Either way it will work and look great IMO. Post a pic when you get itfinished. Good luck!Looking forward to trying this. Fantastic work, great tutorial, awesome color selection!Well done!Great idea and well described. I've got two candidate chairs in my basement. As a suggestion, aclove hitch can loosen over time as strain goes on and off the knot (sitting down and getting up).A bowline (see instructable ght be a better choice to tie the cord to the frame.Thanks! I thought about using a constrictor knot but then decided to tie the pigtails from the clovehitch together. Hopefully that will limit movement well.Weave Chair Seats With Paracord: Page 14
Paracord is short for parachute cord which was it's original use. It's now available in a multitude of colors and has a million uses. Comprised of multiple nylon cords it's amazingly strong, very durable, and easy to clean. Cost is not prohibitive either as repairing a chair costs appro