Transcription
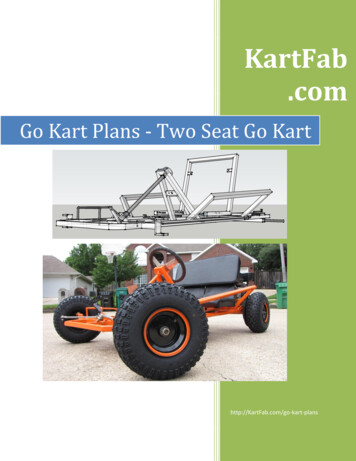
www.kartbuilding.netOff-road kart plansChassis ConstructionThis is the layout for a Kart seating an average person but it is advised that you roughly lays out thisdesign on the ground, placing a wheel at all four corners, the seat and the engine side by side. Themeasurements given below will not need to be altered much as there is room for movement for abigger seat and/or bigger engine on both sides. My advice on going to construct this is to draw out theshape below on a 8 * 4 foot sheet of plywood, if your desperate you can draw it out on a strip of feltunderlay with chalk. But the sheet of ply is the much better option, as you can work from this rightthrough out the welding and bending operations what you can do is place all the sections of pipe cut tothe exact length on this sheet, drive in nails both sides of the pipe and weld all the sections togetherwithout too much distortion taking place. But be ware of fires. I'll take no responsibility if you burn yourhouse down.The most complex detail in this chassis is the pipe bending. Like myself a lot of people are not theowner of a pipe bender capable of bending 25mm mild steel tubing with a wall of 3mm. What I did anwhat a lot of ye will need to do is to go to your local engineering firm show him this plan and get him tobend that section out. Stay Clear of Dear Firms. One engineering firm told me that it would cost toomuch to set up the machine. A place down the road supplied that section of pipe and did all thebending for 30. So shop around. If desperation kicks in got to this link. Pipe bendingA welder is a necessity in this entire project. It doesn't have to weigh a ton, a small 120 amp welderwill be sufficient. I only have a 100 amp welder and I have to be very patient with it. But I got my Kartbuilt. If all you have is a 100 amp welder or less you will definitely need to use 2.5 SWG welding rods.This is the most important section of the entire Kart, spend a good week or two making this section.Have no holes in the joints or anywhere for that matter. If this section is constructed well it will serveyou for years and for a number of engines. Mine went through 4 major engine and drive changes asca be seen in my "Pictures of various karts." at my homepage. Plans pics on last pages**Remember this is the support for every single thing **Below are a few methods of fixing the rotating live axle to the chassis.The axle I recommend for this kart is either 25mm or 30mm of Diameter. So all fixtures are based onthis measurement. This axle can be a plain metal bar cut to the correct length with the bearings grubscrewed to the axle. Depending on the hubs you decide upon, these can be keyed/grub screwed tothe axle as well. If you decide upon, the quick, simple and very effective stainless hubs from awheelbarrow with flat grooved tyres, all you need do is to spot the hub onto the axle, which can beeasily ground off at any time. On the wheelbarrow wheels I used, the internal diameter was 25mm, butmy axle was turned on a lathe, with my bearings pressed on all requiring different diameters. But if it ispossible to get access to a lathe, a length of 120mm at both ends could be turned from a 30mm axledown the required diameter. If you don't, you will have to opt for a 25mm axle.Don't forget that the brakes and sprocket have to be mounted to this axle, so wait before you gorushing in welding things together. This section is next in the free plans page. Brake and SprocketIf you decide upon proper aluminium/plastic hubs, I have plans drawn up for a proper axle hub.Only if you have access to a lathe and the appropriate materials should you set about making hubs.Stick with wheelbarrow hubs, etc with an internal diameter bush. Plans For Hubs-1-
www.kartbuilding.netThis first method is the one you should use.This first method is the most easiest and simplest of them all. I know the diagram looks a bitcomplicated but all it is, is a housing for a self aligning bearing. The whole unit just bolts onto thechassis on both sides. Easy, simple, quick, less hassle, lasts forever. A grub screw secures thespinning sleeve of the bearing inside the housing to the axle. The little nib you see is for a bit of oilnow and again. Some come grease packed requiring no attention ever. The ONLY problem is thatthey will set you back from between 30 and 50 quid, for an axle of diameter of 30mm. Too dear forthe Kart I was building. However you will have to weld a plate to the chassis onto which you can bolton this bearing, otherwise you would have to drill 4 8mm holes in the chassis, which will destroy thechassis. Take note - NEVER DRILL ANY HOLES IN THE CHASSIS, believe me I learned the hardway, the hole chassis bent out of shape with the middle of the ground nearly hitting off the ground, Ihad to straighten it all out and weld heavy angle iron to reinforce it.Scroll down for other methodsThe method I used for my Kart is the following.This design/method would not be possible for me to make without the very helpful assistance of alathe lecturer in a training college. This may well be far beyond many of your capabilities but take alook. I bought two ordinary plane roller bearings for 8 each. I then got a housing turned out to housethem (see fig below), and into which the bearings were pressed, and in turn the whole unit waspressed onto the rear axle. There were four holes in each of the housings onto which I could bolt ontoa plate which was in turn welded to the chassis as shown(weld symbol left).-2-
www.kartbuilding.netAs you can see from the section the bearing was simply pressed into the housing.See also the four mounting holes.You can also see the setup I have at the moment, includingeverything except for the hubs, the wheelbarrow wheels arejust spotted to the axle. Whatever bearings method youdecide to use you will either have to take down the ends of a30mm axle on a lathe, or opt for a slightly weaker 25mmaxle. You will also see that a 8mm steel plate is welded to thechassis, onto which the bearings can be bolted onto. This aidseasy removal, without weakening the axle. Forget about themachined hubs unless you know someone with a lathe. I youare using a 30mm axle, I suggest that about 125mm shouldbe taken down at both ends. The brakes and sprocketmountings will be discussed later, so weld nothingpermanently, to axle or to chassis.Another crude and very cheap method is to use a VERY simple bushing arrangement on the axle.This I do not recommend but I had no choice when I wasstarting out, but to use it. All it is, is a pipe welded to a flat barbolted to the chassis in which the axle could spin. This needsconstant greasing, and WILL WEAR AWAY, through time. If theengine you have will drive you over 30mph DO NOT use thismethod. Both the axle and the pipe will wear away. Even if abrass sleeve were slotted into this pipe, first, it still would wear. Itis just held onto the axle by split pins and washers whichnecessitates the drilling of a hole in the axle !!.(very worrying!!).This is to allow easy removal for greasing. The pipe should be atleast 150-200mm long.-3-
www.kartbuilding.netStub Axles King Pins.The following drawings are self explanatory, and should be easy to follow.One point to note is the Camber and Castor angles stated, 5 and 25 degrees respectively. TheCamber angle is to aid turning corners, especially with the fixed rear axle. The Castor angle is used toturn and keep the wheels pointing forward whenever the steering wheel is let go!. It to also aidsturning corners. The angles are to be kept as close to this as possible, different angles are used fordifferent surfaces, tarmac, concrete. The angles stated are an average of all, so this kart will be aseffective on most surfaces, grass, clay, etc.Brass caps/bushings should be fashioned and pressed/hammered into the 30 X 60mm mild steel pipe,nylon can also be used, however brass will take more punishment. The mild steel pipe (30X60mm) iswelded to the cross member from the chassis, You will have to be PATIENT here in getting the correctangles. You will have to spot the pipe section onto the member, then adjust the angles so that ismakes 5degrees (the top of the pipe pointing inwards) and 25 degrees (the top of the pipe pointingtowards the back wheels). As in the diagram. The main thing is to try and have the angles the samefor both sides. YOU WILL NOT GET IT RIGHT FIRST TIME SO TRY AND TRY AGAIN, PATIENTLY.Also to be fashioned is the U bracket, on to which is welded the stub axle. It can either be bent intoshape from a 40X6mm flat mild steel bar, or as I done, you can cut a section of 2" channel iron, insuch case the measurements may have to be altered. It saved an awful lot of hammering, heating andbending of that 6mm flat bar.-4-
www.kartbuilding.netThe King Pins are M10mm HTS 8.8 (high tensile steel) bolts, with a lock nut and washer, these runthrough the U bracket and the hub pivot bushes which are pressed into the chassis pivots.Make sure you Weld all items exceptionally well, weld a ring once, grind down, clear off the slag, andmake another pass. Make sure you get all the way around, and that there are no pits, holes, cracks,etc.This next drawing shows the steering arm, it's angles, sizes etc-5-
www.kartbuilding.netThe angle of 108 degrees is part of the "Ackerman angle". with the wheels pointing forward thesesteering arm angles should come meet and come together in the middle of the rear axle. This principlecauses the wheels to be able to turn independent angles, causing the inside wheel to take a sharperangle. This however is all worked out in advance for you.Another point to note, is the mounting of the front wheels onto the stub axles. The way I have it on mykart at the moment is very crude. All I have done is secured the wheelbarrow hub with it's brassbushing between split pins and washers on the stub axle. I am currently thinking of a better method asthe speed goes up and over 50mph the front wheels take on a small wobble!!. However if you haveaccess to a lathe and the appropriate materials you can turn out stub axles and hubs. Here are theplans anyways for those of you who have a lathe.-6-
www.kartbuilding.netAs you can see from the drawing, it takes a bit of lathe work, including the threading of the last 20mmto take a M16 HTS nut and washer. Also interference fits must be taken into account when pressingthe bearings into the hub. But when it is constructed it will be the perfect set-up, and will last forever.Appropriate bearings must be obtained from your local engineering store to fit the 21mm part of theaxle, and to fit the internal part of the hub. The nut I recommend is a M16 castle finish nut, requiring apin to be slotted through the axle. This will keep the nut stationary for good!. Again the externaldiameter of the hub and the hole alignment will all depend on the size of the wheel.The Brakes and Sprocket mountings.This is now the time to become well acquainted with your local motorcycle supplier/repair agent as alot of second hand parts from motorbikes will be needed, such as the brake, low cost quality sprocketsand chains.I will talk firstly about the Brakes of this kart.Basically there are two types of brakes 1: Drum Brakes and 2: Disc Brakes. The latter been the mosteffective, nevertheless when the Drum brake is set-up correctly is can be better than a poor set-up ofDisc brakes. The brakes that you will use on your kart will depend on the amount of money you arewilling to spend. I' m using Drum brakes on my kart at the moment, they only cost me 10 from therear brake of a Honda 90, compared to around 40-50 for a front disc and calliper of a motorbike. Andif you ever drove my kart in the rain you will realise how gentle you have to be on the drum brakepedal, otherwise the whole rear will lock up and you will spin off doing 180's. In my opinion drums areeasier and much cheaper, nevertheless I have provided plans for both options, so well in good if youhappen to come across a disc and calliper of a motorbike.Drum Brakes.This type of braking method has disadvantages however, and the use of a lathe is almost a must,even if is it to get it done in a local engineering firm, it's only a small bit to be turned out as you willsee. Firstly you will need the rear brake from a motorbike, preferably 75cc or higher. The front brake isuseless as it has no mounting/securing arm to stop the brake plate from rotating. Cut away all thespokes and remove the sprocket and cush drive, then bolt a plate to this side. (right side on the pictureto the left) When the brake is finally set-up and all thediameters all matched up all on has to do is to spot this plateto the axle. Refer to the picture below of the positioning of thebrake. Only weld up when EVERYTHING is all finished, theshoes working correctly, as when this steel plate is spotwelded to the axle one must grind off the weld to remove thebrake. A bit crude I must admit, but if you want to go to thebother of making a keyway in the axle and then tapping thefixing plate to the axle, go ahead.The bigger the bike it comes from the better as the internaldiameter will be bigger, and will fit your axle better. When you obtain the drum and shoes, concentratefirstly on the open drum. Take out the bearing if there is anyone. Measure the internal diameter. If thismeasurement is smaller than your axle then unfortunately the difference must be taken from the drumon a Lathe. But the internal diameter may be too big!, in this case you will have to hunt down a pipe touse as bushing, you can weld to, which will take up the difference between the axle and the drum. If itis too small you will need a lathe. But not all Lathes have an internal cutting tool, and a drill bit of30mm - I have never seen. In this case, your axle will need a bit of lathe work ie.- taking down. ( If thisis too much Lathe work to handle, then stick with the straight forward Disc Brake)On the left side of this picture (to the left) you can see the piece to which the shoesare attached, and this is stationary with respect to the live axle and drum(to the rightof the picture).-7-
www.kartbuilding.netSee the picture below, the positioning of the brake, and the possibility of taking the axle down to therequired diameter to that point.The drum ispositioned betweenthe wheel and theframe of the chassison the left handside, with the Shoespart of the Brake(brake plate) on thechassis side.(this isto provide easy access to secure the shoes to the chassis via the fixing arm) However depending onyour ability and adventureness you could decide to put the whole brake set-up inside the chassisframe. Now moving onto the shoes part of the brake (brake plate), this is a round cast piece which thebrake pads/shoes are fixed to, and the shoes can be moved outwards by an operating lever on theoutside of this piece, which can be simply connected to a brake cable. This brake plate is the mostdifficult piece of the brake system. It is usually this part which it's internal diameter is too small to fit theaxle. This is where undoubtbly you WILL have to increase the diameter of the shoes piece on a lathe.Depending on the type of Drum you have you may only be able to increase the internal diameter a fewmill, anymore and you will weaken the piece. In this case you will have to take the axle down to meetthe slightly bigger internal diameter of the brake plate. You will understand this much better when youhave the brake in front of you. If you can spare 3-4mm then a brass/nylon bushing could be inserted,so that the brake plate can rotate smoothly on the axle. If not then the brake plate and the axle mustbe thoroughly greased, with an application of oil every 1-2 weeks.As you can also see in the picture, that the brake plate that the shoes are mounted to is keptstationary via a fixing arm which is bolted to the chassis. The Drum which is fixed to the rotating axlespins with respect to the brake plate. Make sure this fixing arm is rigidly fixed with high tensile bolts tothe chassis, as all the torsional load of stopping the kart is transferred through this member to thechassis. The brake operating lever you can see in the picture can be simply operated from a cablecoming from the brake pedal. Simple!. Any problems, just e-mail me (kartbuilding@g-mail.com)-8-
www.kartbuilding.netDisc BrakesDisc brakes have a few more advantages over the drum ie.- more effective straight forward.However the Disc plate MUST be mounted perfectly on the axle - which means making a hub to mountit, preferably made on a lathe, the Disc can not have any wobbles AT ALL!, and it also must beconcentric on the axle. As well as all this the calliper must be mounted rigidly to the axle. And as I saidearlier all this cost money especially the disc and calliper. In saying this a nice hydraulic unit of ascooter etc. would be very nice indeed. I would have used this method only I didn't have any discbrake available cheaply to me.When one thinks about a hydraulic brake they usuallythink about pipes and hydraulic fluid. Well that need notbe the case. Quite simply all one has to do is get thewhole front unit from a scooter/motorbike, brake leverand all. Then all one has to do is to mount the brakelever and fluid reservoir onto a chassis runner close tothe rear axle. Then all you must do is to remove thebrake lever, and fashion a small piece of aluminium/mild steel to fit in it's place. Exactly as it is in the picturebelow. The two holes is to provide different leveragepressures. A cable can then be run from this lever to thebrake pedal at the front of the kart. That is the actuatingprocess finished with. All that's left is to mount the Disc tothe rear axle as well as the callipers.Next you should go onto mounting the plain Disc to the rear axle in the correct position. Thepositioning of the calliper can be adjusted to suit the Disc. To mount the Disc accurately and securelyto the axle necessitates a mounting, something as in the picture below.This particular unit is made up of two parts weldedtogether, one been a circular steel plate made from8mm thick plate, and the other been a section of bar45mm in diameter with either a 25 or 30mm internalbore to fit the axle as well as a 6x3mm keyway in boththe axle and the mounting hub . When this piece ismade a slit of 3-4mm is made with an angle grinder etc.Then an 8mm HTS bolt is used to pinch/tighten the bossto the axle to prevent side to side movement on theaxle. A grub screw can also be used to serve thispurpose as well. The two pieces are then welded together on the axle, keeping everything concentric.Also the correct positions must be made for the Disc it's self, so it too is concentric. I would mark thepositions for the holes to bolt the Disc to the mounting hub in the lathe. Also I'd advise you to put thewhole unit in the chuck of the lathe to check that the Disc is mounted concentrically as well as squareto the axle. When this is checked and contains no flaws, then you can mount it on the axle. Then placethe calliper in place and weld if necessary, an extra runner to the chassis. When this is securely inplace test the brake by spinning the rear wheels in the air, making sure there is no touching of thecalliper and Disc (within a certain limit). Unlike the Sprocket the Disc must be perfectly square to theaxle.Also when removing the calliper from a motorbike try and prevent the callipers from falling out,otherwise you will have to drain the hydraulic fluid from system-9-
www.kartbuilding.netSprocket for the rear axle.The sprocket used for this type of kart, should be one from a motorbike. Bicycle chains come off all thetime. The axle diameter will either be 25mm or 30mm.Method 1. The most straight forward method to make a sprocket carrier, is to turn out a steel plate asshown in the lathe, with and internal diameter of either 25mm/30mm, with a "low interference fit". Quitesimply this plate can be spotted neatly to the rear axle. This will also allow you a great deal of freedomwhen aligning the chain, as this welding is the very last thing to be done prior to driving.Method 2. This more complicated method of constructing a "sprocket carrier" is a bit advanced forsome people with limited resources, like myself. It involves constructing in two separate halves, thenputting both halves on the axle and then to weld them together. A pinch bolt is used to keep thesprocket carrier from moving from side to side on the keyway. Both the keyway and the pinch securingmethod must be used in this method.- 10 -
www.kartbuilding.netMethod 3. The only way I can suggest to people without "lathe access" is to get a steel pipe (internaldiameter to suit the axle), then to get an 6/8mm steel plate, drill out the center (or use a cutting torch)to fit snugly onto thesteel pipe. Spot the plateto the pipe, spot the pipeto the axle, rotate theaxle somehow, andhammer the plate to theappropriate side untill itwobbles no more!. Weldthe plate fully to the pipe.Mark on the plate thediameter of the four holes from the center of the sprocket. Now spin the axle again. Hold a sharp pointto the plate to where the point you just marked and with the axle spinning it should make a uniformcircle. Drill the appropriate holes on this circle. This is to keep the sprocket Concentric to the axle. Boltup and hopefully! it should be satisfactorily enough!.Remember if you have any questions just e-mail me (kartbuilding@g-mail.com)- 11 -
www.kartbuilding.netSteeringSteering Column.This first Diagram shows the main Steering Column, with all it's supports. The Top Column Support iseither a brass bushing pressed into a mild steel pipe, or simply a suitable sized steel pipe. Thesteering column will turn inside this and is prevented from moving by two split pins and washers. Thereason the brass bushing is inside a mild steel pipe is to facilitate it's fixing to the strut, by welding. Theother end of this strut can either be welded or bolted to the chassis, however this can only be donewith a person sitting in the kart and to adjust the height etc. and then finally to weld it in position.The bottom Bushing/pivot can also either be bolted or more simply welded to the chassis, all of whichshould be done with a person/ driver sitting in the kart. A vice-grips or a clamp can be used to keepeverything in the correct position before welding. The bottom pivot can either be turned out on a lathe,or an ordinary pipe, with a suitable washer welded on.- 12 -
www.kartbuilding.netHowever it is my recommendation to leave the installation of the Steering column and Drop Arm untilthe near end of the kart's completion. This can then be adjusted to fit everything else i.e. drop arm,seating position, pedals.Track Rods.The installation and construction of these is fairly simple. Basically the rods are 16/20mm mild steeltubing, cut to the given length, with nuts (M10) welded to each end of each pipe. These nuts willreceive "roseend bearings",which as wellas providing asuitable fixingto the SteeringArms as wellas providing acertain amountof adjustment.In the middlethe Drop Armwill simply boltto these "rosebearings". Atthe endswhere theymeet the "hubsteering arm"they simplybolt togetherOnce the track rods are in place the steering wheel and drop arm can be installed accordingly.- 13 -
Engine Mounting.www.kartbuilding.netThere are a few ways of mounting the engine to the chassis. The main function of the cradle/mountingis to prevent the engine from Rocking (if it was loosely secured). To prevent the chain from loosing it'stension due to engine movement, and to prevent the engine from coming clean off the kart on a roughroad. Therefore all welding as on the rest of the kart must be up to scratch. All bolts again as with therest of the kart must be High Tensile (8.8). My hope is to be able to take the engine off the kart and toeasily bolt it back on the kart at any stage, only requiring the removal of 4 bolts, cables and chain. Andfor the future provide a universal mounting/ Base plate for any better engines one may come across,and all they'll need to be mounted to the engine is a personal Cradle.The way I have mounted my engine (a motorbike engine) to my chassis (as you might be able to seein the link to "pictures of my kart" on my main home page) is quite simple. If you are planning of havingany other sort of engine skip on down the page to "GENERAL PURPOSE ENGINES" It's constructionis totally out of light 1.5" (75mm) angle iron. The Base plate is constructed out of this angle iron as wellas the engine Cradle. The main reason I used angle iron is because, firstly it's fairly strong, secondly Ihad a load of the stuff from an old roof rack of a van, and thirdly the engine can slide along thischannel to adjust the chain etc, preventing sideways movement of the engine, thus upsetting the chainalignment, and only requiring fixing bolts.Base plateThis first diagram is for the "Base plate". This is the item which will be welded to the chassis, in thegeneral location of where the engine will be fixed. it is made up out of four lengths of angle iron, in arectangular shape as shown.Do not weld this to the chassis yet, until the engine is in it's cradle. Sizes may vary depending on sizeof engine, bulky etc. This is for a typical 100cc engine. The Method and Construction remains the verysame.- 14 -
www.kartbuilding.netCradleThis next diagram shows the apparatus which will be bolted to the engine, which in turn will be boltedto the Base plate. The hope is to be able to unbolt the engine totally from the kart with nothing extrabolted to it, and even to refit it back in a motorbike!. This is in case any overhauling, opening up of theengine is required.There is no exact measurements that can be quoted, the only measurement been the width of theCradle to make sure it will fit the Base plate. All the runners, struts etc. are all firstly bolted to theengine and then welded to the Cradle. Making life a bit easier. There is a photo of how my engine issecured to it's cradle as a starting point. Depending on the size of the engine you may want three oreven four supports. For anything below 125's I'd say it's all right with two, the front and the backsupports. Again use 8mm (or 10mm if it will fit) threaded bar (high tensile) to bolt the engine to thestruts, as in the diagram below.Again I'd say to fashion it out of 75mm mild steel angle iron. Again to fit the Base plate nicely.Bolting them together.When the two items (base plate and cradle) are finished, and the engine in the cradle, put themtogether sitting on the chassis. Find the correct location for the chain alignment etc. then weld theBase plate to the chassis. Now fit the engine cradle onto the base plate. Obtain the correct length ofchain required. Fit the chain. Mark and drill four 8mm holes going right through both the base plateand the cradle. Remove the engine and make the hole into an 8mm slot either by using a cutting torchor by drilling a load of holes close together. this is to give a certain amount of chain adjustment. Re fitthe engine, tighten up the tensioning bolt until the chain is at the correct tension, slot through the 8mmbolts and tighten everything up. And there you have it!. Any Further Questions just E-mail me.(kartbuilding@g-mail.com)- 15 -
www.kartbuilding.netGENERAL PURPOSE ENGINESNormal generator, lawnmower, chainsaw etc. engines can bemounted more easily. Just requiring a Base plate as all theseengines will have 4 mounting holes conveniently placed on theirunderside. Follow this easy diagram. All that has to be done isfor the base plate to be welded to the chassis with four 8mmslots in the correct positions. It's as easy as that. There's noneed to make things more complicated than they have to be.See Diagram below. You can clearly see from the photo belowthe fixing holes with can be used to mount the engine withease. For similar idea of the channel see the bottom diagramfor engine mounting of a plain engine.- 16 -
www.kartbuilding.netFloor PanIt is my suggestion that the floor pan nowbe installed onto the kart. I recommend using"Ribbed aluminium Checker Board" (3-4mm)for the floor pan. If not 1mm mild steelsheeting will have to be used. This can easilybe shaped with a "jig saw" with a steelcutting blade. The checker board can then beshaped to fit the curve nicely. If you try to usean angle grinder you WILL fail!!!. you canhowever if you have a few cutting disks tospare you can clean of the burr. Once therequired shape is cut out, it is just a case offixing it to the chassis.You can just bolt the whole pan to thechassis by drilling a hole through thechassis and the pan, and fixing it on with a5mm bolt and rubber grommet/washer.However this severely weakens thechassis, and a better option would be toweld pieces/ tags of metal to the chassisand to bolt the pan to these tags instead.Only a few are needed. It depends on thestrength of the tags.Mount the floor pan on top of the chassis.Also it would be an idea to keep some ofthe "aluminium Checker Board" for later,as it will be useful for the pedal floor pad, for one's feet to rest on.- 17 -
Seatswww.kartbuilding.netThis is a relatively easy part. Although the seat is a fairly important part of the kart. what you need in aKart seat is plenty of "side support", as well as a nice snug fit, so you will be able to steer the kart,instead of using the steering wheel as a rigid support.The best seat around is of course a plastic seat out of a proper racing kart, even an old secondhand one. You might pick one of these up for half nothing in a karting place/circuit.But if your like myself, you can always improvise. The next best thing to a racing seat is an ordinaryplastic seat, with support installed either side of the seat. Take an ordinary plastic seat, bend the fourlegs out flat. Leave around 50mm sticking out from under the seat. Now either bolt or easie
Off-road kart plans Chassis Construction This is the layout for a Kart seating an average person but it is advised that you roughly lays out this design on the ground, placing a wheel at all four corners, the seat and the engine side by side. The measurements given below will not ne
