Transcription
Building an E-CommerceWebsite with BootstrapYou took a look at the various attributes and features of Bootstrap in the earlierchapters. However, just learning the concepts is not enough, as you need topossess the skills to implement them practically. In this chapter, we will createan e-commerce website that will help you get to grips with web designingusing Bootstrap.Initially, we will build the parts step by step and increase the level of difficultygradually so that you do not get overwhelmed with an information overload.We will first build the ecommerce.html page and then create the other pagessuch as category.html, account.html, and product.html, resulting in aresponsive website.With Notepad, you cannot determine whether each div element hasbeen closed, resulting in an incorrect output. In this example, we will beusing Notepad as it provides syntax highlighting, word completion,and syntax folding, which will help you code better. Notepad isopen source and can be downloaded for free from its official websiteat http://notepad-plus-plus.org/. It is a good practice to useNotepad or any advanced editor for your projects, as it streamlinesyour web designing experience.Designing the ecommerce.html pageCreate four web pages, namely ecommerce.html, category.html, account.html,and product.html for the e-commerce, product categories, account, and the productpages respectively.Initially, we will look at ecommerce.html.
Building an E-Commerce Website with BootstrapFor now, let's paste the following basic Bootstrap code in the ecommerce.html file: !DOCTYPE html html lang "en" head meta charset "utf-8" meta http-equiv "X-UA-Compatible" content "IE edge" meta name "viewport" content "width device-width, initial-scale 1" meta name "description" content "" meta name "author" content "" title Bootstrap Store /title !-- Bootstrap Core CSS -- link href "css/bootstrap.css" rel "stylesheet" !-- Custom CSS -- link href "style.css" rel "stylesheet" !-- HTML5 Shim and Respond.js IE8 support of HTML5 elements andmedia queries -- !-- WARNING: Respond.js doesn't work if you view the page viafile:// -- !--[if lt IE 9] script src shiv.js" /script script src ond.min.js" /script ![endif]-- /head body !-- jQuery Version 1.11.0 -- script src "js/jquery-1.11.1.js" /script !-- Bootstrap Core JavaScript -- script src "js/bootstrap.js" /script /body /html As you can see, we have also added respond.min.js, the jQuery file, and HTMLshiv along with the Bootstrap files.[2]
Chapter 9Some CSS3 properties and HTML5 elements are not fully supported bythe Internet Explorer 8 browser. Therefore, Internet Explorer 8 requiresthe use of html5shiv to correctly display those elements and Respond.js to enable media query support.We will now create a navbar for the web page.Similar to the process of creating a navbar in the preceding chapters, you define thenavbar between the body tags. We define navbar-brand as Bootstrap Store anduse the .navbar-inverse class, resulting in a black background and white text forthe navbar: body !-- Navigation -- nav class "navbar-inverse" role "navigation" div class "container-fluid" !-- Brand and toggle get grouped for better mobile display -- div class "navbar-header" button type "button" class "navbar-toggle collapsed" datatoggle "collapse" data-target "#bs-example-navbar-collapse-1" span class "sr-only" Toggle navigation /span span class "icon-bar" /span span class "icon-bar" /span span class "icon-bar" /span /button a class "navbar-brand" href "ecommerce.html" BootstrapStore /a /div !-- Collect the nav links, forms, and other content fortoggling -- div class "collapse navbar-collapse" id "bs-example-navbarcollapse-1" /div !-- /.navbar-collapse -- /div !-- /.container-fluid -- /nav !-- jQuery Version 1.11.0 -- script src "js/jquery-1.11.1.js" /script !-- Bootstrap Core JavaScript -- script src "js/bootstrap.js" /script /body [3]
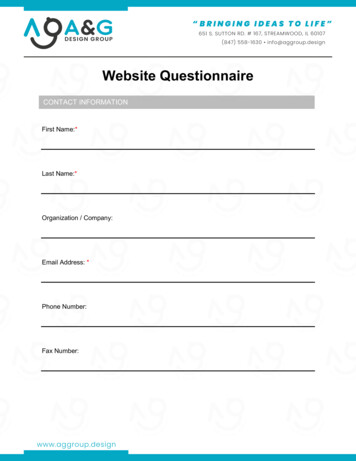
Building an E-Commerce Website with BootstrapThe output of the code on execution will be as follows:Further on, we will add the categories and navigation links to this navbar. The codehas to be inserted after the !-- Collect the nav links, forms, and othercontent for toggling -- comment and before the div element containingthe !-- /.navbar-collapse -- comment.In the code, we define the Categories link in addition to the other navigation links.We create a dropdown for the Categories link, wherein we define the various typesof products by their genre such as baby products, electronics, and shoes.Take a look at the following code to understand it better: div class "collapse navbar-collapse" id "bs-example-navbarcollapse-1" ul class "nav navbar-nav" li class "dropdown" a href "#" class "active dropdown-toggle" datatoggle "dropdown" Categories span class "caret" /span /a ul class "dropdown-menu" role "menu" li a href "category.html" Apparel & Accessories /a /li li a href "category.html" Baby Products /a /li li a href "category.html" Beauty & Health /a /li li a href "category.html" Electronics /a /li li a href "category.html" Furniture /a /li li a href "category.html" Home & Garden /a /li li a href "category.html" Luggage & Bags /a /li li a href "category.html" Shoes /a /li li a href "category.html" Sports &Entertainment /a /li li a href "category.html" Watches /a /li li class "divider" /li li a href "ecommerce.html" All Categories /a /li /ul /li li a href "#" Link /a /li li a href "#" Link /a /li /ul [4]
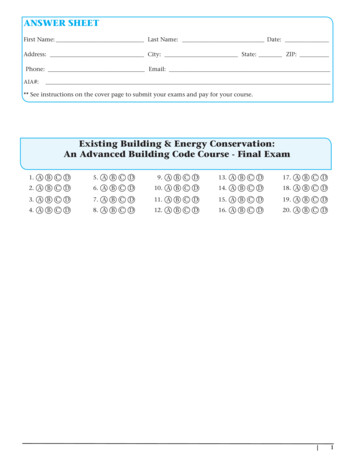
Chapter 9The output of the code will be as follows:Thus, we have defined the Categories menu and the drop-down menu, which isvisible on clicking the caret.Now, we add the Sign in link, user account link, and the shopping cart with a badgeto the right-hand side of the navbar and specify Glyphicons for them. Remember thatthis snippet needs to be added after the links defined prior to it and before the div element containing the !-- /.navbar-collapse -- comment: ul class "nav navbar-nav navbar-right" li a href "#" span class "badge pull-right" 4 /span iclass "glyphicon glyphicon-shopping-cart" /i /a /li li a href "account.html" i class "glyphicon glyphiconuser" /i /a /li li a href "#" data-toggle "modal" datatarget "#myModal" Sign in /a /li /ul The output of the added code on execution will result in the following screenshot:For the Sign in part, we will create a modal that will be displayed by clicking on theSign in link.[5]
Building an E-Commerce Website with BootstrapThe following code snippet needs to be added after the closed /nav element: !-- Modal -- div class "modal fade" id "myModal" tabindex "-1" role "dialog"aria-labelledby "myModalLabel" aria-hidden "true" div class "modal-dialog" div class "modal-content" div class "modal-header" button type "button" class "close" datadismiss "modal" span aria-hidden "true" × /span spanclass "sr-only" Close /span /button h2 class "modal-title" id "myModalLabel" Sign in /h2 /div div class "modal-body" form class "form-signin" role "form" h3 class "form-signin-heading" Sign in with your emailaddress /h3 div class "form-group" input type "email" class "form-control"placeholder "Email address" required autofocus /div div class "form-group" input type "password" class "form-control"placeholder "Password" required /div div class "checkbox" label input type "checkbox" value "remember-me" Rememberme /label /div button class "btn btn-lg btn-primary btn-block"type "submit" Sign in /button /form /div div class "row" div class "col-xs-3" a href "#" class "btn btn-facebook btn-large btn-capsbtn-block" Facebook span class "icon-facebook" /span /a /div div class "col-xs-3" a href "" class "btn btn-twitter btn-large btn-caps btnblock" Twitter span class "icon-twitter" /span /a /div div class "col-xs-3" [6]
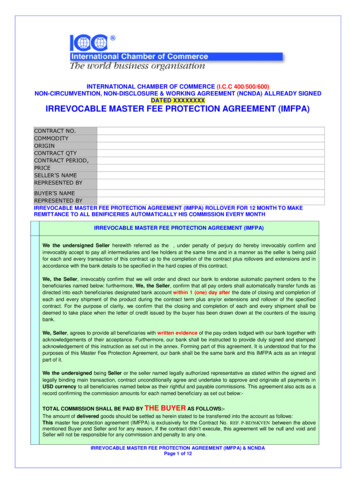
Chapter 9 a href "" class "btn btn-lg btn-caps btn-block" spanclass "icon-dribbble" /span /a /div /div div class "modal-footer" /div /div /div /div If you click on the Sign in link, the following dialog box will be displayed:From the preceding code and the output, you can see that we have defined a form toget the user authentication input and have inserted it inside the code for the modal.We will now create a carousel for the web page. After the modal code has beendefined, we define the page content. We start with the !-- Page Content -- comment for easy readability, which indicates that the entire content will be definedwithin the div element using the .container class and content as the ID for it.Further on, we define the carousel within that container using the following codesnippet: div id "content" class "container" div class "row carousel-holder" div class "col-md-12" div id "carousel-example-generic" class "carousel slide"data-ride "carousel" [7]
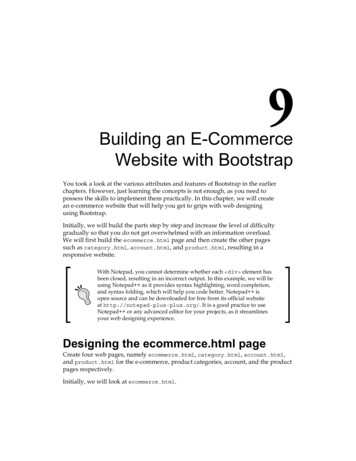
Building an E-Commerce Website with Bootstrap ol class "carousel-indicators" li data-target "#carousel-example-generic" data-slideto "0" class "active" /li li data-target "#carousel-example-generic" data-slideto "1" /li li data-target "#carousel-example-generic" data-slideto "2" /li /ol div class "carousel-inner" div class "item active" img class "slide-image" src "http://placehold.it/1140x350" alt "" / /div div class "item" img class "slide-image" src "http://placehold.it/1140x350" alt "" / /div div class "item" img class "slide-image" src "http://placehold.it/1140x350" alt "" / /div /div a class "left carousel-control" href "#carousel-examplegeneric" data-slide "prev" span class "glyphicon glyphicon-chevron-left" /span /a a class "right carousel-control" href "#carousel-examplegeneric" data-slide "next" span class "glyphicon glyphicon-chevron-right" /span /a /div /div /div /div !-- /.container class with content as the id-- Now that we have defined the carousel, the output of the code upon execution willbe as follows:[8]
Chapter 9Let's now define the product categories after the carousel code using the followingcode snippet: hr / div class "row" div class "col-sm-4 col-md-3" h3 Categories /h3 div class "list-group" a href "category.html" class "list-group-item" Apparel &Accessories /a a href "category.html" class "list-group-item" BabyProducts /a a href "category.html" class "list-group-item" Beauty &Health /a a href "category.html" class "list-groupitem" Electronics /a a href "category.html" class "list-group-item" Furniture /a a href "category.html" class "list-group-item" Home &Garden /a a href "category.html" class "list-group-item" Luggage &Bags /a a href "category.html" class "list-group-item" Shoes /a a href "category.html" class "list-group-item" Sports &Entertainment /a a href "category.html" class "list-group-item" Watches /a /div /div /div /div !-- /.container class with content as the id-- After all the code we have written so far, let's create a footer for the web page bydefining the div element using the .container class only.[9]
Building an E-Commerce Website with BootstrapTake a look at the following code snippet to understand it better: div class "container" hr / !-- Footer -- footer div class "row" div class "col-lg-12" p Copyright © a href "ecommerce.html" PacktPublishing /a 2014 /p /div /div /footer /div Check out each div element and see that it is appropriately closed asthere are multitudes of the div element in the code. Using Notepad ,you will be able to understand whether the syntax is appropriate and alsowhether every corresponding div is closed correctly.The output of the code on adding the product categories and the footer will beas follows:[ 10 ]
Chapter 9Now we will proceed further and add the products along with a brief description sothat they are reflected on your web page. The div element with the categories wasdefined with the .col-sm-4 col-md-3 class, and it occupies three columns of theweb page on the left-hand side on a medium-sized display screen and four columnson a small-screen device. Since it is a 12-column grid, the remaining space will beused to display individual products.Therefore, after the categories have been defined, let's add the following code to it: div class "col-sm-8 col-md-9" div class "row" /div /div Insert the following code in the preceding nested div element with the .row classto add a product to the right-hand side of the Categories menu: div class "col-sm-6 col-md-4" div class "thumbnail" img src "http://placehold.it/750x600" alt "" div class "add-to-cart" a href "#" class "glyphicon glyphicon-plus-sign"data-toggle "tooltip" data-placement "top" title "Add to cart" /a /div div class "caption" h4 class "pull-right" 24.99 /h4 h4 a href "product.html" 1 sup st /sup Product /a /h4 p This is a short description. Lorem ipsum dolor sitamet, consectetur adipiscing elit. /p div class "ratings" p class "pull-right" a href "product.html#comments" 15 reviews /a /p p span class "glyphicon glyphicon-star" /span span class "glyphicon glyphicon-star" /span span class "glyphicon glyphicon-star" /span span class "glyphicon glyphicon-star" /span span class "glyphicon glyphicon-star" /span /p /div /div /div /div [ 11 ]
Building an E-Commerce Website with BootstrapThe output after defining the product is as follows:Copy the code several times and paste it to get a grid of replicated products.On execution of the code, you can see the following screen below the carousel:[ 12 ]
Chapter 9Therefore, we have succeeded in building a web page with the navbar with links,categories to the left-hand side, and products ranging from the center to the righthand side of the page. We defined a carousel and also defined a modal, wherein adialog box comes into the picture on clicking on the Sign in option.Now, let's look at
Initially, we will build the parts step by step and increase the level of difficulty gradually so that you do not get overwhelmed with an information overload. We will first build the ecommerce.html page and then create the other pages such as category.html, account.html, and product.html, resulting in