Transcription
Brooklyn CollegeNetBeansBeginner’s GuideLawrence Goetz8/28/2018
ContentsInstallation . 1Windows . 2Mac . 7Sample NetBeans Project. 10Running a NetBeans Project . 13Debugging Example. 16Source Format . 23Printing . 24Exporting / Importing. 28Multiple Class Files . 31Build/JAR file . 32Javadoc. 35Code Completion . 38Insert Code . 42Example – Getter and Setter . 43Example - Constructor . 45Icons in NetBeans. 47Updates . 48
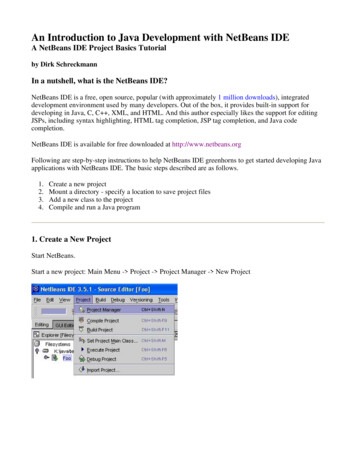
InstallationDownload the JDK with NetBeans IDE Java SE bundle.Select the Accept License Agreement radio button.Select the Download link next to the version that matches your Operating System (Such as Windows orMac x64). Save and then execute the installer.1 Page
WindowsSelect Next.2 Page
Accept the License Agreement and then select Next.3 Page
Take the defaults. Make sure JDK is listed, and then select Next.4 Page
Leave checked to Check for Updates. Then click Install to proceed with the install.5 Page
Uncheck the box to Contribute to the Netbeans project. Then click on Finish.Click on the NetBeans IDE icon to begin.6 Page
MacOpen the installer package. Select Continue from the menu below.7 Page
Select InstallWait while the files are installed. It will take 5 or more minutes.8 Page
When done, you can press Close.Using the Finder, you will see the icon for NetBeans in your Applications.9 Page
Sample NetBeans ProjectMaking a New ProjectFrom the File menu, select make a New Project.From the Categories menu select Java. From the Projects menu select Java Application. Then pressNext.10 P a g e
New Java ApplicationThe Project Name typed was HelloWorld. The NetBeans generated the rest of the values (including theCreate Main Class). Click on Finish when done. It will take a few seconds as the project is created.11 P a g e
Here is a blank project. We will now fill in some code to make the program do something. Replace line18 with the following:System.out.println("Hello World!");12 P a g e
Now we have a new program:Running a NetBeans ProjectFrom the Run menu, select Run Project. You could press the keyboard shortcut F6, if you prefer.13 P a g e
You are also able to press on the green arrowto Run your project.System.out.println("Hello World!");As shown above, the output from the Output panel in NetBeans.14 P a g e
A popup window about Usage Statistics may appear when you start NetBeans. If you would like toparticipate in anonymous information being sent to NetBeans to help them improve the program, clickon I Agree. Otherwise, you may wish to say No, Thank You.15 P a g e
Debugging ExampleLet’s make a more complicated program. We will make a New Java Application. The Project Name willbe called Counter. Check on Finish when done.Now you have a Java Program created with a skeleton code for you to fill in:16 P a g e
We will begin our program at line 19:int i 0;i ;i ;i ;System.out.printf("%d\n",i);17 P a g e
If we Run the program (Press F6), we see the following output:The value of i is displayed on the screen. But how did it become the value of 3. Let us debug the programto see what happens to the variables as the program runs.Select the location the source code that you would like the program to stop at.In this case we selected in the source code at line 21.18 P a g e
From the Debug menu, select Run to Cursor (or Press the keyboard shortcut F4).19 P a g e
The debugger stopped the program. We can inspect the variables. Make sure the Variables tab in thelower right in part of the window is selected.Notice at the variable i, has the value of 0.20 P a g e
From the Debug menu, select Step Over (easier to press F8). The debugger will step over this instructionto the next instruction.As you write more complex programs, you may need to Step Into (to see inside of a method).The value of i became 1. Press F8 again and i becomes 2.21 P a g e
If we select line 25 of the program, and select from the debug menu to Run to Cusor (F4).It shows that indeed, i has the value of 3, when it will be displayed to the console.If you want to stop the debugger, you can select the Red Stop button.22 P a g e
Source FormatYou can have NetBeans automatically format the source code for you. From the Source menu, selectFormat.It will automatically indent, put spaces in between variables and assignments, and fix other formattingissues.Before formatting is applied:After formatting:23 P a g e
PrintingFrom the File menu, select Print.24 P a g e
The preview is missing the line numbers. Let us add them. Select Print Options.25 P a g e
Select Line Numbers and Wrap Lines. Then press OK.26 P a g e
Now the preview shows the line numbers and the text wrapped on the page. Press Print to Print yourfile.27 P a g e
Exporting / ImportingIf you want to move your project to another machine, you can Export it.From the File menu, select Export Project, To ZIP.Select Browse to specify a location to save the zip file.28 P a g e
Specify the location to save and then press Export.To import the project back on a new machine (or if you used the export as a backup and wish to restoreback the original), from the File menu, select Import Project, From ZIP.29 P a g e
The top Browse button will let you select the ZIP file that contains your project. The bottom Browsebutton selects the folder that contains where your NetBeans projects are stored. Leave the bottomFolder location alone. Select from the top Browse button where to find the ZIP file.Press Import once things are set properly.If the project already exists it will replace (overwrite it). Do this only if you are restoring to replace thecurrent project files with the files contained in the ZIP file. Otherwise you can Chance Import Folder toplace the files in a new folder. Otherwise press Cancel to not do the import sequence.30 P a g e
Multiple Class FilesThe project has an expandable/collapsible tree listing of the files in your project.Click on the symbol to expand it.Double click on the file name to open it.The symbols next to the file name mean:31 P a g e
You can press F9 to compile the file (or from the Run menu, select Compile File).Build/JAR fileIf your project contains multiple files, you can build a JAR (Java ARchive) file that contains the all yourclass files and associated resources (such as media or data files) for your profile into a single file fordistribution. To do so, you can select from the Run, Build Project.32 P a g e
From the toolbar you can select the Hammer icon to Build as well.BuildYou should get a Build Successful message. If your code contained errors, you would see them below.Such as for the following:33 P a g e
If you want to Clean (erase the compiled class files) and then Build the project completely, you canselect Clean and Build Project, from the Run menu. You should do this, if you previously built a projectand want to assure that newly compiled classes are in the project.From the toolbar you can select the Hammer/Broom icon to Clean & Build as well.Clean & BuildThe JAR file is located in the dist folder of your project’s directory. From a Command Prompt you canrun it by doing the following command (in our case):java -jar \dist\Counter.jar"This jar file can then be used to run your project from any machine that has a JVM (Java VirtualMachine).NetBeans will create a README.TXT which gives the precise command that can be used to invoke it. TheREADME.TXT file is best opened in Wordpad (on Windows).34 P a g e
JavadocYou should get into the habit of writing your comments in the Javadoc format: https://www.tutorialspoint.com/java/java documentation/index-137868.htmlTraditionally /* and */ are used to indicate normal text comments to the compiler. However, Javadoccomments have an opening tag (also known as the begin-comment delimiter) with two asterisks.For example:/** I am a Javadoc comment. */Here is an example for a method./*** Add two integers together.* @param numA First number to add* @param numB Second number to add* @return int Sum of numA and numB.*/public int addNum(int numA, int numB) {return numA numB;}When generating Javadoc files, you will get message Warning: Leaving out empty argument 'windowtitle', if you do not set the document title. You can ignore this. However if you want to add moreto the title than just the package name, go to the Properties of the project. From the File menu, selectProject Properties.35 P a g e
From the Build category, select Documenting. Then enter in a Browser Window Title.To generate the Javadoc information for your project, from the Run menu select Generate Javadoc.36 P a g e
That will open up the Javadoc files for your project. For example with AddNum, it will have a descriptionof the class.Click on the class name to get more information on the class.For example, this is the information was generated from the Javadoc comments. The Javadoc commentsbecame HTML code viewable in a web browser. The Javadoc associated files are located within thedist\Javadoc directory of your project. You might be encouraged to design a Java library to for use byother developers around the world. The Javadoc comments you add will be invaluable to others. Themore descriptive you are, the easier others (and yourself) will be able to read your code.37 P a g e
Code CompletionCode Assistance in the NetBeans IDE Java Editor: A Reference ference.htmlCode Completion will help assist you when writing your programs. It will offer the various methods andobjects associated with the code that you are writing and complete the command you are writing.Make sure that Code Completion is enabled. From the Tools menu, select Options.38 P a g e
Select Editor options, then select Code Completion. You can adjust the Auto Popup options as you seefit. But for learning purposes, it’s best to keep them set to aid you in coding.39 P a g e
When typing your code and you press a “.” a code completion windows popup.40 P a g e
However, you can press Ctrl-Space at any time to pop open the code completion window. Such as if youtype Sys and then press Ctrl-Space up will come the following.You can then select which line to insert into your code by using the arrow keys to select it and pressingenter (or by double clicking on it).41 P a g e
Insert CodeYou can also have NetBeans generate get and set methods for access to the variables in your class.Place the cursor at the location in the file you want to insert the code and then press Alt Insert (orfrom the Source menu, select Insert Code).42 P a g e
It is also accessible by right clicking at the code location and selecting Insert Code.A menu will appear that allows you to generate a piece of code.Example – Getter and SetterGenerate get and set methods for the private variable item.Right click in the class that contains the variable(s) you want to generate code for.Select Insert Code.43 P a g e
Select Getter and Setter.Check the variables that you want getters and setters generated. Then press the Generate button. If youhave multiple variables, you can select them all by clicking the check box next to the class name.44 P a g e
For the variable item, NetBeans generated the functions getItem and setItem for your program togain access to the variable.Example - ConstructorAnother useful code to insert is a Constructor.45 P a g e
Select the fields you want to be initialized by the constructor and then press Generate.A Tutorial is available ode-generator.html46 P a g e
Icons in NetBeansIf you are on a computer with a very high-resolution monitor, the icons in NetBean may appear small. Tofix this, you can change the configuration settings by doing the following: Make sure NetBeans is not running.Open WordPad as administrator by right clicking on the WordPad icon and select RunAs Administrator.Open the configuration file:o C:\Program Files\NetBeans re trueo-J-Dsun.java2d.dpiaware falseto Save the file, close WordPad and then restart NetBeans.47 P a g e
UpdatesIf you see a popup bubble that indicating “updates found”, you should update. If this bubble disappears,or you want to check for updates go to the Help menu and select Check for Updates.48 P a g e
You will see which updates are available. Select Next.Restart NetBeans to complete the installation of the updates.49 P a g e
You will see the NetBeans Updater window while the updates are in progress.When the updates are completed, NetBeans will open.Enjoy using NetBeans 50 P a g e
directory of your project. You might be encouraged to design a Java library to for use by other developers around the world. The Javadoc comments you add will be invaluable to others. The more descriptive you are, the eas