Transcription
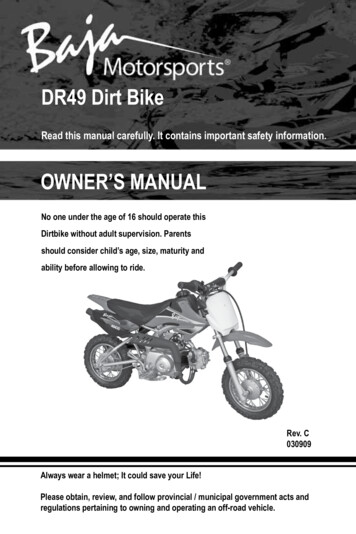
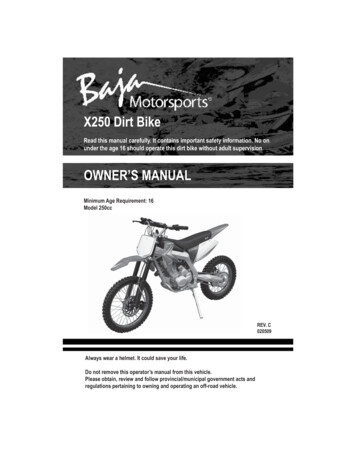
X250 Dirt BikeRead this manual carefully. It contains important safety information. No onunder the age 16 should operate this dirt bike without adult supervision.OWNER’S MANUALMinimum Age Requirement: 16Model 250ccREV. C020509Always wear a helmet. It could save your life.Do not remove this operator’s manual from this vehicle.Please obtain, review and follow provincial/municipal government acts andregulations pertaining to owning and operating an off-road vehicle.
Congratulations on your purchase of the BAJA INC. X250 Dirt Bike.Your bike is warranted to be free of manufacturing defects in the materialand workmanship for a period of 90 days from the date of purchase.During the warranty period BAJA, INC. will at its option, repair, providereplacement parts or replace your Baja Motorsports 250cc Dirt bike atno charge. This warranty does not cover normal wear items or damagecaused by neglect or misuse of the product.Engine Warranty – 90 daysFrame Warranty – 90 daysWarranty is void if:Frame is bent or broken due to abuseWheels are bent or brokenFender bent or broken due to abuseAny sign of impact, accident, jumping, spin-outs or roll over.BAJA, INC. is not liable for any damage claim or liability claim person orotherwise resulting from the operation of this product in any way.Should you experience a problem with your vehicle, please call the BajaINC. customer service line toll free at 1-888-863-2252 between the hours of7am and 5pm Monday through Friday MST (Mountain Standard Time). MDT(Mountain Daylight Time) during daylight saving time. You will be instructedhow to proceed.A COPY OF THE SALES RECEIPT IS REQUIRED.II
!!WARNINGThis manual should be considered a permanent part ofthe vehicle and should remain with the vehicle whenresold or otherwise transferred to a new user or operator.The manual contains important safety information andinstructions which should be read carefully beforeoperating the vehicle.! WARNINGThe engine exhaust from this product containschemicals known to the State of California to causecancer, birth defects or other reproductive harm.CALIFORNIA PROPOSITION 65III
TABLE OF CONTENTSSAFETY .2SAFE OPERATION .3SAFETY GEAR .4WARNING LABEL PLACEMENT .5SPECIFICATIONS.6PART LOCATION.7CRANK CASE BREATHER .9OPERATION .10FUEL FILLING .10FUEL VALVE .10ENGINE BREAK-IN .11SWITCHES ON RIGHT HANDLE BAR .11LEFT HANDLEBAR, CLUTCH LEVER .12RIGHT HANDLEBAR, FRONT BRAKE LEVER ANDTHROTTLE TWIST GRIP.12REAR FOOT BRAKE .12GEAR SHIFTING .13PRE-RIDE INSPECTION .14STARTING ENGINE .15BATTERY INSTALLATION .16MAINTENANCE .19CHECKING ENGINE OIL .19CHANGING ENGINE OIL AND CLEANING SCREEN .20CHECK UP OF SPARK PLUG.20VALVE CLEARANCE.21CHECKING & CLEANING AIR FILTER .22ADJUSTING THE THROTTLE CABLE .23ADJUSTING THE CARBURETOR .23FRONT HYDRAULIC DISK BRAKE .24REAR HYDRAULIC DISK BRAKE .24CLUTCH ADJUSTMENT .25ADJUSTMENT OF CHAIN .26LUBRICATING CHAIN .26TORQUE SPECIFICATIONS .27INSPECTION AND MAINTENANCE CHART .28TROUBLE SHOOTING .30VEHICLE WASHING .31INSTRUCTIONS FOR STORAGE .32RESUMPTION OF SERVICE AFTER STORAGE .33SERIAL NUMBER LOCATION .34EMISSION CONTROL SYSTEM WARRANTY .351
SAFETYPlease read this manual and follow all instructions carefully. To emphasize specialinformation, the symbol and the words WARNING or CAUTION have specialmeaning. Pay attention to WARNINGS and CAUTIONS.WARNINGIndicates a potential hazard that could result in death or injury.! CAUTIONIndicates a potential hazard that could result in vehicle damage.NOTE: Indicating special information which makes maintenance easier and/orinstructions clearer.WARNING and CAUTION are arranged like this:WARNING-or-CAUTIONThe first part will identify a POTENTIAL HAZARD.The second part will describe WHAT COULD HAPPEN if you ignorethe WARNING or CAUTION.The third part will describe HOW TO AVOID THE HAZARD.This user’s manual contains important safety and maintenance information. Readit carefully before riding. Failing to follow the warnings contained in this manualcould result in INJURY or DEATH.It is important that this manual remain with the vehicle when you transfer it toanother user or owner.All information, illustrations, photographs and specifications contained inthis manual are based on the latest product information available at the timeof publication. Due to improvements or other changes, there will be somediscrepancies in this manual. We reserve the right to make product changes atany time, without notice and without incurring any obligation to make the same orsimilar changes to the vehicle previously built or sold.2
SAFETYSAFE OPERATIONRules for Safe OperationA pre-operation check must be conducted before starting the engine. This check willinsure safety, prevent mishaps, and prevent damage to components.It is strongly suggested that all operators take a certified motorcycle rider’s course priorto operating the vehicle.Full attention is required during driving; paying close attention to the following pointsto avoid any injury to you by other motorized vehicles:·Always wear an approved DOT (Department of Transportation) helmet. It is aproven fact that helmets reduce the number of severe head injuries. Never ride, orlet a child ride without a DOT approved motorcycle helmet.·Always wear protective riding gear, helmet, eye protection, long sleeve shirt, longpants, riding boots and gloves.·Always watch for off-road hazards. Be aware of unexpected turns, drop off’s,rocks and other hazards. Keep speed low enough to allow time to react to hazardsand changing conditions.·Never use alcohol or drugs before or during operation. Alcohol and drugs cansignificantly reduce your ability to make good judgements and ride safely.·Do not drive too close to other vehicles.·Never carry a passenger. This dirt bike is for one operator only.·Never operate this dirt bike at night. Night is defined as the period of time 30minutes before sunset to 30 minutes after sunrise.·Driving at high speeds is the cause of many accidents; do not drive at a speed thatthe actual situation does not permit.·Never allow anyone under the age of 16 to operate this dirt bike. Physical, mentaland emotional maturity are requirements for safe riding. Rider must be able tojudge speed, distances and be able to react to changing conditions with goodhand, foot and eye coordination.·Always avoid operating an this dirt bike on paved surfaces, including; sidewalks, paths,parking lots, driveways, streets, roads, and highways. Never operated this or any OffRoad Vehicle on a public street, road or highway where motor vehicles are inoperation.3
SAFETY·Always keep your dirt bike in safe operating condition. Inspect dirt bike beforeeach ride and perform all recommended maintenance and pre-ride inspections.·Never overload dirt bike. Maximum weight capacity is 250 lbs. (113 kg).SAFETY GEARA DOT approved motorcycle helmet is the most important part of your safetygear. A DOT approved motorcycle helmet can help prevent a serious head injury.Choose a helmet that fits snug. Motorcycle dealers can help in selecting a goodquality helmet which fits properly.! WARNINGOperating this dirt bike without wearing an approved DOT motorcyclehelmet, eye protection and protective clothing could be hazardous.Operating without an approved DOT motorcycle helmet or eye protectionincreases your chances of severe head injury or death in an accident.Operating without protective clothing also increases your chances of severeinjury in an accident.Always wear an approved DOT motorcycle helmet which fits properly.Always wear eye protections (goggles or face shield). You should also weargloves, boots, long sleeve shirt or jacket and long pants.You should wear eye protection when you ride. If a rock or a branch hits youreyes, you could be severely injured. Wear goggles or a face shield.Wear proper clothing when you ride. The proper clothes can protect you frominjury. Wear a good pair of gloves, strong boots that are over the ankle, longpants and a long sleeve shirt.Loose clothes are not suitable for motorcycle driving or riding as they mayget caught on the operating lever, kick lever, footrest or wheel, resulting indanger.MODIFICATION OF THE VEHICLE! CAUTIONNever perform any unauthorized modifications to this vehicle. Only useoriginal replacement part which can be obtained through Baja Inc.888-863-2252.4
WARNING LABEL PLACEMENTOFF ROAD USE ONLYThis vehicle is manufactured anddesigned for off road use only. It doesnot conform to federal motor vehiclesafety standards.Operation on public streets, roads, orhighways is illegal5
l Length1920mm( 75 1/2 in.)Cylinder bore XStroke67mm X 65mmOverall Width820mm(32 1/4 in.)CompressionRatio9.2:1Overall Height1060mm(41 3/4 in.)Output Max11.5kw / 6500 RPM15.2hp / 6500 RPMWheelbase1320mm(52 in.)Displacement244ccDead weightG.W/N.W116.5kg/97kg(257 lbs./213 lbs.)Idle Speed1500 r/min 100 r/minPayload113kg(250 lbs.)Spark PlugA7TC (Torch)D8EA (NGK)Gap .6mm - .7mm(.024” - .028” )GroundClearance250mm(9.84 in.)Front Wheel70/10-1922psiRear wheel90/100-1628psiIgnitionCDIMax Speed 90KM/H(56 MPH)Transmission5 gear meshFuel capacityand type3.35L(.88 gal.)92 octane orhigher6
PART LOCATIONPARTS & SUBASSEMBLIESClutch LeverBrake fluid reservoirFront brake leverOn/Off switchElectric startbuttonThrottle twistgripFuel tank capIgnition key switch7
PART LOCATIONIgnition KeyAir filter compartmentFront Shock AbsorberGas CapFront WheelFront brakecaliperBatterycompartmentRear ShockFuel ValveGear ShiftingDrivePedalSideStandChoke leverDrive Chainon CarburetorRear WheelRear ForkSeat CushionExhaust SilencerFront ShocksRear brakecaliperCarburetorCrank caseKick Lever Oil CapbreatherRear Brake pedal8
CRANKCASE CREATHERWhen shipped from the factory, the crankcase breather is tied up with a zip tie.Before starting engine for the first time, make sure the zip tie is removed frombreather. Remove zip tie using a pair of shears or sharp knife, dispose of zip tieproperly.! CAUTIONZip tie on breather hose needs to be removed before engine is started forthe first time.Failure to remove zip tie from crank case breather hose before startingengine the first time could result in damage to engine, breather hose andbreather.Starting engine with low or no oil will damage the engine.Crank case breatherBreatherRemove zip tie9
OPERATIONFUEL FILLINGThe capacity of the fuel tank is 3.33L (.88 gal) . Unscrew gas cap by turningcounter clockwise and carefully fill tank with unleaded gasoline throughopening. DO NOT MIX GAS AND OIL TOGETHER, THIS IS A 4-STROKEENGINE. Replace gas cap by carefully aligning the threads on cap and thetank and turning the cap clock wise. Wipe any spilled fuel from dirt bike usinga cloth. Dispose of cloth properly. DO NOT SMOKE OR REFUEL VEHICLENEAR OPEN FLAMES OR NEAR HEATING UNITS. ONLY REFUEL THEVEHICLE IN OPEN AREAS TO REDUCE THE LIKELIHOOD OF THE BUILD UPOF GASOLINE FUMES.FUEL VALVEON: Turn fuel valve to ON” position before attempting to start engine.Turning fuel valve to “ON” position allows fuel to flow to the carburetor.OFF: Turning fuel valve to “OFF” position, prevents the flow of fuel from fueltank to carburetorFuel Valve10
OPERATIONENGINE BREAK-INThe first 10 hours of operation should be considered the “Break-in” periodand special attention shall be paid to the following points:1.Do not throttle past half throttle during the first 10 hours of operation.Fluctuate the throttle during this period to break in engine components.Do not put excessive load on engine by climbing steep hills or havingfast starts.2.Warm up engine 3-5 minutes prior to operation so all components arelubricated sufficiently. Failure to allow engine to warm up could causedamage to engine.SWITCHES ON RIGHT HANDLEBARIgnition switchThe ignition switch is Located on the right handlebar.When switch is turned to “ ” (off) position, the engine will not start. Ifengine is running and(off) button is pushed the engine will turn off.When switch is turned to “ ” (on) position, the engine can start whenignition key is also at(on) position and electric start button isdepressed, or when starting by the kick lever.OFF buttonON buttonElectric Start button11
OPERATIONLEFT HANDLEBAR, CLUTCH LEVERClutch leverClutch leverWhen clutch lever is pulled toward hand grip, clutch is applied.RIGHT HANDLEBAR, FRONT BRAKE LEVER AND THROTTLE TWIST GRIPFront brakeleverThrottle twist gripThrottle twist gripControls engine and dirt bike speed. When twist grip is turned backCCW (counter clockwise) engine speed is increased along with speed ofdirt bike. When twist grip is turned forward CW (clockwise) engine speed isdecreased along with speed of dirt bike.Front brake leverSqueeze lever toward hand grip to apply front brakes.REAR FOOT BRAKEThe foot brake is located on right hand sideof dirt bike. Foot brake applies rear brakeRear foot brake12
OPERATIONGEAR SHIFTINGReduce throttle before shifting. Never increase throttle while shifting gears.Pull in the clutch lever, located on the right hand gripDepress the Shift lever to place the gear in 1st, lift up the lever to shift to 2nd,3rd, 4th and 5th.Do not place your foot on the gear-shifting pedal while operating the dirt biketo avoid damaging the clutch caused by sudden accidental gear shift.4325th gear4th gear3rd gear2nd gearNeutral1st gear1N(5)(4)(3)(2)(N)(1)5Shifting to lower gearsShifting sequenceShift leverShifting to higher gearsPoints for Attention during Drive1.Avoid unnecessary idling of engine at high speeds. Idling engine at highspeeds will damage engine components.2.The clutch will wear out quickly if clutch in a semi-engaged position.Clutch should be pulled in and release once desired gear is achieved, donot hold clutch half in or half out of engagement.3.Shift to lower gears when there is insufficient power to climb hills orcontinue forward.4.Use both front and rear brakes when coming to a stop. Applying frontbrake only could cause front wheel to lock up which could result in anaccident.5. Do not place transmission in neutral while traveling at high speeds6.Decrease throttle while braking.13
OPERATIONPRE- RIDE INSPECTIONBefore each ride it is important to inspect your dirt bike. Make sure anyproblems found are corrected before starting engine. A pre-ride inspection isa must for off-road riding because off road riding can provide excessive wearand tear on components.Tires:Use a tire gauge to check the air pressure Adjust air pressure if needed.Look for signs of damage or excessive wear.Spokes and Rims:Make sure all spokes are tight, check rims for damage.Leaks:Look under vehicle for signs of leaking fluids (Oil or Gas)Engine Oil:Check engine oil level, add oil if needed.Nuts and Bolts:Check nuts and bolts for tightness. Refer to proper Torque specificationslocated on page 25.Throttle:Check throttle free play and adjust if needed. Rotate throttle to makesure it moves smoothly without sticking, and snaps back automatically whenreleased, in all steering positions.Brakes:Squeeze front brake lever and step on the rear brake pedal to check thatthe controls operate normally. Adjust free play, if necessary.Fuel:Check fuel level and add fuel if needed. Make sure fuel fill cap is securelyfastened.Cables:Check cable housing for wear. Check fittings for looseness. Replace ortighten as needed.Maintenance:Make sure maintenance procedures are followed in this manual.14
OPERATION! WARNINGNever start engine without first performing a pre-ride inspectionFailure to perform a pre-ride inspection could result in severe injury or death.Always perform pre-ride inspection before every ride and correct anyproblems.! CAUTIONVerify oil level prior to starting.Starting the engine with low or no oil will damage the engine.! WARNINGNever start the engine in a closed place as the exhausted fumes from vehiclecontains toxic carbon monoxide.ClosedSTARTING ENGINE1. Set the ignition key switch to“ON” position.2. Set the handlebar ON/OFF switch to “ON” position.3. Put dirt bike in neutral gear.4. Ensure that there is fuel in tank.Open5. Set the fuel valve lever to “ON” position.6. If engine is cold, place choke lever in up (closed) position.choke lever7. Start engine with electric start or kick start lever.8. Once engine has started, slightly turn throttle twist to increase rpm’s to warmengine. Do not fully open throttle to warm engine.9. Once engine has sufficiently warmed up, place choke lever in down (open)position.! CAUTIONThe engine can only be started in neutral gear.Unnecessarily increasing RPM’s to a high level while the dirt bike is inneutral is harmful to engine.Procedures for stopping the engine:1. Release throttle twist grip to slow down engine.2. Shift to neutral position.3. Set ignition switch to “” (OFF) position.4. Set fuel valve handle to “OFF” position.15
BATTERY INSTALLATIONBATTERY INSTALLATIONINITIAL SERVICE AND INSTALLATION OF BATTERY:WARNINGThe following procedure is very dangerous and should be performed withutmost care and attention. Wear protective eye wear, rubber gloves, and havewater available should electrolyte come in contact with skin or eyes. KEEPALL CHILDREN AWAY FROM THE AREA WHILE THIS PROCEDURE IS BEINGPERFORMED.POISON – CAUSES SEVERE BURNSContains sulfuric acid.Avoid contact with skin, eyes, or clothingTo prevent accidents, rinse empty container with water.ANTIDOTE:External – flush with waterInternal – Call physician immediately. Drink large quantities of water or milk.Follow with milk of magnesia, beaten eggs or vegetable.Eyes – Flush with water for 15 minutes and get prompt medical attention.KEEP OUT OF REACH OF CHILDREN.16
BATTERY INSTALLATIONNote: The following page is for vehicles with battery’s containing separateelectrolyte pack.Preparing the battery:·Place battery on level surface. Remove capstrip from top of battery. (see figure 20)Figure 20.Wear eye protection and rubber gloves forthis step. Once battery strip is removed,locate electrolyte in bottle and place over thesix openings. Press firmly down on bottleallowing the battery to pierce the six in-lineopenings in bottle. Let electrolyte drain intobattery until bottle is completely empty. (seefigure 21)·Discard empty electrolyte container in a wastearea that is inaccessible to children andanimals.·After filling let battery stand for at least 30minutes before charging. This allows theelectrolyte to penetrate plates for optimumperformance and ensures longer battery life.·After 30 minutes the battery is ready for itsinitial charge. Place caps loosely over batterycell holes (see figure 22)17Figure 21Figure 22
BATTERY INSTALLATIONHow to Initially Charge the battery:1.Connect the red positive ( ) cable tothe red positive ( ) pole of the battery.(see figure 24)2.Connect the black negative (-) cableto the black negative (-) pole of thebattery. (see figure 25)Note: The red positive ( ) cable has alarger diameter than the black negativey cable.3.Figure 24Charging rate: Charge battery @ 0.7Amps for5 10 hours. After charging is complete, installsecurely all six battery caps (seefigure 26) Install battery into battery traylocated under seat (see figure 27). Once battery is firmly seated intray, attach red positive ( ) wireto positive ( ) terminal on battery,then attach black negative (-) wire tonegative (-) terminal on battery (seefigure 27)BatteryCompartment BoltsFigure 25Figure 26Red WARNINGBlack -NEVER REMOVE THE STRIP OF CAPS NORADD ANY WATER OR ELECTROLYTE.Figure 2718
MAINTENANCECHECKING THE OILCheck engine oil each time prior to operating dirt bike.The oil level should be between the upper and lower lines of oil gauge fitted in ascrew plug, which is on right cover of crankcase.1.Set dirt bike on level ground. Look at sight gauge for current oil level. Youcan also remove dipstick plug, wipe it clean and then reinsert into crankcase.Remove dipstick to check oil level.2.Add lubricating oil up to the upper line when needed, but do not overfill.3.Finally reinstall dip stick plug and cinch finger tight.! CAUTIONNever start engine when there isinsufficient lubricating oil. Otherwise,it will cause harm to engine.Oil dipstick plugOil sightgaugeLubricating Oil RecommendedThe lubricating oil is an important factor affecting performance and service lifeof engine. Please refer to the chart for correct grade of engine oil based on theenvironmental conditions in your area. Do not use any other type of oil other thanwhat is recommended in the chart. DO NOT MIX OIL WITH THE GASOLINE.Lubricating oils of differentviscosity should be employedin different regions and atdifferent temperatures.20W-505W-40 15W-40MACHINEOIL10W-40 10W-5010W-30 C-30-20-10010203040 F-22-41432506886104TEMP.19
MAINTENANCECHANGING ENGINE OIL AND CLEANING SCREEN1.Remove oil drain Plug, located at bottom of engine and let oil drain intoan approved collection container. DO NOT PERFORM THIS PROCEDUREWHILE ENGINE IS HOT. SERIOUS BURNS COULD RESULT FROMCONTACT WITH HOT OIL.2.Dispose of the used oil properly. For proper disposal procedures,contact your local oil recycling center.3. Remove oil filter plug and screen, Clean oil filter screen with solvent.4. Re-install oil Plug.5. Re-install oil filter screen and screen plug4.Refill engine with proper amount of oil and recheck amount of oil byusing dip stick and/or sight gauge.Oil filter screenSpringOil PlugScreen PlugCHECK-UP OF SPARK PLUG1.Remove the cap of spark plug and screw offthe spark plug using the plug wrench.2.Clean the spark plug all around or replace itif it is corroded or there is too much depositon it.3.Regulate the gap of the spark plug to 0.60.8mm.024” - .032”3. The spark plug of the designated typeshould be used. The applicable type ofspark plug: D8EA (NGK)200.6 0.8mm(.024” - .032”)
MAINTENANCEVALVE INSPECTIONREFER TO MAINTENANCE SCHEDULE IN THIS OWNER’S MANUAL FOR VALVEADJUSTMENT INSPECTION INTERVALS.Valve clearance should be:Intake:0.002 inch (0.051 mm)Exhaust:0.002 inch (0.051 mm)The engine will make excess noise if the gap is too large in air valve. If gap is toosmall valve operation will be hindered which could result in valve malfunction andfailure. Therefore, air valve gap must be checked periodically.If you have the proper tools and are mechanically proficient, instructions onadjusting the valve clearance are given in the service manual. If assistance isneeded please contact Baja Inc to find your local service center.21
MAINTENANCECHECKING & CLEANING THE AIR FILTER1. Air filter is located under seat. To get to the air filter remove bolts from each side ofseat. Remove air filter cover2. Take the air filter out and check to see if it is dirty or torn.3. Remove foam element and wash with water and allow to dry per instructions below.4. Apply a few drops of machine oil. Squeeze it with a dry cloth to remove excess oil.Recommended oil: SAE 15W-405. Re-install air filter making sure it is seated correctly.Bolts(each side)Air Filter coverAir filterAir filterWash foam element with waterSqueeze out excess water! CAUTIONThe air filter element must be intact or the engine will suck in dust and dirt,resulting in a shorter service life of the engine.Water should be prevented from entering into the filter when washing the vehicle.The filter element shall be cleaned gently without twisting to prevent it fromcracking. Never wash it with gasoline or any acid, alkaline or organic volatileoil to avoid its aging, which will result in reducing the effect of the air filter oil tocatch particles before they enter the engine. Replace the filter element with anew one if it is broken or cracked.22
MAINTENANCEADJUSTING THE THROTTLE CABLE2-4mm1/16 - 3/16 inMake sure the throttle works normally.Check if the throttle twist grip has the required freeoperating movement.The required free operating movement: 2-4mm(1/16-3/16 in) If the grip cannot be moved freely,turn adjusting nut located on top of the throttle twistgrip to ensure proper operating movement.Adjust nutAfter adjustment, start the engine and check for the operating movement again.Repeat the adjustment if necessary until the desired operating movement isobtained.ADJUSTING THE CARBURETORAdjusting procedures of idling speed:1.Support the vehicle by a stand.2.Adjust the idling speed by the throttle stop screw to 1700 rpm 100 rpm.! CAUTIONDo not try to correct a malfunctioning carburetor by adjusting the idlingspeed. If the carburetor is not functioning properly, it should be repaired bya service center.Adjust idling speed only when the engine is warmed up or 10 minutes afteroperation.Idle speed adjusting screw23
MAINTENANCEFRONT HYDRAULIC DISK BRAKE INSPECTIONBrake fluid reservoirLower markBrake hoseBrake fluid capFront disk brake caliperBrake fluid level1. Inspect the front disk brake caliper for leakage. If brake fluid leaks, the safetyof riding could be affected.2. Inspect the brake hose for cracks, and the joint for leakage.3. Check the brake fluid level in the brake fluid reservoir, if level is at or below theLOWER mark, inspect brake pads for wear and hydraulic system for leaks.4. To add brake fluid, unscrew the 2 screws on top of the brake fluid container.Add DOT3 or DOT4 brake fluid. Do not mix brake fluid types.REAR HYDRAULIC DISK BRAKE INSPECTIONBrake fluid capRear disk brake caliperBrake hoseBrake fluidreservoirSight gauge1. Inspect the rear disk brake caliper for leakage. If brake fluid leaks, the safety ofriding could be affected.2. Inspect the brake hose for cracks, and the joint for leakage.3. Check the brake fluid level in the brake fluid reservoir, if level is at or below themiddle of sight window inspect brake pads for wear and hydraulic system for leaks.4. To add brake fluid, unscrew cap on top of brake fluid container. Add DOT3 orDOT4 brake fluid. Do not mix brake fluid types.24
MAINTENANCECLUTCH ADJUSTMENT3.0 - 5.0mm play(0.12”-0.20”)Clutch leveradjustment nutAdjustment CoverTo adjust the clutch lever play:1.Remove adjuster cover (slide back on cable).2.Loosen adjuster nut and move adjuster in or out to obtain the correct play.3.Tighten adjuster nut4.Recheck the clutch lever free distance.Readjust it if it is not within the correct limits.To adjust the clutch:1.Loosen adjuster nut and move adjuster in or out to obtain the correct tension.3.Tighten adjuster nut4.Recheck the clutch lever free distance.Readjust it if it is not within the correct limits.Clutch adjustment25
MAINTENANCEADJUSTMENT OF CHAIN1.When chain adjustment is needed, loosen rear axle bolt .2.Turn the chain adjusting nuts on the left and right sides to adjust the tensionof the chain and to align the marking of the chain adjuster with the engravedlines in the similar position on both sides.3.Tighten rear axle bolt by a torque of 50-60Nm (37-44 ft.lb.).4.Repetitively check the tension of the chain.Rear axle bolt15-20mm1/2” - 3/4”Chain adjusting nutsLUBRICATING CHAIN1.Shut off the engine2.Add light amounts of machine oil or chain lube to the driving chain. (Toomuch machine oil or chain lube may cause splattering to occur.)Attention:The chain sh
X250 Dirt Bike Read this manual carefully. It contains important safety information. No on under the age 16 should operate this dirt bike without adult supervision. OWNER’S MANUAL Minimum Age Requirement: 16 Model 250cc REV. C 020509 Always wear a helmet. It could save your life. Do not remove t