Transcription
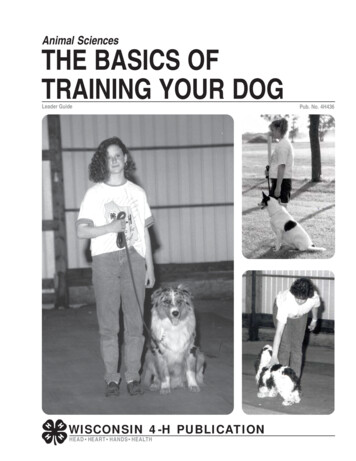
Animal SciencesTHE BASICS OFTRAINING YOUR DOGLeader GuideWISCONSIN 4-H PUBLICATIONHEAD HEART HANDS HEALTHPub. No. 4H436
ContentsFor the leader.2Basic commands. 2Lesson 5. 7The stand for examination (Part II). 7For the member and the leader. 3Basics of training .3Lesson 6. 8The recall (Part I).8Lesson 1. 4The heel and sit .4Teaching to heel . 4Teaching the sit. 5Lesson 7. 8The recall (Part II). 8Lesson 2. 5The long sit.5Lesson 3. 5The down exercise; slow, normal, and fast heeling. 5The down exercise.5The down stay exercise.6Slow, normal, and fast heeling. 6Lesson 8. 8The figure 8.8Lesson 9. 9Review of exercises. 9Graduation. 9The brace: pre-novice or novice. 9The team.10Lesson 4. 7The stand for examination (Part I).7Holding the leash.7WISCONSIN 4-HPub. No. 4H436, Pg. 1
For the leaderThis guide shows the steps to follow in obedience training.You may wish to teach these exercises in a different order andmay have equal success; however the order as listed issuggested. You may also know of different training methodsthat are equally as successful.At the start of the first class of instruction, demonstrate theHeel and Sit as discussed in Lesson 1 by using a dogbelonging to one of the members. The class should form acircle around the instructor. Continue the training exercisesfor a half hour, take a five-minute break, and continue practiceof the exercises for the remaining half hour.For one half hour at the beginning of the second class,practice the exercises as taught at the first class. After a fiveminute break demonstrate the next exercise (Lesson 2) usingone of the member’s dogs. The class should then practice thenew exercises for the remainder of the class period.At each subsequent meeting follow the format of practicingthe exercise learned in the previous lesson during the firsthalf of the class period, take a five-minute break, and thenlearn the new exercises in the next lesson.Basic commandsThe following list of commands may be helpful to a 4-Hleader in conducting the Pre-novice course. The leader willuse similar commands when conducting training classes inBrace and Team classes.Lesson 3 - The Long DownClass forms a straight line in front of instructor.yyPrepare your dog for the long down.yDown your dog.yLeave your dog.yBack to your dog.yExercise finished. The handler then says the dog’s nameand “Heel,” takes two steps forward and puts the dog inthe sitting position before praising.yLeft turn.yRight turn.yAbout turn.yWhile heeling, the instructor will give the command,“Slow,” “Normal,” and “Fast.”(Although the above three turns were demonstrated in thefirst meeting, they are usually not used in a class exerciseuntil the third lesson.)Lesson 4 - The Stand for Examination (Part I)y Prepare your dog for the stand for examination.yStand your dog. (Handler leaves the dog when satisfiedhe is standing firmly.)yWalk away about six feet.yBack to your dog.yExercise finished. (The handler then moves the dog threesteps forward as described in Lesson 3, before praisinghim.)Lesson 1 - The Heel and Sity Class forms a circle around instructor.yHave your dog sitting squarely at your heel.yForward.Lesson 5 - The Stand for Examination (Part II)y Use the commands given in Lesson 4.yExercise finished.yLesson 2 - The Long Sity Class forms a circle around instructor.yPrepare your dog for the long sit.yLeave your dog.yBack to your dog.yExercise finished. The dog is praised in the sittingposition.WISCONSIN 4-HThe instructor should examine each dog after the handlerhas left him in a standing position.Lesson 6 - The Recall (Part I)y Have your dog sitting squarely at your heel.yLeave your dog.yCall your dog. (The handler runs backwards several stepsgathering in the dog and has him sit directly to his front.)yBack to your dog.yExercise finished. (Dog is in sitting position for praise.)Pub. No. 4H436, Pg. 2
Lesson 7 - The Recall (Part II)y Have your dog sitting squarely at your heel.yLeave your dog.yCall your dog. (He is to sit squarely in front of you.)yFinish your dog. (Handler moves dog from in front to theheel position.)yExercise finished.Lesson 8 - The Figure 8Have your dog sitting squarely at your heel.yYounger dogs usually behave as puppies and are, therefore,too difficult for the inexperienced to train. Advanced age isitself no limitation, as many dogs over 10 years old have beentrained very well. The major concern with older dogs is theirgeneral health. Those afflicted with arthritis or poor sight andhearing should not be forced to undergo training.Vaccination for rabies is required in most states. Your dogshould be vaccinated at four months of age and receive abooster shot after one year. There are also some vaccinesthat work for three years before requiring a booster shot.Consult your veterinarian for the proper vaccines for yourdog.yForward. (Handler passes between stewards and turnseither left or right.)yHalt.Basics of trainingyExercise finished.By studying this guide carefully, you can learn to train yourdog alone. It is better, however, to train your dog in a class inthe presence of other dogs and strange surroundings so thathe will learn to obey in almost any situation. There should be10 or 12 students for each leader in class so that each studentand his dog can get adequate attention.Lesson 9 - Review of ExerciseReview all exercises and explain graduation program.yFor the member and the leaderThe companionship and affection you share with your dogand the sense of responsibility for his welfare that ownershipdevelops are deeply satisfying experiences for any boy orgirl. By training your dog in obedience, you can developeven further what you now enjoy, and you can add a newfeeling of accomplishment and reward from what you andyour trained dog can do together.Dog training is not a person working and a dog working –it is a person and a dog working as a team. To become andremain a team, you must concentrate completely on yourwork and you must get and keep the undivided attention ofyour dog. Do not talk to someone else while training. Do notbe grim, but be businesslike.What does it take to train a dog? What must you be preparedto do?There are several ways to keep your dog’s attention. The firstis to put his collar on properly, close behind his ears. (SeeImage 1.) Talk to him or make a quick turn and jerk his leashwhen you suspect his attention has wandered.A primary consideration is the age and health of your dog.He should be at least nine months old to begin training.Image 1: Correct placement of the collarWISCONSIN 4-HPub. No. 4H436, Pg. 3
When he is heeling say “Good!” in a pleasant, confidentvoice. This is especially important in the first two or threeclasses. You may say your dog’s name once just before averbal command or before a verbal command and signal. Youmay not say his name and then give only a signal. Do not sayhis name in “Stay” commands. Release your dog fromtraining only from the sitting position at your heel.Training should be a happy time for you and your dog. If youfind you are losing your temper, stop everything until you arecalm. Be patient. You may have to repeat a word or commandmany times before your dog begins to understand. Incompetition the judge gives penalties for commands hethinks are too loud.Correction and praise are important. When your dog makes amistake, correct him immediately while he can still associatethe correction with the mistake. Praise every achievementimmediately because your dog values your approval andpraise is his only proof that he has that approval.Keep a regular schedule. Work every day at the same time,but do not bore your dog with long lessons. Two 15-minutessessions a day are better than one 30-minute session.Footwork is important. Learn from your instructor to moveyour feet correctly before you begin to train your dog. (SeeImage 4.)Image 2: Start with yourdog in a sitting position.WISCONSIN 4-HLesson 1 - The heel and sitWhen heeling, the dog should walk at your left side, the areafrom the back of the head to the shoulder in line with yourleft hip. When you halt he is to sit squarely at your left, hisshoulder still even with your knee. (See Images 5 and 6.)Teaching to heelPlace your dog in the sitting position at your left, his collaron properly, close behind his ears. Fold the leash neatly intoyour right hand and hold it about waist high. Let your leftarm hang at your side and control the leash with your lefthand. Jerk the leash sharply to keep control. (See Image 2.)Upon your instructor’s command, “Forward,” you should:1. Say your dog’s name and “Heel” in a commanding voice,neither weak and pleading nor loud and harsh.2. Step forward with your left foot. Give a jerk with the leashat the same time. Eventually, the jerk will be unnecessary.As soon as your dog starts to move, encourage him withenthusiastic praise, saying “Good boy! Good boy!” Heel at abrisk pace.If he will not move, do not drag him, but jerk the leashrepeatedly, saying his name and “Heel.” As soon as he startsImage 3: Remember to keep a looselead when teaching your dog to heel.Pub. No. 4H436, Pg. 4
Image 4: Handler’s footworkto move, praise him and keep him moving. If he forges ahead,jerk him back and say “Heel.” If he lags behind, jerk himforward. The jerk on the leash must come only a split secondafter you say “Heel.” If you jerk forward first and say heel afew seconds later, it will be much more difficult for the dog tolearn.Teaching the sitUpon your instructor’s command, “Halt,” you do not repeatthe command but merely stop on your right foot, bringingyour left foot alongside your right and give the command,“Sit.” Quickly reach across your body with your right handand grasp the leash about 12 inches from the training collar.Most handlers make the mistake of keeping the leash tightwhen teaching the dog to heel. The leash should be loose sothe dog can make mistakes of lagging behind, forging aheador going wide. (See Image 3.) When he makes these mistakes,he learns through a jerk on the leash and when he is heelingclose he learns that he receives praise. When the leash iskept tight all the time, he only learns to dislike the whole ideaof training.Place your left hand on the dog’s rump and push down whilepulling the leash taut and up with your right hand. Only pullthe leash taut; otherwise, the dog will struggle against it. Besure to pull it straight up or slightly back – not side to side. Ifyou pull across your body, it will make the dog sit at an anglerather than straight. Remember to praise him as soon as hesits.Lesson 2 - The long sitThe dog is to remain sitting for one minute.Image 5: Your dog shouldsit directly at your sidewhenever your stop.Image 6: Make sure yourdog sits squarely.Lesson 3 - The down exercise; slow,normal, and fast heelingThe down exerciseStart with your dog at heel. Then use whichever of thefollowing methods works best with your dog. Work ongetting your dog to go down willingly rather than staying.Leash method:Say “Fido, down.” With your right hand, pull down on theleash directly under his chin. At the same time, with your lefthand, press down and to one side on you dog’s back. Assoon as he is down, praise and let him get up.WISCONSIN 4-HPub. No. 4H436, Pg. 5
The down stay exerciseOnce your dog has learned the down command, you canbegin teaching your dog to stay in the down position whileyou leave him. Eventually. the dog will be required to staydown for three minutes. (See Images 7 and 8.)At first, with your dog down, try standing up straight next tohim. Correct him quickly if he tries to get up by jerking downon the leash or tapping him on the nose. When he is steady,say “Stay” and step in front of him. Wait five seconds, andthen pivot back to his side. Do not let him get up. Pause atleast two or three seconds before going down to him andpraising him while he is still down. Give him the releasecommand and let him up. Work up your time and distractionsgradually as in the sit-stay.Image 7: Stand at the end of your lead while your dog is inthe down position.Foreleg method:Hold the live ring of the collar with your left hand and layyour left forearm along your dog’s back. Say “Fido, down”and press down on your dog’s back. At the same time, takeyour dog’s forelegs out from under him with your right armand lower him to the ground. Don’t grab his paws! If heresists, try pushing him off balance at the same time, preferably towards yourself so that he doesn’t think it’s a game. Assoon as he is down, praise him and let him up.Image 8: Practicing the long down with otherdogs will help your dog get used to payingattention to you.WISCONSIN 4-HSlow, normal, and fast heelingIn an obedience trial, you will be required to heel your dog atslow, normal, and fast pace. Upon the order, “Slow,” from thejudge, heeling should quickly change to a definite slow pacethat may be easily distinguished from the normal pace. Whenthe order, “Fast pace,” is given, the handler and dog mustbreak into a run. The dog should remain in the heel position.The order for a slow, normal or fast pace may be given in anysequence. (See Image 9.)Image 9: Make your dog match yourpace. Do not slow down or speed upfor it.Pub. No. 4H436, Pg. 6
Lesson 4 - The stand forexamination (Part I)Lesson 5 - The stand forexamination (Part II)There are several ways of teaching your dog the “Stand forexamination.” Select the method that you think may workbest with your dog and don’t change.At an obedience trial, the judge will require your dog to standfor examination. Upon the order, “Stand your dog,” you mayuse any of the methods described in Lesson 4. Take the timeyou need to get your dog standing squarely and when youthink he will remain standing and stay for the examination,say “Stay,” giving the hand signal and stepping in front ofyour dog. Stand facing your dog, holding his leash loose andclear of the floor. The exercise does not start until you say“Stay” and move away from your dog. If you say “Stay” asecond time, you will be marked for a double command andlose points. The judge will approach your dog from the front,allow the dog to smell his hand and then touch the dog’shead, back, and hindquarters. He may also move his handslowly down the dog’s back and apply a slight pressure tomake sure the dog is standing firm. Your dog should notmove his feet. After the judge has finished the examination,he will step back and say “Back to your dog.” After you havereturned to your dog, he will say “Exercise finished.” Youshould then say your dog’s name and “Heel,” take two stepsforward, and order him into the sitting position. Then givehim praise. (See Images 10 - 12.)Holding the leashAt the start of the fourth week your dog should be heelingwell enough for you to hold the leash in your left hand atyour waist with your right hand free. This will also allow youto give the stay signals with your right hand withoutchanging the leash to the other hand. In an obedience trial,you may hold the leash in either or both hands; however, youwill appear more natural to carry the leash in your left handand allow your right hand to be free at your side.The habit of holding the leash in your left hand may beespecially useful to you when not in an obedience trial asyour right hand will be free for opening doors, carryingpackages, shaking hands, and many other things we normallydo with our right hand.Image 10: Your dog might notstand squarely when you stop.Handling by a stranger may be difficult for your dog and willrequire some practice. Put your dog in a standing positionand ask a friend to examine him.The dog’s training to stand also will be useful when yougroom him or when your veterinarian examines him. The dogmust show no shyness or resentment during the exercise.Image 11: You can square yourdog by placing its feet in thecorrect position. Make sure topay attention to the breed whenyou learn this procedure.Different breeds should stand indifferent positions.WISCONSIN 4-HImage 12: Afterleaving your dog thejudge will examine itby rubbing the dog’sback. The dog shouldnot sit when the judgedoes this.Pub. No. 4H436, Pg. 7
Lesson 6 - The recall (Part I)The first part of the recall is to teach your dog to come whencalled.Put your dog in the sitting position at your heel. (See Image13.) Swing your left hand in front of his nose and say “Stay.”Step away from the dog on your right foot, going to the endof the leash and facing him. Say his name and “Come.” Makeit a happy call that will make him want to obey. As soon as hestarts to move, run backward several steps gathering up theleash and guide him directly to your front within fingertipreach. He must not touch you nor sit between your feet. Givehim the command to sit. If necessary, jerk up on the leash. Itshould not be necessary for you to reach over him and pushdown on his rump.Image 13: Prepare to leave your dog by placing it in a sittingposition by your side.When he is sitting squarely in front of you, praise him but donot pat him on the head or praise him so much that he jumpsabout. After he has sat properly and you have praised him,give the command and signal (right hand fingers down) to“Stay.” Go to your right, walking around the dog to the heelposition. Then give plenty of praise.Never scold or do anything unkind that he might associatewith coming to you. He should want to come to you.Lesson 7 - The recall (Part II)The second part of the recall is to move your dog fromdirectly in front of you back to the heel position. There aretwo acceptable ways of teaching him.Do not always use the same routine, otherwise he willanticipate your command and will get into the habit ofwalking up to you and going directly to the heel position.Sometimes when you are heeling, halt, have him sit as usual,command him to stay, step directly in front of him and returnto his side instead of having him go to heel. This will alsomake it less boring for him.Lesson 8 - The figure 8The purpose of the figure 8 is to teach your dog to walk closeto people, animals or objects without touching or sniffing. Adog substituting as an object receives training as valuable asthat received by the dog making the figure 8. The figure 8 is avariation of heeling. Walk your dog around two objects orpeople about eight feet apart, making a figure 8 by crossingbetween them. (See Image 14.)Start about two feet in front of the objects, one toward yourleft and the other toward your right. Say your dog’s nameand “Heel” and guide him around one of the objects and thenaround the other, making a cross in the center as shown inthe illustration. Heel close to the objects and at a faster thannormal rate to prevent lagging. In an obedience trial, thehandler and dog go around the figure 8 twice with at leastone halt during and another halt at the end of the exercise.Image 14: Handler’s footworkWISCONSIN 4-HPub. No. 4H436, Pg. 8
Lesson 9 - Review of exercisesThe brace: pre-novice or noviceAfter completing the first eight lessons, your dog shouldhave a basic knowledge of the commands and signals used inobedience training. Do not be discouraged if your dog makesmistakes. Dogs that perform to near perfection have usuallybeen trained for several years. Have patience and vary theexercises so neither you nor your dog will tire of them.The brace is for boys and girls who have two dogs of theirown or for those who want to team up in training a pair ofdogs. Dogs of the same breed, size, and color are preferred,but not necessary. The class is judged according to the bracescorecard for Pre-novice or Novice. (See Images 15 and 16.)Review by doing the exercises exactly as you will at graduation.The heel on leash and figure 8, the stand for examination, andthe recall are performed and judged individually. The dogsappear in the ring together while doing the long sit and longdown.GraduationFollowing the completion of the lessons, a graduation shouldbe conducted. Certificates of graduation may be awarded toall 4-H members who have completed the lessons.You may find the scorecard and certificate in the back of the4-H Leader’s Guide useful to you at time of graduation. Thisscorecard has been modified somewhat from the AKC Novicescorecard. Most counties require a score of 170 in order toreceive a certificate of graduation and qualify for advancement to the Novice course. Those who do not qualify mayrepeat the course or practice on their own and take thequalifying test at the next graduation.In the off lead exercises, the dogs are attached together butoff lead. Dogs should have the Pre-Novice or Novice trainingcourse and more training is helpful.When training the dogs to heel on leash and do the figure 8,place the quickest and most responsive dog on the outsidebecause he will have to hurry on the turns. Stewards standfarther apart for the figure 8 to allow more space for the dogsto turn. Heeling is done at slow, fast, and normal speeds.The stand for examination is made by the judge touchingeach dog on the head, back, and rump. Remove the leash,hold the dogs by the coupler, and take several steps forward,walking them into the stand or standing them separately.Image 15: A tandem chain is used to connect the dogs.At the Pre-novice graduation you may do the recall exercise(Part I) as in practice by calling your dog and taking severalsteps backward to allow your dog to break into a run whencoming to you. If you do not run backward several steps, alarge dog will not be able to run within the distance of the sixfoot length.The second part of the recall, the finish, may also be done asin practice by taking a step backward with your right or leftfoot and guiding your dog into the sitting position. If yourdog will “finish” upon your command only, you should notgive the extra aid by stepping backward.WISCONSIN 4-HPub. No. 4H436, Pg. 9
The long sit for one minute and the long down for threeminutes is done by lining up the braces side-by-side on oneside of the ring. Upon the judge’s command, “Leave yourdog,” the handlers will move to a position about 30 feet infront of their dogs.The brace that works in unison and with the most precisionreceives the highest score.When commanding two dogs simultaneously to heel orcome, you may wish to use a single term such as “boys” or“girls” instead of two separate names. When heeling yourdogs on leash, you may correct a dog that is lagging orforging by jerking the individual dog attached with thetandem chain. When correcting your dogs, carry the leash inyour right hand and make the correction with your left. Youmay at first wish to attach a lead to each dog, holding a leadin each hand so that positive individual corrections can bemade.Image 16: Dogs of the same size, breed, and color workbest for the brace.WISCONSIN 4-HThe teamThe ideal team would consist of four well-trained dogs of thesame breed, size, and coloring. This will likely be difficult toattain through the 4-H program, so selection should be madeaccording to the training ability of the dogs. (See Image 18.)This class is judged according to either the Pre-novice orNovice Team scorecard. Dogs should have completed thePre-novice course and more advanced training will be useful.The success of a team depends equally upon the handlers asthey must work together in harmony, each knowing equallywell the entire routine. Nothing new is required of the dogs,except that they must follow commands while working closeto other dogs in a group.The first practice session should be without the dogs. Thehandlers should line up side-by-side facing the samedirection. The person on the extreme left is Number one, nextis Number two, etc. Each person to the right of Number oneshould raise his left arm so that the fingertips just touch theImage 17: Patterns for team heelingPub. No. 4H436, Pg. 10
shoulder of the person on his left. The three members shouldlook to their left forming a straight line with Number one.Upon the command, “Forward,” from the 4-H leader (or judgein competition), step off with your left foot. Upon thecommand, “Halt,” stop on your right foot and bring the leftalongside it. Make sharp left and right turns and about turnsas shown. (See Image 17.) You will probably soon discoverthat it will take some training to march straight, make sharpturns, and keep in line. Don’t give up; with a little practiceyou will soon be marching with precision. Several alternatesshould be trained to fill in for regular members in emergencies.After the team has learned to march and make turns withsome precision, include the dogs. They will likely at thispoint make fewer errors than the handlers. After you areheeling your dogs well as a team, try the slow and fast gaits.In competition, the team will perform the heel on leash andfigure 8 the same as would be required of a single competitor.(See Image 19.)Next comes the figure 8 which involves eight stewards. Inpractice, you may wish to use stakes. Upon the judge’scommand, “Prepare for the figure 8; take your places,” theteam should line up, each handler facing a pair of stewards.After a brief pause, the judge will command “Forward,” andsimultaneously each handler will step off on the left footturning to the left as he begins the figure 8. The judge willcommand you to halt twice while performing the figure 8.After the second command to halt, the judge will say“Exercise finished.” The team will then re-group side-by-sidewith their dogs in the sitting position.On command from the judge, “Prepare for the recall,” thehandlers will remove the leashes and prepare to leave theirdogs in a sitting position and on the command, “Leave yourdogs,” each handler will march forward about 30 feet and turnand face his dog. The judge will then command “Call yourdog” and the handlers will simultaneously obey.The judge will then command “Finish your dog” and all dogsare to simultaneously go smartly to heel.Image 18: 4-H teams need not be made up of dogs of the same type. However, dogsof the same ability work best together.WISCONSIN 4-HPub. No. 4H436, Pg. 11
The stand for examination exercise begins with the team linedup and the dogs in the sitting position off lead. The judgewill command “Stand your dog” and team members willsimultaneously obey. With practice, all members will be ableto give the hand signal and command “Stay,” step off ontheir right foot, and take a position about 15 feet away facingtheir dogs. The judge will then examine each dog by touchingthe head, back, and rump. The judge will next command“Return to your dog.” After the handlers have returned, thejudge will say “Exercise finished” and each member will taketwo steps forward and put his dog in the sitting position.The long sit, one minute, and long down, three minutes,should be done with no more than four teams (16 dogs) in thering at the same time. The dogs will be off lead and thehandlers in sight. The judge will give the same commands asfor the stand for examination.Image 19: Practice the patterns with plenty of space in between the dogs. Practicing together helps the dogs get used toone another.Image 20: The long sit should also be done in unison.WISCONSIN 4-HPub. No. 4H436, Pg. 12
providesequalopportunities in employment and programming, including Title IX andAmerican with Disabilities (ADA) requirements.” 2004 by the Board of Regents of the University of Wisconsin System.Developed by the Wisconsin 4-H Office, 431 Lowell Hall, 610 LangdonSt., Madison, WI 53703. The 4-H name and emblem are federallyprotected under Title 18 US Code 707.Created by Melanie Miller, Marilyn and Gerald Hrabik, MichelleZimmerman, Deanna Schneider, and Wayne Brabender. Layout and designrevised by Gretchen Krause, 4-H Youth Development Graphic Artist,February 2004.To order multiple copies of this publication, call toll free:1-877-WIS-PUBS (947-7827). To see more CooperativeExtension Information, visit our web site: http://cecommerce.uwex.edu.
Apr 04, 2011 · dog. Basics of training By studying this guide carefully, you can learn to train your dog alone. It is better, however, to train your dog in a class in the presence of other dogs and strange surroundings so that he will learn to obey in almost any situation. There should be 10 or