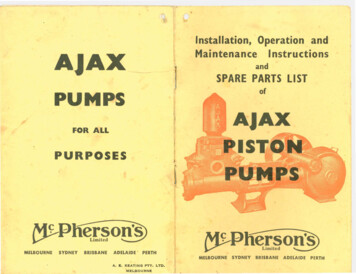
Transcription
WAR DEPARTMENTTECHNICAL MANUALMAINTENANCEAND CARE OFHAND TOOLSWAR DEPRTMEIENT.APRIL 1945
WAR DEPARTMENT TECHNICAL MANUALTM 9-867MAINTENANCEAND CARE OFHAND TOOLSWIAR DEPAR TMENTAPRIL 1945
WAR DEPARTMENTWashington 25, D. C., 19 April 1945TM 9-867, Maintenance and Care of Hand Tools, is published forthe information and guidance of all concerned.A.G. 300.7 (20 Nov43)0.0. 461/60440 RaritanBY ORDER OF THE SECRETARY OF WAR:G. C. MARSHALL,Chief of Stafi.OFFICIAL:J. A. ULIO,Major General,The Adjutant General.DISTRIBUTION: AAF (10); AGF (5); ASF (2); Dept (10); AAFComd (2); Arm & Sv Bd (1); S Div ASF (1);Tech Sv (2); SvC (10); PC&S (1); PE (Ord O)(5); Dist O 9 (5); Dist Br O 9 (3); Reg O 9(3); Establishments 9 (5); Decentralized SubO 9 (3); Gen & Sp Sv Sch (10); USMA (20);A (10); CHQ (10); D (2); B 2, 4-8, 18, 44 (1);R 2, 4-11, 17-19, 44, 55 (1); Bn 2-11, 17-19, 44,55 (1); C 2-11, 17-19, 44, 55 (1); AF (2);W (1); G (1); S (1); F (1).Refer to FM 21-6 for explanation of distribution formula.
TM 9-867CONTENTSSectionIIIPageIntroduction.Abrasive Wheels and Oilstones .5IIIAwlsIVBits and Boring Tools .14VBraces and Hand Drills .24Brushes .26VIICalipers.29VIIIChisels.33Clamps .39Dividers42VIIXXXI.2.11Files and Rasps .44Hammers, Mallets, Mauls, and Sledges.47XIIIHand Grinders .51XIVHatchets, Axes, Mattocks, Adzes, and s.62XVIIIXIXXXXXIXXIINippers and Pliers .64Planes67.Punches.74Reamers IXXVIIIXXIXXXX.Shears .899296Soldering Irons .100Taps and Dies .Vises .Wrenches .References .1031071091121
TM 9-867Section IINTRODUCTIONPURPOSE AND SCOPEThis manual is published for the information of arms and servicescharged with care of hand tools. It is intended to serve as a guideand ready source of definite information for personnel having someprevious knowledge in the operations covered. Insofar as practicable, descriptive and use-of-tools information is omitted in orderto devote more space to care of tools. The efficiency of a mechanicand the tools he uses are determined to a great extent by the condition in which that mechanic keeps the tools. Likewise a mechaniccan be judged by the manner in which he handles and cares fortools. Micrometers, or any other precision tool, must be handledwith a careful, delicate touch and precision, commensurate with theextreme accuracy with which these tools are capable of measuring.It is with joy and great interest that everyone watches a skilledmechanic at his work, and this is largely due to the care and precision with which he uses the tools of his trade. There is a place forevery tool and he keeps each tool in its place. He carefully wipeshis tools clean and dry before he places them in the tool box. If hedoes not expect to use a tool again for some time he lubricates it toprevent rusting.NOTE: When storing tools under conditions of extreme humidity,moisture or salt air, it may be desirable to use preservative lubricating oil (medium) instead of the preservative lubricating oil(special) or engine oil (SAE 10) prescribed in this manual fornormal conditions.LIST OF TOOLSAbrasive Wheels and OilstonesAbrasive wheelsOilstonesBraces and Hand DrillsBracesBreast drillsHand drillsAwlsHandled seat awlBrad awlSaddler's sewing awlBrushesBits and Boring ToolsAuger bitsCountersink bitsExpansive bitsScrewdriver bitsTwist drills -Painter's dustSash toolSteel wireStencilVarnish2
TM 9-867CalipersHand GrindersFirm jointInside and outside micrometersInside and outside springHatchets, Axes, Mattocks,Adzes, and odworker'sKnivesDrawPocketPuttyClampsC-typeHand screwHydraulic brake cylinderToolmaker'sLevelsNippers and PliersNippersDiagonal side cuttingHeavy typeLight typeDividersSpringWingFiles and RaspsRoundHalf round raspFlatTaperPliersAdjustable combinationBrake springFlat-nosedHalf round-nosedRound-nosedSide cuttingTire chain repairHammers, Mallets, Mauls,and SledgesHammersBell faced clawBlacksmith's cross peenBlacksmith's straight peenDing weightMachinist's ball peenPlain faced clawRivetingSoft face (copper, lead,leather, plastic, ith's cross peenBlacksmith's straight idCenterPinPrickTaper3
TM 9-867ReamersHand reamersStraightTaperExpansionAdjustablePower reamersStraightTaperShearsBenchBolt cuttersCurved blade tinner'sScroll pivoter snipsStraight blade tinner'sSoldering rosscutDovetailHackKeyholeMiter boxNestedPatternmaker'sRipStairbuilder'sVeneerTaps and DiesTapsNational series hand tapsPipeDiesNational series round diesPipe diesSquareFour pieceVisesBlacksmith'sMachinist'sPipeUtility esScrewdriversClutch-headOffsetPhillips typeSpiral ratchetStandardAdjustableBoxOpen endPipeSocketSocket head set screw4
TM 9-867Section IIABRASIVE WHEELS AND OILSTONESFLARINGCUPSTRAIGHTBEVELEDRA PD87173ANGLE FACE RECESSED ONE SIDE OFFSET AND RECESSEDABRASIVE WHEELSMaintenance* Handle wheels with care at all times; they break easily.* Do not grind on sides or corners of wheel, unless it is impossibleto grind the job at hand on the face of the wheel. This ruleshould be observed, due to the difficulty of dressing the sidesof the wheel.* When mounting wheel on spindle observe the following precautions:RA PD 87174Test wheel by tapping with a cellulose face or rubber face hammeror mallet. A ringing sound indicates a satisfactory wheel. A dullthudding sound indicates a cracked wheel. Do NOT use a crackedwheel.GASKETRA PD 87175Be sure wheel is equipped with blotter paper gaskets or safetywashers on each side. If safety washers are used, remove paper fromwheel and fit rubber sides next to wheel.5
TM 9-867Do not force wheel onto spindle. It must slide on easily with 0.003to 0.005-inch clearance.RA PD 87177Tighten spindle nut just tight enough so flanges hold wheel firmly.Overtightening may crack wheel.After installing, test wheel for breakage by starting. CAUTION:Stand clear!* If wheel glazes easily (cutting particles become dull), decreaseits speed or use softer wheel.* If wheel loads easily (pores or spaces between cutting particlesclog with material being ground), increase its speed or usesofter wheel.TruingRemoval of material from cutting face of a wheel so surfaceruns true.DressingRestoring sharpness of a wheelface which is "loaded" or dulled.aS*On grinding machines, these operations are best done with adiamond dressing tool rigidly supported in a fixed tool post. Abrasive wheel dressers and abrasive type dressers are used on benchor pedestal grinders.4-CUTTER TYPE DRETUBE TYPE DRESSERRA PD 871786
TM 9-8671. Set tool as shown, almostin contact with high point ofwheel.2. Start wheel rotating. Start10 TO 15tool traversing and feed intowheel 0.001 to 0.002 inch atend of each pass until contact is made.TvDIAMOND{3. Traverse cutter back and forth across wheel face, usingTOOL HOLDER-0.001-inch feed until soundRA PD 87179indicates dresser is cuttingall around the wheel.NOTE: For wet grinding, dress wet. For dry grinding, dress dry.WHEEL DRESSERGRINDER REST\kJ o ', ' JVD J US T A'-"'J"REST AWAY FROM'WHEELTO PERMIT LEG OF* a/ WHEEL DRESSER TO GUIDEON FRONT EDGE OF RESTRA PD 87180rs1. Adjust tool rest to permit wheel dresser to contact abrasive wheelon centerline of wheel as illustrated.2. Start wheel revolving, then support the dresser on tool rest withhandle tilted upward at angle shown in illustration.3. Slowly press the wheel dresser against face of revolving wheeluntil it "bites," then move dresser from side to side across wheelto obtain a straight surface on the wheel. CAUTION: Hold thedresser rigidly enough on tool rest to prevent vibration.4. Smooth wheel by passing an abrasive type dresser back andforth over the face of the wheel as shown below, smoothing with avery light pressure.ABRASIVE WHEEL DRESSERRA PD 871817
TM 9-867Common Misuses and AbusesDo not operate wheel which has worn to a small diameter at samerevolutions per minute as when new. This causes wheel to actexcessively soft and wear fast because of the much reduced speedof grinding surface. Increase revolutions per minute to make up forsmaller size.Wheels not in use must be stowedin racks. If left on the floor they areapt to get broken.StorageSuspend wheels through their spindleholes in racks in a dry place, or storethem in individual boxes.RA PD ND EDGE SLIPRA PD *7183Maintenance* Soak new oilstone in engine oil (SAE 10) before using.* Prevent glazing by application of engine oil (SAE 10) duringuse of stone.* Wipe stone clean with wiping cloth or cotton waste after eachuse.* SOAK IN OIL0 USE LUBRICANT80 WIPE AFTER USERA PD 87184
TM 9-867CleaningWash glazed or "gummed up" stone with dry-cleaning solvent oraqua ammonia. If this treatment fails to completely clean stone,scour it with aluminum oxide abrasive cloth or flint paper attachedto a flat block.DressingTrue uneven surfaces on coarse, medium, or fine oilstones on side ofan old grinding wheel, a grindstone, or as follows: Cover a smoothcast-iron block with waterproof artificial abrasive paper. Place stoneon surface and lap in with water until true.NOTE: Special shape stones canbe formed by making a groove ofmating shape in a cast-iron block.Use waterproof artificial abrasivepaper and water and draw stonethrough groove.DRESSING OILSTC)Repairing Broken Oilstoneor0L ' -RR ARA PD 87187PDO87186Scrub pieces with dry-cleaningsolvent or aqua ammonia toremove gum and dirt.Heat pieces on a hot plate todrive all oil from inside stone.PD 87188Dust broken edges thickly withflake or ground orange shellac.Carefully work shellac into allcracks and openings.;5RA PD 87189Reheat pieces to melt shellac,and clamp together until cooled.Dress stone if joints are uneven.9
TM 9-867If shellac is not available, mount broken pieces in wooden block.Cut recess in block, exact size of stone, depth about one-half thethickness of stone. Assemble pieces of stone and force into recessin block.Common Misuses and AbusesDo not use stone dry. This causes glazing and clogging of stone.Apply engine oil (SAE 10) (or water in an emergency) before usingstone.WRONGRA V87190RA PD87191RIGHTDo not store stone in a hot place. Heat will cause oil to form agummy residue on stone. Store in a cool, moist place.1II] -i'RIGHTRA PD 87193WRONGRA PD 87192Do not attempt to do a honing job with the wrong stone. Such procedure wastes time and energy and causes unnecessary stone wear.Use stones as follows:STONECoarseUSETo sharpen large and very dull or nicked tools.MediumTo sharpen ordinary mechanics' tools not requiring finished edge such as tools for working soft wood, cloth,leather, and rubber.FineTo sharpen tools requiring a very fine edge such asmachinists', engravers', instrument workers', and cabinetmakers' tools.StorageKeep stone clean and moistened with engine oil (SAE 10). If storedin a dry place, keep stone enclosed in a covered box.10
TM 9-867Section IIIAWLSFERRULE-.HANDLEBLADECONE/BRADAWL/Q(OO5 PIECESADDLER'SSEWING AWLRA PD 87194GRINDING AND TEMPERINGGeneralNormal order for reconditioning an awl blade is to harden, grind,and sharpen. Usually all three operations are not needed. Hardenand temper only if tempered part has been broken off, worn, orground away, or if tool has been overheated. Grind after hardeningand tempering, or if blade has lost its shape from repeatedsharpening.Hardening and TemperingHeat about one and one-half inches of tip of blade to cherry red.Use a gasoline torch, gas furnace, or charcoal fire. Do not overheat.Quench about 3/4 inch of heated tip in clean, cold water to harden.HEATRA PD 87195QUENCHRA PD87196Quickly rub hardened end with aluminum oxide abrasive cloth oroilstone to brighten it. Watch color return to tip from heatedportion of blade and quench when light straw color arrives at point.Polish blade with aluminum oxide abrasive cloth and crocus cloth.11
TM 9-867GrindingRA PD 87198RA PD 87197Grind blade of cone-pointedawl to point. Rotate awl during grinding to keep point centered. Be careful that the revolving wheel does not catchthe point and cause damage.Dip blade frequently in wateror wet grind it.If grinding a flat-pointed orspecial shaped awl blade, holdblade against abrasive wheel inpositions to preserve or restoreoriginal shape.SharpeningKeep point sharp by frequentlygiving it a few strokes on an oilstone. Rotate cone-pointed awlslightly before each stroke. Donot use too much pressure onthe tool, to avoid ridge markson the surface of the stone.RA PD 87199Replacing HandlesClamp blade in soft-jawed vise and pull or tap old handle fromshank of blade. Pry ferrule from handle.* Tap ferrule onto new handle. Prick punch ferrule to handle.* Tap handle onto shank of blade and remove blade from vise.·FERRULE WSTALLATION12
TM 9-867Common Misuses* Do not use an awl with a loose handle.This often results in injury to the user.Make sure the handle is tight, thus preventing the tang from,injuring the user's hand.·Do not use the awl with a prying or lever action.This results in breakage.Exert force toward the point or cutting edge.StorageDip awl in rust preventive compound (thin film). To protect thepoint of the awl, insert the point into a small cork, a small, shorttwig from a tree, or a soft wood block. Store in a dry place. Protectblade from contact with metals. Upon removal from storage, washmetal parts with dry cleaning solvent to remove rust preventivecompound.13
TM 9-867Section IVBITS AND BORING TOOLSK BITRA PD 87201·- IFLUTEPARTS OF A TWIST DRILL14THE POINTRA PD 87202
TM 9-867GRINDING TWIST DRILLSGeneralTwist drills may be ground in a drill holder fixture or free hand.Use fixture if available. Both methods are given in the followingpages.Grind drill lips or cutting edges at anangle of 59 degrees, as illustrated below(50 to 60 degrees for drilling brass orbronze, 68 degrees for extremely hardmaterial). Both cutting edges mustmake same angle with drill axis, andboth cutting edges must be of samelength.0 0590590IRIGHT12oTO 15 '-7RA PD8720410 150RIGHTGrind heel to an angle of 12 to 15 de-grees (9 degrees for drilling extremelyhard material). Failure to provide suffiRIGHTcient clearance is the principal causeof drills splitting up the web.RA PD 8720395RIGHTLIPANGLERA PD 87205.J.o.-u-.615
TM 9-867Some Common Grinding Faults toGuard Against:FAULTRESULTLip angle excessive.Drill will not centerproperly becausecone-shaped point istoo flat.WRONGLip angle too small.WRONGOnly one cutting edgePoint on center butcutting edges groundto different angles."AAND"B"UNEQUAL1BAWRONGCutting edge anglesare equal but lips areof different lengths.DISTANCES"A" AND "B'/UNEQUALInsufficient heel angleor clearance.ANGLEUNDER 120WRON4GExcessive heel angleor clearance.Drills slower and requires more powerbecause of longerlength of cuttingedges, and requiresfrequent sharpening.-c. l WRONGRA PD 8720616will do work. This results in rapid drillwear and causes holeto be larger than drill.This throws point andlip off center, causingstrain on drill, machine, and work, andcausing hole tobemuch larger thandrill.Cutting edges loseeffectiveness. Drillwon't drill and maysplit up center whenpressure is applied.Cutting edges likelyto break down due toexcessive bite with in-sufficient support.
TM 9-867Using Drill Holder Fixture*Exact procedure for grinding will vary with make of drill grindingmachine used. General procedure, which applies to conventionaltype machines, is given in the following steps:Adjust machine to desired cutting edge and heel angles. Referto illustrations of lip angle and heel angle (page 15).Place drill in V-blocks of holder. Turn so cutting edge will contact abrasive wheel as drill is fed into wheel.Start motor and advance tailstock until drill makes contact withwheel.Hold drill in place in V-blocks and swing holder spindle slowlythrough its arc. Without changing tailstock adjustment, revolvedrill one-half turn in V-blocks and sharpen other lip of drill insame manner.u-ABRASIVE WHEELV-BLOCKDRILL:.II-Inspect drill point to see if it has been ground back far enough toeliminate all nicks. Repeat grinding and inspection operations untilperfect appearing points are obtained.Free Hand Grinding1. Adjust tool rest to a convenient '- 6-Ž'V--height for resting back of forehandon it while grinding.RA Po 8720817
TM 9-8672. Hold drill between thumb and index finger of right or lefthand. Grasp body of drill near shank with other hand.3. Place forehand on drill rest with centerline of drill makingdesired angle with cutting face of wheel and slightly lower shankend of drill as illustrated./RESTnRA PD 87210RA PD 872094. Slowly place heel of drillagainst grinding wheel. Thengradually raise shank end ofdrill and twist drill in fingersin a counterclockwise directionwhile grinding wheel approachesthe -utting edge. Exert onlyenough pressure to grind thedrill without overheating. Frequently cool drill in water whilegrinding.5. Check results of grindingwith a gage to determine if cutting edges are same length andat desired angle and if heel isground to angle of 12 to 15degrees.(RA PD 8721118
TM 9-867Thinning WebTo strengthen a drill, the thicknessof web is increased as flute approaches shank. As point is groundback, the web becomes thicker.Ordinarily a web at the point ofgreater than 1/32 to 1/16 of an inchis objectionable. Grind down webon a thin round or bevel edgewheel to obtain web thickness of anew drill of same size. Use care toremove the same amount of metalfrom each flute. A coarse handstonemay be used to obtain the dimension when a grinding wheel of theproper width is not available. Holddrill flat on bench and stroke fluteaway from point. Use care to keepfrom stoning away drill land.,/RA PD 87214Sharpening Expansive BitsSharpen spurs and cutters on expansive bit per instructions givenfor auger bit, below.Grinding Screwdriver BitsFor method of grinding screwdriver bits, see section 24, "Screwdrivers."Sharpening Countersink BitsUse a taper file to sharpen cutting edges of rose countersink bitsas illustrated. Use extreme care to retain original shape of cutters.RA PD 8721519
TM 9-867SHARPENING AUGER BITSSHANKAUGER BITSCREWSPURTWISTRA PD 87216Sharpening SpursAUGER:Select an auger bit file or asmall mill file.RA PD 872'17asHold auger bit against a solid surface with shank down asillustrated.spurs, using care to retainoriginal shape of spur. Stop filing when a fine bur appears oncutting edge of spur. Check todetermine if spurs are equal inRA PD 87219length.Remove bur from spurs with a light touch of file.20RA PD 872220
TM 9-867Sharpening CuttersHold auger bit against a solidsurface with screw of auger bitpointing down.Lightly file each cutter ontop side. Use care to maintainoriginal chisel-like shape of cutting edge.RA PD 87221CUTTINGEDGERA PD 87222viT Stop filing when a fine burappears on cutting edge.Check to determine if cuttingedges contact surface of a boardat same level.CUTTING EDGESRA PD 87223Common Misuses to AvoidNever attempt to enlarge a hole by tipping drill sidewise. You arelikely to break or bend the drill or hurt yourself. Use a larger drillor reamer to enlarge hole.WRONGRA PD87224RIGHT21RA PD87224A
TM 9-867Do not allow drills to overheat while in use or being sharpened.Heating destroys temper and makes tool worthless. Use propercutting oil or compound when drilling metal other than cast iron.Wet grind drills when sharpening.WRONGRIGHTRA PDR7775To drive a drill into a socket orsleeve, do not use a steel hammeror other hard object. This woulddamage cutting edges. First makecertain socket or sleeve and drillshank are clean, then tap drill toseat with a lead or brass mallet.WRONGRIGHTRA PD 87225ADo not place work-supporting blocks far from drill. "Springiness"of work will snap off drill. Support work near drill and clampsecurely to prevent turning.WRONGRIGHT22RA PD 87226
TM 9-867Do not allow drill to workloose in chuck. This willcause "chucking" and willbur or break drill. Keep drilltight in chuck.RIGHTRA PD 87228WRONGRA PD 87227Never keep drills loose in tool boxes. This practice causes unnecessary dulling of cutting edges. Keep in a rack or divided box whennot in use.WRONGRIGHTRA PD87229StorageCoat bits and drills with rust preventive compound (thin film)and store in a dry place. Use racks or divided boxes to protectcutting edges from contact with metal. Upon removal from storage,wash with dry cleaning solvent to remove rust preventive compound.23
TM 9-867Section VBRACES AND HAND DRILLSTYPICALBREAST DRILLTYPICALHAND DRILL4JAWStRATCHETTYPICAL HAND BRACETYPICAL SPIRAL HAND DRILLRA PD 87230CAREKeep holding screws tight at all times. Loose screws may permitloose meshing of gears. This causes teeth to break.Do not disassemble chuck except when necessary to make repairs,because of danger of losing springs.Do not let tool rust. Scour off rust with crocus cloth or finealuminum oxide abrasive cloth. Apply lubricating preservative oil(special) or engine oil (SAE 10) lightly to surfaces which tend torust.Keep tool lubricated at all times, in accordance with followinginstructions:24
TM 9-867LUBRICATION DATATOOLPARTLUBRICANTCap bearingsGREASE, general purpose, No. 0,or GREASE, O.D., No. 0Handle bearingsRing and ratchetmechanismBraceRing and ratchetBreast andSleeve and jawmechanismGear teethHandle bearingsDrill chuckhand drillsmechanismSpirals (pushtype hand drills)OIL, engine, SAE 10, or OIL,lubricating, preservative, specialOIL, engine, SAE 10, or OIL,lubricating, preservative, specialGREASE, general purpose, No. 0,or GREASE, O.D., No. 0Common Misuses and AbusesWRONGRA D 87231Do not use tool with bit notfully inserted into chuck.This places a strain on jawsof chuck and may breakdrill. Insert bit fully intochuck.RIGHTRA PD 87232Do not use a "squeaking" brace or hand drill. A squeak means toolis wearing. Lubricate before using.SQUEAKWRONGRIGHTRA PD 87233StorageFor permanent storage, wash tool in dry cleaning solvent to removelubricants. Coat all metal parts of tools with rust preventive compound (thin film) and store in a dry place where tool will be safefrom accident.Upon removal from storage, remove rust preventive compoundfrom metal parts by washing with dry cleaning solvent.25
TM 9-867Section VIBRUSHESPAINT AND VARNISH BRUSHESCleaning Brush After UsingAfter using brush, squeeze paint or varnish from brush by pressingbrush against inside of container. Do not rub brush across edge ofcan, as that wears and breaks bristles.RA PD8723526
TM 9-867Pour small quantity of thinner as prescribed for thinning the particular paint, enamel, varnish or shellac with which the brush hasbeen saturated, into a shallow, widemouthed container. Work thinnerthoroughly into brush, making certain the base of bristles or hair insetting has been thoroughly immersed.When brush appears clean, disfcard the thinner and refill containerwith clean thinner. Work brush inthis until all traces of pigment dis 4i K-appear from brush and until bristlesare soft and pliable. Dry cleaningsolvent may be used in an emergencyin place of synthetic enamel or volatile mineral spirits paint thinner.87236Cleaning Hardened Paint from BrushNOTE: Never allow paint to harden on brush. Cleaning is oftenimpossible and always shortens brush life.1. Scrape paint from bristles with a putty knife.2. Soak bristles several hours in linseed oil (clear lacquer thinnerfor lacquer brushes, alcohol for shellac varnish brushes), and cleanas above.Miscellaneous Notes on Brush Care1. Before using a new brush, tap bristles across edge of a board.Remove all loose bristles which will appear at end of brush.2. Never stand brushes, wet or dry,on their bristles; once its bristles"set" in a curve a brush is ruined.3. In charging a brush with paint,do not rub bristles over edge ofcontainer to remove excess paint.Tap bristles lightly against insideof container.4. "Break in" new brushes on firstcoats. This will increase their pliability and elasticity.5. Always clean brushes after eachuse.6. Always store brushes properly.27RIGHTWRONGRA PD 87237
TM 9-867Overnight Storage1. Drill small hole in handle ofbrush.1/2. Suspend paint and enamelbrushes in linseed oil "keeper"so that bristles and setting arecompletely submerged, but do *not allow bristles to touch bot-WRONG2ittom of container.3. Brushes used with shellacvarnish will be cleaned immediately after use, wrapped inpaper and. kept flat, pending?5IIAfurther use.PRA PD 87238Indefinite Storage1. Clean brush thoroughly and immersein linseed oil. Press out most, but notall, of linseed oil.2. Wrap in oiled paper or brown wrapRA PD 87239ping paper and store flat.3. Once every six months,unwrapbrush and treat with linseed oil.NOTE: Brushes used with lacquer or shellac varnish can bewrapped in paper and stored dry.CareDUST BRUSHESBlow dust from brush with compressed air.Clean soiled or stained brushes with dry cleaning solvent. Presssolvent from bristles and suspend brush by handle until dry.StorageClean brush and wrap in paper. Store brush in flat position.CareWIRE BRUSHESClean brushes in dry cleaning solvent and blow dry with compressed air.StorageApply rust preventive compound (light) to bristles. Wrapgreaseproof wrapping paper and store in a dry place.inCommon Misuses and AbusesImproper cleaning and improper storage are the most commonabuses of brushes. Clean and store brushes in accordance withinstructions above.28
TM 9-867Section VIICALIPERSFIRM JOINT CALIPER(HERMAPHRODITES)INSIDE TERCALIPEROUTSIDE SPRINGCALIPERRA PD 87240 ,tGeneralMAINTENANCECalipers are precision instruments and must be used and handledwith care at all times. Wipe perspiration and fingerprints fromthem with a soft cloth; if neglected, this may cause rust. Do notforce threaded parts. Use touch measurement. Do not spring orclamp calipers. Keep in case or wrap in soft cloth when not in use.RA PD 87241HOW NOT TO USE A MICROMETERLubricationOil threaded and moving parts and friction surfaces (firm jointcalipers) with preservative lubricating oil (special). Coat nonoperating surfaces with a film of preservative lubricating oil(special).Cleaning, Inspection, and Repair1. Disassemble caliper and wash parts in dry cleaning solvent. Drywith a clean, soft cloth.29
TM 9-8672. Inspect all threaded parts to be sure all dirt is removed. Scarcelyvisible particles may cause uneven thread motion and binding.3. Inspect parts to see if they are rusted, corroded, burred, bent,or worn. Scour with crocus cloth to remove rust or corrosion.Replace parts which are bent, broken, or worn.4. Lubricate parts as instructed above, and reassemble caliper.Repair Bent Firm Joint or Spring CaliperIf leg is bent, place caliper on soft metal block. Straighten bent legto original shape by tapping with brass hammer. Replace bentadjusting screws.RATCHET STOP------THIMBLE CAPTHREAD PLAY ADJUSTMENT NUTFIXED NUT CMICROMETER SCREW-THIMBLE-BARREL-CLAMP)RING .TYPICALMICROMETERCALIPERCUTAWAY VIEW30j
TM 9-867Adjustment of Micrometer CaliperTo compensate for thread wear, screw thimble from barrel. Tightenthread play adjustment nut on fixed nut a fraction of a turn ata time. Test fit of micrometer screw in fixed nut. Repeat tighteningand test until operation is free from both binding and play.NOTE: Some micrometers have an automatic spring-controlledthread play adjustment.Testing MicrometerCaliper1Clean measuring faces with a soft cloth.Examine faces after cleaning and remove any lint deposited by cleaningcloth.2Measure length of micrometer test gageof same length as minimum capacity ofmicrometer. Micrometer should read itsexact minimum capacity. For 0-1 inchmicrometer, screw thimble down untilspindle contacts anvil. Do not forcethimble. Reading should be 0.000 inch.3Measure length of a micrometer testgage of same length as maximumcapacity of micrometer. MicrometerRA Pa 87243should read its exact maximum capacity.Check inside micrometers against outside micrometers or gageblocks.If in checking it is found that micrometers do not read correctly,refer to proper authority for adjustment.Never use inaccurate micrometers.MisusesNever use micrometers with dirty anvil and/or threads.Dirt on micrometer anvil gives incorrect readings. Dirty threadscause excessive wear and eventually inaccurate readings.Do not carry micrometers in a pocket of work clothes, as dirtfrom the pocket works into the threads.Keep micrometers in a covered box on the job and wipe anviland spindle clean with a soft, slightly oiled rag each time afterusing and before returning them to their places in the box. Keepcover closed to protect micrometers from dirt and grinding dust.835846 0 - 49 - 331
TM 9-867-IWRONGRIGHTRA PD 87244Do not check a pa
Repairing Broken Oilstone or 0L ' -RR A PDO 87186 Heat pieces on a hot plate to drive all oil from inside stone. PD 87188 Dust broken edges thickly with flake or ground orange shellac. Carefully work shellac into all cracks and openings. RA PD 87187