Transcription
Oak Level I User ManualTable Of Contents OAK Level I1.LOGGING INTO OAK LEVEL I . 22. MESSAGE SCREEN . 33. NAVIGATION MENU BAR. 44. ORDER ENTRY SCREEN . 55. ORDER TICKET SCREEN . 66. SEARCH FOR CONTRACT/MONTH/STRIKE. 77. CONFIRM FOR ENTRY SCREEN . 88. ORDER NUMBER SCREEN . 99. PARKED ORDER SCREEN / RAPID ORDER ENTRY. 1010. WORKING ORDERS SCREEN . 1211. FILLED ORDER SCREEN . 1412. DETAIL SCREEN . 1512. ACCOUNT VIEW SCREEN . 1613. BROKER OVERRIDE FUNCTION . 1714. RISK SCREEN . 18Oak Trading Systems, Inc.1
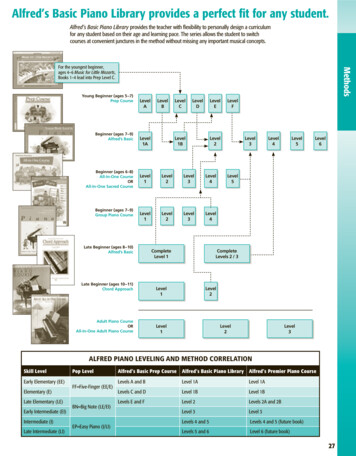
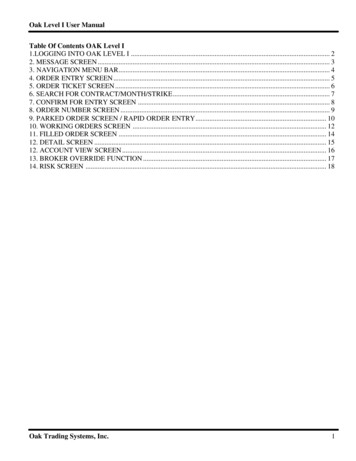
Oak Level I User Manual1.LOGGING INTO OAK LEVEL I The Oak I login can be found on the OAK Trading Systems website, www.oaktrading.com.Click on the link entitled enter live trading, which can be found on the left side of the webpage.A box will appear with spaces to enter your username and password. Upon filling in the fields, clickon the enter button to login to OAK LEVEL I (See Figure 1). Once logged in, the user will be directed to the Message Screen (The message screen will bediscussed in more detail in Section 2).The Navigation Menu Bar can be found on the top of every screen and allows you to access everyfacet of OAK I (The Navigation Menu Bar will be discussed in more detail in section 3). Oak Trading Systems, Inc.2
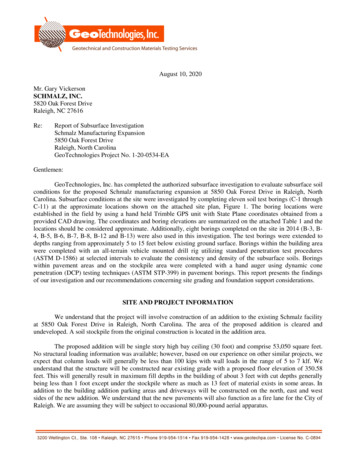
Oak Level I User Manual2. MESSAGE SCREENThe first screen that populates the browser is the Message Screen. This screen will alert you to any OAK Iupdates and changes, as well as helpful information regarding support and general use of the OAK TradingSystem.The Message Screen can be accessed at any time by clicking on the messages button from the NavigationMenu Bar.Oak Trading Systems, Inc.3
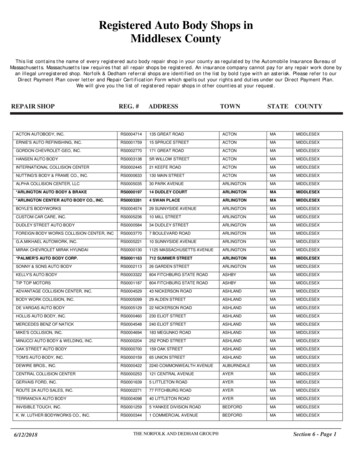
Oak Level I User Manual3. NAVIGATION MENU BARThe Navigation Menu Bar can be found at the top of each screen and allows the user to access each part ofOAK I. Clicking on any of the underlined choices from the Navigation Menu Bar will open the desiredsection (See Figure 3).Oak Trading Systems, Inc.4
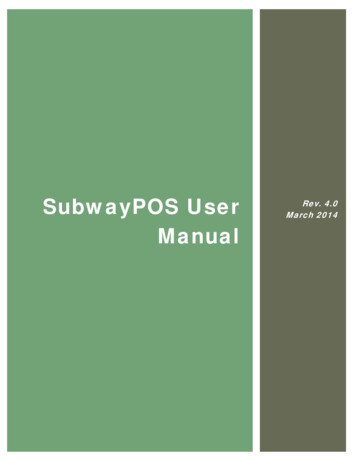
Oak Level I User Manual4. ORDER ENTRY SCREENTo access the order entry screen, click on Order from the Navigation Menu Bar. The Order Entry Screen allows you to enter in Futures, Options, or Spread orders. The screenalways defaults to a Futures order.At any point you can click on the Option button to switch to an Options ticket (See Figure 4 andFigure 5). The Option button can be clicked after selecting “buy” or “sell” to immediately transferthe order to an Option order.The Spread button allows you to switch to a spread order. The Spread button can be clicked at anytime, including after the buy or sell button is clicked (See Figure 4 and Figure 5).The office number defaults to the assigned IB number. OAK I can be configured in the “admin –user setup – screen” to have a default office or account number. It can also be set to remember thelast office number used.Select how long you would like the order to work from the drop down menu: Day or GTC (SeeFigure 4). The default is Day.Clicking on buy or sell will begin your order. This will bring up an order ticket in a new screen toenter all of the order information including; quantity, contract type, month/year, price, and order type(See Figure 4 and Figure 5).Oak Trading Systems, Inc.5
Oak Level I User Manual5. ORDER TICKET SCREEN To produce an order ticket, click on the buy or sell button from the Order Entry screen.The order ticket is blank with spaces to input all order information including; quantity, contract type,month/year, price, and order type (See Figure 5). Simply left click once on an open box and type inthe information.If any of the codes are unknown, OAK I will assist you in finding the proper code. Click on thesearch button to look up codes for different commodities as well as month and year codes (SeeFigure 5).o If an improper code is entered, this feature is automatically employed and will bring up a listof possible codes for you to use (See Figure 6).o Simply left click on a symbol from the list and it will automatically place it on your orderticket (See section 6 and Figure 6).The buy/sell button can be clicked at any point to immediately switch the order from a buy order to asell order (See Figure 5).The clear order button can be clicked at any time to clear all details of the order. This will bring youback to the order entry screen (See Figure 5).Click on the verify buy button to submit the order (See Figure 5).Once the verify buy button is clicked, you will be directed to the Confirm for Entry Screen whichallows you to ensure that your order is correct before sending it to the trading floor (This screen willbe discussed in more detail in section 7).Oak Trading Systems, Inc.6
Oak Level I User Manual6. SEARCH FOR CONTRACT/MONTH/STRIKE The search function will assist OAK I users with finding the correct contract symbol, month andyear, and/or strike price.When entering a buy or sell order, select the search button and the contract months as well as optioninformation will appear. After selecting the correct month and year and/or option strike price, theinformation will populate in the buy or sell ticket (See Figure 6).If familiar with the contract symbol, type it in and select the search button. The specified contract’smonth/year and option strike price information will appear.If an order code is improperly typed, this function will be employed automatically, bringing up a listof valid codes. Simply click on the desired code from this list and it will be placed on your orderticket.Oak Trading Systems, Inc.7
Oak Level I User Manual7. CONFIRM FOR ENTRY SCREENThe Confirm for Entry Screen is brought up when the user clicks on the verify buy button from the OrderTicket Screen. The Confirm for Entry Screen allows the user to review their order before it is transmittedfor execution. The Confirm for Entry Screen will give different background colors for different lot-size orders:o Gray1-5 Loto Aqua6-25 Loto Yellow26-100 Loto Red100-500 Loto Maroon501 Lot or greaterAll orders are checked for real-time buying power before they are executed. Required margins foreach account are fully calculated every 10 minutes, and partially calculated with each fill. Themargining information for the account appears at the bottom of the screen (See Figure 7).Liq Value represents the liquidating value for the selected account. This information includes OpenTraded Equity (OTE) based on the most recent quote (See Figure 7).Margin Excess/This Acct Order represents the margin excess for this specific account.Margin Excess/All Orders represents the margin excess for all accounts related to the specifiedaccount.Margin Results/This Order represents the margin required for this order.Margin Result/All Accts Orders represents the margin required for all accounts and orders relatedto this specific account.Clicking on the flashing Send button will complete the order.Oak Trading Systems, Inc.8
Oak Level I User Manual8. ORDER NUMBER SCREENThe Order Number Screen is displayed upon confirming your order. This screen displays your OAK order number (See Figure 8).This number is used for future reference in the working and fills screens, as well as to report anyproblems to your OAK support desk.Clicking on the Order button on the bottom left of the Order Number Screen will take you to theOrder Entry Screen in order to begin a new order.Clicking on the Working button will take you to the Working Orders Screen (The WorkingOrders screen will be discussed in Section 10).Oak Trading Systems, Inc.9
Oak Level I User Manual9. PARKED ORDER SCREEN / RAPID ORDER ENTRYThe Parked Orde r Screen can be used for rapid order entry, saving, and re-entering frequently tradedcontracts. The top portion of the screen is used for entering your particular order information. It can either be"Sent" to the pit or "Parked" on the lower half of the screen for later use.The bottom portion lists all the information that's been entered above as a parked order.Parking orders allows you to repeatedly send the parked orders to be executed.Creating a Parked Order:There are two ways to create a parked order; 1.)Manually inputting the information into the Rapid OrderEntry section2.)Using a previous ly existing parked order and making thenecessary changes to it. 1.) To create a new parked order manually, simply fill in the fields of the Rapid Order Entrysection which can be found at the top of the Parked Order Screen (See Figure 9.1). After filling in the Rapid Order Entry section, click on the park button which can be found at thetop right corner. This will create a new order template in the Parked Order Screen (See Figure 9.1). 2.) To create a new parked order by using a previously existing parked order, Click on a gray ordernumber button from the Parked Order Screen (See Figure 9.1).This populates the information of that order into the Rapid Order Entry section above. This allowsyou to make changes to that parked order without having to create an entirely new order.At this point you can either click on the park button to add the new order to the parked orderssection or click on the send buy or send sell button to send the order for execution (See Figure 9.1).Once an order is sent for execution, an order number screen will be displayed. From this screen,click on the continue button to go back to the Parked Order Screen (See Figure 9.2).To clear the Rapid Order Entry section click on the reset button at the top right corner.Oak Trading Systems, Inc.10
Oak Level I User ManualSending a Parked Order: To send any order(s) that are parked, simply check the white box(es) next to the gray ordernumber(s) and click on the send button (See Figure 9.1). Once the order is sent for execution, the order number screen will be brought up. From this screen,click on the continue button to go back to the Parked Order Screen (See Figure 9.2). The order(s) will highlight in yellow after they have been sent for execution. (ANY ORDER THATHAS A CHECK NEXT TO IT WILL BE ROUTED) (See Figure 9.1). The orders will remain in the parked orders section even after they are selected and sent to allow youto rapidly send frequently needed orders. Clicking on the refresh button will refresh the parked orders section and remove the yellowhighlighting from the orders (See Figure 9.1). To delete an order from the parked orders section simply check the white box next to the gray ordernumber and click on the delete button (See Figure 9.1).Oak Trading Systems, Inc.11
Oak Level I User Manual10. WORKING ORDERS SCREENThe Working Orders Screen shows you the status of your orders and allows you to go in and cancel orcancel/replace an order. The status of each order can be found in the first column to the right of the order number column(See Figure 10.1).o In Transit/Pending: The order has been sent but not yet accepted as working.o Received: The order has been received at the electronic device and is waiting to be accepted.o Accepted: The order has been accepted for execution by an electronic broker device or otherelectronic system.o Working: The order has been sent to the exchange via electronic or printer. Order is workingin the market.o Rejected/Edit: The order will be highlighted in RED. The rejected order IS NOTWORKING and therefore will not be filled. The rejection of this order must beacknowledged by clicking on the gray order number to the left.Oak Trading Systems, Inc.12
Oak Level I User ManualTo Cancel an order: Click on the gray order number button on the le ft side of the page. This will bring up a copy of theorder (See Figure 10.1 and Figure 10.2). Click on the cancel order button on the bottom of the order page. This will bring up a confirmationpage to cancel the order (See Figure 10.2). If you want to cancel the order click on the yellow cancel button on the top left of the page. Uponcanceling the order you will be brought back to the working order screen. The status of the orderwill switch to being canceled (See Figure 10.3). If you chose not to cancel the order, click on the gray do not cancel button on the top right of theconfirmation screen (See Figure 10.3).To Cancel/Replace an order: Click on the gray order number button on the left side of the Working Order page. This will bringup a copy of the order (See Figure 10.1 and Figure 10.2). From this page, you can modified, QTY,Price, and Type. After modifying your order, click on the gray change order button on the bottom of the page (SeeFigure 10.2). After you click on the gray change order button, you will be directed to a confirmation page. Tosend the order for execution, click on the yellow send button on the top of the page (See Figure 10.3).At this point you will be directed back to the Working Order Screen.Oak Trading Systems, Inc.13
Oak Level I User Manual11. FILLED ORDER SCREENThe Filled Order Screen displays all orders that have been filled, including the details of the order. New fills are displayed with a green background and located at the top of the fills list until they areacknowledged (See Figure 11).All fills are displayed with a white background whether they are acknowledged or not. They arelocated under the dark green order bar, beneath the new fills (See Figure 11).Oak Trading Systems, Inc.14
Oak Level I User Manual Fills that have been undone by the broker are displayed with a red background.To Acknowledge Fills or Undo’s : Click on the small box to the left of the order. Click on the refresh button, which can be found at the top right of the screen (See Figure 11).To Acknowledge all Fills: Place a check in the AcknAll square located at the top left of the screen (See Figure 11). Click on the refresh button.Note: Once a New Fill is acknowledged, the green highlight will disappear. The fill can then belocated beneath the dark green order box with a white background.Note: When the Fills button on the Navigation Menu Bar is highlighted in Red, a fill was undone by12.DETAILSCREENa clerkon anElectronic Clerk device. When this happens, the order is immediately moved back to theWorking Screen and the fills screen displays the undone order.The Detail Screen shows the entire history of any order placed through OAK, and allows you to search forspecific trades to view details. Checking the history box and then clicking the refresh button will display orders that have beenfilled or canceled prior to the present trading day (See Figure 12).Oak Trading Systems, Inc.15
Oak Level I User Manual Checking the working box and then clicking the refresh button will display orders that are currentlyworking or orders that were put into OAK the same day (See Figure 12).The orders in the Detail Screen are categorized into eight different statuses:o Order – the order has been received by the order routing server.o Receive – the order has been received into the incoming deck of an Electronic Clerk.o Accept – the order has been accepted by the broker into the working deck.o Fill – the order has been quick filled or endorsed.o Cxl Rep – the cxl replace has been received by the order routing server.o Cxl – the cxl has been received by the order routing server.o Reject – the order has been rejected by the broker.o Fill Delete – indicates a quick fill has been endorsed or a fill has become undone.12. ACCOUNT VIEW SCREENThe Account View Screen allows you to look at your account marked to market. OAK is integrated withthe firm’s accounting system. Therefore, the activity in your account, OAK or otherwise, is reflected on thispage. To access the Account View Screen, simply click on the Account button on the Navigation MenuBar.There are several abbreviations on the Account View Screen:o OTE – Open Trade EquityOak Trading Systems, Inc.16
Oak Level I User Manualooooo LOV – Long Option ValueSOV – Short Option ValueBalance – The Total Cash Balance of the accountLiq Value – The Liquidating Value of the accountMME – The Margin Excess Value, mark to marketValues are displayed At Settlement (from the previous day) and Current.The Current Values are updated every 10 minutes via OAK’s span margining system.The entire position is marked to market real-time, which is reflected in the current MME Value.13. BROKER OVERRIDE FUNCTIONThe Broker Override function allows individuals with permission to override the routing setup by the firmand route an order to a different broker.Using the Broker Override Function: Open the Order Ticket Screen from the Navigation Menu Bar. Enter the preferred broker’s device name in the BkrOvrd box located on the right side of the OrderTicket Screen (See Figure 14). This can be used via a regular order or a rapid entry order. The information will override any other routing information setup for the firm.Oak Trading Systems, Inc.17
Oak Level I User ManualThree things to be aware of: The user must be setup as a Level 4 or above for this functionality. Any cancel/replace will follow the original order’s path. In other words, the Broker Overridefunction will not work for an order that is cancelled and replaced. The Broker Override function will not allow you to enter a value when creating a Parked Order.14. RISK SCREENTo open the Risk Screen, click on the risk button from the Navigation Menu Bar.The Risk Screen gives a risk manager the ability to supervise profit/loss and margin changes on theirparticular accounts intra-day. Choosing either negative/positive and less than/greater than values in the boxes listed will bring upany account(s) falling within the perimeter set (See Figure 15).The Risk Screen will display (along with the time that the account was last margined):o Current and Beginning of Dayo Liquidating ValueOak Trading Systems, Inc.18
Oak Level I User Manualo Margin Excesso Securities on DepositOak Trading Systems, Inc.19
Oak Level I User Manual Oak Trading Systems, Inc. 2 1.LOGGING INTO OAK LEVEL I The Oak I login can be found on the OAK Trading Systems website, www.oaktrading.com. Click on the link entitled enter live trading, which can be found on the left side of the webpage. A box wil