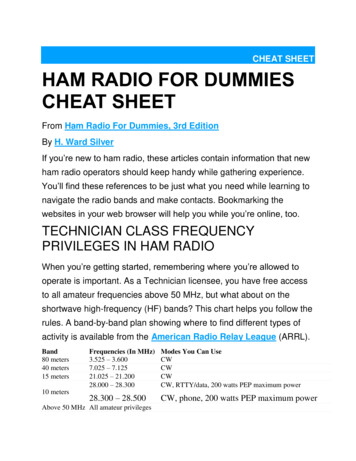
Transcription
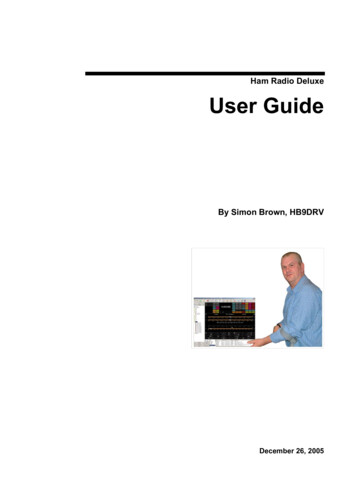
Ham Radio DeluxeUser GuideBy Simon Brown, HB9DRVDecember 26, 2005
ContentsIntroduction7How It All Began. 7This Guide . 8Sponsors. 8Requirements9Computer . 9Supported Radios . 9Interfacing . 10Installation11Introduction . 11Ham Radio Deluxe . 11First Steps15Connection. 15Dem-o-matic. 15Options . 15Connecting. 16What’s Next. 17Radio Display19Introduction . 19Frequency Display . 19Tuning Dial. 20Fine Tuning . 20Main Tuning . 20Band Selection. 21Display Scroll . 21Band Selection. 21Date & Time. 21Buttons . 21Dropdowns . 21Sliders. 21Customise Layout23Introduction . 23Schemes . 23Layout. 24Buttons. 25Faceplate. 26Frequency . 27Meters . 28Sliders: Appearance . 29Sliders: Layout. 29
Tuning Dial. 30Program Options31Introduction . 31Accelerators . 31Comms. 32COM Port TX . 33Docking Panes . 33ICOM Calibration. 34Info: Modes. 34Info: Options. 35Internet. 36Out Of Band. 36Mouse Wheel. 37Selection Window. 37Toolbars . 38Updates . 38Band Layouts39Introduction . 39Manager . 39Adding A Definition . 40Copying A Definition . 41Selecting . 41Favourites43Inspiration. 43Manager . 43Markers. 45Quick Save47Introduction . 47Add Entry . 47Markers. 47DDE Support49Introduction . 49Available Support . 49Commands . 49Add ADIF Record . 50Refresh . 50Set Button . 50Set Dropdown. 50Set Frequency . 50Set Mode . 50Top Window. 50DX Cluster51Introduction . 51OH2AQ . 52HRD . 52Starting. 52Configuration. 53Cluster Source . 53OH2AQ / Ham Radio Deluxe. 53Custom – DX Cluster Client. 53
Options. 54Auxiliary Switching57Introduction . 57Technology . 57Manager . 57Definitions . 57Port Address . 58Various . 58Monitor . 59Selection Window. 59Remote Server61Introduction . 61Requirements. 61Technology. 61Installing . 61Configuring. 62Connecting. 63Remote Connection . 65Slow Link . 65Satellite Tracking67Introduction . 67Satellites. 67Observer. 70Ground Control. 71Kenwood TS-2000 . 71Yaesu. 72ICOM . 73Single VFO Radios. 73Linear Transponders. 74Frequency Resolution. 74Options . 74Schedule. 75Current Data . 76Mutual Visibility. 76Visibility . 77Next Passes . 78Single Pass. 79Plot. 80DDE. 80Synchroniser81Introduction . 81Starting. 81Dual Radio Satellite Tracking. 82K1EL WinKey85Introduction . 85Main Window . 85Options. 86Keyer . 86Speeds. 86Options . 87Pin Config . 87
Macros. 87Logfile . 88Help . 88Annex: Command Tester89Introduction . 89Too Many Radios . 89Data Formats . 89Command Types. 89Starting. 89Connect. 90General Options . 90Results . 91Platforms. 91Elecraft . 91ICOM CI-V . 92Yaesu. 94Annex: Portmon97Introduction . 97Sample Log. 98Annex: Remote Server99Technical Information. 99Commands. 99Structures. 100
IntroductionHow It All BeganIn early 2003 Peter PHP1PH and myself Simon HB9DRV talked aboutdeveloping a simple program to control the soon to be released ICOM IC-703.We had previously developed the FT-817 Commander, which proved to be verypopular, the main lesson being learnt that future programs must not be tied to asingle radio or a single manufacturer; rather they must be designed to support allcurrent and future radios.Maybe it was the beer, maybe the desire to give something back to the radioamateur community, however on June 6th, 2003 the first line of code was written,Ham Radio Deluxe (HRD) was born.The inspiration for the design came from a variety of sources: Internet Explorer(especially the Favourites), my old Eddystone EA12 and a desire to prove thatPeter and myself could develop something better than the current ‘not quite sofree and fantastic’ products being peddled to radio amateurs.On December 23rd, 2005 the number of registered users stood at 20,006 – quitean achievement in such a short time.--- --- --Very sadly Peter passed away on June 8th, 2005. His contribution to Ham RadioDeluxe will never be forgotten.Doc-To-Help Standard TemplateIntroduction 7
This GuideKevin Crockett, VK3CKC, wrote the original user guide. Now that HRD is amore mature product the time has come to write the document you are currentlyreading.Thank-you for reading this guide - and before you ask it’s written in BritishEnglish, plenty of my favourite colours despite Word’s attempts to change thespelling .SponsorsTo help keep HRD free for all Amateurs and SWL’s several companies havehelped by sponsoring the HRD development. If I have missed your companyplease let me know.
RequirementsComputerYou can run HRD on any Windows 98 or NT/2K/XP computer.There will never be a LINUX or Macintosh native version, HRD is known to rununder Wine for LINUX and PC emulators for the Macintosh.I may be crazy undertaking a project like this in my spare time1; I am not ‘deepstir-fry serve in a bun with extra chilies’ crazy2!The code is not open source; it cannot be ported to Linux and will never bereleased as some of the code is protected under copyright and if released willland the author with a nice big legal ‘fee’.Supported RadiosYou don’t need a radio – HRD comes with built-in Dem-o-matic radio support(K2, TS-480, TS-2000 and Orion).HRD currently supports these ‘real’ radios:12 Elecraft: K2 FlexRadio: SDR-1000 ICOM: IC-7000, IC-703, IC-706, IC-706MkII, IC-706MkIIG, IC707, IC-718, IC-725, IC-726, IC-728, IC-729, IC-735, IC-736, IC737, IC-738, IC-7400, IC-746, IC-746Pro, IC-751A, IC-751A(Piexx), IC-756, IC-756Pro, IC-756ProII, IC-756ProIII, IC-761,IC-765, IC-775DSP, IC-7800, IC-781, IC-821H, IC-910H, IC-R10,IC-R20, IC-R75, IC-R8500, PCR-1000 Kenwood: R-5000, TS-140S, TS-2000, TS-440S, TS-450S, TS480, TS-50S, TS-570, TS-60S, TS-680S, TS-690S, TS-790, TS850, TS-870, TS-940S, TS-950, TS-B2000 Ten-Tec: Argonaut, Jupiter, Orion, RX-350 Yaesu: FT-100, FT-1000D, FT-1000MP MkV, FT-600, FT-817,FT-840, FT-847, FT-857, FT-890, FT-897, FT-900, FT-920, FT990It was the voices in my head that made me do itMedical opinion may differ hereDoc-To-Help Standard TemplateRequirements 9
Yaesu: FT-100, FT-1000D, FT-1000MP MkV, FT-600, FT-817,FT-840, FT-847, FT-857, FT-890, FT-897, FT-900, FT-920, FT990InterfacingYou will need a cable to connect your radio to the computer’s serial (COM) port.If you don’t have a serial port all is not lost – USBserial converters arewidely available.For more information refer to: The HRD Interface guide, and CATbox, a Modular Computer Interface by Bas Helman G4TIC.Check out the cable solutions from G4ZLP http://g4zlp.ham-radio.ch/ and WestMountain Radio http://www.westmountainradio.com/ .
InstallationIntroductionThe Ham Radio Deluxe kit is a standard Windows kit – it supports Windows 98,Windows 2000 and more recent releases.The Logbook requires DAO (Data Access Objects) 3.5 or higher. If you do nothave DAO 3.5 installed you will get error messages when you start the logbook.Ham Radio DeluxeHam Radio Deluxe can be installed in under a minute. Special knowledge is notneeded – the kit does everything for you!When you start the installation the first screen shows the release and build youare installing.Doc-To-Help Standard TemplateInstallation 11
You must accept the licencing conditions. Ham Radio Deluxe is free for radioamateurs and shortwave listeners, commercial use requires a licence.Select the folder where Ham Radio Deluxe will be installed, the suggesteddefault is usually sufficient.
Select the folder in the Start menu where the Ham Radio Deluxe entries will beadded, the suggested default is usually sufficient.Click Install to start the installation.Doc-To-Help Standard TemplateInstallation 13
The progress of the installation is shown while the software is being installed.When the software has been installed select the programs to be started, thenpress Finish.
First StepsConnectionNow that you have installed HRD you can try it out using a Dem-o-matic radio.This is a reasonable accurate simulation of the real thing, designed for use duringpresentations and while developing HRD when a radio is not available (on thetrain, in a plane, in an airport, stuck in a hotel room in Finland etc.).From the Start menu select Programs Ham Radio Deluxe. Once the splashscreen has closes you see the Connect window.Dem-o-maticThe Dem-o-matic radios do not need cables – simply select Dem-o-matic in theCompany dropdown, select an option in the Radio dropdown, and then pressConnect.They are ideal for demonstrating HRD when you do not have a suitable radioavailable.OptionsCompanySelect your radio manufacturer from the drop-down list.Doc-To-Help Standard TemplateFirst Steps 15
FlexRadio: you must install the virtual serial port drivers from Philip Covington(N8VB). These are used to provide the connection between HRD and thePowerSDR sofware which must be running before you try to create theconnection with HRD. More information is available from http://www.flexradio.com/.ICOM: disable the CI-V Transceive option for best performance.Kenwood: make sure Packet communication mode is switched OFF (ifsupported). Most Kenwood radios require CTS and RTS to be ON for flowcontrol.RadioSelect your radio model from the drop-down list.COM PortThe COM port on this computer where you have connected the radio interfacecable.Make sure that you do not have other programs using the same port, for examplemobile phones and personal organisers.Select 'Auto-detect' to try all available ports.SpeedThe speed used for communicating with the radio, check the speed setting viathe radio's configuration menu.Select 'Auto-detect' to try all available speeds.CI-V AddressICOM only: the address assigned to the radio, consult the radio's handbook forthe default address. This can also be configured via the radio's configurationmenu.CTSEnables the CTS flow control, required for Kenwood radios.DTREnables the DTR line when the COM Port is opened and leaves it on, usually toprovide power for an interface cable. For Yaesu CT-62 and ICOM CT-17interfaces this can be left unchecked (off).RTSEnables the RTS line when the COM Port is opened and leaves it on, usually toprovide power for an interface cable. For Yaesu CT-62 and ICOM CT-17interfaces this can be left unchecked (off).ConnectingPress Start to connect to the radio. If you see the error below then the COM portis currently held open by another program.Check that you have not started another radio control program. Other culprits arePDA and mobile phone connections. Even if you have disconnected a devicefrom a COM port you must make sure that the software is no longer running.
One connected HRD reads the radio’s frequency to ensure that the options youselected are correct. If you see the error below then HRD failed to read theradio’s frequency:If HRD can read the frequency the Connect window is replaced with the mainradio display – you are now using HRD!What’s NextA taste of what’s to come later in this guide AppearanceSet the appearance:Doc-To-Help Standard Template From the View menu select Colour Schemes, Select Customise Layout and Program Options from the Toolsmenu.First Steps 17
Radio DisplayIntroductionThe HRD radio display has many, many features. This section attempts todescribe everything you can do in this display.To aid in the clarity of the screenshots the LCD Scheme is used.Frequency DisplayDoc-To-Help Standard TemplateRadio Display 19
ConfigurationSee Frequency on page 27.DropdownsIf you have enabled dropdowns as part of the configuration just click on adropdown and make a new selection.Mouse WheelWhen you rotate the mouse wheel in the frequency display the currently activedigit is incremented / decremented depending on the scroll direction.If you rotate while the cursor is over an inactive digit then the digit is activated.Up/DownThe up-arrow, down-arrow, - and keys increment / decrement the active digit.Mouse-clickSelect a digital by clicking over the digit. To increment / decrement click above /below the center of the digit and keep the mouse button pressed.Direct EntryTo enter values just press a numeric key (0-9). The active digital is updated andthe next digit to the right is made active.Press Enter to display the Enter Frequency window.Enter the new frequency, and then press Apply.If you check Auto-apply then the new frequency is applied every time you makea change.If you check Track this window is updated with changes made to the frequencydisplay – for example when you tune the radio manually.Griffin etc.Support for third-party devices such as the Griffin Powermate is available – seeAccelerators on page 31.Tuning DialFine TuningMain Tuning
Band SelectionThe Band Section buttons are shown between the Fine and Main layouts.The buttons are: ALT, BSP, 160m, 80, 10m.Display ScrollBand SelectionDate & TimeButtonsDropdownsSlidersDoc-To-Help Standard TemplateRadio Display 21
Customise LayoutIntroductionUsed to define the appearance of the radio display, Customise Layout is selectedfrom the Tools menu, or by pressing the Customise button.Sch
single radio or a single manufacturer; rather they must be designed to support all current and future radios. Maybe it was the beer, maybe the desire to give something back to the radio amateur community, however on June 6th, 2003 the first line of code was w