Transcription
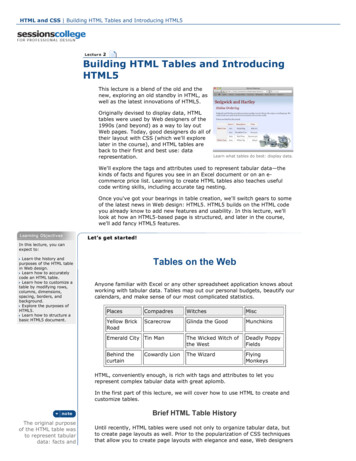
HTML and CSS Building HTML Tables and Introducing HTML5Building HTML Tables and IntroducingHTML5This lecture is a blend of the old and thenew, exploring an old standby in HTML, aswell as the latest innovations of HTML5.Originally devised to display data, HTMLtables were used by Web designers of the1990s (and beyond) as a way to lay outWeb pages. Today, good designers do all oftheir layout with CSS (which we'll explorelater in the course), and HTML tables areback to their first and best use: datarepresentation.Learn what tables do best: display data.We'll explore the tags and attributes used to represent tabular data—thekinds of facts and figures you see in an Excel document or on an e commerce price list. Learning to create HTML tables also teaches usefulcode writing skills, including accurate tag nesting.Once you've got your bearings in table creation, we'll switch gears to someof the latest news in Web design: HTML5. HTML5 builds on the HTML codeyou already know to add new features and usability. In this lecture, we'lllook at how an HTML5 based page is structured, and later in the course,we'll add fancy HTML5 features.In this lecture, you canexpect to:Learn the history andpurposes of the HTML tablein Web design.Learn how to accuratelycode an HTML table.Learn how to customize atable by modifying rows,columns, dimensions,spacing, borders, andbackground.Explore the purposes ofHTML5.Learn how to structure abasic HTML5 document.Tables on the WebAnyone familiar with Excel or any other spreadsheet application knows aboutworking with tabular data. Tables map out our personal budgets, beautify ourcalendars, and make sense of our most complicated statistics.PlacesCompadresWitchesMiscYellow BrickRoadScarecrowGlinda the GoodMunchkinsEmerald City Tin ManThe Wicked Witch ofthe WestDeadly PoppyFieldsBehind thecurtainThe WizardFlyingMonkeysCowardly LionHTML, conveniently enough, is rich with tags and attributes to let yourepresent complex tabular data with great aplomb.In the first part of this lecture, we will cover how to use HTML to create andcustomize tables.Brief HTML Table HistoryThe original purposeof the HTML table wasto represent tabulardata: facts andUntil recently, HTML tables were used not only to organize tabular data, butto create page layouts as well. Prior to the popularization of CSS techniquesthat allow you to create page layouts with elegance and ease, Web designers
figures!used tables to position and size sections of a Web page.Using tables for layout is not only semantically incorrect (as page layouts arenot the intended purpose of tables), but they are inferior to modern CSSlayout techniques. Recall the importance of separating content frompresentation: using tables for layout purposes blatantly integratespresentation within the HTML content of a page.Tables are still occasionally used for layout, mostly by designers who don'tknow any better. We will not cover table layouts in this lecture. (It's just badpractice.) We will, however, cover CSS methods for page layout.We'll focus on the true purpose of tables: to display data. The tags andattributes we're going to learn in this lecture are as follows:HTML tables were co opted by Webdesigners of the 1990sas a structure for pagelayouts. This practicehas since become ano no and has beenreplaced with CSS forlayout.ElementTagsAttributeValueTable table /table ColspancolspanTablehead thead /thead RowspanrowspanTablebody tbody /tbody Alignleft, center,right, or justifyTable row tr /tr WidthwidthTableheadercell th /th Borderborder,bordercolorTable data td /td Framevoid, above,below, hside,vsides, lhs, rhsCaption caption /caption CellspacingcellspacingSummary summary /summary CellpaddingcellpaddingScopescopeCreating a Basic TableLet's examine a simple table on a Web page. Imagine we need to create atable that displays the price of different brands of tea for a client. Often you'llreceive such information in an Excel or Word document like this:Table content delivered in Word formatDownload the lesson2 folder here, and open the tea.html file in the tea folderwithin. I've included the basic tags we learned in Lecture One but left the
table data without markup. Note that the text within the table tags may notappear in a browser or Dreamweaver Design view until the table code hasbeen completed. (Please ignore the outrageous prices for tea; they havebeen exaggerated for the purposes of demonstrating table cell alignmentlater on!)Let's now look at how to create an HTML table for this data. We'll add thesetags one at a time. Remember to always use closing tags.1. Define the table: table The table tag defines the table as a whole. Create a one pixel border tothe existing table tag by adding the border attribute to the opening tag: table border "1" 2. Specify the table head and table body: thead tbody When a table has a header such as a row of category names, add the thead tag to one or more rows as the table header, then use the tbody tag to wrap the table body (as distinct from the table header).3. Define the table rows: tr Next, add table row tags tr at the beginning (and end) of each table row.This tag wraps groups of individual table cells. First you define a row, andthen you add the enclosed cells. (Note that no tag exists for a table column.)The HTML table has astrict nestingstructure: content iswrapped in data cells,which are wrapped inrows, which arewrapped in table bodyor table header tags.4. Define individual cells: th and td Use the th tag for each cell you want to designate as a table header cell(here, this includes Item, Description, Price). This can be the head of a rowor a column. The specific cell content should be enclosed in the tag. Bydefault, browsers bold the text in header cells.Use the td tag for table data. It marks out individual cells in a table. Likethe th tag, it wraps specific cell content.Done? In a browser, your table should look like this:There are no tablecolumn tags. Instead,table rows tags createeach row.Click here to compare your code with mine.To review, the tag nesting structure of a table is as follows:1. Table header thead and table body tbody tags go insidetable tags table It's good practice touse table body andtable header tags.2. Table rows tr always go inside table header tags or tablebody tags as appropriate3. Table header cell th and table data td tags always go
inside table rows4. Cell data always goes inside table cell header th or tabledata td tagsFor example:Use tableborder "1" tocreate a one pixel borderthat makes thetable visible. table border "1" thead tr th Header row /th /tr /thead tbody tr td Data row 1 /td /tr tr td Data row 2 /td /tr /tbody /table As you can see, making a basic table is pretty simple. But to see howversatile the HTML table really is, let's customize it.Customizing TablesSpanning Multiple Columns and RowsThere may be instances in which you want to merge two or more cellstogether so that they span multiple columns or rows. For example, maybeyour table header is a single cell that spans the columns below it like this:Wizard of OzColspan or rowspanattributes can be usedto make cells spanseveral columns orrows.PlacesCompadresWitchesMiscYellow BrickRoadScarecrowGlinda the GoodMunchkinsEmerald City Tin ManThe Wicked Witch ofthe WestDeadly PoppyFieldsBehind thecurtainThe WizardFlyingMonkeysCowardly LionYou can achieve this effect with HTML using the colspan and the rowspanattributes. colspan Apply the colspan attribute when you want acell to span two or more columns. rowspan Apply the rowspan attribute when you wanta cell to span two or more rows.Both the colspan and rowspan attributes take a number (the number of rowsor columns to span) as a value. For example, tr colspan "3" or throwspan "3" .Let's try it out. Say we wanted to add a column to our table that categorizedthe types of teas listed, dividing them into black and white teas, like so:
Black TeasAdd the colspan orrowspan attribute tothe table cell in whichyou wish the span tobegin.White TeasItem #DescriptionPriceA01Darjeeling 28.00A02Breakfast Tea 124.50A03Earl Grey 2,000.50A04White Tip 8.50To do this, add an extra table header tag at the beginning of the first of thethree rows you want to span. The value "3" indicates that it will span threerows. th rowspan "3" Black Teas /th td A01 /td td Darjeeling /td td 128.00 /td Also remember to add an empty cell at the top left and an additional tableheader tag for "White Teas": tr th White Teas /th td A04 /td td White Tip /td td 8.50 /td /tr It is rendered like so:Colspan orrowspan aretricky tovisualize andeasy to mess upat first.Setting AlignmentYou can set the alignment for content in a cell or row using the align andvalign attributes.Align sets the horizontal alignment of a cell, and takes one of four values:left, center, right, or justify.Try right aligning the numbers in the "Price" column. Edit each cell like so: td align "right" 28.00 /td Next, try to center all the elements in a row: tr align "center" Use attributesValign sets the vertical alignment for a cell or row. It takes one of four
to align thecontent in tablecells or rows.values: top, middle, bottom, or baseline (in which the first line of text in thecell shares a common baseline with the other cells in the row).Here, the text in the left cell will sit at the top of the cell: th rowspan "3" valign "top" Black Teas /th Below, we've adjusted the table so that the cells in the first column arevertically aligned to the top, and the cells in other columns are aligned to thecenter:Fluid vs. Fixed TablesSpecifying the widthof a table cell or rowas a pixel value cangive it fixeddimensions. Using apercentage value canmake the table fluid.Thus far, our HTML tables have sized to the width of the content inside them.If you need a different size, you can define the width of a table, or anindividual column, using the width attribute. The attribute can take anumber or a percentage as a value.Add this attribute to the table tag to make your table 200 pixels wide: table border "1" width "200" You can also define the width of a column by applying a width to any cell inthat column: td width "50" Darjeeling /td Note that the entire column will be 50 pixels wide, not just that one cell.Both of these examples demonstrate the creation of a fixed table. A fixedtable is one that has a determined width, regardless of the size of thebrowser window. Alternatively, you can create a fluid table, where the widthof the table shrinks or stretches with as the browser window changes size.Create a fluid table by using percentages for the width value: table border "1" width "75%" You will end up with a table that is 75% the width of the browser window:
Borders andbackgrounds can beapplied to tables toaffect thepresentation.You need not use only"Web safe" colors inyour page designs;almost every Webuser has a screen thatcan display millions ofcolors. But the Web safe colors do offer agood starting point inyour color selection.As the browser window stretches and shrinks, so will the table:If you set a column to, say, 50%, then that column will be 50% of the totaltable width. Try it!The advantage of the fluid layout is that it makes ideal use of screen realestate, and prevents the user from having to horizontally scroll in case thetable is wider than the browser window. The disadvantage to this method isthat it may present the table in a way that is not ideally readable (if the tableis smooshed very narrowly or stretched very wide).Adjusting Borders and BackgroundOur table is legible enough, but it still looks a bit stark and boring. Let'sadjust some of the aesthetic elements to make it look a little better.First, let's change the borders and frame. By default, tables are displayedwithout frames, though we've already added a 1 pixel border to delineate thecells more clearly.Let's make our border 2 pixels thick and also change the color to a lightgray: table border "2" bordercolor "#cccccc" The border attribute takes a number as its value (indicating how thick it is,in pixels), while bordercolor takes a hexadecimal color as its value.Hexadecimal colors are six digits or letters that indicate a specific color toyour HTML or CSS. The cccccc you see above, after the pound sign, is ashade of light gray. A chart of the most common or "Web safe" colors can befound here via december.com, and more colors can be found here onWikipedia. You'll notice that some colors can also be represented with threedigits or letters (#ccc), or with a word indicating the color name, such asblack or gray.It's recommended that you stick with white, gray, and black as you buildyour tables until you get more comfortable with designing.Let's remove the "frame" that surrounds the entire table:
table border "2" bordercolor "#cccccc" frame "void" Now our table looks like this:Cellpadding andcellspacing attributesgive the table contentbreathing room.Adjusting SpacingNow, let's change some of the spacing in the table. There are two relevantattributes: cellspacing, which determines how much space there is betweencells, and cellpadding, which determines how much space there is betweenthe border and the content of the cell.Here is our table with 10 pixels of cell spacing:While here, we've added 10 pixels of cell padding:But for the purposes of our table, we are going to set the cellspacing to 2,and add a bit of padding (5 pixels): table border "2" bordercolor "#cccccc" frame "void"cellspacing "2" cellpadding "5" The table still looks a little dry. Let's add some color. You can add abackground color to the entire table, or any row or cell using the bgcolorattribute. This adds a light gray color to a table row: tr bgcolor "#eeeeee" This adds the same color to a row header cell. th rowspan "3" valign "top" bgcolor "#eeeeee" Black Teas /th If we add a background color to our header row and header cells, we get thefollowing:
Notice here, and whenever working with bordered tables and tablebackgrounds, that the result may be a little different depending on thebrowser. The above result comes from Firefox, while the result below comesfrom Safari:This makes our headers stand out a bit more.To wrap the tea site up, let's add a quick CSS document I've created, whichwill format our text and other visuals: head title Online Ordering /title link rel "stylesheet" type "text/css" href "css/tea.css" /head Ready to review the process of creating and customizing HTML tables? See ithappen from start to finish in this video tutorial:
Creating HTML TablesTables can be nestedwithin tables, thoughthis can createproblems for codersand devices alike.00:00 / 00:00Special TablesData TablesWhen you think of a table, you generally think of a data table: a grid usedto organize and display data. The example we've been working with so far isa data table. Thile the table we've created is simple enough to be understoodand deciphered as is, you may be asked to create very complex data tablesthat may need more work to make them optimally usable.The more specific thedata (displaying stockreports on your cellphone, for example),the more likely thatadditional tableattributes may berequired.A complicated data table at nationmaster.com.Tables can be particularly difficult for users that use screen readers. Thoseusing standard browsers can just glance at a table as a whole and get some
idea of what the table is about, what kind of data it contains, and how thatdata is related. Screen readers, however, read off a table cell by cell, line by line, and unless explicit connections are drawn using tags, a screenreader will not convey how certain cells (such as header cells) are related toother data.There are, however, additional tags and attributes that you can use toprovide more meaning to content presented in tables. These additional tagscan make tables much more accessible to users with screen readers as wellas more readable and useful in standard browsers.Let's take a look at some of these tags and attributes: caption : Use the caption tag to provide a brief description ofthe table. The browser displays the caption by centering it abovethe table. summary : Use the summary tag to provide a more detaileddescription of the table's contents. The summary is not displayedby the standard browser, and is mainly for the benefit of screenreaders. People using screen readers cannot glance at the tableas a whole to get an idea of what it contains, so providing asummary gives those users the benefit of having an overview ofthe table's contents.scope: You can use the scope attribute to associate header cellswith the rows or columns that they head. e.g., thscope "col" Item # /th indicates that this cell heads acolumn, while th scope "row" White Teas /th indicates thatthis cell heads a row. Now, a non visual browser knows whatheader cells to associate with which data. thead , tfoot , and tbody : As mentioned earlier, youcan also carve out headers, footers, and body sections of a table.You can, for example, enclose all of your header rows within the thead tag, and the remaining rows with the tbody tag.Doing this does not, by itself, alter the way that the table isdisplayed. But, some browsers have the capability to print theheaders and footers on every page if the table spans more thanone page. Mozilla has the capability of scrolling the table bodyindependently of the headers and footers (so that if you have avery long table, you can set it up so that the headers and footersremain stationary while the rest of the table scrolls inside of it).To show you how these tags work, click here to see the code for a basic tableshowing iPod specifications. Most of the content has been stripped away tofocus on presenting where these additional attributes should be placed.Image Slice TablesImage slicing is the process of taking a large image and dividing it up intosmaller images using your favorite image editing program. Then you canreconstitute the entire image by placing the image slices within a table.Why would you want to slice up an image? You can create a link, rolloverimage, or other HTML event that applies to part of an image. Or you maywant to apply different file optimization settings to one part of an image. Soyou could, for example, create an image that can be turned into a navigationmenu by making certain parts of the image link to other parts of your Website.There are quite a few tools available that let you easily slice up your imagesand even create the table that pieces the images back together. We won't gointo the details of using these tools here, as instructions vary according tothe tools that you use.
You can slice images in Photoshop, as shownabove, then export the individual pieces usingwhatever settings you like for each piece.Photoshop generated the following HTML code, but as you can see, it's nodifferent than what you could have created yourself. Notice that the table hasno padding, no spacing, and no border, so that the images will cometogether seamlessly in the page, looking like a single image. The width andheight are equivalent to the images inside, so there is no extra space. table id "Table 01" width "492" height "746"border "0" cellpadding "0" cellspacing "0" tr td rowspan "2" img src "images/sliced 01.jpg" width "101"height "746" alt "" /td td colspan "2" img src "images/sliced 02.jpg" width "391"height "273" alt "" /td /tr tr td img src "images/sliced 03.jpg" width "264"height "473" alt "" /td td img src "images/sliced 04.jpg" width "127"height "473" alt "" /td /tr /table So now that you've got a sense of tables, one of the longest running andmost useful features in HTML, we'll switch gears to one of the newestinnovations in coding.Introducing HTML5The True Successor to HTML 4
HTML5 hearkens a radical departure from the HTML 4 you have learned sofar, as well as from XHTML.XHTML (a mixture of HTML and XML) was once billed as the successor toHTML 4, the previous standard in Web languages. HTML 4 was not verydemanding in how its code was formed, and browsers were designed to bevery forgiving of mistakes. Browsers would try to render buggy pages thebest they could. XHTML was developed with much stricter syntax rules. Foran XHTML page to be considered "valid," it had to abide by many rigidguidelines. For example, you couldn't capitalize your element tags and youhad to close all open tags.HTML5 loosens the rules again, but does so by employing simpler language(such as for many of the header elements). Overall, this makes coding easierfor Web designers (meaning fewer lazy mistakes!), and more lax validationrules for HTML5 documents (which, again, makes for less of a headache forus). It includes many welcome HTML elements, which is expected, but it alsomakes the language easier and the syntax more forgiving. Check outhttp://studio.html5rocks.com to see a few of the great things HTML5 can do.HTML5 offers excitingnew features andsome flexibility inwriting code.What does this mean for HTML 4? Well, nothing really! You can still use theHTML 4 Doctype for your Web pages, code to that specification, and beperfectly right with page validators, your browser, and the world at large.However, we can move forward and adopt additional semantic HTMLelements like header, nav, footer, and other cool stuff in HTML5 while stillutilizing all of the basic concepts of semantic markup that HTML 4 gave us.But now with the HTML5 specification, we have a markup language thatbetter reflects the kind of Web we use and code for every day.Let's create a simple HTML5 document that uses some of the new elements.Then in the next lecture, we'll try some of the really fancy new features.Setting the DOCTYPE, Charset, and Language for HTML5Open the the healthy.txt file inside your download folder. This documentcontains the text for our simple HTML5 example. Start a fresh HTMLdocument and follow along.The doctype declaration could not be simpler for HTML5. Include thefollowing as the first line of your HTML document, as you always would for adoctype declaration: !DOCTYPE html Don't forgetyour usual HTMLtags—like html,head, and table—when workingin HTML5!Gone are the long and cryptic doctype declarations of the past; HTML5requires a mere two words to start rendering your Web page in standardsmode.Now add your usual html , head , and title tags to the document.The character set encoding for HTML5 is also much simpler. For the standardUTF 8 encoding, include the following in your head: meta charset "utf-8" / Don't forget to set the default language of your document as well. This line isnecessary for the browser to use the correct font, spell checker, and so on.Include it in the html tag and set it to English: html lang "en" Structural Elements (Header, Footer, Section, Nav)
HTML5 includes several new elements that add semantic value to thestructure of a Web page. When structuring a page in XHTML, you needed toenclose the header, footer, navigation, and so on with separate div tags,and then label those div tags with meaningful id values like "header" and"nav". (Note that div tags still play an important role in HTML, but we'lltalk about them later in the course in conjunction with CSS.)Section elements inHTML5 eliminate theneed for speciallynamed div tags thatwere required inXHTML.In HTML5, most of those structural pieces are their own element now, whichnot only makes it simpler to code, but also makes it easier for Web browsersand search engines to make sense of the content on a page. These elementsdon't make your page look any different (unless you style them with CSS, aswe'll learn in detail later), but rather they define sections of the code.Defining a section heading: header The header element defines a section heading of a page. The first line in yourdownloaded file is our section heading. Use the header element and an h1heading to define it. header h1 How to Eat Healthy on a Budget /h1 /header Note that a header element is not uniquely reserved for the top of the Webpage. And, unlike div elements, you can use headers more than once inan HTML document. Any section of a Web document that is titled can have itsown header (as well as its own footer and navigation section as well).This brings us to the more generic section element.Defining a generic section: section The section tag defines a section within a Web document. Nearlyanything that would naturally have its own header could be delineated as asection (except for syndicated content like blog posts, which would use the article element instead).The healthy eating steps in your download file should go in their own section,along with their own headers. For example: section header h1 Step One: Plan Your Meals /h1 /header . /section Use the footerelement foryour site'scopyrightinformation.Note that with HTML5, the rules for using h1 to h6 tags have changed:In previous versions of HTML and XHTML, these tags were used to definedocument sections, and a document hierarchy was outlined by the correctuse of these elements: You were to always use them in correct order ( h2 isalways followed by h3 , and so on), and you could only use h1 once.Now, we can define a document hierarchy by nesting section elements. And,we enclose the title of each section in the h1 tag. So, as you can see in ourexample page so far, there will be multiple h1 tags within an HTMLdocument, but they will each be within the context of their own section.Defining a footer section: footer The footer tag encloses elements that end sections of a page. Footerstypically include information such as the author, copyright information, andrelevant links. Like the other elements mentioned here, you can have morethan one footer on a page: You can include a footer with each section withina document.Add the remaining text for the page as a footer.
footer p Copyright 2010 p p Email me at mailto:imdandy@gmail.com imdandy.com /a . /p p Find me on a href "http://twitter.com/imdandy" Twitter /a . /p /footer Defining a navigational section: nav The nav tag carves out navigation sections. Use this element, as you mightexpect, to delineate lists of links that take you to other sections of the site: nav ol li a href "/home/" Home /a /li li a href "/about/" About /a /li li a href "/blog/" Blog /a /li li a href "/contact/" Contact Me /a /li /ol /nav Like the other new elements in HTML5, you can include more than one nav section within a Web page. For example, you might have a navigation menuat the top of the page, as well as a set of navigational links in the sidebar.Defining subheadingsAs we discussed earlier, HTML5 is a living standard, and that means thatsome things come and go. Here's a case of that: there is currently nodedicated HTML5 markup for defining groups of headings. So if you'relooking, for example, to define a title and subtitle of a section, you have tothink carefully about the semantic roles of those headings to ensure thatyour code remains valid.If your subtitles define new sections, as in a table of contents, you'll want touse h1 to h6 elements.If your subtitles simply define further descriptions of a title, you can enclosethem in a p element in the line below your numbered header element(such as h1 ). For example: section header h1 How to Eat Healthy on a Budget /h1 p Five Tips for Wise Eating without Going Broke /p /header . /section For more information and up to date resources on all things subheadingrelated, see the subheadings section of the W3 specs.Putting It All TogetherOur sample page combines all of the elements above in a document thatshould look something like this: !DOCTYPE html html lang "en" head meta charset "utf-8" / title How to Eat Healthy on a Budget /title /head
HTML5 isn'tsupported byolder versionsof IE. Use theJavaScriptModernizer toautomaticallymake yourHTML5compatible. body nav ul li a href "/home/" Home /a /li li a href "/about/" About /a /li li a href "/blog/" Blog /a /li li a href "/contact/" Contact Me /a /li /ul /nav header h1 How to Eat Healthy on a Budget /h1 p Five Tips for Wise Eating without Going Broke /p p By Mike Pendleman /p /header section header h1 Step One: Plan Your Meals /h1 /header . /section section header h1 Step Two: Stick to Your Grocery List /h1 /header . /section section header h1 Step Three: Frequent Your Farmer's Market /h1 /header . /section . footer p Copyright 2010 /p p Email me at a href "mailto:imdandy@gmail.com" imdandy.com /a . /p p Find me on a href "http://twitter.com/imdandy" Twitter /a . /p /footer /body /html After the requisite head of our document, we've included a navigationmenu, a page header, several sections (along with their own headers) and afooter. While a fairly simple document, you can appreciate the semanticorganization that HTML5 brings to our Web page. Our page is divided intomeaningful sections that we can style with CSS, and that search engines or aWeb client can easily parse.Note on HTML5 SupportWhile modern browsers support the HTML5 syntax, the older versions ofInternet Explorer don't. In order to support HTML5 in those browsers, aspecial JavaScript needs to be inserted at the top of the document to forcethe acceptance of these new HTML elements.Thankfully, this can be done with a very handy JavaScript library calledModernizr, which requires no JavaScript knowledge. To use it, first downloadthe Modernizr JavaScript library (click the Development version and go toFile Save Page As in your browser to save the JS file) and put it in afolder for your Web page or Web site; I like to have a folder called "js" formy JavaScript files. Then add the line of code below to your page head,adjusting the link path as needed for the folder you've chosen and for the filename of your version of Modernizr.
script type "text/javascript"src "/-/js/
Building HTML Tables and Introducing HTML5 This lecture is a blend of the old and the new, exploring an old standby in HTML, as well as the latest innovations of HTML5. Originally devised to display data, HTML tables were used by Web designers of the 1990s (and beyond) as a