Transcription
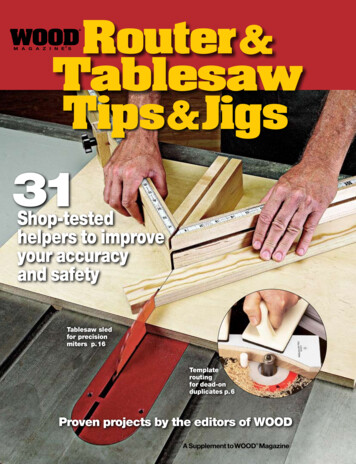
Router &TablesawTips& JigsWOOD m a g a z i n e’ s31Shop-testedhelpers to improveyour accuracyand safetyTablesaw sledfor precisionmiters p. 16Templateroutingfor dead-onduplicates p. 6Proven projects by the editors of WOODwoodmagazine.comA Supplement to WOOD Magazine1
WOOD Magazine's Router & Tablesaw Tips & JigsContentsP.2P.6P.11 5 tips to get more from your router table5 Fancy flutes simple setup6 Fast, accurate template routing8 Master the keyhole bit10 Watch out for loose bits11 14 tips to increase router bit life12 Quick-and-easy height gauge13 Tablesaw hold-downs14 Easy-lock feather board16 Tablesaw miter sled17 Magnetic auxiliary fence18 Tenon cheek-cutting jig20 Texas-size fence21 Make it square panel-cutting sled Copyright Meredith Corporation 2010. All rights reserved.P.11P.142P.21P.6P.12Router & Tablesaw Jigs & Tips
5 tips to get more from your router tableWhether you go with afloor model or a benchtopversion, a router tableimproves both control andsafety when cutting variouskinds of parts.1. Want tosuper-size thosedowels?Start pointFinish pointSometimes you need hardwood orbig dowels that match the wood ofyour project, and standard stockdoesn’t fill the bill. Here’s a router tabletechnique that we’ve used for projects,such as quilt racks, and for handles on toolcaddies and utility carts.You’ll need a round-over bit with thesame radius as the dowel’s radius. Forexample, use a 1 2" round-over bit to makea 1" dowel. Chuck the bit in the router, andposition the fence flush with the pilot bearing. Put two pieces of masking tape on thefence, oneDRAWING1 on either side of the bit, andmark two points 3" from the bit’s center.Dowel-routing setupFencePiloted round-over bit,radius is fi of stockthicknessStockwoodmagazine.comWe raised the guard for clarity in this photo. Keep it just above the workpiece when you’rerouting dowels, to ensure that your fingers stay clear of the spinning bit.On the tablesaw, rip each dowelblank theDRAWING1 photo above, hold the end firmlyto a square profile equal in thickness against the fence, and begin routingto the desired diameter of the dowel. any edge. Ease the workpiece into theMaking sure the dowel blank is square is bit, and move the blank across the bitessential to achieve the four identical until the right end reaches the rightquarter-round cuts you'll rout later. Cross- hand finish point. Repeat the procedurecut the blank 6" longer than the length of for the three remaining edges. The flatthe finished dowel.surfaces left at each end not only prePlace your workpiece as shown in the vent the blank from rotating, but alsodrawing at left. Align the left end with keep your fingers at a safe distancethe left-hand start point,as shown inStockfrom the bit.Pattern-cutting bitPilot bearingTemplate1
2. Sink your teeth into some biscutsTo cut biscuits on your router table, all youneed is a slot-cutting bit that matches thestandard biscuit thickness of 5 32" and amiter gauge with an auxiliary fence.Every time you set up to make a joint,center the cutter on the thickness of yourstock, and make a test cut to double-check.To further reduce the risk of misalignment,mark the face of each component, thenkeep that side up.Plunging a workpiece into a standardslot-cutting bit produces a slot that’sshorter than a standard biscuit. You canlengthen the slot by moving the workpieceand making additional cuts.However, ifyou’re going to make only a few joints,it’s quicker and easier to shorten the biscuits. Here’s how to cut slots for a rail-andstile frame.Use a steel rule to align the face of yourrouter table fence with the frontof the bit’s pilot bearing. Place a piece ofmasking tape on the fence above the bit.Then, use a square and a pencil to markthe center of the bit on the tape. Now,Stop blockSlot-cutting bitMiter gaugeA2Trimmed endBmark the center of a rail. Hold the lengthof the rail against your miter gauge,equipped with an auxiliary fence thatnearly touches the router table fence, asshown in Photo A. Align the two centermarks, and clamp a stopblock on therouter table fence so it meets the back ofthe miter-gauge fence. Using the mitergauge fence as a support, plunge theworkpiece squarely into the bit. Cut until itcontacts the bearing.Mark a biscuit at both ends, making itslightly less than the slot length. Slice offthe ends with a bandsaw. Test the fit, asshown in Photo B, to make sure that atleast half of the biscuit’s width slides intothe slot.To cut a matching slot on a stile, leavethe miter gauge and stopblock in place.Carefully push the workpiece into the cutter, as shown in Photo C.You can cut a slot in the other end of thestile with the same setup, but you have toflip the stock over, putting the face sidedown. If the slots are perfectly centered inthe stock thickness, that will work fine. Thealternative is to measure the distance fromthe center of the bit to the miter gauge,and then clamp a stopblock at that samedistance to the left of the bit. Remove themiter gauge and right-hand stop, then cuta slot at the opposite end of the stile, stillkeeping the face side up.CPHOTO A: Your miter gauge, backed by astopblock, provides a solid, square guide asyou push the end of a rail into the spinningslot-cutting bit.PHOTO B: Trim the biscuit ends, slip it into theslot, and test the fit before gluing. If a gapshows, take just a bit more material off eachend of the biscuit.PHOTO C: Your setup remains the same whenyou cut a biscuit slot for a stile. This slot willmatch perfectly the slot in the previouslymilled rail.Router & Tablesaw Jigs & Tips
3. A template means never having to say "Oops"Let’s say you want to make four table legswith matching curves. A table-mountedrouter and template enable you to produceas many identical legs as you want.Using 1 4" hardboard or medium-densityDRAWINGfiberboard, make a templateto 1 theshape you want. Use a bandsaw or scrollsaw to cut close to the line on the template,then sand to it. Attach the template toDRAWING 1your stock with cloth-backed, doublePilotedround-overbit,faced tape, orienting the grain for bestFenceradius is fi of stockeffect. Bandsaw the workpiece within 1 8"thicknessof the template.Turning to your router table, you haveStocktwo choices for router bits—a flush-trimStockbit and a pattern-cutting bit. In some situPattern-cutting bitations, you might need both.A flush-trim bit has a ball-bearing pilotmounted at the tip, as shown at right. ToPilot bearingTemplateuse this type of bit, place your workpieceon the table with the template on top.NG 1Adjust the bit height so the pilot runsalong the template's edge.On pattern-cutting bits, the pilot sitsDRAWING 1between the shank and the cutter, asFILENAME:138RouterTech-Dowels.epsshownin thedrawingsPilotedround-overbit,below. Your temFenceDate:radiusfi oftable.stock 9-01plate restsonistheLornaJ.thicknessWhichever bit you use, ease the workpiece intoStockthe bit until it contacts the pilot,then move the piece from right to left. IfNStockyou’ve left more than 1 8" of excess materialPattern-cutting bitOin some spots, trim it to size with a couple ofPattern-cutting bit StockPshallow passes. Don’t pause too long in anyspot, or you’ll burn the wood. Double-checkPilot bearingQTemplatethe surfaces you’ve just routed before youTemplate removedWhenmakingidenticalparts,it'seasierto make the cuts faster and more accurate if you use aremove the template. Sometimes anotherRhardboard or MDF template and a flush-trim bit like the one shown here.pass will smooth out a rough spot. Finally,Sslide a putty knife blade between workpiece use a pattern-cutting bit and a flush-trim the pilot bearing riding on the surface youand template, pop them apart, remove the bit in the sequence shown in Steps 1, 2, just machined. Finally, flip the workpieceTtape, and you’re done.and 3. Make one pass with the pattern- over and use the flush-trim bit, with theDRAWING 1URouterTech-Dowels.epsWhen you have a workpiece that’s cutting bit, template side down. Remove pilot bearing riding on the previouslythicker than the cutting length of your bit, the template, then make another pass with milled surface.VWXYZHow to handle extra-thick stockSTEP 1Pattern-cutting bitSTEP 2StockSTEP 3Pattern-cutting bitStockStock invertedFlush-trim bitPilot bearingwoodmagazine.comTemplateTemplate removedStock3
4. Make your router think it's a jointerWe added an edge-jointing functionto our router-table fence by simplyclamping a piece of plastic laminateon the left-hand, outfeed end of thefence. Use sandpaper to ease theedge nearest the router bit, so itwon’t catch your workpiece as theboard slides past. As seen at right, weused a steel rule to align the laminatewith the cutting edge of a straight bitmounted in the router.Set the bit high enough to trim theentire edge of the board in one pass.Then, turn on the router, and movethe board across the table from rightto left. You’ll remove 1 16" with eachpass, and leave a perfectly straight,square edge. Repeat the procedurewith a second board, and the twopieces can be glued together withouta gap anywhere.Place your laminate piece at the left-hand edge of the bit-clearance notch in the router tablefence. The rigid router fence will keep the laminate from flexing.5. Add custom plates to your tableClamp your insert-plate blank and a backerboard to your drill-press table, centeredunder the bit of your holesaw. Drill slowly,and you’ll get a clean cut.4Router-table work goes smoother and moresafely when the hole in your insert plate isonly slightly larger than the diameter of thebit. You can buy a plate with removablerings to fit different router-bit diameters,which gets you close enough in most situations—or you can make a custom plate tomatch a bit exactly. Use Baltic birch plywoodfor the least expensive plate, or choose polycarbonate for a clear plastic plate. You canbuy a 12 12" piece of 3 8" polycarbonatefrom Woodcraft. Call 800-225-1153 to orderpart number 16L72.Place the insert plate faceup on a flatsurface. Remove the subbase from yourrouter, and adhere it to the plate, face up,with double-faced tape. Be sure it’s centered, and oriented so that your router willbe convenient to operate once it’s mountedunder the table. Select a drill bit the samesize as the holes in the subbase, and chuckit in your drill press. Using the holes in thesubbase as guides, drill matching holesthrough the insert plate. Remove the subbase, and countersink all the holes.Attach the insert plate to your unpluggedrouter and place it flat on your workbench.Chuck a 1 4" drill bit in the router, and lowerit until the bit touches the insert plate. Turnthe collet by hand to mark the centerpoint.Remove the insert plate from the router.Chuck a holesaw or adjustable circle cutterin your drill press to cut a center hole ofthe diameter needed, as shown at left.For more routing techniques go to:woodmagazine.com/routertechniquesRouter & Tablesaw Jigs & Tips
Fancy flutes simple setupAdd impressive details to your finest work, using a router and these tips.Traditional detailing on cabinets andfurniture often includes the classiclook you can create with parallel,round-bottomed grooves called flutes.Because these grooves do not exit at theends of the workpiece, we call them“stopped” flutes. As a design element,they set your work apart from the ordinary,yet they’re easy to make.Successful fluting starts with carefulplanning and layout. For example, for the23 4"-wide stile shown here, we used a 1 4"core-box bit to make four flutes approximately 1 4" wide and 1 16" deep, leaving 1 4"of flat surface between flutes, and a 1 2"border along each edge. Pieces of differentdimensions might call for more or fewer,wider or narrower flutes. Whatever the plan,keep the flat intervals equal to or less thanthe flute width. Draw full-scale samples onpaper to arrive at a handsome design.For best results with stopped flutes,you’ll need a plunge router so you cansmoothly lower and raise the bit at thebeginning and end of each flute. You’llalso need an adjustable edge guide. Keepeach set of stopped flutes aligned at theends with a startblock and a stopblock.First, set the depth of your cut. To dothis, extend the blade of a combination square 1 16", and lock it in place. Withthe router in its plunge mode, hold theblade end on the router base, and adjustthe bit to make contact with the square’shead, as shown below. Now, set the router’sdepth stop.12Mark the ends of your planned fluteson the workpiece. Place a rule on therouter base, and measure from the bit tothe edge of the base, as shown below.Measuring to the leading edge tells youhow far to set your stopblock from the topmark. Measuring to the trailing edgedetermines the distance from the bottommark to your startblock. If your router baseis round, these measurements will beequal. Place the workpiece at the edge ofyour workbench, and clamp the blocksand workpiece in place.3On a piece of scrap the same width asyour workpiece, lay out and mark thelocations of your flutes. Now, set yourrouter edge-guide fence to make the firstflute. The distance from the fence to thebit center equals the distance from thescrap edge to the nearest mark. Test thesetting by routing into the scrap piece, asshown below. When it’s centered on themark, rout the first flute. (If your routerbase is round, and block-to-flute distancesare equal, flip the workpiece around, androut the flute nearest the opposite edge.)Cut a wood spacer to match the distance between marks on your scraptemplate. Clamp the router to your workbench. Loosen the edge-guide fence, andslip the spacer between it and the workbench, as shown below. Tighten the fence,remove the spacer, unclamp the router,and then double-check the setting on yourscrap. Rout the second flute on your workpiece. Repeat this step for each flute, usingthe same spacer. (If your router has a roundbase, and you cut two flutes in Step 3, flipthe workpiece after cutting this third flute,and rout the fourth one.)45When you rout a flute (see below),butt the router base against the startblock, plunge to the preset depth, andimmediately move the router forward.Rout until the base contacts the stopblock, and immediately allow the plungemechanism to pop up. Quick entry andexit prevents hard-to-remove burn markson the wood.Stopblockwoodmagazine.com5
Fast, accurate template routingFrom machining to bitselection, here are tips tomake identical parts.When you need several copies ofcurved parts, such as the corbels for a mission furnitureproject, consider pattern routing. Using atemplate and a router bit designed to follow it, you’ll speed through the drudgeryof making duplicate parts without sacrificing quality. By keeping a battery of templates, you also can save time on projectsyou decide to build more than once.Start the job on paperThe shape for your template can comefrom a magazine pattern, woodworkingplan, a part from an existing piece offurniture, or a design you draw. If you startfrom scratch, work out the curve or curveson paper using a lead-core, flexible-curveruler (available through art supply orwoodworking stores); a French curve; anextra-long profile gauge; a compass; orany object that serves as a tracing modelfor the shape you want to cut.Of course, pattern-based templateshave their limits. A router bit can’t reproduce a sharp inside angle or inside curvewith a radius less than the radius of the bit.Either avoid those details in your design orplan to complete them using other tools,such as a scrollsaw or bandsaw, after you'verouted the rest of the shape.Begin with a paper pattern. Cut out itsstraight lines using a knife and straightedge. Use scissors to cut curves roughly1 2" outside of the marked curved lines.Bandsaw the pattern curves, as shownin Photo A. We used a 1 2" blade, cutting1 16" outside the cutline. Rely on a scrollsawif your design includes curves that are tootight for a bandsaw blade.If you don’t have an oscillating spindlesander, install a sanding drum with80-grit sandpaper on your drill press.Double-check that you have a 90 angleBANDSAW THE TEMPLATEbetween the drum and the drill presstable. Sand the curved template edges tothe paper pattern lines [Photo B].Get ready to routTrace the shape of the finished templateonto your workpiece, aligning straightedges wherever possible. Using a bandsaw, rough-cut your workpiece to 1 16 –1 8"SAND THE CURVED AREASMake the templateTempered 1 4" hardboard makes an economical template, but we prefer 1 2" Balticbirch plywood. Both materials are free ofvoids—a vital feature for smooth routing—but the extra thickness of the Baltic birchplywood gives the router’s bearing amplesurface to roll along.Spray-adhere the paper pattern tothe rigid template material, matching thestraight edges wherever possible to reducethe amount of cutting required.6ABRouter & Tablesaw Jigs & Tips
START YOUR CUTTemplateWorkpieceStarter pinCfrom the edge of its finished form to reducethe amount of material your bit will needto remove.Using double-faced tape, adhere thetemplate to the workpiece and alignstraight edges where possible. Whetherthe pattern will go on the top or bottom ofthe piece depends on whether you’re routing freehand or on a table, and on yourchoice of bits.As seen on the chart below, you haveseveral bit choices for pattern routing. Onflush-trim bits, the bearing mounts to theend. On a pattern bit, it’s between theshank and the cutters. You’ll get the highest quality sand-free edges with spiral- orsheer-cutting bits.Use your router table when workingwith small or narrow parts. A flush-trim orpattern bit will work here, but the flushtrim’s top-mounted bearing isbestbecause a pattern bit exposes the spinningcutter above the workpiece. For pieces toolarge or awkward for the router table, usea handheld router.Shape the partsAdjust the height of the router bit so itsbearing rides on the center of the template’s edge with the bit’s cutting edgespanning the thickness of your workpiece.Don't worry, the bit won't cut into thetemplate; its cutting diameter is sized tomatch the bearing.A starter pin placed as near as safely possible to the bit [Photo C] will help braceyour workpiece as you feed it into the bit.For small pieces, use pushblocks to keepthe template firmly against the bearingwhile protecting your fingers, as shown inthe top photo on page 6.Feed the workpiece in a steady, fluidmotion along the piloted bit. By cuttingthe end grain sections first, you can reducethe chance of tear-out on the remainingedges of the workpiece.After routing each part, peel the template and double-faced tape away fromyour workpiece. Remove any adhesiveusing paint thinner. Sand any fine splintersor machine marks if needed.Flush-trim and pattern bit samplerBit TypeSize RangesPatternLocation onWorkpieceCommentsCombinationDouble bearing Patternupcut/downcut flush-trimFlush-trimSpiral flushtrim (upcut)3 8 –7 8" dia.; –2" cuttinglength181 4 – 1 2 " dia.; –11 8" dia.; –21 2" cutting 3 8 –2" cuttinglengthlength3 8 – 3 4" dia.; –2" cuttinglength341212 " dia.;11 8 –15 8"cutting length1 2 – 3 4" dia.;1–11 4" cuttinglength –2" dia.; –2" cuttinglengthTable: topHandheld:bottomTable: topHandheld:bottomTable: topHandheld:bottomTable: topHandheld:bottomTable: topHandheld:bottomTable: eitherHandheld:eitherTable: bottomHandheld: topAdequate formost work.As with allcarbide bits,look formicrograincarbide.Cutters sliceat an angle fora smooth cut;upcut bitswork best fortable-mountedrouters.Steep spiralmakes smoothslices, especiallyin laminatedmaterials, suchas plywood;downcutversions workbest forhandheldrouting.*Cutters slice atan angle for asmooth cut;downshear isbest forhandheldwork whileavailableupshearversions arebest for tablework.Slices throughthin veneersof plywood withless chipping onboth faces.†One bit workson bothhandheld andtablemountedrouters foreither patternrouting orflush-trimwork such aslaminates.‡Top bearinglets templatebe attachedatop aworkpiecefor handheldrouting.Spiral flushDownsheartrim (downcut) flush-trim125 1612Hard-to-find bits: *from MLCS (800-533-9298, mlcswoodworking.com); † from Woodhaven (800-344-6657, woodhaven.com); ‡ from Eagle America(800-872-2511, eagleamerica.com)woodmagazine.com7
Master the keyhole bitCertain wall hangings, like quiltracks, plaques, and display shelves,look and function better when flushmounted to a wall. To accomplishthat, try this wireless hangingtechnique. With the right bit, aplunge router, and our simple-to-usetemplate, you’ll master keyhole slotsin minutes.KEYHOLE TEMPLATEDiameter of guide bushing8"Our simple router template helps you make long keyhole slots,‹ x fi"such as the slot shownabove, or short slots, as shown below.dust-relief slotsIf it’s made of wood, and you want towall-mount it, call on a keyhole bit.Unlike sawtooth hangers or the oldwire-over-nail method, keyhole slots capture the head of a screw driven partwayinto the wall, so you can firmly affix apicture frame, plaque, clock, orbracketed shelf without fear of it falling. And, without eyelets or hangersto get in the way, your workpiecehugs the wall.A typical keyhole bit has a majordiameter (the size of the screw-entryhole) of 3 8", and a minor diameter(the width of the visible slot) of 3 16".For thick stock requiring larger screws,some manufacturers also sell a 1 2"major-diameter bit that leaves a 1 4"visible slot.Slot-index marksAs you plunge the bit into your workpiece, it first creates the screw-entry hole.Moving the router with the bit loweredplows an inverted T-shaped slot to capturethe screw head.Small weight-bearing pieces, such as theshelf shown below,1" benefit from a short,vertical slot. Make certain your slot is perfectly centered, though, or the piece maynot hang level.‹ x 8 x 18"For larger and heavier workpieces,use templatehardboardUp and down? Side to side? two or more slots. A picture frame hungDepending upon the type of wall- from the center of its top rail tends tohanging you're working with, you can sag under its own weight, but a verticalKeyholeTemslotplatkeyholeine each stile of the framecut keyhole slots vertically (with thethe burden on these vertical framescrew-entry hole at the bottom) TJCor places10-17-01horizontally. Usually a horizontal slotworks best for small, flat items thatsmall shelfrequire only one screw for hanging.That allows you to slide the item side toside until it balances and hangs straight.Cut the slot near the top of the workpiece and 1 2–1" on both sides of thecenter line. -‰"-thickshoulder18‰"KEYHOLE TEMPLATEDiameter of guide bushingKeyholeslot8"‹ x fi"dust-relief slotsSlot-index marks1"‹ x 8 x 18"hardboard template8Router & Tablesaw Jigs & Tips
members. In order for the frame tohang straight, both keyhole slots mustend the same distance from the top of theframe, and the screws in the wall must beboth level and the same distance apart asthe frame’s slots.For long wall hangings, such as a bracketed shelf, where you want to make sureyour mounting screws bite into a wall stud,we recommend a pair (or more) of longhorizontal slots. Find the mounting location, drive the screws into the wall, thenmark the screw locations on the back of theworkpiece. Roughly center a long keyholeslot at each screw location, with all slotspointing in the same direction. With 8"-longslots, you can shift the workpiece up to 4"in either direction until it looks right.Master keyhole slots in four easy stepsDust-relief slotCenterlineSlot-indexmarksKeep it straight, keep it evenIf a horizontal keyhole slot runs downhill,or if a pair of vertical slots don’t start andstop on the level, your workpiece will beout of kilter. We came up with a simpletemplate, shown on the previous page, toavoid this problem.Our template requires a 5 8" guide bushing(Porter-Cable part no. 42046), but you canuse a different size. Just adjust the slot widthaccordingly. If your bushing protrudes morethan 1 4" beyond the router’s base, you’llhave to file or grind it down to length.To make the template, first lay out thestart and end points (the slot-index marks)of your slots on the hardboard with long,bold lines. You’ll use these index marks foralignment purposes later. With a 5 8" Forstner bit loaded in your drill press, and afence set 2" from the center of the chuck,bore a hole centered on each of your layout lines. Don’t move the fence whenyou’re done.Now remove the waste between theholes. For the short slot, drill a series ofoverlapping holes with the Forstner bit,then file the edges of the slot smooth; forthe long slot, use a 5 8" straight bit in ourrouter table.Finally, chuck a 1 4" bit in your drill press,then bore and clean out the dust-reliefslots. To use the template, follow the photos and instructions at right.Watch free routervideos erline1 Mark the slot2 Index the templateLocate the keyhole slot by drawing along centerline on your workpiece.Measure and mark the bottom end ofthe keyhole slot, as shown, with ashort perpendicular line.Align the short line with the slot-indexmarks on the template, and center thelong line in the dust-relief slots. Clampthe template to the workpiece, and setyour plunge router’s depth stop so thebit will leave a 1 8 – 3 16"-thick shoulderabove the keyhole slot.3 Rout the slot4 Remove the templateWith the guide bushing at thebottom of the slot (as the workpiecewill hang) and the router on, plungethe bit into the workpiece. Guide itto the other end, backing outfrequently to clear dust.After finishing the cut, turn the routeroff and back it completely out of thecut. If you’re going to hang the piecefrom two fasteners, mark the otherslot and repeat the process.9
Watch out for loose bitsSafety advice from a woodworkerwho has experienced an incidentthat might happen in your shop.The incidentI was using my table-mounted router to cutmortises in cabinet face-frame stiles whensuddenly the 1 4"-diameter upcut spiral bitbegan to chatter loudly. Without shutting offthe router, I lifted the stile off the table andimmediately felt something tick me on theright cheek. I then shut off the router, andrubbed my cheek to check for what I thoughtwas a splinter.I didn’t find anything but, through myperipheral vision, I saw something stickingout of my forehead between my nose andright eyebrow. Assuming it was a piece ofwood, I grabbed it with my handkerchief andpulled it out. I couldn’t believe it was the bit!I guess it had glanced off my cheek.After covering the wound, I drove to ahospital. Although the bit had penetrated5 8", an X-ray showed no sign of serious injury,so the opening was sutured.The next morning, I checked the routerand bit and found the nut tight on the colletand no sign of damage on the bit shank. Ireally don’t know what caused the problem.The 12-year-old router now resides in a landfill, but I carry the bit with me every day as alucky charm.—Clark Mittan, Waldorf, Md.The woodworkerWith more than 40 years of experience, Clark is a professional woodworkerspecializing in cabinetry and housing restoration work in the District ofColumbia and suburban Maryland.The warning signsThe chattering that Clark heard signaledthat something was loose in the router,requiring immediate shutdown andinspection. Rather than lifting the workpiece, Clark realizes in hindsight that heshould have held it in place to safely con10tain the bit while turning off the router.Also, he was not wearing safety glasses,which might have deflected the bit fromhis face and prevented a more seriousinjury if it had hit his eye.The lessonsA loose router bit can become a dangerousprojectile, as Clark learned, and it also canaffect the accuracy of your cuts. Althoughit’s not clear what caused Clark’s bit toloosen, here are a number of things youcan do to prevent this kind of problem.Use only sharp bits. Dull cutting edgesincrease force and stress on the bit androuter collet, which can cause slippage.Before you install a bit, make sure theshank and collet are free of sawdust,grease, and other contaminants. Also,check the collet and bit shank for rust anddamage, such as scoring, which can createburrs that prevent sufficient collet grip. Ifyou see any corrosion or damage, replacethe collet and/or the bit.When installing a bit that has a radiusedtransition area between the cutter andshank, insert the shank into the collet untilit bottoms, then pull the bit out enough toclear the radius by about 1 16", as shownbelow. This ensures that the collet clampstightly around the shank.CLEARING A BIT-SHANK RADIUSUsing the router-supplied wrenches,tighten the collet nut firmly. Never tightenthe nut without a bit inserted oryou may damage the collet.Never exceed the maximum speedspecified by the bit and router manufacturers. Use the chart below as a guide forspeed based on bit diameter.MAXIMUM ROUTER SPEEDBit diameterUp to 1"1 to 11 4"11 4 to 21 4"21 4 to 31 2"Max. speed (rpm)Up to 24,00016,000 to 18,00012,000 to 16,00012,000Note: Maximum speed of fixedrouters is typically 24,000 rpm.When using bits larger than 1"diameter, we recommend usinga variable-speed router.When you need to remove a lot of material, make multiple shallow passes to minimize stress on the bit and collet.Listen to the router. If you hear it straining, you’re probably removing too muchmaterial or feeding the workpiece too fast.When routing multiple pieces, occasionally shut off the router and measure thecut depth or the bit height to ensure it hasnot changed.Always wear eye protection and, whenever possible, use a bit guard.Router & Tablesaw Jigs & Tips
14 tips to increase router bit lifeHere’s how to get more mileage and better cut quality from your router bits.Imacle12Clean bits of pitch and resin with lacquer thinner or a good bit cleaner.Lubricate the bearing often.Never overload or abuse a bit. If thejob calls for cutting away more thanthe equivalent of a 1 4" square area, removethe extra waste by making multiple passeswith lig
2 Router & Tablesaw Jigs & Tips To cut biscuits on your router table, all you need is a slot-cutting bit that matches the standard biscuit thickness of 5 32" and a miter gauge with an auxiliary fence. Every time you set up to make a joint, center the cutter on the thic
