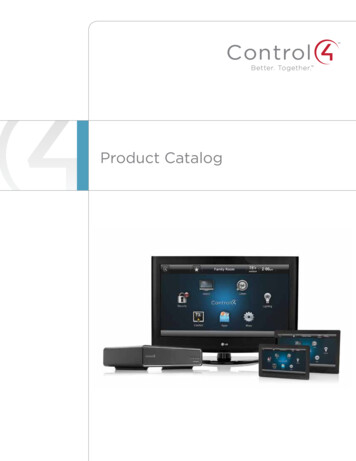
Transcription
Control4 Smart HomeAutomations GuideSEE THE NEW OS 3 USER GUIDEAT CTRL4.CO/USERGUIDEContentsAbout automations . . . . . . . . . . . . . . . . . . . . . . . . . . . . 2Creating a security and access event . . . . . . . . . . . . . . . . 11Take control . . . . . . . . . . . . . . . . . . . . . . . . . . . . . . 2Creating a sensor event . . . . . . . . . . . . . . . . . . . . . . . 11Adapt . . . . . . . . . . . . . . . . . . . . . . . . . . . . . . . . . . 2Creating a room media event . . . . . . . . . . . . . . . . . . . . 12Learn . . . . . . . . . . . . . . . . . . . . . . . . . . . . . . . . . . 2Selecting a “Then” action . . . . . . . . . . . . . . . . . . . . . . . . 13Planning automations . . . . . . . . . . . . . . . . . . . . . . . . . . . 3Adding a delay to an action . . . . . . . . . . . . . . . . . . . . . 14Planning ahead . . . . . . . . . . . . . . . . . . . . . . . . . . . . 3Adding a countdown timer to an action . . . . . . . . . . . . . . 15Tips for planning your automations . . . . . . . . . . . . . . . . . 3Editing your automations . . . . . . . . . . . . . . . . . . . . . . . . 16Getting started . . . . . . . . . . . . . . . . . . . . . . . . . . . . . . .4Legal notices . . . . . . . . . . . . . . . . . . . . . . . . . . . . . . . 17Selecting a “When” event . . . . . . . . . . . . . . . . . . . . . . . . . 5Creating a schedule event . . . . . . . . . . . . . . . . . . . . . . 6Creating a voice scene event . . . . . . . . . . . . . . . . . . . . 7Creating a keypad or remote button tap event . . . . . . . . . . 8Creating a light switch tap event . . . . . . . . . . . . . . . . . . 9Creating a door station tap event . . . . . . . . . . . . . . . . . . 9Creating a lights event . . . . . . . . . . . . . . . . . . . . . . . . 10Creating a lighting scene event . . . . . . . . . . . . . . . . . . . 10Note: The information in this guide applies to the latest Control4system capabilities. Features can vary between customizedinstallations and Control4 software releases, so contact yourControl4 Dealer with any questions about available features.Important: For creating your own automations, your Control4system must be on Control4 OS v2.10 or later.
About automationsTake controlAdaptWith a Control4 system, you can create your own set of “digital instructions”for the system to follow, triggered by a myriad of possible events. There’s noneed to contact your Control4 Dealer to create these basic automations—Just log in to your customer.control4.com account, and you can access settingsfor your entire system.You (or your Control4 Dealer) may have set up a long list of automationswhen your system was first installed. But your lifestyle changes over time, andyour home automation needs to change along with it. These When Thenautomations are just what you need to bring the system up to date with yourlatest needs.LearnThe first part of this guide covers the basics of getting set up to useautomations. The second part covers the events (“Whens”) you can selectfrom. The third part covers the actions (“Thens”) that can result. Finally, editingcompleted automations is explained.2
Planning automationsWhen Thenyou do this.Planning aheadTips for planning your automationsIn the world of Control4 custom automations, also known as“When Then,” every action can result in a host of reactions. You can decidewhich event (“When”) results in which action (“Then”). Don’t worry about making mistakes—it’s as easy to change (or delete) anautomation as it is to create one. And your Control4 Dealer can also helpanswer your questions or create automations for you.Before creating your own automations, it helps to plan ahead. A good place tostart is to ask yourself these two questions: Test the automation as you add “Thens” to make sure it acts the way youexpect it to.1 What event should happen that starts the automation? (the “When”)2 What is the end result you want with the automation? (the “Then”)Another approach is to write down every “I wish.” thought you encounterregarding your smart home, over the course of several days. With thiscomprehensive “wish list,” you can more deliberately plan how eachautomation should be launched and which results can be combined.This is what a “When Then” automation looks like. Theaction is on the left, the result on the right.You’ll first select the “When” (sunrise, in this example), thenyou can specify “Thens” (turning off the outside lights).3this happens If you want multiple keypads to launch the same automations, it’s mucheasier to remember button assignments if the automations are assignedconsistently to each keypad. You will be able to see dealer-created automations in your list, but theywill be disabled for editing unless the dealer unlocks them. To change ordelete those automations, contact your Control4 Dealer. Requesting automation changes to buttons with engraved names maynecessitate changing the engraving text (for the label to match the newaction). Keep in mind that replacing buttons that have text labels willinvolve additional cost. Ask your Control4 Dealer for details. It’s good practice to create an automation that can reverse or “clear”every schedule event automation you create. For example, if you create a“Sunset” automation that turns on most lights at sunset, it’s a good idea tocreate another schedule automation (such as “Night”) that turns off mostlights at bedtime.
Getting startedTo create your own home automation, you’ll first need to log in to your onlineControl4 account.2 In the Automation tile, click When Then.Important: You must have a current 4Sight subscription to create yourown automations, and your system must be on Control4 OS v2.10 ornewer. If you need to upgrade to OS v2.10, contact your Control4 Dealer.To subscribe or check on your subscription status, log in tocustomer.control4.com, then click 4Sight in the Resources tile. You canalso ask your Control4 Dealer to help you sign up or renew.The When Then home screen opens.To make sure your Control4 system is upgraded to v2.10 or newer: On a Control4 touch screen, tap Settings, then tap System Info andlook at the number under “Control4 software.” On a Control4 mobile device app, tap Settings, Systems, then tapControl4 system name and look at the number listed under “DirectorVersion.”To log in and watch an introductory video:1 Log in to your account at customer.control4.com.3 For an quick introduction, click Give me a quick tutorial. Scroll through theinformation, or click Watch the Video. When you’re ready to try it on yourown, click Go to When Then.-OR-Tip: If you don’t have your login information, contact your Control4Dealer. Or, you can go to the login page, enter your email address, thenclick Forgot Password. An email will be sent to you with password resetinstructions.4If you want to get started right away, click View My Automations.Tip: If you’re already familiar with When Then and just want to seea list of the newest features that have been added, click Learn aboutthe newest features.
Selecting a “When” eventA “When” is an action or condition that triggers a different action (a “Then”).Control4 automations are made up of a “When” paired with one or more“Thens.” Your system has several “Whens” to select from:Security and accessSecurity and door access can trigger an automation for house-wide monitoringand “welcome home” automations. You can know exactly when your childrenget home from school or when a package was left inside your door.Scheduled actions5Scheduled actions are tied to schedules that you’ve created. A scheduleis more than just date and time—it can also include date ranges, recurringdates, start dates and times, and even sunrise/sunset times. You must createa schedule before you’re able to add actions to it. You can also edit schedulesafter the automation has been created.SensorsButtonsRoom mediaButtons can be used to start any automation. The buttons can be on a Control4keypad, switch, dimmer, remote control, or door station, and most buttonpresses can be configured as single, double, and triple-taps.Room media, when tied to automations, can make your entertainment optionscome to life. Want to automatically dim the lights when a movie starts playing?You can do that and so much more.LightsDelays and timersLights can start automations by reaching an on, off, or specific dimming level,whether they reach that state via remote control or manually. You can evenmake a lighting scene start an automation when it’s activated or deactivated.For instructions on setting up an action’s times, time delays, time ranges, andtimers, turn to “Selecting a “Then”” on page 13.Sensor-launched automations can add to your home’s security by notifying youwhen motion, vehicles, door or gate openings, or water is detected. Even yourDoor Station (the Control4 intercom panel) can trigger events when a keypadbutton is pressed or the camera starts or stops detecting motion.
Creating a schedule eventA schedule event is a “When” that is based on times and dates, or with arecurring natural event such as sunrise and sunset.The Create Schedule screen opens.Tip: It’s good practice to create an automation that can reverse or “clear”every schedule event automation you create. For example, if you create a“Sunset” automation that turns on most lights at sunset, it’s a good ideato create another automation (such as “Night Night”) that turns off mostlights at bedtime.To create a schedule:1 In the Automation home screen, click Add New Automation, clickSchedule something to happen., then click Create New Schedule.2 Enter a descriptive and unique name for the schedule, set the dates, times,and the recurrence, then click Next: Add Actions.The action assignment screen opens.3 Go to “Selecting a “Then”” on page 13.6
Creating a voice scene eventA voice scene is a “When” event that, like all other available events, canresult in a host of “Then” actions, all depending on how you put together theautomation sequence.The Create or Select Voice Scene screen opens.Voice scenes bring the Amazon Alexa voice experience into your Control4system to allow voice control of automation features. For example, a voicescene allows you to play music from a streaming service (such as Spotify)throughout your house.Tip: It’s good practice to create an automation that can reverseor “clear” every “Turn On” voice scene automation you create.For example, if you create a “Turn On Night Night” voice sceneautomation that turns off all lights at bedtime, it’s a good idea tocreate another automation (such as “Turn On Good Morning”) thatturns on lights used in the morning (such as bathrooms, dining room,and hallway).Another example: If you create a “Turn On Party” voice scene thatstreams a music channel to your kitchen, rec room, and deck, youshould also create a “Turn Off Party” voice scene that turns off allmusic. (The Alexa system will not understand “Turn Off Party” unlessyou create an automation named “Turn Off Party.”)To create a voice scene:The voice scene list will be blank the first time you open it.2 Click Create a New Voice Scene. The Create Voice Scene screen opens.3 Click the drop-down list next to “When I say:” and select how the voicecommand will begin—Turn On or Turn Off—then type the voice scene titleyou want to activate the scene with. In this example, we create a scenecalled “Night Night.”Important: Before creating a voice scene, you need to ask yourControl4 Dealer to enable Alexa Home Automation.1 In the Automation home screen, click Add New Automation, then underVoice Scenes click Make something happen when you speak.Important: The “Turn On” and “Turn Off” options refer to only what youwant the voice command to start with, not to what the scene does. Theidentical “Then” actions are available whether you select “Turn On” or“Turn Off.” Which you use to start the voice command is completely upto you and what makes sense to you.4 Click Next: Add Actions, then go to “Selecting a “Then”” on page 13.7
Creating a keypad or remote button tap eventA keypad or remote button tap event is a “When” that is based on single-,double-, or triple-taps of keypads or presses of remote control custom buttons.To create a button tap event for keypads or switches:To create a button press event for a system remote:1 In the Automation home screen, click Add New Automation, then clickWhen a system remote custom button is pressed in a room.1 In the Automation home screen, click Add New Automation, then clickWhen a keypad button is tapped.A list of rooms opens. (Remember that a “room” can also be “outside” or“garage.”)A list of keypads opens.2 Click the keypad you want to use. A list of available buttons opens.Note: The available buttons will depend on the keypad’s button layout.2 Click the room in which to set the button’s behavior. A list of the threeavailable buttons opens.3 Click the button you want to use. A list of available tap patterns opens.3 Click the button to use for the action. The action assignment screen opens.4 Go to “Selecting a “Then”” on page 13.4 Click the tap pattern to use. The action assignment screen opens.5 Go to “Selecting a “Then”” on page 13.8
Creating a light switch tap eventA light switch tap event is a “When” that is based on single-, double-, or tripletaps of light switch and dimmer buttons.3 Click the button you want to use. A list of available tap patterns opens.To create a light switch tap event for light switches and dimmers:1 In the Automation home screen, click Add New Automation, then clickWhen a light switch button is tapped.4 Click the tap pattern to use. The action assignment screen opens.5 Go to “Selecting a “Then”” on page 13.A list of light switches and dimmers opens.Creating a door station tap eventA door station’s buttons can be used for a “When” based on button taps.To create a door station tap event1 In the Automation home screen, click Add New Automation, click When adoor station button is pressed, then click the door station you want to use.2 Click the light switch or dimmer you want to use. A list of available buttonsopens. Note: if your switch has more buttons than the single on/off switch,it’s considered a “keypad,” and you should create a button tap eventinstead (see previous page).A list door station buttons opens.2 Click the door station button you want to use. The action assignmentscreen opens.3 Go to “Selecting a “Then”” on page 13.9
Creating a lights eventThis event detects lighting status, regardless of how the light got to that level—either through keypad control, manual load control, or an automation. Forexample, you can automatically play music in a room when the light is turnedon or lock the front door whenever the porch light is turned off.To create a lights on/off event:1 In the Automation home screen, click Add New Automation, then clickWhen a Light is turned on or off.A list of lights opens.2 Click the light you want to use. A list of available lighting states opens (onor off only).Creating a lighting scene eventThis event detects when a lighting scene is activated or deactivated. Forexample, if you use a touch screen to activate the “Good Night” scene, alighting scene event can use that event to launch actions.To create a lighting scene event:1 In the Automation home screen, click Add New Automation, then clickWhen a lighting scene is activated or deactivated.A list of lighting scenes opens.2 Click the lighting scene you want to use as a “When” event. A list ofavailable lighting scene states opens (active or inactive only).3 Select the scene state (“active” or “inactive”) you want the automation towatch for.Tip: Any amount of “on” will launch an “on” event. For example, a dimmerthat’s barely on will launch a “lights-on” event as surely as it would at fullbrightness.3 Click the lighting state to use. The action assignment screen opens.4 Go to “Selecting a “Then”” on page 13.104 Go to “Selecting a “Then”” on page 13.
Creating a security and access eventCreating a sensor eventWhether you want to monitor the comings and goings of your kids, the arrivalsof guests or deliveries, or gate access, automation events can help you keeptabs on it all.Smart sensors throughout your home and yard can tell you when a vehicle ison the driveway, when motion is detected, when a water leak or excessive heator humidity is detected, and much more.To create a security and access event:To create a sensor event:1 In the Automation home screen, click Add New Automation, then clickan event such as When a garage door opens or closes or When a doorstation camera starts or stops detecting motion. (Available events dependon which hardware is installed.)2 A list of blinds, garage doors, or gates opens, including the availableopen/close states.111 In the Automation home screen, click Add New Automation, then click anevent such as When a water sensor indicates the presence of water orWhen a motion sensor detects motion or lack thereof. (Available eventsdepend on which hardware is installed.)2 A list of sensors—including driveway, gate, heat, humidity, motion, water,and any other available sensors—opens, along with the available sensorstates.3 Click the open/close state to use. The action assignment screen opens.3 Click the sensor state you want to use. The action assignment screenopens.4 Go to “Selecting a “Then”” on page 13.4 Go to “Selecting a “Then”” on page 13.
Creating a room media eventYou can use the condition of media playback in any room to start anautomation. Whenever a movie is started or stopped, whenever a streamingmusic station is changed, and whenever a video or audio source has changed,you can change lighting, security, temperature—anything that’s connected toyour smart home.2 A list of the rooms in your house opens.Tip: It’s good practice to create an automation that can reverse or“clear” every automation you create. For example, if you create a “Party”automation that streams a music channel to your kitchen, rec room, anddeck, you should also create a “Party Off” automation that turns off allmusic.To create a room media event:1 In the Automation home screen, click Add New Automation, then clickan event such as When the Play Audio/Video command is received bya room or When the video selection playing in a room has changed.(Available events depend on which hardware is installed.)123 Click the room you want to use. The action assignment screen opens.4 Go to “Selecting a “Then”” on page 13.
Selecting a “Then” actionTo set a “Then” action:1 After you have set the “When” event, you are brought to the actionassignment screen.A “Then” is an action or actions that result from a “When” event. Although all“Then” actions are displayed, only actions supported by the Control4 software(such as Send an email) or installed hardware will work. You can select fromseveral actions, such as: Send a push notification or email Turn on, off, or change the level of a light Activate or deactivate a lighting scene2 The first time you set an action for a particular event, the summary bar(near the top of the screen) should read “No actions currently assigned.”Tip: If the summary bar is grayed out with a lock icon, then theautomation has been programmed and locked by your Control4Dealer, and only they can change it, unless they unlock it. Change the color of LEDs on a switch, dimmer, or keypad Set, restart, or turn off a timer on a light, fan, or keypad Open or close blinds or shades3 Select an action (“Then”). The configuration screen for that action opens. Lock a door4 Follow the on-screen prompts to finish adding the action. Turn off all audio and video playing in a room Play a favorite TV station, radio station, or streaming playlist Select a room’s video or audio sourceTip: Click Test while adding actions to make sure the automation isdoing what you expect.5 To add more actions, click Add Actions and select a new action. Find a system remote Change a thermostat setting Wait a period of time before a resulting action (see next page)Note: If you want to control a device that hasn’t been integrated into yourControl4 system, ask your Control4 Dealer for help.136 When you’re done adding actions, click Done.
Adding a delay to an actionYou can tell the system to wait for a period of time before performing the“Then” action. This is a helpful feature whenever you don’t want an actionhappening immediately, such as turning the lights off in a room while you stillneed to walk through it.3 Set the amount of time to delay, then click Add Delay. The conditionaltiming options are listed.To add a delay to an action in a new automation:1 After you have set the “When” event, you are brought to the actionassignment screen.4 Select a time condition (for a simple delay, select), change the condition’ssettings if prompted. For a simple delay, select Always perform this action. For a time range during which the action is performed, select Betweencertain hours of the day.2 Scroll down and select Wait for a period of time. For times relative to the sun’s position, which changes throughout theyear, select either Within a certain time relative to sunrise or sunset,During the day, or During the night.5 Click Add Conditional Action. In the example below, Between certainhours of the day was selected, and the user is now prompted to set thetimes between which the action(s) will be enabled.The “Define a delay interval” settings appear.Important: Adding a “Wait” action adds the delay to the bottom of theautomation’s Actions (“Then do this.”) list, so you need to add delays andother actions in the order you want them carried out.14
Adding a countdown timer to an actionYou can set a countdown timer to turn off devices such as lights, fans, orkeypads. This feature is useful for conserving energy by keeping lights on for alimited time, making lights being left on less of a worry.3 Select the device to set a timer on, then select either Turn off auto-off,Restart auto-off, or Set auto-off timer.To add a countdown timer to a light or fan:1 After you have set the “When” event, you are brought to the actionassignment screen.4 If you selected Set auto-off timer, set the countdown timer in hours,minutes, and seconds, then click Set the auto-off time.5 Complete setting up the actions as described on the previous pages.2 Select Set, restart, or turn off a timer on a light, fan, or keypad.A settings screen opens, asking you to select the device you want thetimer to apply to.15
Editing your automationsAfter you’ve created an automation, you can either use the new automationas-is, or add/delete and enable/disable multiple actions. With the addition ofenough tasks to an event, pressing one button can, for example, “wake up”your entire house (or put it to sleep).4 To toggle an action off (or on), click the toggle button next to the action.To edit an existing automation:1 In the Automation home screen, click the automation you want to change.The automation details screen opens.Tip: Each action is listed in the “Then” column. If the automation has toomany actions to display in this view, click the small down arrow at thebottom of the list to expand it.2 To add an action, click Add Actions and select additional “Thens.”3 To delete an action, click the wastebasket icon next to it, or click Delete AllActions to delete all of them.165 To edit a schedule, click the schedule automation you want to change,click Edit Schedule, then click Save when you’re done with changes.6 To delete the entire automation, click Delete All Actions, then click Done.
Legal noticesControl4 disclaimerMPEGControl4 makes no representations or warranties with respect to this publication, andspecifically disclaims any express or implied warranties of merchantability or fitness forany particular purpose. Control4 reserves the right to make changes to any and all partsof this publication at any time, without any obligation to notify any person or entity ofsuch changes.Fraunhofer IIS and Thomson. MPEG Layer-3 audio coding technology licensed fromFraunhofer IIS and Thomson. Supply of this product does not convey a license norimply any right to distribute content created with this product in revenue-generatingbroadcast systems (terrestrial, satellite, cable, and /or other distribution channels),streaming applications (via Internet, intranets, and/or other networks), other contentdistribution systems (pay-audio or audio-on-demand applications, and the like) or onphysical media (compact discs, digital versatile discs, semiconductor chips, hard drives,memory cards, and the like). An independent license for such use is required. For details,visit mp3licensing.com. Radio Locator is the service provider of AM/FM channel list.GNUGNU GENERAL PUBLIC LICENSE TERMS AND CONDITIONS FOR COPYING,DISTRIBUTION AND MODIFICATION (Section 3.b.)You may copy and distribute the Program (or a work based on it, under Section 2) inobject code or executable form under the terms of Sections 1 and 2 above provided thatyou also do one of the following:Accompany it with a written offer, valid for at least three years, to give any third party,for a charge no more than your cost of physically performing source distribution, acomplete machine-readable copy of the corresponding source code, to be distributedunder the terms of Sections 1 and 2 on a medium customarily used for softwareinterchange.The complete text for this license is available on the Control4 web site at:www.control4.com.GracenoteGracenote , Gracenote logo and logotype, and the “Powered by Gracenote” logoare either a registered trademark or a trademark of Gracenote, Inc. in the UnitedStates and/or other countries. Music and DVD recognition technology and relateddata are provided by Gracenote . Gracenote is the industry standard in Music andDVD recognition technology and related content delivery. For more information visitwww.gracenote.com.SpreadThis product uses software developed by Spread Concepts LLC for use in the Spreadtoolkit. For more information about Spread see www.spread.org.Copyright and trademarksCopyright 2019, Control4 Corporation. All rights reserved. Control4, Pakedge, Triad,and their logos are registered trademarks or trademarks of Control4 Corporation in theUnited States and/or other countries. 4Store, 4Sight, Control4 My Home, Mockupancy,and BakPak are also registered trademarks or trademarks of Control4 Corporation.Other names and brands may be claimed as the property of their respective owners. Allspecifications subject to change without notice.No part of this publication may be reproduced, photocopied, stored on a retrievalsystem, or transmitted without the express written consent of the publisher.Contact informationControl4 Corporation11734 S. Election RoadSalt Lake City, UT 84020 USAwww.control4.comEDOC-00184-E2019-02-11 MS
Control4 Smart Home Automations Guide Note: The information in this guide applies to the latest Control4 system capabilities . Features can vary between customized installations and Control4 software releases, so contact your Control4 Dealer with any questions about available features . Important: For creating your own automations, your Control4