Transcription
How to Fix S/MIME for Air Force OWA:Reading and sending encrypted e-mail, andapplying/validating digital signatures10/1/2019OPR: AFNIC/CHESContact: AFNIC.NT.CP@us.af.milDSN (312) 779-5844/ 1 (618) 229-5844Document source al/SMime%20Library/Forms/AllItems.aspx
TABLE OF CONTENTSSectionPageTABLE OF CONTENTS . 21INTRODUCTION . 31.1Purpose . 31.2Background . 31.3Scope . 31.4System Requirements . 32PROCEDURES . 42.1Download Edge S/MIME Extension v20.19.701.1 . 42.1.1 For home computers . 42.1.2 For work computers . 42.2Install or Update Edge S/MIME Extension. 62.2.1 For home computers . 62.2.2 For work computers . 72.33Configure Edge S/MIME Extension . 9PROCEDURES . 113.1Google Chrome S/MIME Extension . 113.1.1 For home computers . 113.1.2 For work computers . 113.3Configure Chrome S/MIME Extension. 124Test S/MIME Functionality in AF OWA . 15
1INTRODUCTION1.1 PurposeThe primary purpose of this document is to provide the procedures taken to update S/MIME forthe Microsoft Edge and Google Chrome web browsers for Air Force Outlook on the web (AFOWA) users to read/send encrypted e-mail and apply/validate digital signatures.1.2 BackgroundThe capability to read/send encrypted e-mail and apply/validate digital signatures on e-mailusing AF OWA has been degraded for some time. Focused troubleshooting has uncovered thatthe S/MIME version that is available on the AF OWA website is not current (version 20.19.214.2at the time of this document). Microsoft is in the process of officially updating the AF tenant’sS/MIME control through their release process, however AFNIC, in cooperation with severalpartners, have found a fix specifically for Microsoft Edge and Google Chrome.1.3 ScopeThis document will provide AF OWA users a fix for S/MIME on Microsoft Edge and GoogleChrome for both home and work computers. External AF OWA website (e.g. home, hotel, school): https://owa.us.af.mil/ Internal AF OWA website (e.g. work, AFNet VPN): https://webmail.apps.mil/owa/1.4 System Requirements Microsoft Edge and/or Google Chrome web browser(s) installed DoD root certificates installed g-started/) CAC Smart card reader Middleware (if necessary, depending on your operating system)
2PROCEDURES2.1 Download Edge S/MIME Extension v20.19.701.1Until the updated S/MIME control (version 20.19.701.1 or greater) has 100% propagated to theAF tenant, follow these steps to download the S/MIME extension for Microsoft Edge:2.1.1 For home computersUsers can download the S/MIME extension at this link (case 20.19.701.1/OwaSmimeEdgeExtension.appxbundle. If thelink for some reason does not work, users can download a copy from the AFNIC EnterpriseServices SharePoint at this link (use your e-mail ternal/SMime%20Library/Forms/AllItems.aspx and select the “NonAFNet Computer” folder.To download, click the ellipses in both menus and select “Download a copy” (as depicted below)to save the file to the Downloads folder on your computer. Go to Section 2.2 to continue.2.1.2 For work computersApplies to computers with the AFNet SDC image. Users connected to NIPRNet may utilize theSoftware Center to install the Edge extension. Click on the Start window, type in SoftwareCenter. Click on Applications on the left, choose Microsoft Edge S/MIME Extension and clickinstall. Close Software Center.
Alternatively, an administrator with elevated permissions will be needed to properly downloadand install/update S/MIME. This mainly applies to users with work computers in a non-AFNetenvironment (e.g. school on .edu domain).NOTE: AFNet-connected computers will receive an enterprise update that will automatically installthe required files, so users will not need to coordinate with their local administrators to download andinstall S/MIME. However, users will want to ensure that S/MIME is configured correctly and test thefunctionality for themselves (refer to Sections 2.3 and 2.4 below), and coordinate with theircommunications focal point (CFP) if they encounter issues.Administrators can copy the required files/folders from \\VEJX-AS006v\SMIME\AFNET Computer LocalAdminRequired\. If unable to access the shared drivelocation, administrators can download a copy from the AFNIC Enterprise Services SharePoint atthis link (use e-mail ternal/SMime%20Library/Forms/AllItems.aspx and select the“AFNet Computer Local Admin Required” folder.Administrators will need to copy all five (5) files to the desktop of the user using AF OWA.Once downloaded, continue to Section 2.2.
2.2 Install or Update Edge S/MIME ExtensionFollow these steps to install or update the S/MIME extension for Microsoft Edge:2.2.1 For home computers1. Navigate to the Downloads folder on your computer.NOTE: If for some reason the downloaded file saved as a .zip instead of .appxbundle, users will needto rename the file by clicking the View tab in the folder window and checking the box for “File nameextensions” on the right (as depicted below). Right-click on the file, select Rename, and replace the“.zip” with “.appxbundle” and hit Enter to change the file name extension (click Yes if prompted).2. Double-click on the OwaSmimeEdgeExtension appxbundle file to initiate the install/update.If prompted “How do you want to open this file?”, choose “App Installer” and click OK (asdepicted below).
3. A pop-up window will appear asking you to install or update S/MIME Control for Outlook.4. Click Install or Update to complete the install/update process, and continue to Section 2.3.2.2.2 For work computers1. Log in as administrator.2. Enable sideloading: This can be done through the GUI in Windows 10 as local admin ormodified in the registry. Always default to making this change with the GUI, however, if you donot have local admin rights to the computer, someone who does can add the following registrykeys, in subsection b, remotely using regedit (recommend removing these after setup):a. GUI method: Navigate to Start Menu Settings Update & Security. Select “Fordevelopers” on the left-side and select the “Sideload apps” radio button.b. Registry key method: pModeUnlock,AllowAllTrustedApps (DWORD) with value of 1 pModeUnlock,AllowDevelopmentWithoutDevLicense (DWORD) with value of 0 and close regedit
3. If the computer is connected to the AFNet, you will need to modify the following registry keyas local admin to disable SmartScreen so the OwaSmimeEdgeExtension file can run withouterror: HKLM:\SOFTWARE\Policies\Microsoft\Windows\System, changeEnableSmartScreen DWORD value to 0, click OK and close regedit4. Have the user log back into the computer.5. Open and install the Microsoft.NET.Native.Framework.1.3 &Microsoft.NET.Native.Runtime.1.4 files in both the DotNetNative x64 and DotNetNative x86subfolders—a total of four (4) files will be installed.6. Double-click on the OwaSmimeEdgeExtension appxbundle file to initiate the install/update.If the previous steps were followed, no errors should be presented. Continue to Section 2.3.
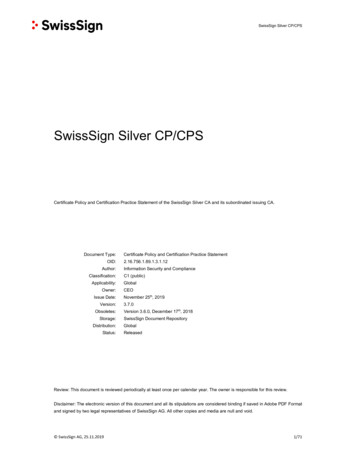
2.3 Configure Edge S/MIME ExtensionFollow these steps to correctly configure the S/MIME extension in Microsoft Edge:1. Click on the Start button and open Microsoft Edge. It may be already pinned to the StartMenu on the right-side (as depicted below) or you may have to navigate to it in the programs liston the left-side.2. Click on the ellipses on the top-right of the window.3. Select “Extensions” from the menu.4. Move your mouse over the “Microsoft S/MIME Control” until the settings cog icon appears,then click it.5. In the “About” section, ensure that your version reflects “20.19.701.1” and that the toggle isset to On.6. Click “Options” to add the necessary AF OWA domains:
a. Check both boxes and add “owa.us.af.mil” and “webmail.apps.mil” on separate linesin the text box (as depicted below).b. Click Save and you will notice green text appearing to inform you your changes weresaved successfully.7. Close Microsoft Edge and proceed to section 4 to test OWA S/MIME in Edge.NOTE: Unsigned extensions are automatically turned off on subsequent launches of Microsoft Edge.If you see the pop-up below when you open Microsoft Edge, click “Turn on anyway” to use S/MIME,or go to the Extensions menu and turn it on from there.
3PROCEDURES3.1 Google Chrome S/MIME ExtensionFollow these steps to install the S/MIME extension on Google Chrome.3.1.1 For home computersCurrently, this feature is not available for most personal computers. Per Microsoft, S/MIME usein Google Chrome is limited to domain joined computers.3.1.2 For work computers1. Log in as administrator.2. Using Regedit, navigate toComputer\HKEY LOCAL MACHINE\SOFTWARE\Policies\Google\Chrome and create thefollowing (NOTE: Entries are case sensitive):Key: ExtensionInstallForcelistString Value: 1 (increment the number if 1 is already in use)Value ook.office.com/owa/SmimeCrxUpdate.ashx3. Have the user log back into the computer to configure the S/MIME extension.
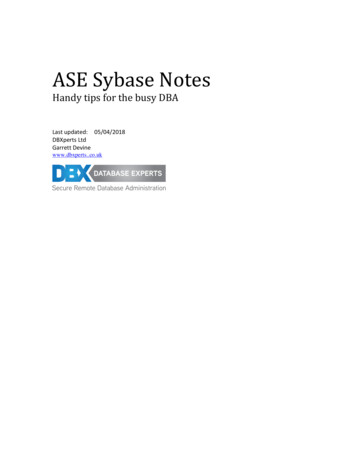
3.3 Configure Chrome S/MIME ExtensionFollow these steps to configure the S/MIME extension on Google Chrome.1. Ensure that you have network connectivity.2. Open Google Chrome.3. Click on the vertical ellipses in the upper right corner of the window, hover over “MoreTools” and click on “Extensions”. NOTE: It may take several minutes for the next windowto pop up, please be patient.4. From the Microsoft S/MIME Control 20.19.814.2 window, click on “Details”5. Click on “Extension Options” to add the necessary AF OWA domains:a. Check both boxes and add “owa.us.af.mil” and “webmail.apps.mil” on separate lines inthe text box (as depicted below).
b. Click Save and you will notice green text appearing to inform you your changes weresaved successfully.6. Close Chrome.7. Launch Chrome.8. Access the appropriate AF OWA URL (External AFNet: https://owa.us.af.mil; InternalAFNet: https://webmail.apps.mil/owa/).NOTE: When logging into AF OWA for the first time on a computer, you may be prompted to loginusing your Air Force e-mail address (i.e. first.last@us.af.mil or first.last.#@us.af.mil).9. If prompted for login certificates, use your e-mail certificate (i.e. DOD EMAIL CA-##).10. Read and click OK at the DoD Warning and Consent Banner screen. Be patient, it may takea moment for your mail to populate.11. Once OWA has loaded, click on the Settings cogto open the “Settings” menu.on the upper right side of the window12. Click on Mail in the “Your app Settings” section.13. Click on S/MIME in the menu on the left side of the screen.14. In the S/MIME Settings window, click on “Click Here”15. In the Save As window, click Save to download the SmimeOutlookWebChrome.msi file tothe default Downloads folder.
16. Once downloaded, navigate to the Downloads folder or click on theSmimeOutlookWebChrome.msi file at the bottom of the window to open the file.17. Allow the S/MIME Control to load.18. Once installed, navigate back to the S/MIME Settings (see steps 11-13 above if needed) andverify the new S/MIME control is installed by validating a version number is present (e.g.4.0800.20.19.814.2).19. Close and re-launch Chrome before moving on.
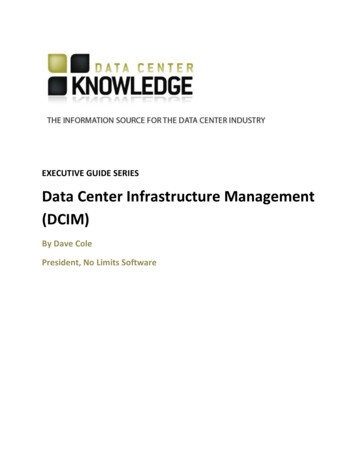
4TEST S/MIME FUNCTIONALITY IN AF OWAFollow these steps to test that S/MIME is properly configured and working as intended:NOTE: Users may be prompted multiple times to enter their PIN while using OWA, when openingan encrypted or digitally signed message, and/or when sending an encrypted or digitally signedmessage. This is normal.1. Ensure that you have network connectivity.2. Launch Microsoft Edge or Google Chrome.3. Access the appropriate AF OWA URL (External AFNet: https://owa.us.af.mil; InternalAFNet: https://webmail.apps.mil/owa/).NOTE: When logging into AF OWA for the first time on a computer, you may be prompted to loginusing your Air Force e-mail address (i.e. first.last@us.af.mil or first.last.#@us.af.mil).4. If prompted for login certificates, use your e-mail certificate (i.e. DOD EMAIL CA-##).5. Read and click OK at the DoD Warning and Consent Banner screen. Be patient, it may take amoment for your mail to populate.6. Test reading a signed/encrypted e-mail without errors: If you see S/MIME isn't supported in thisview. To view this message in a new window, click here, click the link and the message will open in anew browser window and be viewable.NOTE: By default, messages are viewed on the right side in Conversations. To easily viewencrypted e-mail messages, you can change your view mode to Messages. Click “Filter” at the top ofthe Inbox, move down the menu to “Show as” and select Messages instead of Conversations.7. Test sending a signed/encrypted e-mail without errors:a. Click on New to start a new e-mail message.b. Click on the ellipses above the new e-mail message for more options and choose“Show message options ” from the menu.
c. Check the boxes for “Encrypt this message (S/MIME)” and “Digitally sign thismessage (S/MIME)” and click OK.d. Complete the rest of your message (fill in To, Subject, etc.) and click Send.e. Follow up with the person the e-mail was sent to ensure they received it.
7. Close Microsoft Edge and proceed to section 4 to test OWA S/MIME in Edge. NOTE: Unsigned extensions are automatically turned off on subsequent launches of Microsoft Edge. If you see the pop-up below when you open Microsoft Edge, click “Turn on anyway” to use S/MIME