Transcription
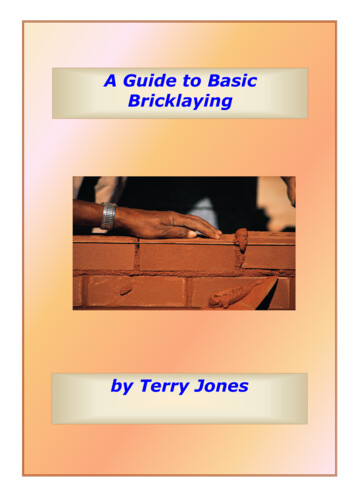
A Guide to BasicBricklayingby Terry Jones
IntroductionHow it all started; a short history of bricklayingChapter 1Bricklaying toolsChapter 2Brick Cut ShapesChapter 3Mortar MixesChapter 4Plumbing, levelling and gaugingChapter 5Setting out a Basic WallChapter 6Brickwork bondingChapter 7Pointing and finishing upCopyright [2007] Terry Jones www.Design-Your-Fiireplace.com All Rights Reserved2
IntroductionA short history of bricklayingThe seventeenth century witnessed great developments in thecraft of bricklaying in England due in part to the introduction ofthe Dutch fashions under William and Mary. The famousarchitect Sir Christopher Wren plumped for many features in hisdesigns and none more so than ‘gauged’ brickwork. This veryfine brickwork called for a high degree of craftsmanship andknowledge of geometrical pattern work and it can still be seenin many of the old buildings in Europe and the UK. Thecraftsman of the day was allowed free scope to producedecorative designs and moldings all for the, often personal,quest to decorate buildings. London, and in particular itsmuseums, had their fascias decorated with ornamental carvingscut directly into the soft red bricks; a skill that has sadly movedon due to cost and availability of the skill levels of builderstoday.After previous designers had discovered the need to bondbrickwork together to maintain maximum strength, architectsbecame influenced by the Flemish approach to building andbegan to break up large areas of walling with highly decorativeCopyright [2007] Terry Jones www.Design-Your-Fiireplace.com All Rights Reserved3
patterns know as ‘diaper bond’ and ‘garden wall bonds’. Itcould be said that during this period the bricklayer became askilled artisan and it is not difficult to see examples which backup the argument that the craft of brickwork is indeed steeped inhistory. The thirteenth century saw a major increase in the useof brick for dwellings in England. It’s possible for instance, totrack back in time to the invasion of Britain by the Romans towitness the desire to replace the Saxon style of using almostany material which came to hand to build a home. Perhaps themost noticeable change in house and building design arrived asa result of the great fire of London. At the end of a long drysummer in 1666 a fire broke out in London's Pudding Lane andfor 3 days it raged across 400 acres of tightly packed timberframed buildings. Only the River Thames halted the progress ofthe fire to the south. In an effort to halt the disaster, buildingsin the path of the fire were destroyed using gun powder. Withdamage of around 7,000,000, in a century when themagnificent Banqueting House in London cost only 15,000 tobuild, this indeed proved to be a drastic turn of events. InSeptember of that year the first rebuilding act was passed andfrom then on bricks and stone were required by law for use inthe front and rear walls.Further back during the middle ages, brickwork had been inconstant use in a wide range of locations. At the beginning ofthe 19th century mechanical brick-making processes began tobe patented and by the latter half of the century had almostentirely replaced the ancient hand-fashioning methods.Contemporary American building bricks for instance took on astandard rectangular block shape with the dimensions of about2 1/4 by 3 3/4 by 8 in. (5.7 by 9.5 by 20.3 cm) becomingcommon.Copyright [2007] Terry Jones www.Design-Your-Fiireplace.com All Rights Reserved4
A suitable brick today must be resistant to atmospheric actionand be able to withstand high temperatures and, in some cases,they must be more durable than stone. Specific bricks haveeven been developed to accommodate high heat resistance inindustrial situations. Called refractory bricks, the inside ofmany industrial boilers are lined with these special bricks but,sadly, with technology moving on this is a dying craft.The devastating results of two world wars in Europe created adesperate need for housing. Fortunately, numerous clay pitsand quarries had been located and brick manufacture wasbecoming fully mechanised. The ability to produce largequantities of building materials strengthened even more theneed for brick. During the 60’s sadly, the need declined as themove to provide housing for large amounts of people increased.Architects took to the skies and many city skylines becamecluttered with huge high rise tower blocks. Leaving little spacefor the craft artisan, brick dwellings became the focus of themiddle and upper class once again. However, like every goodstory there is a good element. Traditional features survivedand the use of wood, brick and stone continued to be thedomain of the more discerning client.Copyright [2007] Terry Jones www.Design-Your-Fiireplace.com All Rights Reserved5
The art of craft building has not been destroyed; however, thecost of providing them has become an issue. Today it is moredifficult to find a builder with the skill and experience of how toprovide for a client group who have their own ideas as to whatthey should incorporate in their homes. Today if one visits atechnical college providing craft training, one will find asituation where the amount of training, depth and complexityhave declined and this is a sign of financial pressure of buildingin general. One thing is for sure though, while the desire torecreate stylist features from the past continues, the need forspecialist crafts people will continue.Copyright [2007] Terry Jones www.Design-Your-Fiireplace.com All Rights Reserved6
Chapter 1Bricklaying toolsUnlike some building crafts, the bricklayer does not need toown a large amount of tools in order to carry a range of tasks;considerations on the other hand lies more toward the qualityof tool instead. Other factors come into play when you assessjust how much bricklaying is to be carried out over a period oftime; why buy a set of top quality golf clubs if one day a week isyour target? While tools need to robust, if a single project is tobe undertaken it may be prudent to purchase a ‘middle of theroad’ items instead of a professional outfit. It’s similar tophotography in a way. You can take a good picture on amedium priced camera but if you planned to take it up full timethen a top of the range model would be a better bet. It must besaid that cheap tools are not only an unsound financialinvestment they can be unsafe. Blades on trowels can becomeunstable if fully loaded and sprit levels can offer false readingswith only the smallest knock. When working with any tool youshould remember that each tool should only be used for the jobin hand; the reasons being that due to the uncertainly of theredurability and reliability you may be faced with safety qualityissue. It’s true to say that you get what you pay for when itCopyright [2007] Terry Jones www.Design-Your-Fiireplace.com All Rights Reserved7
comes to any tool but it can help build your confidence if youknow you are using industry standard equipment. Taking tripto your local DIY / hardware store or builder merchants willgive you a selection to pick from. One thing to remember isthat once you have used them it’s extremely difficult to returnfor a refund if they don’t ‘fit the bill’. So let’s take a look at thetypical tools to be found in a bricklayer tool kit!The Brick Trowel. This is the 'main stay' of any bricklayingoperation is the large brick trowel. These trowels come in arange of sizes from around 9 to 13 inches and the length ismeasured along the underside of the blade. So which one? Thechoice is determined by your ability to control it. Obviously thelarger the trowel the more mortar you will be able to lift andplace. For the person new to bricklaying the best bet is to gofor the smaller version; in time you can always progressupwards. Look for a trowel which has a welded joint where thehandle meets the blade, it is best not to go for a version whichhas been riveted at that point. In general a riveted joint willbecome loose in a short period of time due in part to tappingbricks into place. Now trust me on this, there are left and righthanded trowel. yes, yes I here you say, just like a left handedscrewdriver. Well it’s true and it’s all to do with the shape ofboth sides of the trowel. One side is straight and is used to cutoff excess mortar after laying the brick, the edge has a roundededge which can be used for trimming bricks down to side. Leftand right handed trowels have these edges reversed.Small Pointing Trowels. When bricks have been laid in placethis trowel will be useful for finishing mortar joints. Ranging issize from 3- 6 inches they may also be useful for small taskswhere it is not possible to spread mortar using the main trowel.Copyright [2007] Terry Jones www.Design-Your-Fiireplace.com All Rights Reserved8
Again look for quality in its construction. As this trowel is notused very often it is advisable to run a thin layer of oil over theblade to stop any rusting effects.Club Hammer. This hammer maybe referred to as a ‘lump’hammer. It’s basically a heavy hammer up to 1 pound inweight which is used in conjunction with a bolster and or coldchisel. It has a range of other uses were it is necessary toknock things down or smaller demolition jobs. Be sure to checkout how solid the head is fixed to the handle and make sure nogrease or oil comes in contact with the hammer face.Bolster Chisel. This is a wide bladed chisel which used inconjunction with the club hammer and its main use is forcutting bricks to length. It is important to avoid using a bolsterchisel for cutting into concrete or similar tasks however, if thisis unavoidable it is better to purchase two chisels and keep onesolely for cutting bricks. The blade can be sharpened on a gridCopyright [2007] Terry Jones www.Design-Your-Fiireplace.com All Rights Reserved9
stone and it's advisable to maintain the edge after a period ofprolonged use. Look out for version which has a rubber ringsome way down the handle as this can help protect hands andfingers if you slip with the lump hammer.Brick Hammer. This hammer is extremely useful due to havingto two different heads. One head is in the form of a square flatface, useful for hammering in nails etc, and the other has asharp wide blade which is used for chopping areas of brickwhen create a shape in a bricks. These hammers may comewith a removable blade in place of the sharp end; rememberthat they should be used with care as it is all too easy to cut ahand or other body part.Spirit Level. Perhaps next to the brick trowel this is the mostobvious tool needed. Ranging from 9 inches to up to 6 foot,some even come with an adjustable bubble to allow for settingwalls at an angle. Buy the best you can afford. With this toolyou need to feel sure that the vertical and horizontal readingsare accurate. Look for the option to have the bubbles adjustedby the company who made the tool if you are planning toundertake a larger amount of projects. Care needs to takenwhen using a level, avoid the temptation to hit it with ahammer or a trowel when trying to adjust the upright or levelof the bricks.A sliding cassette rule. The sliding cassette rule has becomethe most common form of measuring tool used today. Used foras many areas as you can think of, it has only a short list ofrequirements. It has to be long enough for the task in handand it has to be accurate; if these two factors are met the offyou go; look out for a version which has a belt clip.Copyright [2007] Terry Jones www.Design-Your-Fiireplace.com All Rights Reserved10
Stiff Hand Brush On completion of brickwork it very oftennecessary give the walling a light brush. Again try to keep thebrush for this purpose only; after all you wouldn’t use the samebrush to do the dishes as you would brush your hair. Make surethe bristles are smooth as brick joints can be destroyed bypressing to hard.Brick Jointing Tool or Jointing Iron. A brick jointer is usedmostly to create a half round joint between all joints in a wall.Generally they are a long piece of steal rod which with a raisedend to stop rubbing of fingers against the wall. By rubbing theminto the semi wet mortar it creates a compacted and strongjoint as well as a pleasing finish. It has been know for sometrades people to use an odd piece of rubber hose, be careful ifyou take this choice as the rubber wears down quickly and thebrickwork joints become varied.Small Hawk for Pointing.A hawk is a small square of woodwith a handle underneath. It’s used to holding small amountsof mortar and is used when re-pointing brickwork. It enablesthe user to carry mortar when working from a ladder etc. Manypeople make a version for them selves.Hard Carpenter Type Pencil Given that it is necessary to drawlines on brick occasionally it is of little use to use a pencil whichis used for line drawing on paper. Look for a broad tip thickcharcoal lead; it maybe that variations are to found in differingcountries.Builder SquareOn many occasions you will need to ensurethat your walling is square at the corners. It is possible toconstruct a simply square from timber but it maybe moresensible to purchase one from your builders store. Take care ofCopyright [2007] Terry Jones www.Design-Your-Fiireplace.com All Rights Reserved11
this tool as you will be relying on its accuracy each time youuse it.Cold Chisel A cold chisel is simply a long (6-12 inches) used forcutting out old bricks, making holes and all sorts of hand tasks.Line & PinsBest ask your local store for a set of bricklayingline and pins as they will show the best choice. These items areto be used when you need to build long lengths of walling. Byfixing the line at each end of the corners they are raised to offera guide to each line of brick laid; normally referred to as thecourses of brickwork. Make sure that the lines are wound ontothe pins in a way which avoids knots etc and take care not tocut the line with a brick trowel.Safety Goggles I am not sure these explaining however, theiruse maybe a different subject. When cutting bricks it isessential that safety goggles be used. If the projects you areworking on are outside and you have a strong wind be preparedto wear these each time they are needed. On some occasions itmaybe advisable to use but you may find it difficult to lay brickswith this kind of hand protection.This list is a starting point to take to the store and seek advice.Above all, use your judgment when looking at quality andcosting. Think of a subject which you feel confident in andimagine the same ethos and values being applied to your newpurchases. Good luck with your spendingCopyright [2007] Terry Jones www.Design-Your-Fiireplace.com All Rights Reserved12
Chapter 2Brick Cut ShapesBricks today are available in a range of colours and textures butone thing seems to stay the same, that of the size. Brick sizesfor a long time in the UK were measured under the old styleimperial system of inches. During the changes to measurementin Europe all things changed and bricks became a standard size.In most part a standard brick face is 65mm deep, 215 mm longand 102.5 mm wide.It’s possible to purchase bricks of varying density for projectswhich require less or more strength in their materials. Somebricks have a decorative face on 3 sides only and thus arelimited in their use while the more expensive type have thesame colour throughout all faces.Most projects that you undertake will require you to cut bricksinto a variety of lengths. Most commonly, bricks cut into ½ and¾ lengths are easy to produce and are perhaps the mostcommon size you will need. However, as you move on tosomething of a more decorative nature you may well comeacross some of the shapes shown below.Copyright [2007] Terry Jones www.Design-Your-Fiireplace.com All Rights Reserved13
A Selection of Brick CutsCopyright [2007] Terry Jones www.Design-Your-Fiireplace.com All Rights Reserved14
At first glance you could say “what would I need all of themfor”. It’s all to do with ‘bonding’ the pattern of bricks togetherin way which eliminate the possibility of having one jointdirectly above another; the professionals refer to this as ‘havinga straight joint’. The effects of ‘straight joints’ are to serve onlyto weaken a wall. Think about when you first drew the front ofa house. I bet you drew straight lines across the page to showdifferent rows of brick and then you naturally alternated thejoints between each brick. So in essence the reason bricks arecut into different lengths and shapes are to help ‘bond’ thebricks together with creating a straight joint; if this subjectgrabs you I suggest you take a more technical manual forfurther advice.It is possible to purchase a range of pre shaped bricks fromspecialist manufactures. Wonderful names such ‘plinth, bullnose, squint and cant are among those on offer. These prefabricated shapes are expensive and are to be used onoccasions when its difficult to cut the shape required and youneed to see the same finish to the brick face form all angels.Again’ take a look at the text books on bricklaying to seeexamples of their use.Cutting should always be done using a club hammer and bolsterchisel. Hold the chisel directly on the cut line’ give a swift blowonto the chisel. The more tapping that takes place the more thechisel will move around and the cut will not be straight. Best towear your safety goggles for this task as you can never be surewhen the odd piece will ‘fly off’. bricks are replaceable but youonly get one set of eyes. Finally, take time to practice cuttingdifferent lengths on some old bricks maybe. Make ¾ cuts andthen ½cuts on the same brick before trying for the finalversion.‘Remember to use safety goggles when cutting bricks’Copyright [2007] Terry Jones www.Design-Your-Fiireplace.com All Rights Reserved15
Chapter 3Mortar MixesBefore we look at all the ‘messy’ parts of sticking brickstogether let’s decide what makes a good mortar mix. In orderto keep our bricks together (or keep them apart?) most peoplerun to the store and purchase a bag of cement. Good starthowever, we need more. Mixing washed ‘building sand’ (i.e.not from the beach), ‘cement’ and something like ‘lime’ willgive an easy to use mix which is referred to as mortar. Somepeople are confused and refer to this mix as concrete, wellconcrete is a much courser mix made up of special cements andsand with small to large stones within it (i.e. aggregates).A useable mortar mix then is a mixture of washed buildingsand, a form of plasticiser such as lime and cement. Notmentioned before is the plasticiser. This could be a liquidadditive or a percentage of building lime. Mortar mixes withouta plasticiser can be difficult to manipulate, pick up and spread;so let’s assume we would like an easy to use mix. Mortar mixescan vary in proportions and therefore in strength. In generalthe strength of a mortar mix should match the strength of brickused; i.e. the stronger the brick the richer in cement should bethe mix. A typical mortar mix should be in the proportions ofCopyright [2007] Terry Jones www.Design-Your-Fiireplace.com All Rights Reserved16
part cement, 1 part lime and 5 or 6 parts sand. If a strongmortar mix is used with a weaker strength brick then you canexpect to see shrinkage and cracks as the mortar mix dry out ata different rate to the bricks; the rule then is to match strengthof each. The chart below offers a general guide to a range ofmortar mixes.Type ofCementSoft SandwallingLime orSharp SandplasticiserBrick house1520Block walls1510Retaining walls1321Block retaining1311Coping stones12½2Chimneys152Bedding1014Paving joints1300Laying paving10061320Floor screed1004External render23½13½External render24½24½1300chimney potsslabsPointing brickjointsecond coatHigh densitybricksIf this is all too much you could always purchase a pre-mixeddry bay from the merchant; remember however, that these baysare expensive and they don’t go far.Copyright [2007] Terry Jones www.Design-Your-Fiireplace.com All Rights Reserved17
If separate ingredients are to be used the proportions should bemeasured by volume. Use a simple thing such as a dry bucketor similar but remember that for each measure you should fillthe container to the same level. Find a clean outside area suchas some old paving or better a large piece of timber boarding.It is vital that all the ingredients are mixed together in a dryformat first. Be extra careful to make sure the cement is notblown away by strong winds. When mixed dry create a largemound and scoop out the centre to create a space for the water.Now it is not necessary to measure out an amount of cleanwater before mixing as the amount needed will depend on theporosity of the ingredients. Add the water slowly to the mixand turn over with a clean shovel. When to stop mixing? Wellyou will know, just make sure that you do not over do theamount of water as this will weaken the mix.Important to remember that the proportions of the mortar muststay the same if you are looking for consistency in strength andcolour when dry; how much you mix is of course determined bythe size of the project and only practice will help here.You can of course use a cement mixer with the sameproportions. In this case add the mixture in dry form first thenslowly add the water being careful that the cement is mixedthoroughly.Remember before you go down this route you willbe mixing large amounts of mortar. Remember also that mixersmust be clean thoroughly after use.Let's get mixingCopyright [2007] Terry Jones www.Design-Your-Fiireplace.com All Rights Reserved18
Chapter 4Plumbing, Levelling & GaugingI want you to think solely for a moment as a consumer. Whenyou check out an item for sale or consider an expensive piece ofclothing or take a new PC for a test drive, you are guided tosome extent by the visual appearance. If the finish is poor, youform an opinion quickly as to the quality of the item and thesame applies to a finished piece of brickwork. Brick walling willappear to be of poor quality if it is not straight, up right or evenout of line and poor workmanship has to be the main reason formaking a judgment. Brickwork then has a set of guidelines onwhich quality can be measured. For your brickwork project topass the quality test it needs to be: Upright or vertical Level or horizontal over the full length of the walling Be in line across the diagonals i.e. from corner to cornerThese elements are achieved by paying attention to Plumbing,Levelling and Gauging, so let’s look at each in turn.Copyright [2007] Terry Jones www.Design-Your-Fiireplace.com All Rights Reserved19
The picture above shows the two most common areas whichshould have your attention.Plumbing When bricks are laid there has to be a guide tokeeping the walling upright. By using a sprit level as shown inthe bottom drawing above, one is said to be leveling the wall.This is extremely important when building the first section ofwalling. The drawing above shows a spirit being used at theend of a wall. Each time a row of bricks (known as a course)are laid it becomes necessary to straighten things up. Byplacing the spirit level against the 2 sides of the end you areable adjust the amount they learn in or learn out. By placingyour foot at the bottom of the level it is possible to tap thebricks in or pull them out; this motion is becomes necessaryafter laying each course of bricks. You should aim toward thecorners of your new first as this is where all the measuringplumbing and leveling takes place. Take care that the face ofthe level is kept clean from any mortar as it may rub off ontothe face of your bricks.Levelling As you would expect, if walling is not kept straightalong the of the courses then it quickly becomes unsightly andCopyright [2007] Terry Jones www.Design-Your-Fiireplace.com All Rights Reserved20
difficult to manage. Using a spirit level on top of the bricks isknown as leveling and again it is best done at the ends of thewall. After laying a number of brick (usually not more than thelength of your level) you should taps the tops of each brick untilthey are in contact with the underside of the level. Again avoidtaping the spirit level with a hammer or your trowel as damagecaused will render the level to give false readings.Gauging In order for walls to be level it is necessary to keepthe distance between each mortar bed the same; this is knowas gauging. In the diagram above it is possible to see an endon view of a section of walling. To the left is the brickworkwhile on the right you can see a long length of timber withdivisions cut into it. Generally the divisions are equal to theheight of the brick the joint. When using bricks of metricsizing you will find that a joint of 10mm is normal. Nowconsider that the depth of a brick is 65mm it follows that thecut line on your gauge rod should be 75mm. By using a gaugerod it will help to keep each ends of the walling to the sameheight.The above shows the brick to the left and a gauge rod being place against theface of the wall.Copyright [2007] Terry Jones www.Design-Your-Fiireplace.com All Rights Reserved21
Chapter 5Setting-out a Basic WallStarting a long length of walling: let's imagine that we need tobuild a length of walling; say 10/12 foot long or similar to thedrawing below. After the foundation has been created and thelines for the wall decided it will be advantageous place somedry bricks along the length in order to see how things will workout; this is know as ‘dry bonding’ and the purpose is to helpavoid and unnecessary brick cuts in the middle of the wall.Copyright [2007] Terry Jones www.Design-Your-Fiireplace.com All Rights Reserved22
Ok, so you have worked out that a full amount of bricks will fitinto the proposed length so let’s get laying. A number oftechniques can be applied before you begin to lay bricks whichwill greatly increase the chances of producing a ‘qualityproduct’ and they start with handling the mortar. In the sketchbelow you can see that the mortar has been placed on a smallwooden board; this helps in handling and also picking up etc.You can see that a trowel full of mortar has been pulled to thefront of the board; this is known as ‘rolling the mortar’. Takinga trowel full at a time spread some out along the line of wallingstarting form the corners. Sufficient mortar should be spreadto lay 3 or 4 bricks; use your level and gauge rod to line thingsup. Going back to the drawing showing the layout of a brickwall you can see that a building line has been fastened betweenthe corners and this now becomes your guide to help keep allbrick in line. Use the line to match each top edge of the bricksLift the line for each course until the wall is at the requireheight. When the walling returns around a 90 angle you willneed to use the building square. After placing the bricks youcan either place the square into the internal angle or placedirectly on top of the bricks.Copyright [2007] Terry Jones www.Design-Your-Fiireplace.com All Rights Reserved23
Chapter 6Brickwork BondingFor brickwork to be effective, thought needs to be given to thepattern in which the bricks are placed. How bricks are ‘lapped’over each other is referred to as ‘bonding’. The primarypurpose of bonding is to ensure strength in a wall because ithelps to spread loads over a wider areas however, you alsohave choices as to the pattern of the bricks in your wall. As it isnot good practice to have each joint immediately above eachother it becomes necessary to lap bricks by ½ or ¼, in otherwords, ‘half bond’ or ‘quarter bond’. Now I am sure that allthat read this are aware of a simple process of lapping eachbrick in a ‘half bond’ fashion however, when you wish toincrease the thickness of the wall it is possible to introduce oneof the 2 bonds belowHeader Closer StrecherHeader Closer StrecherLooking back through this e-book at the section covering brickcuts you can see a variety of cut shapes, some of which wouldbe relevant at this stage. A simple ½ cut is referred to as a‘half bat’ while a brick cut along its length is known as a ¼Copyright [2007] Terry Jones www.Design-Your-Fiireplace.com All Rights Reserved24
closer or ‘queen closer’. Take a look at the patterns above andyou will see that a ‘half bat’ is not used but instead a ¼ closercomes into play on the left hand side of the drawings. Placingbricks in this fashion allows for a double strength wall as thedepth of the wall is a full brick. Now the above brick bonds areonly the starting point, to show you more would take us pastthe remit of this e-book; if the interest takes you I wouldsuggest looking at a technical building book in your local store.In all cases care needs to be taken in trying to maintain a10mm joint between the bed joints and the cross joints; anymore than this and you run the risk of you walling becomingunsightly.Copyright [2007] Terry Jones www.Design-Your-Fiireplace.com All Rights Reserved25
Chapter 7Pointing & Finishing upWhen a wall has been built and before the mortar hardens thebricklayer needs to ‘finish off’ the joints; this is done for tworeasons. The first is to provide a decorative finish to thewalling while at the same time ensuring that any gaps betweenthe joints are filled. The second reason is more to do withadding strength to the joints as very often is involvescompressing the mortar with a tool. So finishing off the jointsis referred to as ‘pointing & or jointing’. You have a choice onhow to finish the joints. The sketch below shows 4 differentfinishes that can be easily applied.(1)(3)2)(4)Copyright [2007] Terry Jones www.Design-Your-Fiireplace.com All Rights Reserved26
Figure (1) shows a ‘flush’ finish. As the name suggests themortar would become totally flush with the face of the bricks.This type of finish is very useful if you plan to use a differentcolour joint finish to the mortar. It’s worth using this methodfor a larg
A short history of bricklaying The seventeenth century witnessed great developments in the craft of bricklaying in England due in part to the introduction of the Dutch fashions under William and Mary. The famous architect Sir Christopher Wren plumped for many features in his designs and none more so than ‘gauged’ brickwork. This veryFile Size: 1MBPage Count: 30Explore furtherPractical bricklaying: a handbook of instruction and .archive.orgBeginner Wood Carving Patterns – FREE PATTERNSskipattern.comEmbroidery Stitches Free PDF Book AllFreeSewing.comwww.allfreesewing.comFree Woodworking EBookswww.woodworkweb.com17 Simple Furniture Building Plans for Beginners - The .www.thecreativemom.comRecommended to you b