Transcription
NotebookSoftware ApplicationManual
Software Application Guide Copyright NoticeThe material in this document is the intellectual property of MICRO-STAR INTERNATIONAL.We take every care in the preparation of this document, but no guarantee is given as to thecorrectness of its contents. Our products are under continual improvement and we reserve theright to make changes without notice. Trademarks All trademarks are the property of their respective owners. SRS Premium Sound, SRS and the symbol are trademarks of SRS Labs, Inc. THX and THX TruStudio Pro are trademarks of THX Ltd. which may be registered in somejurisdictions. All rights reserved. Technical SupportIf a problem arises with your system and no solution can be obtained from the user’s manual,please contact your place of purchase or local distributor. Alternatively, you may contact ourtechnical staff for further guidance at: http://support.msi.com/ Revision History2VersionRevision HistoryDate2.1For Windows 8 and later only10, 2013
Preface1-3 About This ManualThis Software Application Manual provides instructions and illustrations on installing and usingthe software applications which are exclusively designed by MSI. This manual will give usersmore on how your notebook can be more efficient, convenient, and enjoyable with the help ofthese software applications.The software applications selected here may be optionally supported for particular models.Contact the local dealer for further information if necessary.SCM (System Control Manager)SCM (System Control Manager) is a proprietary software for driving and controlling the Fn keyson the keyboard. The SCM is pre-installed with the default Win 8 OS and will run automaticallyin background.Dragoon Gaming CenterDragoon Gaming Center (DGC) is a handy application for integration of games installed andgaming software interface. Providing easy access to real-time system performance monitor andgaming environment setting, DGC empowers users to facilitate tweaking process withoutoccupying system resources.Keyboard LED Manager (KLM)For the gaming notebook equipped with colorful keyboard LEDs, users control the colorvariation of the LEDs underneath the keyboard by using the Keyboard LED Manager (KLM)application. These colorful keyboard LEDs are designed to give users more visualentertainment while using the gaming notebook.Battery CalibrationThis application helps to extend the life cycle of the battery.It automatically refreshes thebattery capacity through efficient processes of charging, discharging and recharging the battery.Sizing OptionsThis application helps to adjust the system DPI setting conveniently.Only with the resolution(2880 x 1620) can provide the respective image including 100%, 125%, 150% (the best option),175% and 200% DPI.3
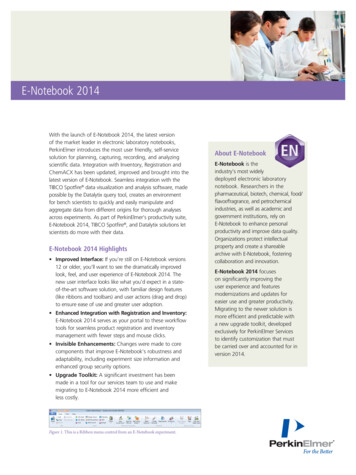
Software Application GuideRecovery Image Backup ToolRecovery Image Backup Tool, the utility designed to backup the recovery image to blank DVDdisks, a USB flash disk or ISO files. They can be used to recover the system to manufacturer’sdefault settings when it is needed.This utility applies to the Operating System of Windows 8 and later only.application on any product with no authorization may be prohibited.4Usage of this
Preface1-5Note5
Software Application Guide SCM (System Control Manager)SCM (System Control Manager) is a software for driving and controllingthe Fn keys on the keyboard. The SCM is pre-installed with the defaultOS and will run automatically in background. If you intend to install yourown version of OS, it is required to install SCM to enable the Fn keys. Quick Launch [Fn] KeysUse the Quick Launch [Fn] buttons on the keyboard to activate the specific applications andtools. With the help of these quick launch buttons, users will be able to do work moreefficiently.F5: ECO Engine (Power Saving) FunctionECO Engine, the outstanding and unique power saving function, provides various powersaving modes – Movie mode, Presentation mode, Game mode, and Office mode, to extendthe battery running time while performing different tasks with this notebook.6Movie ModeSelect this mode when playing multimedia applications.Presentation ModeSelect this mode when performing presentation applications.Game ModeSelect this mode when performing game applications.Office ModeSelect this mode when dealing with office documentation tasks.ECO OffSelect to disable ECO Engine.
Preface1-7F6: WebcamONOFFONOFFF10: Airplane Mode7
Software Application Guide User Define keyThis function allows users to define the P1 quick launch button for launching the particularapplication.Once the shortcut has been created properly, users will be able to launch theselected program, application, utility, or path by pressing the P1 Fn key on the keyboard.Note: This function will not be available when Dragoon Gaming Center is installed.To restore this function, uninstalling Dragoon Gaming Center is necessarily required. To define the P1 quick launch button, move the cursor to the [SCM] icon on the lowerright side of the display, and the right click the mouse to select P1 Setting to bring outthe Use Defined Key settings dialogue. Click the Browse button to setup the shortcut to an appointed program, application,utility, or path, and then click OK to have this selection take effect. Click the Remove button to delete the previous shortcut made.F4: P1 Setting8
Preface1-9 Dragoon Gaming Center (optionally supported)When the application of Dragoon Gaming Center is installed, activate Dragoon GamingCenter with Quick Launch P1 Fn key.F4: Dragoon Gaming Center9
Software Application Guide System Control Manager interfaceBesides using the [Fn] buttons on the keyboard to activate the specific applications and tools,users may also achieve the same results via the System Control Manager interface.Double right click on the SCM icon on the lower right corner of the display to bring up theSystem Control Manager interface as shown below.1.Devices ON/ OFFRight click the mouse on the device icon to switch the selected device on or off recurrently.2.Brightness LevelRight click the mouse on the Left/ Right arrow to turn the display brightness level up anddown.Volume LevelRight click the mouse on the Left/ Right arrow to turn the speaker volume level up anddown.3.ECO Engine (Power Saving) FunctionSelect a proper power saving function by right clicking on the icons.4.Display ON/ OFFRight click the mouse on the icon to switch off the display. To switch on the display, hitany key on the mouse or keyboard.5.ODD Eject (optionally supported)Right click the mouse on the icon to eject the ODD. (If there is multiple ODD on thenotebook, this function will eject the first ODD by ASCII order.)10
Preface1-11Note11
Software Application Guide Dragoon Gaming CenterLaunching Dragoon Gaming CenterWhen the Dragoon Gaming Center application has been installedsuccessfully, the Dragoon Gaming Center launching icon will appearunder Programs and the system tray in the lower right-hand corner ofscreen.Click on this icon to launch the Dragoon Gaming Centerapplication.Main Window1.System Monitor: This item shows current system loading information.2.Utility:: Default has included some pre-installed software shortcuts.3.Instant Play: This item includes settings regarding gaming mode environment.4.Hybrid Power (optionally supported): This item indicates whether Hybrid Powerstatus is ON or OFF.12
Preface1-13System MonitorThe field shows real-time readings of major components including CPU/ GPU, memory,temperature and network speed.Loading StatusThis item shows current status of CPU, memory, battery capacities, disk I/O loading,GPU, current power scheme, power consumption while AC power is unplugged, andfan speed.TemperatureThis item shows GPU and CPU temperature. Click on ‘F can switch to Fahrenheitdegree while click on ‘C to Celsius degree.Network SpeedThis item shows Ethernet and Wireless speed.13
Software Application GuideUtilityThis function integrates a maximum of nine shortcuts of software and utilities embedded in thenotebook.14
Preface1-15InstantPlayInstantPlay function allows users to define several features in one P1 key shortcut. Users will besurprised by what a P1 key or a combination of Fn F4 key is capable of! One can designate animmediate startup on one specified game in P1 key shortcut, and set P1 key as a quick switchto ECO Gaming mode and adjust hardware configuration.InstantPlayThis item gives an easy and quickmanagement of installed game database.Users can add or remove shortcuts ofyour computer games.15
Software Application GuideDisplay & AudioThis item is meant for audio and displayadjustments.MouseThis item adjusts settings include: Point Speed Speed ScrollingResource ReleaseThis item allows users checkunnecessary applications in EndTaskList to avoid influencing gamingperformance.16
Preface1-17Hybrid Power (optionally supported)This function empowers users to monitor current Hybrid Power status.Hybrid Power Status ChartThis item indicates the duration of the Hybrid Power mode the system has enteredin the last 60 seconds.Hybrid Power AbilityHybrid Power shows current status of Hybrid Power mode and the function is onlyavailable in selected models. The selection will not be displayed in the followingconditions: the model purchased does not support Hybrid Power, an unplugged ACpower or a battery capacity that is lower than 30%.Hybrid Power StatusThis item indicates whether Hybrid Power status is ON or OFF.Note: Hybrid Power is only available in selected models.17
Software Application GuideNote18
Preface1-19 Keyboard LED Manager (KLM)Launching the Keyboard LED ManagerWhen the KLM application has been installed successfully, the KLMlaunching icon will appear under Programs and the system tray in thelower right-hand corner of screen. Click on this icon to launch theKeyboard LED Manager application.Standard Status and Idle StatusKLM allows users to set different LED flashing modes under Standard status and Idle status. When a desired LED Flashing Mode is selected under [ Standard ] status, the selectionwill take effect while the system is still on. When a desired LED Flashing Mode is selected under [ Idle ] status, the selection willtake effect while the system is in Sleep mode.Standard StatusIdle StatusSelecting the LED Flashing Mode under Standard Status Click on [ Standard ],Select a desired LED flashing mode from the option: Dual Color, Wave, Breathing,Gaming, and Normal.19
Software Application GuideNormal Mode:1. When this mode is selected, the keyboard LEDs will always stay lit with theselected color.2. Select an LED section (A, B, or C) by clicking on the corresponding area on thediagram.3. Select a desired LED color for each LED section by clicking on the color wheel.4. The selected color for each LED section will be shown in the LED ColorIndicators below the keyboard diagram.5. To turn off the LEDs of a particular LED section, simply click on the LED switchabove each LED section.6. To group all three LED sections into one main section, click [ Lock Keyboard ]on the left hand side. Then only one LED color can be selected for the keyboardLEDs.20
Preface1-21Gaming Mode:1. The keyboard LEDs of Section-A will always be lit to show the selected color.2. The keyboard LEDs of Section-B and Section-C will always be disabledwhen Gaming mode is selected.3. Select a desired LED color by clicking on the color wheel.4. The selected color will be shown in the LED Color Indicator for Section-A21
Software Application GuideBreathing Mode:1. The keyboard LEDs of each section will be individually lit with the selected LEDcolor and then darkened with a steady rhythm.2. Select a desired LED color for each LED section by clicking on the color wheel.3. The selected color for each LED section will be shown in the LED ColorIndicators located below the keyboard diagram.4. To group the three LED sections into one main section, click [ Lock Keyboard ]on the left hand side.5. Now only a single LED color can be selected for the keyboard LEDs.22
Preface1-23Wave Mode:1. The keyboard LEDs of Section A, B, and C will be lit with the selected LEDcolor in order from LED Section-C to Section-B to Section-A, and then theLEDs will darken with a steady rhythm.2. Select a desired LED color for each LED section by clicking on the colorwheel.3. The selected color for each LED section will be shown in the LED ColorIndicators located below the keyboard diagram.4. To group the three LED sections into one main section, click [ LockKeyboard ]5. Only a single LED color can be selected for the keyboard LEDs.23
Software Application GuideDual Color Mode:1. When Dual Color mode is selected, the keyboard LEDs will be grouped intoone main section, and the keyboard LEDs will be lit with the two selectedcolors.2. Select two LED colors at a time by clicking on the color wheel.3. The two selected colors will be shown on the LED Color Indicator.24
Preface1-25Selecting the LED Flashing Mode under Idle StatusSelect a desired LED Flashing Mode in Idle status.The selection will take effect while thesystem is in Sleep mode. Click on [ Idle ], Select a desired LED flashing mode from Wave, Breathing, and Off.Off Mode: Turn off the Keyboard LED function.Breathing Mode:1. The keyboard LEDs of each section will be individually lit with the selectedLED color in order and then darkened with a steady rhythm.2. Select a desired LED color for each LED section by clicking on the colorwheel, and the selected color for each LED section will be shown in the LEDColor Indicators located below the keyboard diagram.3. To group the three LED sections into one main section, click [ LockKeyboard ] so that only one LED color can be selected for the keyboardLEDs.25
Software Application GuideWave Mode:1. The keyboard LEDs of each section will be lit with the selected LED color inorder from LED Section-C to Section-B, and to Section-A, and then dimmed inan on/off pattern.2. Select a desired LED color for each LED section by clicking on the color wheel.3. To group the three LED sections into one main section, click [ LockKeyboard ], so that only one LED color can be selected for the keyboardLEDs.Adjusting the RGB Color level of LEDsThe RGB Color level of the keyboard LEDs is adjustable. Make sure the KLM console is closed. Use the following buttons to adjust the shades of color of the LEDs.Increase LEDs' RGB saturation level. Decrease LEDs' RGB saturation level. 26
Preface1-27Grouping the LED sectionsThe divided LED sections can be grouped into one main section by clicking on the [ LockKeyboard ] icon.be illuminated.Once the three LED sections are grouped, only one color can be selected toNote: Grouping function will not take effect in Gaming mode.Closing the KLM interfaceTo close the KLM interface, simply click on the [ Close ] icon.LockKeyboardClose27
Software Application GuideNote28
Preface1-29 Battery CalibrationActivating the Battery CalibrationWhen the Battery Calibration application has been installed successfully,the Battery Calibration launch icon will appear in the MSI folder of theStart menu.Click on this icon to launch the Battery Calibrationapplication.Starting the Battery Calibration Process1.Left click on the Battery Calibration launch icon in the MSI folder of the Start menu, andthe Battery Calibration main display will appear.2.If you are using the Battery Calibration process for the very first time, there will be no dateinformation for the last calibration shown on the Stats field.3.Before starting the Battery Calibration process, make sure that the following conditionsare met:a. The AC/DC adapter is connected.b. The battery is installed properly.c. No any other application is activated.4.Left click on the “Start” icon to start the Battery Calibration process.29
Software Application Guide5.The calibration process status will be shown on the display telling users that the system isnow charging, recharging, or discharging.6.Calibration completed.Note: MSI recommends doing Battery Calibration every 3 months tohave the best battery life.30
Preface1-31Warning Notification1. If the AC/DC adapter is disconnected during the calibration process, awarning notification will appear.2. Please reconnect the AC/DC adapter to continue the calibration processwithin 15 seconds; otherwise the calibration process will stop automatically.1. If the battery of the notebook is not installed properly or removed during thecalibration process, the warning notification will appear.2. Please double check that the battery is installed properly, and then press theTry Again button to continue the calibration process.31
Software Application GuideNote32
Preface1-33 Sizing Options (Only available in selected models)Activating the Sizing OptionsWhen the Sizing Options application has been installed successfully,the Sizing Options launch icon will appear in the MSI folder of the Startmenu and the system tray in the lower right-hand corner of screen.1.Left click on Sizing Options shortcut icon on the desktop or the icon in the lowerright-hand corner of the screen to launch the Sizing Options application.2.Left click on the Sizing Options launch icon of the Start menu to launch the SizingOptions application.Main WindowSizing Options has 5 adjustable DPI buttons in the main window: 100%, 125%, 150%, 175% and200% DPI. 150% DPI is the default and the optimum setting for resolution 2880 x 1620 (3Kpanel). There will no preview image if the resolution is not 2880 x 1620 (3K panel).33
Software Application Guide5 Preview WindowsWhen select one DPI setting will bring the following respective preview image:34
Preface1-35When change the DPI setting will bring one dialogue and ask you to sign out of the computer toapply these changes, or you can choose to sign out later. Only select “Sign out now” and restartyour computer, the updated DPI setting will take effect.35
Software Application GuideBest DPI for the DisplayWe recommend you to apply the following DPI settings to get the best DPI for the display.ResolutionBest DPIResolution 1920X1080100%1920X1080 Resolution 2880 x 1620125%2880 x 1620 (3K panel)150%100%125%36
Preface1-37150%37
Software Application GuideNote38
Preface1-39 Recovery Image Backup ToolRecovery Image Backup Tool, the utility designed to backup therecovery image to blank DVD disks, a USB flash disk or ISO files. Theycan be used to recover the system to manufacturer’s default settingswhen it is needed.This utility applies to the Operating System of Windows 8 or later only.Usage of this application on any product with no authorization may beprohibited.Note: For more detailed information about using Recovery Image Backup Tool, please refer tothe User’s Manual of System Recovery.Activating the Utility1.Find the shortcut of BurnRecovery on the Start Screen or Windows desktop.2.Double click on the shortcut to activate the Recovery Image Backup Tool.3.Main Selection page of the Recovery Image Backup Tool.39
Software Application Guide40
Preface1-41Create and Burn a Recovery Disk1.To create and burn a Recovery Disk, select [Recovery Disk], and then follow theon-screen instructions to continue.2.Prepare the number of the writable disk as requested.3.Place the disk into the optical drive device, and then select [Burn].4.Note: Closing the other applications while burning the recovery disk is suggested.5.Click [Close] when a disk is successfully created.6.Click [Next] to continue the procedure of creating and burning recovery disks.7.Exchange and place the rest disks into the optical drive device as instructed.8.All recovery disks created and burned successfully.41
Software Application Guide42
Preface1-4343
Software Application GuideRecovering the SystemWhen the hard drive and system encountered non-recoverable problems, it is alwaysrecom
Recovery Image Backup Tool. Recovery Image Backup Tool, the utility designed to backup the recovery image to blank DVD disks, a USB flash diskor ISO files. They can be used to recover thesystem to manufacturer’s default settings when it is needed. This utility applies to the O