Transcription
Oracle Communications Core SessionManager SCZ 7.1.5m1p1 and OracleCommunications Session Border ControllerSCZ 7.2.0 with Broadworks Platform R19SP1Technical Application Note
DisclaimerThe following is intended to outline our general product direction. It is intended for information purposes only, and may not beincorporated into any contract. It is not a commitment to deliver any material, code, or functionality, and should not be reliedupon in making purchasing decisions. The development, release, and timing of any features or functionality described forOracle’s products remains at the sole discretion of Oracle.2
Table of ContentsINTENDED AUDIENCE.5DOCUMENT OVERVIEW .5INTRODUCTION .6AUDIENCE . 6REQUIREMENTS . 6ARCHITECTURE. 6CONFIGURING THE ORACLE COMMUNICATIONS SBC AND CSM .8IN SCOPE . 8OUT OF SCOPE . 8WHAT WILL YOU NEED . 8CONFIGURING THE SBC . 9Establish the serial connection and logging in the SBC. 9Initial Configuration – Assigning the management Interface an IP address . 10Configure system element values. 11Configure Physical Interface values . 13Configure Network Interface values . 14Configure Global SIP configuration . 17Configure Global Media configuration . 19Configure Realms . 20Configure SIP signaling configuration . 25Configure next-hop signaling configuration . 32Configure SIP routing . 34Configure media handling . 35Configure sip-manipulations and translation rules . 36Verify configuration integrity . 40Save and activate your configuration . 40CONFIGURING THE CSM . 42Establish the serial connection and logging in the CSM . 42Initial Configuration – Assigning the management Interface an IP address . 43Configure system element values. 43Configure Physical Interface values . 45Configure Network Interface values . 46Configure Global SIP configuration . 47
Configure Realms . 49Configure SIP signaling configuration . 54Configure next-hop signaling configuration . 60Configure SIP routing . 69Configure SIP Authentication . 70Configure SIP registrar . 71Configure Home Subscriber Server . 72Configure ifc-profile . 73Verify configuration integrity . 73Save and activate your configuration . 73PROVISIONING THE HOME SUBSCRIBER SERVER FHOSS . 75PROVISIONING THE BROADWORKS APPLICATION SERVER . 83TEST PLAN EXECUTED . 87TROUBLESHOOTING TOOLS . 95WIRESHARK . 95ON THE ORACLE CSM AND SBC. 96Resetting the statistical counters, enabling logging and restarting the log files . 96Examining the log files. . 96APPENDIX A . 98ACCESSING THE ACLI . 98ACLI BASICS . 98CONFIGURATION ELEMENTS . 102CREATING AN ELEMENT. 102EDITING AN ELEMENT . 102DELETING AN ELEMENT. 103CONFIGURATION VERSIONS. 103SAVING THE CONFIGURATION . 104ACTIVATING THE CONFIGURATION . 105
Intended AudienceThis document is intended for use by Oracle Systems Engineers, third party Systems Integrators, end users of the OracleCommunications Core Sessions Manager (CSM) and Session Border Controller (SBC). It assumes that the reader is familiar withbasic operations of the Oracle Communications Core Sessions Manager and Session Border Controller.Document OverviewThis document is intended for use as a guide for a successful integration of Broadworks Platform, Oracle Communications CoreSessions Manager and Session Border Controller. It outlines the architecture design, CSM and SBC configuration includingtroubleshooting tools, as well as test cases executed as part of the integration process.
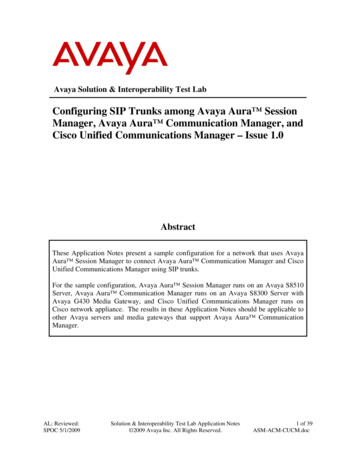
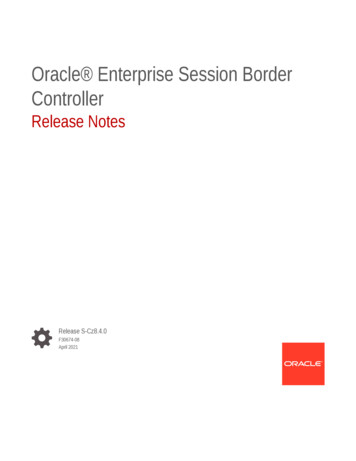
IntroductionAudienceThis is a technical document intended for telecommunications engineers with the purpose of configuring Oracle CommunicationsCore Session Manager and Oracle Communications Session Border Controller as an SBC IMS function. There will be steps thatrequire navigating throught the Acme Packet Command Line Interface (ACLI). Understanding the basic concepts of TCP/UDP,IP/Routing, and SIP/RTP are also necessary to complete the configuration and for troubleshooting, if necessary.Requirements Oracle Core Sessions Manager Virtual Machine series running SCZ 7.1.5m1p1. Oracle Session Border Controller 3820 or 4500 series running SCZ 7.2.0 GA. Broadworks Platform R19SP1. Home Subscriber Server. Various SIP endpoints. Network DNS services. 100MB Ethernet Switch.ArchitectureThe following reference architecture shows a logical view of the connectivity.
BSFT NS IP (ISC):10.0.200.11BSFT AS IP (ISC):10.0.200.10HSS IP Mgmt:172.18.255.18HSS IP Cx:10.0.200.18sip:6175551001@as.labtel: 16175551001sip:6175551002@as.labtel: 16175551002Access networksip:6175551003@as.labtel: 16175551003sip:6175551011@as.labtel: 16175551011GmCxISCMwASBC IP Mgmt:172.18.255.100ASBC IP Access:10.0.210.150ASBC IP Core (Mw):10.0.200.150CSM IP Mgmt:172.18.255.53CSM IP Access (Mw):10.0.200.110CSM IP Core (ISC):10.0.200.100MjPSTNtel: 16175551007P-CSCF/SBC, CSM and Broadworks represent the Service provider domain infrastructure which provides PSTN service as well.Access network represent the different access technologies (DSL, UMTS, WLAN, etc) of subscribers and enterprises.
Configuring the Oracle Communications SBC and CSMIn this section we describe the steps for configuring an Oracle Communications SBC, formally known as an Acme Packet Net-NetSession Director (“SBC”) in an IMS scenario, as well as Oracle Communications CSM formally known as an Acme Packet Net-NetCore Sessions Manager (“CSM”).In ScopeThe following step-by-step guide shows the configuration of Oracle Communications SBC as an IMS function to work with OracleCommunications CSM and Broadworks platform.Note that Oracle offers several models of SBC. This document covers the setup for the 3820 and 4500 platform series runningSCZ 7.2.0 GA or later. If instructions are needed for other Oracle SBC models, please contact your Oracle representative.Oracle CSM is only offered as a virtualized solution. This document cover the setup running SCZ 7.1.5m1p1 or later.First step of provisioning of HSS FHoSS (The FOKUS Home Subscriber Server) and Broadworks platform is also shown.Out of Scope Configuration of Network management.What will you need Serial Console cross-over cable with RJ-45 connector. Terminal emulation application such as PuTTY or HyperTerm. Passwords for the User and Superuser modes on the SBC and CSM. IP addresses to be assigned to management interfaces (Wancom0) of both SBC and CSM - the Wancom0 managementinterface must be connected and configured to a management network separate from the service interfaces. Otherwisethe SBC and CSM are subject to ARP overlap issues, loss of system access when the network is down, andcompromising DDoS protection. Oracle does not support SBC and/or CSM configurations with management andmedia/service interfaces on the same subnet. IP address of Core Sessions Manager internal and external facing ports (Service interfaces). IP address to be used for the SBC internal and external facing ports (Service Interfaces). IP address of HSS and Broadworks Platform servers. IP address of the next hop gateway in every network.
Configuring the SBCOnce the SBC is racked and the power cable connected, you are ready to set up physical network connectivity.Plug the slot 0 port 0 (s0p0) interface into your outside (subscribers facing) network and the slot 0 port 1 (s1p0) interface into yourinside IMS network. Once connected, you are ready to power on and perform the following steps.All commands are in bold, such as configure terminal; parameters in bold red such as ASBC-IOT are parameters which arespecific to an individual deployment. Note: The ACLI is case sensitive.Establish the serial connection and logging in the SBCConfirm the SBC is powered off and connect one end of a straight-through Ethernet cable to the front console port (which is activeby default) on the SBC and the other end to console adapter that ships with the SBC, connect the console adapter (a DB-9 adapter)to the DB-9 port on a workstation, running a terminal emulator application such as PuTTY. Start the terminal emulation applicationusing the following settings: Baud Rate 115200 Data Bits 8 Parity None Stop Bits 1 Flow Control NonePower on the SBC and confirm that you see the following output from the bootup sequence.
Enter the following commands to login to the SBC and move to the configuration mode. Note that the default SBC password is“acme” and the default super user password is “packet”.Password: acmeASBC-IOT enablePassword: packetASBC-IOT# configure terminalASBC-IOT(configure)#You are now in the global configuration mode.Initial Configuration – Assigning the management Interface an IP addressTo assign an IP address, one has to configure the bootparams on the SBC by going toASBC-IOT#configure terminal --- bootparams Once you type “bootparam” you have to use “carriage return” key to navigate down A reboot is required if changes are made to the existing bootparams
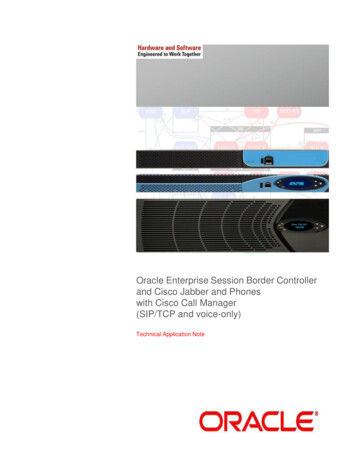
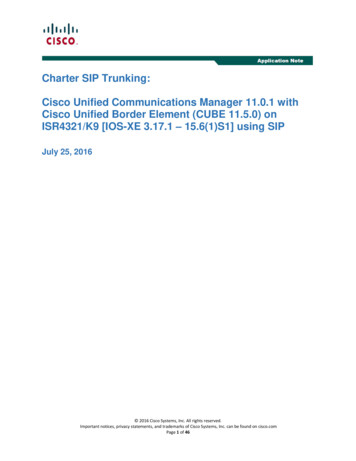
ASBC-IOT#(configure)bootparam'.' clear field; '-' go to previous field; q quitboot device: eth0processor number: 0host name: acmesystemfile name: /boot/nnSCZ720.64.bz --- location where thesoftware is loaded on the SBCinet on ethernet (e): 172.18.255.100:ffff0000 --- This is the ipaddress of the management interface of the A-SBC, type the IP address andmask in hexinet on backplane (b):host inet (h):gateway inet (g): 172.18.0.1 --- gateway address hereuser (u): vxftpftp password (pw) (blank use rsh): vxftpflags (f):target name (tn): ASBC-IOTstartup script (s):other (o):Configure system element valuesTo configure system element values, use the system-config command under the system branch. Then enter values appropriateto your environment, including your default gateway IP address for your management Ethernet interface.ASBC-IOT(configure)# systemASBC-IOT(system)# system-configASBC-IOT(system-config)# hostname ASBC-IOTASBC-IOT(system-config)# description "ASBC"ASBC-IOT(system-config)# location "Bedford, MA"ASBC-IOT(system-config)# default-gateway 172.18.0.1ASBC-IOT(system-config)# doneOnce the system-config settings have completed and you enter done, the SBC will output a complete listing of all current settings.This will apply throughout the rest of the configuration and is a function of the done command. Confirm the output reflects thevalues you just entered as well as any configuration defaults.
C-IOTASBCBedford, all172.18.0.1enabled0
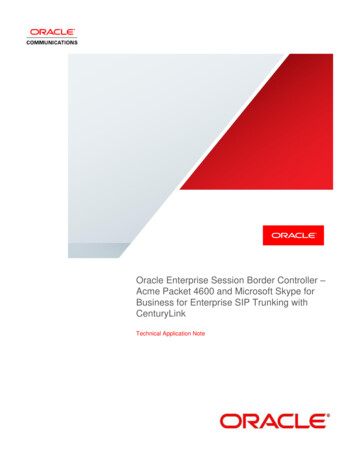
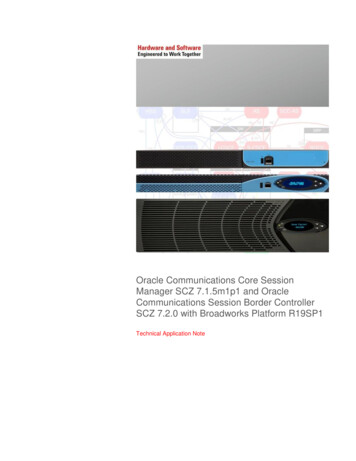
disabled2400-1::1500150000:00v1v2Configure Physical Interface valuesTo configure physical Interface values, use the phy-interface command under the system branch. To enter the system branchfrom system-config, you issue the exit command then the phy-interface command.You will firs
Note that Oracle offers several models of SBC. This document covers the setup for the 3820 and 4500 platform series running SCZ 7.2.0 GA or later. If instructions are needed for other Oracle SBC models, please contact your Oracle representati