Transcription
Auditing UNIX, Linux and Oracle– An Interactive SessionPresented by:Alvin HauDerek Koopowitz
DisclaimerThe slides and opinions expressed in thispresentation are our own and may not reflectthe official positions of the Federal ReserveBank of San Francisco or the Board ofGovernors of the Federal Reserve System.2
Agenda Goals and expectations of the sessionWhat tools will we need?Installing our toolsScanning our network to see what is out thereLunch Auditing UNIX / LinuxAfternoon Break Auditing Oracle Q&A3
Ok Let’s Dive Right In 4
Goals And Expectations Of The Session What are you hoping to get out of thissession? Any particular areas we should concentrateon? Let’s meet on the other side 5
What Tools Will We Need? Scanning the network– Nmap – open source network exploration and security auditing tool– Scanline – free command line port scanner from McAfee Vulnerability Scanning– Nessus – free for personal use and runs on Windows, UNIX and Linux NOTE: We will not use this during the session – it will be demonstrated only Telnet/SSH Client– PuTTY – free SSH, Telnet and Rlogin client for Windows Password Crackers– John the Ripper – free and runs on Windows, DOS, UNIX, Linux, BeOSand OpenVMS Knowledge of UNIX / Linux command line commands Scripts to automate the information gathering Running SQL commands on Oracle– SQL*Plus6
Installing Our ToolsLet’s install our tools But first, connect up to the wireless network.The one you need to connect up to is “FBI Surveillance”The password is “isaca2011” – without thequotes.7
Installing Our Tools Disable (if you can) any anti-virus software youhave running since several of the tools aredetected as potentially harmful – such asscanlink. Open up Windows Explorer Create a new folder on your C drive (or anotherdrive) called “tools” – off the root of the drive Copy the contents of the “tools” folder on theUSB drive to the folder created above8
Installing Our Tools - continued Use Windows Explorer to browse to the“tools\nmap” folder Double click the executable “vcredist x86.exe”– this will install some components that nmapneeds9
Installing Our Tools - continued Use Windows Explorer to browse to thetools\putty folder Right click on the putty.exe file and create ashortcut on the desktop Right click on the psftp.exe file and create ashortcut on the desktop10
Installing Our Tools - continued Use Windows Explorer to browse to thetools\sqlplus folder Right click on the sqlplus.exe file and create ashortcut on the desktop11
Set Up Our ToolsSetting up Putty – for Linux:Double click the Putty shortcut on the desktopType the following for the host name and create a name for the session and save it.1. Type in the IP address2. Type in a name for thesession3. Click the Save button12
Set Up Our Tools - continuedSetting up Putty – for UNIX:Double click the Putty shortcut on the desktopType the following for the host name and create a name for the session and save it.1. Type in the IP address2. Type in a name for thesession3. Click the Save button13
Set Up Our Tools - continuedAdditional settings that will help the display.Highlight the Solaris session you just saved and thenclick “Load”. Click on the “Window” category.Modify these settings to suityour display14
Set Up Our Tools - continuedModify these settings to suityour displayWhen you are finished click on the “Session”category and then click “Save”. Repeat these twosteps for the “Ubuntu” session you saved earlier.15
Scanning Our NetworkWhy scan?The process is essentially similar to a thief goingthrough a neighborhood and checking every doorand window on each house to find out which onesare open and which ones are locked.Scanning explores the network so that one canbuild an inventory of hosts, services, and operatingsystems that are in use.16
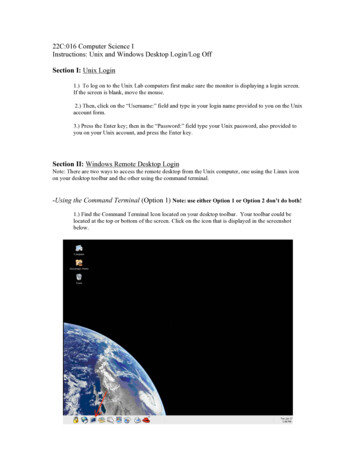
Scanning Our Network - continued Click the “START” button and then click“Run ” On the command line type CMD and then clickOK – a DOS window should have opened upon your desktop. Change to the drive letter where you createdthe “tools” folder above – e.g. c:17
Scanning Our Network - continuedLet’s run Scanline now Change to the new “tools” directory and thenchange to the scanline directory:cd\toolscd scanline Run the scanline program using the followingparameters:sl –f hostlist.txt –b –o isaca.txt -v18
Scanning Our Network - continuedLet’s review results of scan.From the command line type the followingcommand:notepad isaca.txt19
Scanning Our Network - continuedRun NMAP now From the command line Change to the nmap directory:cd .cd nmap Run the NMAP program using the following parameters:nmap –sV -sC –sS –T5 192.168.1.1/24 –oX myscan1.xml Or you can use the following parameters:nmap –sV -sC –sS –T5 –iL hostlist.txt –oX myscan1.xml20
Scanning Our Network - continuedFrom Windows Explorer, browse to the\tools\nmap folder and double click on the filemyscan1.xml. It will open up in InternetExplorer (or your default browser).21
Scanning Our Network - continuedNMAP – continuedThere are also canned scripts within NMAP thatcan be used. These are scripts that other usershave written to automate a wide variety oftasks.22
Auditing UNIX / Linux23
Setting Up To Audit UNIX / LinuxWhat do we need to get? We need a user account! A regular useraccount will do but we will need help from theSysadmin in getting data from certain filesthat are only accessible using a privilegedaccount.24
Auditing UNIX / LinuxWhere are the areas of risk in UNIX / Linux? User administrationNetwork connectivitySystem administrationFile systemBackupsPhysical securityThe above areas are the most important and our focus will be onensuring that controls are in place to mitigate risks in these areas. Any other risk areas that we are forgetting?25
Auditing UNIX / Linux – User AdministrationWhat should we focus on for user administration? Account authorizationPassword policyStrong passwordsUnique user and group IDsUsers sharing the same UID numberGroup membershipSystem accountsDefault umask settings for root, ftp user, and regular usersInactive accounts26
Auditing UNIX / Linux – Running Our ScriptsLet’s run Putty and log on to UNIX and Linux 1. Double click the Putty shortcut icon you have onyour desktop. Double click the Solaris line andthis will connect you to the server. Type youruser ID and password to log in.2. Double click the Putty shortcut icon you have onyour desktop. Double click the Ubuntu line thiswill connect you to the server. Type your user IDand password to log in.27
Auditing UNIX / Linux - CommandsLet’s familiarize ourselves with UNIX / Linuxcommands - common commands that are usedto navigate/browse UNIX / Linux are:–––––passwd – change a passwordexit – logs out of sessioncat – displays the contents of a filehead – displays the first few lines of a filetail – displays the last few lines of a file28
Auditing UNIX / Linux - CommandsAdditional commands are:– more – displays the contents of a file but pausesscrolling if more than one screen– ls –la – displays a directory listing showingfilenames and attributes– cd – changes directory– rm – deletes a file or directory– cp – copy a file29
Auditing UNIX / Linux - Commands cont’dAdditional commands are:– mv – move a file (or rename it)– pwd – displays current directory location– ps –ef – displays information about processes/jobsrunning– grep –in – search utility– find – locate files– vi – very basic editor30
Auditing UNIX / Linux - Commands cont’dAdditional commands are:––––––nano – more advanced editor in Linuxmkdir – create a directorychmod – change permissions on a filechown – change ownership on a fileclear – clears the screenman – displays help information for a command31
Auditing UNIX / Linux - PermissionsFile permissions – a VERY quick overviewFile permissions give information about the fileand what kind of file access (read, write orexecute) is granted to users on the system.32
Auditing UNIX / Linux - Permissions cont’dThe first character of the file’s mode fieldindicates the type of file. Some modes are: - indicates a plain file d indicates a directory l indicates a symbolic link33
Auditing UNIX / Linux - Permissions cont’dThe next nine characters taken in groups of 3indicate who can do what with the file. There arethree kinds of permissions: r permission to read w permission to write x permission to execute34
Auditing UNIX / Linux - Permissions cont’dFacts about permissions: One can have execute access without read. If one hasread access but not execute access then one couldcopy the file and assign one’s own execute permission– ownership will change if one does copy the file.Some versions of UNIX / Linux do require that anexecutable script must have read access as well.35
Auditing UNIX / Linux - Permissions cont’dThere are three classes of permissions as well: owner file’s owner group users who are in the file’s group other (or world) everybody else on the system (except thesuperuser)Most people think that file permissions are pretty basic, however,many systems have had security breaches because file permissionswere not set correctly.36
Auditing UNIX / Linux - OwnershipFile Ownership and Access – a really QUICK overviewOnly a superuser can change the ownership of a file. In earlier versions ofUNIX / Linux, all users could change the ownership of a file that they owned –this allowed one to “give away” a file to someone else. Unfortunately this isa big security risk.There are two attributes in files – the owner and the group that has access tothe file. If one is the file owner then one can change the group of a fileprovided you are in the group to which you are trying to change the file. Allsuperusers can change the group of a file.37
Auditing UNIX / Linux – Running Our ScriptsNow we need to FTP the scripts to each server. Double click the PSFTP icon you created onyour desktop At the psftp prompt type the followingcommand to connect to UNIX:open 192.168.1.1138
Auditing UNIX / Linux – Running Our Scripts You’ll be prompted for your user ID and password. At the psftp prompt type the following commands.Press enter after each line:put c:\tools\unix-linux-scripts\audit.shput c:\tools\unix-linux-scripts\audit1.shput c:\tools\unix-linux-scripts\audit2.pl At the psftp prompt type quit to end your FTPsession and close the window.39
Auditing UNIX / Linux – Running Our ScriptsNow we can execute the scripts – let’s jump over to thePutty window that you started for Solaris (192.168.1.11).Type the command ls -la and you should see the 3 files inyour directory. You’ll also note that the permissions onthe files do not allow them to be executed. We need tomodify these permissions to 744.40
Auditing UNIX / Linux – Running Our ScriptsBefore we modify the permissions, we’ll need to su to root so that we can runthe scripts since some of the files referenced in the scripts require rootaccess. At the prompt type the following:su root Enter the password of “solaris1” (without the quotes). Now let’s modify the permissions. Enter the following command:chmod 744 audit*This will modify all the audit scripts it finds with the 744 permissions.41
Auditing UNIX / Linux – Running Our ScriptsNow we can run the scripts At the prompt type the following command and press enter:./audit.sh When the script completes you should see 2 log files in the directory.Execute the command below to see the files:ls –la We need to modify the permissions of the log files so that we can FTPthem. Run the following command and press enter:chmod 644 solaris*.log42
Auditing UNIX / Linux – Running Our ScriptsLet’s FTP the log files back to our laptop Double click the PSFTP icon on the desktop to open the connection.Type:open 192.168.1.11 Press enter and then enter your login information. Type the followingcommand and press enter:get solaris.audit1.logget solaris.audit2.nnnn.logThe nnnn above is unique and you can get this number if you list (ls) the filesright after you connect up using FTP.43
Auditing UNIX / Linux – Running Our ScriptsNow we need to FTP the scripts to each server. Double click the PSFTP icon you created onyour desktop At the psftp prompt type the followingcommand to connect to Linux:open 192.168.1.1044
Auditing UNIX / Linux – Running Our ScriptsYou’ll be prompted for your user ID and password. At the psftp prompt type the following commands.Press enter after each line:put c:\tools\unix-linux-scripts\audit.shput c:\tools\unix-linux-scripts\audit1.shput c:\tools\unix-linux-scripts\audit2.pl At the psftp prompt type quit to end your FTPsession and close the window.45
Auditing UNIX / Linux – Running Our ScriptsNow we can execute the scripts – let’s jump over to thePutty window that you started for Ubuntu (192.168.1.10).Type the command ls -la and you should see the 3 files inyour directory. You’ll also note that the permissions onthe files do not allow them to be executed. We need tomodify these permissions to 744.46
Auditing UNIX / Linux – Running Our ScriptsWe’ll need to use the sudo command to modify thepermissions and run the scripts since some of thefiles referenced in the scripts require root access. Let’s modify the permissions. Enter thefollowing command:sudo chmod 744 audit*This will modify all the audit scripts it finds with the744 permissions.47
Auditing UNIX / Linux – Running Our ScriptsNow we can run the scripts At the prompt type the following command and press enter:sudo ./audit.sh When the script completes you should see 2 log files in the directory.Execute the command below to see the files:ls –la We need to modify the permissions of the log files so that we can FTPthem. Run the following command and press enter:sudo chmod 644 testubuntu*.log48
Auditing UNIX / Linux – Running Our ScriptsLet’s FTP the log files back to our laptop Double click the PSFTP icon on the desktop to open the connection.Type:open 192.168.1.10 Press enter and then enter your login information. Type the followingcommand and press enter:get testubuntu.audit1.logget testubuntu.audit2.nnnn.logThe nnnn above is unique and you can get this number if you list (ls) the filesright after you connect up using FTP.49
Auditing UNIX / Linux – Running Our ScriptsOpen up Windows Explorer and browse to the\tools\putty folder and you should see the log files.50
Auditing UNIX / Linux – Account AuthorizationThe Sysadmins should document and enforceaccount management procedures. These shouldinclude the creation of new user accounts,moving a user to a new group or role, deletionof users, and handling of dormant or inactiveaccounts.51
Auditing UNIX / Linux – PasswordsPassword policy and strong passwords in place – how dowe find out what the default policy is for all users?UNIXmore /etc/default/passwdLinuxmore /etc/login.defs52
Auditing UNIX / Linux – PasswordsWhat are in the files?UNIX Sets defaults in terms of the number ofweeks – even though actual values onuser accounts are kept in days. If thepolicy is maximum days of 90 for apassword then MAXWEEKS should be13 (91 days). Suggested values areMAXWEEKS 13, MINWEEKS 1,WARNWEEKS 1, PASSLENGTH 8.If your company policy is to keep ahistory of passwords used then this lineshould be uncommented and the valuereplaced. Suggested value isHISTORY 12.Password complexity should be enabledby uncommenting these options.Suggested values are MINDDIFF 3,MINALPHA 3, MINUPPER 1,MINLOWER 1, MAXREPEATS 0,MINSPECIAL 1.53
Auditing UNIX / Linux – PasswordsSet the default values to matchyour password policy. Suggestedvalues are PASS MAX DAYS 90,PASS MIN DAYS 7,PASS WARN AGE 7.Linux If you are using the PAMauthentication module then checkthe /etc/pam.d/commonpassword file. Add the minlen 8to the end of the line below toforce a minimum of an 8 characterlength password.54
Auditing UNIX / Linux – Strong PasswordsHow do we verify strong passwords are in place?John the Ripper is our tool!55
Auditing UNIX / Linux – Strong PasswordsLet’s log on to UNIX first so that we can get thepassword file that contains the password hashes– this is the /etc/shadow file. We’ll also copythe /etc/passwd file which contains user namesand other useful information.56
Auditing UNIX / Linux – Strong PasswordsNormal users do not (or should not) have ANYaccess to the /etc/shadow file, so in order for usto copy it, we’ll need to have the Sysadmin copyit and send it to us, or if you have SU access(switch user), we can switch users to a privilegedaccount that will allow us to copy the file fromits current location to our home directory.57
Auditing UNIX / Linux – Strong PasswordsLet’s log in use Putty for this select the Solarissession you saved and click open. Type in youruserid and password when prompted. At the UNIX prompt, type the followingcommand:cp /etc/shadow solaris shadow.txtWhat did you see?58
Auditing UNIX / Linux – Strong PasswordsSince we don’t have permissions to do this, havethe Sysadmin do it for you, or if you have su accessfor a privileged account then use it.Since we all have access to the root account for this class –let’s go that route: At the UNIX prompt, type the followingcommand:su root59
Auditing UNIX / Linux – Strong Passwords Now type the password for root which is “solaris1” (without thequotes). Type the following commands (one at a time):cp /etc/passwd solaris passwd.txtcp /etc/shadow solaris shadow.txtWhat did you see? Run the following command:ls -la60
Auditing UNIX / Linux – Strong PasswordsBecause we used the root account to do thecopy, our permissions on the etc/shadow file stilldefault to the system permissions. In order forus to FTP this file back to our Windows machinewe will need to change its permissions.61
Auditing UNIX / Linux – Strong Passwords Type the following command to modify thepermissions to read only for everyone:chmod 444 solaris shadow.txtWhat permissions do you see now? Run the following command:ls -la62
Auditing UNIX / Linux – Strong PasswordsLet’s log into Linux now use Putty for this select the Linux sessionyou saved and click open. Type in your userid and password whenprompted. At the Linux prompt, type the following command:cp /etc/shadow linux shadow.txtWhat did you see? Type the following command:ls -la63
Auditing UNIX / Linux – Strong PasswordsSince we don’t have permissions to do this, have the Sysadmin do it for you, or if youhave sudo access for a privileged account then use it.Since we all have SUDO access for this class – let’s go that route: At the Linux prompt, type the following commands (one at a time):cp /etc/passwd linux passwd.txtsudo cp /etc/shadow linux shadow.txt You’ll be prompted to re-enter your “sudo” password at this point – this is yourlogin password for the account you used.What did you see? Type the following command:ls -la64
Auditing UNIX / Linux – Strong PasswordsBecause we used the root account to do thecopy of the etc/shadow file, our permissions onthe file still default to the system permissions.In order for us to FTP this file back to ourWindows machine we will need to change itspermissions.65
Auditing UNIX / Linux – Strong Passwords Type the following command to modify thepermissions to read only for everyone:sudo chmod 644 linux shadow.txtWhat permissions do you see now? Type the following command:ls -la66
Auditing UNIX / Linux – Strong PasswordsRunning John the Ripper:We need to run it from the actual server so log on to theLinux server using Putty. Combine the passwd and shadow files into one file atthis time. Run the “unshadow” command using thefollowing parameters: For Linux type the following command:sudo unshadow linux passwd.txt linux shadow.txt linux.txt67
Auditing UNIX / Linux – Strong PasswordsRun John the Ripper using the followingco
– Nessus–free for personal use and runs on Windows, UNIX and Linux . Setting Up To Audit UNIX / Linux What do we need to get? We need a user account! A regular user . There are two attributes in files –
