Transcription
Volume1AGKSOFT DocumentationUser Guide
Chapter 1 – IntroductionThe AGKSoft Software lets you run your Gas Station/C-Store/Liquor Store entirely without ever leaving the software. Thesoftware provides all features required to do all your accounting work as well as track your inventory. The software runsas Back Office Software (BOS), Home Office Software (HOS) or as Point of Sale (POS).If you are running the software as BOS, we currently support the following systems:Gilbarco PassportDresser Wayne Nucleus and NAMOSRuby VeriFone, Ruby Sapphire/Topaz, Ruby 2/Ci (Commander)SmartDESQ ComDataThe software includes the following features:Gas Sale and Gas Load (Pool Margin and Tank Inventory Tracking)Sales Room and Inventory ControlClient Accounts (Account Receivable, Local Charges, Invoices and Label Printing)Expenses, Assets tracking and Car WashVendors Invoices with Electronic Data Invoicing (EDI)Portable Scanner to do inventory/load invoices/price changeLottery Scratch Tickets, Lottery Machine, Lottery Paid and Lottery SettlementsElectronic Credit Cards, Manual Credit Cards and eChecks ProcessingWork Order and Garage InventoryPayroll (With the ability to handle taxes for all 50 states)Multiple Checking Accounts, Electronic and Cash AccountsShort/Over and Daily BooksBalance Sheet, General Ledger and Net IncomeExport to QuickBooks/Excel/HTML, Price book Import/Export.Home Office Central Price book and data consolidate from multiple locations and much more.Hardware Requirements Any PC or Laptop running Windows XP, Vista, Windows 7, Windows 8 or Windows 10. 100 GB of free disk space 4 GB of RAM To connect to a VeriFone Ruby, you will need a serial port (9-pin male) To connect to a VeriFone Ruby Sapphire/Commander, Gilbarco Passport, Dresser Wayne Nucleus/NAMOS or COMDATA, youwill need 2 network cards unless you have wireless internet.1
Running AGKSoftLook for your AGKSoft Iconon your desktop and open it.UPC-CodesIn the United States, there are 2 types of UPC-Codes, UPC-E (short) and UPC-A (long).In Europe and in the Middle East, EAN8 (short) and EAN13 (long) are the most common.UPC-A is the most common UPC-Code in the U.S. and it looks something like the following:UPC-A is 11-digits 1 check-digit and it is stored without a check-digit in AGKSoft.UPC-E is 7-digits 1 check-digit, it always starts with 0 or 1, and it is common for smaller items and it looks somethinglike the following:UPC-E is now expanded to UPC-A on most systems.EAN13 is the most common UPC-Code outside the U.S. and it looks something like the following:EAN13 is entered as 12-digits complete without the check-digit (e.g. 873074512345). The check-digit in this case is “1”.EAN8 is common for smaller items outside the U.S. and it looks something like the following:EAN8 is entered as 8-digits complete including the check-digit. Example: 87307450. Note that the “0” is the checkdigit and it must be included.2
Structure of a UPC-A numberA UPC-A number consists of four areas: (1) A 1-digit Number System (NS); (2) A 5-digit manufacturer code; (3) A 5digits product code; (4) A 1-digit check digit.Normally the Number System (NS) digit is printed to the left of the barcode, and the check digit to the right. Themanufacturer and product codes are printed just below the barcode, separated by the guard bar.(NS)0123456789(UPC-Code Description)Regular UPC codeRegular UPC codeWeight ItemsDrug/Health ItemsIn-store use (Make your own UPC-Codes)CouponsRegular UPC codeRegular UPC codeRegular UPC code (Reserved)Regular UPC code (Reserved)Number System (NS): The number system is the first digit in the UPC number to identify the type of the product. Forexample, if the barcode starts with digit 5, this barcode is a coupon code.Manufacturer Code: The manufacturer code is assigned by UCC council to each manufacturer or company whodistributed goods that uses UPC-A barcode.Product Code: The product code is assigned by the manufacturer. The product code is a 5-digit number so it canaccommodate 99,999 possible products for each manufacturer.Check Digit: The check digit is used to verify that the barcode is generated or scanned correctly. The check digit iscalculated based on the rest of the barcode digits.UPC-A (11-digits):0 12546 30026 10 is the Number System (NS) (This is typically 0, 1, 3, 6 or 7 for most C-Store items)12546 is the manufacturer’s code30026 is the manufacturer’s item number1 is the check-digit !!!DO NOT ENTER THIS DIGIT WHEN MANUALLY ENTERING A UPC-CODE!!!If you want to enter this UPC-Code manually, you would key in 01254630026 (11 digits) and you would leave out thecheck-digit.UPC-E (7-dgits): 0 499770 40 is the prefix (This is typically 0)4 is the check-digit !!!DO NOT ENTER THIS DIGIT WHEN MANUALLY ENTERING A UPC-CODE!!!We can expand all UPC-E codes to UPC-A codes. The expanded version of this code is: 04900000977If you want to enter this UPC-Code manually, you would key in 0499770 (7 digits)Make sure you program your scanner to include the prefix and not to transmit the check-digit.3
Chapter 2 – Quick TourUsing the AGKSoft login window:After you run the AGKSoft Software, you will see the Login window shown above. You need to enter a password (bydefault the supervisor's password is lowercase "s", the manager's password is "m", the worker's password is "w" and thegarage's password is "g").Next to "Year", you will see the current year you are working in. If you want to access another year, click the or arrows or simply enter the year you want to access.If you click on the AGKSoft Logo (The Gas Attendant in brown holding the Gas Nozzle), this will prompt you "Do youwant to allow AGKSoft on your PC?” By allowing AGKSoft onto your pc, you will be allowing a Support Engineer toconnect to your pc remotely and guide you through training, questions or to simply set up the software in the beginning.Under “Upload Data To”, if you click on” AGKSoft Server.” you will see the “Send files to AGKSoft” window. Youcan click “Send Files” to send all your files to AGKSoft for Remote Backup or for support.You can also click “My Server” if you want remote backup on your own server.Under “Backup Options”, you can click “Select a new Backup Folder” to pick your backup folder. We highlyrecommend that you backup to a removable drive such as a USB Stick. You can also select a Network drive.“Backup Files NOW” will perform your backup immediately. Note that the Backup happens automatically once per dayto the selected backup folder. If the backup folder is not available, we will back up to your C:\AGKSoft\Backup folderautomatically. Note that we do keep up-to 7 unique backups, once per day. If you look at your backup folder, you will seefolders 1 to 7 inside the backup folder.If you click on the “[ ]” button, you will be exploring the backup folder in Windows Explorer.“Restore Your Data from a previous backup.” will give you a choice of up-to 7 backups to choose from. You shouldalways try the latest one 1st if you need to restore.Enter your password; hit the Enter key or click OK and you will now see the AGKSoft Desktop as shown below:4
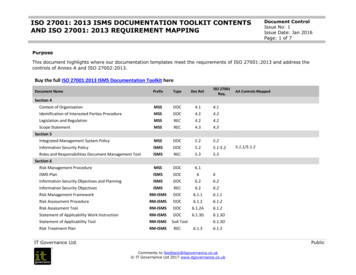
When using the software as a Home Office you have the option of choosing which location to work on separately or choosing towork on "All Locations" at once. As seen below, we show the Home Office Cash Register Interface.You can enter the Location Number or click on the Location Name to work on the selected location.5
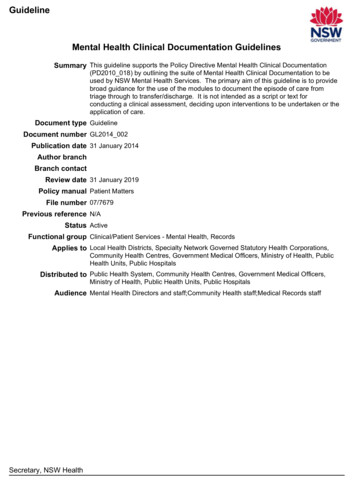
Creating UPC-Codes or PLUs with AGKSoftOpen Cash Register Interface, select “Create/Modify Products” and you will get the following window:If you have a scanner, you can simply scan an item and make the proper selections. Please contact AGKSoft if you need a scanner.If you do not have a scanner, make sure you enter the 1st digit shown on the UPC-Code, this is the prefix. The prefix is typically 0or 7 for most convenient store items. Do not enter the check-digit at the end of the UPC-Code. UPC-A codes are made up of 11digits a check-digit. The check-digit is not used.UPC-A ExampleUPC-A # ToEnterUPC-EExampleUPC-E # ToEnter0 12546 31241 7012546312410 499770 40499770If you have a deli in the store using AGKSoft as the POS, you have the ability to create and print your own in-house bar codes. Forexample, if you would like to use PLU #321, you would enter “200321”.If you don't have a scanner, you can lookup UPC-Codes by name by hitting the Enter key while in the UPC Number field in theCreate/Modify Product window. When you press Enter, you will see the list of UPC-Codes as shown below.In this list, you can enter part of the name to help you find the item and press ENTER when you find it. You can also sort byDescription or ID by clicking on the title “Description” or “ID”. You can also type a name or a portion into the search fieldand click find and the software will find all names matching your criteria.6
Barcode Printing with AGKSoftAGKSoft has the ability to print to barcode printers such as the Dymo Label Writers. You must install the printer andsoftware that came with your printer before trying to print any labels. Please follow the instructions that came with yourprinter. Once your printer is installed please follow the steps below to print shelf labels.How to create/print shelf labels: Open the Cash Register Interface window and click “Create/Modify Products”. Youwill get the window shown below.From the Create / Modify Products window do the following: In the UPC Number, enter or scan the UPC of the item you would like to create the label for, validate that allinformation for this UPC is correct. An example would be: 4000010001If you are creating your own In-house UPC-Code, it must start with 4 and have 10 digits after that for a total of 11 digits.Note: AGKSoft will create the check digit based upon the UPC that is entered.7
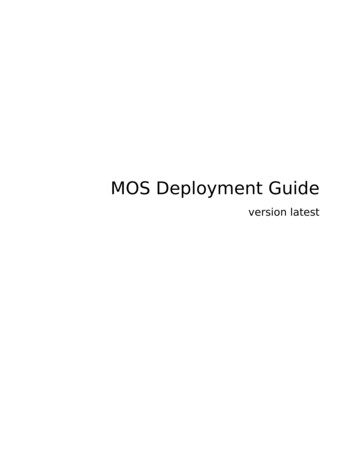
When using a Dymo Label Writer, click “Print UPC” and you will get the window shown below:From the “Dymo Print UPC – Code” window, do the following: From the combo box next to “Select Printer “choose your printer (example: Dymo Label Writer 400) Check the “Hide Dymo Label” check box to hide the Dymo Software that came with your printer. Choose the “# of Copies” you would like to print.If you have chosen to use a label other then one of the Predefined Labels choose “Other” and enter the Label Filename(example: MyOwnCustomLabel.label)Once all your selections have been made, click on “Print Label” and your label will print from your selected printer.How to create custom labels:From the Dymo Software do the following:Please Save all labels into “C:\AGKSoft” with the extension “.Label”.1. Choose the label size by clicking on File and New or CTRL N.2. Click on “Designer” on the left side.3. Add a barcode by clicking on the barcode graphic. Once added right click on the barcode and select “ObjectSettings”; you should now see the “Barcode Setting” dialog box.o Under where it says “Data” enter in a UPC (e.g. 01254630281).o For the “Symbology” select UPC A from the list. Press OK once finished.o Save the Label.o Reminder: Please save all labels into “C:\AGKSoft” with the extension “.Label”. Right click again on the barcode and select “Object Properties”; you should now see the Object Properties box.o Change the “Reference Name” from barcode to “UPCCode”. Press OK once finished.o Save the Label.4. Click on the “AB” to add a text object. Position it so it looks appropriate for the label size you have chosen.Enter in a description of an item (e.g. Dentyne Ice). Once satisfied right click on the description and select“Object Properties”; you should now see the “Object Properties” dialog box.o Change the “Reference Name” from Text to “Desc”.o Save the Label.5. Click on the “AB” again to add another text object for the price. Position it so it looks appropriate. Enter in aprice (e.g. 1.95). Once satisfied right click on the price and select “Objet Properties”; you should now see the“Object Properties” dialog box.o Change the “Reference Name” from Text to “Price”.o Save the Label.6. When you are ready to use this label in AGKSoft choose “Other” as your label type and enter the name yousaved it as (e.g. MyCustomLabel.Label) Note: Please save all labels in C:\AGKSoft.8
AGKSoft Loyalty:How to setup AGKSoft Loyalty?1. Open Cash Register Interface Setup, click next to Coupons to select the Coupons Department. If it does not exist, youcan go ahead and create a Negative Coupons Department.2.Open Cash Register Interface, click “Loyalty”.3.Click “New Match” and answer all the questions for this Loyalty Program.The linked image cannot be displayed. The file may have been moved, renamed, or deleted. Verify that the link points to the correct file and location.4.5.6.Click “List Wizard” and select all the products that belong to the selected Loyalty Program.Click “Print UPC List” or “Print UPC List on Avery Sheet”. This will print 80 Coupon UPC-Codes by default.Click “Send to Register”.What does a Cashier do?1. When a client buys the proper Quantity, the Cashier gives one of the printed Coupon UPC-Codes to the client andScans it after scanning the products. The client will get a discount automatically.2. The cashier should inform the client to keep the coupon on their key ring or wallet for the next time they come in.3. When another client buys the proper Quantity, the Cashier gives another Coupon UPC-Codes to this client as well.4. When the same client returns the next day, the Cashier scans the Coupon UPC-Codes the client already has and shouldnot give this client another Coupon UPC-Code.9
1. First Time User:If this is the first time running the software, you will see the "First Time User" window shown below. If you happen toclose it, click on the Help menu and then pick “First Timer User” to see it again.First Time User - 1. Cash Register Interface:Select the Cash Register you are connecting to and click the “Configure” button.First Time User - 2. UPC-Code Options:Expand UPC-E – Expand UPC-E to UPC-A should always be checked.Remove check-digit – If you are not able to program your keyboard scanner to automatically remove the check-digit,check this box and we will automatically remove it.Support EAN8 – If you get products from Europe, you may want to check this box.Handle Weight Items – Check this box if you have a deli and sell products that you weigh. Note that the weight UPCCodes will always start with the number 2.First Time User - 3. Download Shift/Day Options:Auto-Generate Daily Sheet – Auto-Generate a spreadsheet report of your Daily Batch; your Dept. Sales, Inventory, GasSale, Lottery and more.Auto-Print Shift Log – Auto-Print the Shift to the default printer.Update Department – If this is checked & the Dept # on the register is different than the Back Office, we will change it.Auto-Generate Journal File – Auto-Generate a spreadsheet showing all the Tender Types (Cash, Credit, House Charge,etc.). This will also show Voids, Safe Drops, Coupons, etc.Auto-Generate Lottery Sheet – Auto-Generate a Lottery Spreadsheet showing the Open, Sold and Closed books.10
First Time User – Misc Options: Click “Gas Blending” if you sell Gas and blend it.Click “Business Info.” to setup your Business name, address and e-mail.Click “Taxes” to setup your Sales Tax Rates.Click “Vendors” to configure the vendors that you do business with.Click “Employees” to create employees.“Bank Info” is only needed if you want to use the software to print checks.“Expenses” is used to configure all your expenses.“Incomes” is used to configure all your incomes.If you have a Garage, click “Work Types” to configure all your Garage Work Types. You can also set the “Hourly rate” forlabor under “Garage/Work Order Options”Click “Lottery” to configure the lottery scratch ticket UPC-Codes for the software to track.“Payees” is used to configure Companies used in Pay Center for Bill Payments like Utilities and Phone bills.“Assets” is used to configure all your Assets.Money Order - Profit/Transaction – If you use the software as BOS, then you can map the "Money Order" department, we areable to give you the profit on the department using the Profit/Transaction value by multiplying the number (e.g. 0.31) by the #of Money Orders sold.Example: If profit/ transaction is 0.31 & you sold 50 money orders; the profit amount would be 15.50. Charge - Finance Charge - Enter the percent that will be charged on any unpaid balance in the Client Accounts window.Most Recent – When you open most windows such as “Gas Sale”, this limits the # of weeks to show in the Most Recent section.Payroll – “Do not add Tips to Final Pay” would be checked if the Tip was already paid to the employee.Tax – When checked, the Tax for products will get updated based on the Dept.Time Card –When checked, you can scan a UPC-Code to clock-in/out in the Time Card window.11
First Time User – Act Options: Electronic – Open your Electronic Account.Cash – Open your Cash Account.Checking – Open one of your Checking Accounts.Mercury – This section allows you to process Credit/Debit/EBT Cards with Mercury/Vantiv/Worldpay.Elavon – This section allows you to process Credit/Debit/EBT Cards as well as eChecks with Elavon/US Bank.Credit Card Options:oPrompt for Address/ZipoMust Sign Credit/Debit ReceiptoMust Sign EBT ReceiptChecks Options:oIntuit – Use Intuit Quicken style checksoCynaptics LCM01 – Use Cynaptics style checksoBlank Checks – Use Blank style checks where we have to fill in the Routing and Account NumbersoMax # – This is where you can limit the biggest check number to allow.Ignore Manual Credit Cards Closing Date – When checked, we ignore the Closing Date and simply use the actual Date/Timewhen the Transaction took place. Note that any transaction after midnight and before 9am will have a different Closing Date.First Time User – Garage Options: Labor – You can specify your Hourly Rate that you charge for Work Orders.Most Recent – When you open the Garage Inventory window, this limits the # of weeks to show in the Most Recent section.Shop Materials – When you create a work order, we can automatically add a % age for Shop Materials.Include Unpaid Invoices – Check this box, if you want the software to not include Invoices that have no payment. This meansthe Balance is the same as the Total.Auto Populate Order – When you open the Work Order window, we will auto-populate the list of work orders automaticallywhen this is checked. If you have too many, this may be slow, so you would not check it.12
First Time User – Other Options: Product Names – Do not change products names or change them to Mixed Case or Upper Case.Lotteryo Auto-Print when Shift is closed – After we download a shift, we will auto-print the Lottery template.o Sort by Display # - When check, we can sort the Lottery list by Display # rather than the Lottery IDo Most Recent – Show how many weeks.Margin changes selling - When Changing Profit Margin, If this option is checked, we will change the Selling Price, otherwisewe change the cost.Auto Load - Auto Load/Populate the Expense Lists and Income Lists when one of these windows is opened.Round Time - Round the time to the nearest 15 minute interval.Use List - Use List when checked, otherwise create file a text file for Notepad.Show Notepad - After uploading Products to your register, show Notepad with a list of changed products.Disable Invoice Multiplier - When loading an Invoice using the Portable, disable the Case/Carton multiplier.Allow Carton in BuyDown – You typically setup the BuyDown using the Packs, Cartons will be automatically done based onthe Pack and the Multiplier. If you do not want to do it by Pack, you can check this box.Update HOS Prices – Only available for Home Office - When importing from the Back Office, update the Home Office Prices.Use Notepad – Rather than using Notepad to view Text Files, we can use Notepad when this is checked.Use AGK Browser – Rather than using Internet Explor
as Back Office Software ( BOS ), Home Office Software ( HOS ) or as Point of Sale ( POS ). If you are running the software as BOS , we currently support the following systems: Gilbarco Passport Dresser Wayne Nucleus and NAMOS Ruby VeriFone, Ruby Sapphire/Topaz, Ruby 2/Ci (Commander) SmartD