Transcription
Surgery Circulator’s GuidePatient Check-In . 2Checking-In Patients Scheduled in Surgical Case Manager . 3Intra-Op Documentation . 4Overview .4Intra-Op Segment Comments .5Charting in the Documentation Tab .6Changing a Procedure .9Changing the Primary Procedure .11Add a Procedure .12Cancel a Procedure.13Using Free-Text Items When Adding Supplies During Documentation .15Finalize Documentation on the Documentation Tab .16Adding a Segment to the Documentation Tab .18Discontinue or Activate a Segment .19Explant - FDA Only Segment .21Completing the Fields.21Creating and Printing the Explant Medical Tracking Form.23Explant Printing for OR Designee .26Terminating an Intra-op Document .28Terminating an Incomplete Document .28Terminating a Completed Document .29Cancelling a Case . 32Charting in the Pick List Tab . 34Set the Pick List Tab Default View .34Confirm Supplies Used.35Multi Select Supplies in the Pick List Tab .38Documenting Wasted Items in the Pick List Tab .39Using Free-Text Item Functionality in the Pick List Tab.40Intra-Op Document Lock Message . 40Printing a Picklist or Surgery Schedule . 41Printing a Picklist .41Printing a Surgery Schedule .42Copyright 2018 Children’s Hospitals and Clinics of Minnesota. All rights reserved. Some content is based on the intellectual property of CernerCorporation. All other trade names, trademarks and registered trademarks are the property of their respective owners. This content wasdeveloped for use in Children’s patient care environment and may not be suitable for use in other patient care environments. Each clinician shoulduse his/her own independent judgment to meet the needs of each individual patient. This content is not a substitute for professional medicaladvice, diagnosis, or treatment. Children’s does not endorse, certify, or assess third parties’ competency. You hold all responsibility for your useor nonuse of the content. Children’s shall not be liable for claims, losses, or damages arising from or related to any use or misuse of the content.Updated June 2018Questions or problems? Call Children’s IT Service Desk 24/7 952-992-5000 (4-5000 internal)
Surgery Circulator’s GuidePatient Check-InWhen an inpatient arrives in the surgery department for their scheduled appointment, they need to bechecked into the SurgiNet application. This is done in the SurgiNet Organizer (Case Selection).The table below illustrates which staff checks in which patients.Who checks inAdditional NotesOutpatients/InpatientsPre-Op areaInpatients that stop at the deskcan be checked in by ControlDesk or CirculatorInpatients going directly tothe ORCirculatorCase Manager-scheduledcasesCirculator1Must always “reselect” theencounter to ensure it is thecorrect encounterWhen you access SurgiNet, it opens to the Case Selection. (Or if already in a patient’s chart, click theCase Selection button in the tool bar).Note: It is recommended to always open the patient chart from Case Selection. Do NOT open thepatient chart from Case Tracking.2Check in the patient. Click on the correct patient in the patient list, right-click to display the dropdown,and click on Check In from the dropdown.2Updated June 2018Questions or problems? Call Children’s IT Service Desk 24/7 952-992-5000 (4-5000 internal)
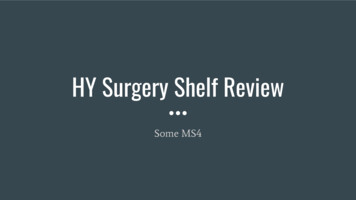
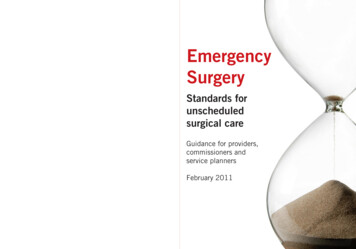
Surgery Circulator’s GuideChecking-In Patients Scheduled in Surgical Case ManagerThis explains how to check-in patients, using the SurgiNet Organizer, who have been scheduled throughthe Surgical Case Manager application.1From Case Selection, locate the correct patient. Then open the Intraop Doc.qqNew picqq3The Associate Encounter window displays. Click the Re-select button.4The Encounter Search window displays. Click on the correct encounter, and click OK.5When opening IntraOp Doc, confirm the correct encounter again.Note: This is important because all encounters (past, current and future) will display. You must select thecurrent encounter for this admission, so that this surgical case is associated with the correct encounter. Anincorrect encounter may require you to re-document the case.3Updated June 2018Questions or problems? Call Children’s IT Service Desk 24/7 952-992-5000 (4-5000 internal)
Surgery Circulator’s GuideIntra-Op DocumentationOverviewIntra-Op Documentation is a record of patient data that is collected in the OR.Once the Intra-Op documentation has been finalized, it will display in the NotesTab in the patient’s chart.To begin charting, click on Intra Op Doc from the Menu. The Intra Op Docwindow is displayed.In Intra-Op Documentation you will document the surgical case data within “segments”. Segments are thevarious stages in the surgical process. It is recommended to complete all segments in Intra-OpDocumentation, but there are segments that are required: UPE Pre Procedure segment Case Attendance segment Case Times segment General Case Data segment Surgical Procedures segment UPE on Arrival segment UPE (Universal Protocol Events) Time Out segment Skin Assessment segment Patient Positioning segment Implant Rinsing Solution segment (This segment is required if you answered Yes to the questionIs Rinsing Solution Needed? from the Implants segment.) Departure from OR segment Debriefing/EBL segment4Updated June 2018Questions or problems? Call Children’s IT Service Desk 24/7 952-992-5000 (4-5000 internal)
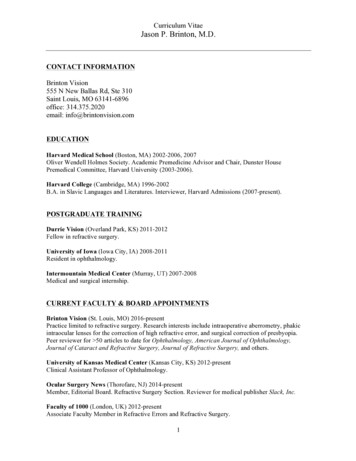
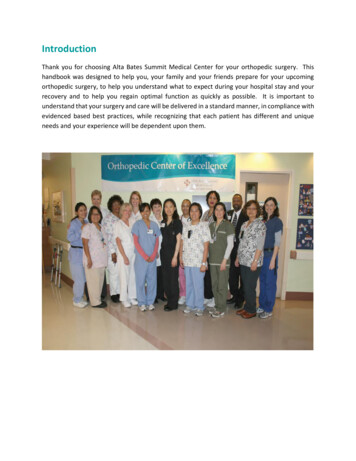
Surgery Circulator’s GuideSome segments have more than one page. Always check to see if there is more than one page number atthe bottom of the Documentation navigation window. The page you are on will be highlighted. You mustcomplete documentation on all pages within a segment.This example shows that the Segment has 2 pages and that page 1is displayed.Note: Required fields within a segment are indicated by a boxabove the field.Always click Next to continue forward to the next segment: When you move from one segment to the next using the Next button, the system automatically bringsyou to the next logical segment in the surgical process. Once you have completed all required fields ina segment, and moved on to the next segment, the system places a green check mark next to thesegment name. This means that the segment is completed. Required segments are automated: You will be prompted to chart a required segment when needed.For example, when you document in the Counts Verification segment, and continue to the Next set ofsegments, you will be returned to the Counts Verification segment later to record another countverification. The system will do this automatically, as you click Next and complete one segment afteranother. Saving documentation: Moving to the Next segment or page saves your charting.Note: If you add, modify or remove data in a segment, be sure that you click the Add, Modify, etc. buttonbefore clicking Next, otherwise you will be asked if you want to save your changes.Intra-Op Segment CommentsEach segment contains a free-text comments window that is segment-specific. When comments areentered here, they become part of the patient record.Document in the free-text window to clarify the documentation of that segment. When Other - SeeComments is chosen for a field, you should use the segment free-text window to describe what “other”refers to, unless the segment contains a Comment field.Click on Segment Text in the lefthand list area, then type your comment in the righthand area.Type your comment here5Updated June 2018Questions or problems? Call Children’s IT Service Desk 24/7 952-992-5000 (4-5000 internal)
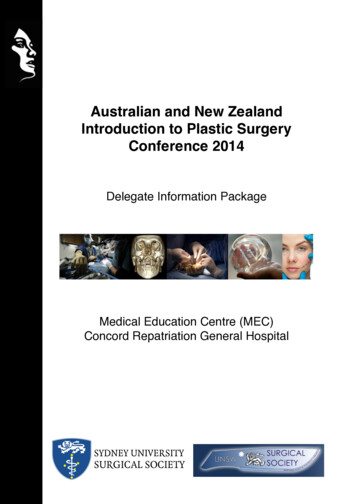
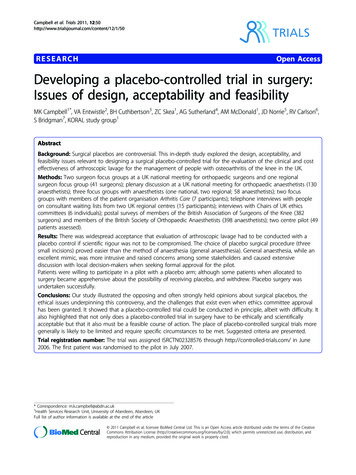
Surgery Circulator’s GuideCharting in the Documentation Tab1 Intra Op Charting is started in the Documentation window, with the UPE Pre Procedure segmentpage displayed. An exclamation point indicates this segment is required and has information that must becompleted before the document can be closed. A Green checkmark will replace the exclamation point when all required fields have beencompleted in a segment.2Complete the UPE Pre Procedure page, and click Next to open the next page.3The Case Attendance segment page displays: The Case Attendance page will reflect all participantsin the surgery room.6Updated June 2018Questions or problems? Call Children’s IT Service Desk 24/7 952-992-5000 (4-5000 internal)
Surgery Circulator’s Guide To add surgical staff to Case Attendance, click the binoculars. Locate your staff person, and clickOK. The name will display in the Case Attendee: field. All providers and hospital staff withprivileges to care for patients at Children’s should be in this search database. Click in Role Performed field, and select role from the dropdown list. Select Time in. Click Add button. The surgical staff you added now display in the Case Attendance window. If applicable, complete the Procedure Code field on the second page of Case Attendance.Notes:4 Make sure that the correct procedure and In and Out Times are associated to each attendee.Example: Two surgeons doing two different procedures should not be associated to bothprocedures and the entire case if they were not a participant. Case Attendance should include anyone who is in attendance during the case, and should includeany staff in the room providing patient care, as well as observers, such as reps or medical students. Important: Anyone in attendance during the case who is not in the Cerner database should beadded in the free-text Segment Text comments area. Your next step should be to notify theControl Desk, or leave them a note on off hours. This is so the appropriate people can ensure thatthe “missing” person is credentialed/privileged at CHC.Click Next button. The Case Times segment page displays. Enter the Anesthesia Start Time.Anesthesia Start Time is the time that anesthesia assumes care of the patient. Anesthesia start timemay be obtained by asking the Anesthesiologist or CRNA.5 Enter Patient In Room Time.5Click Next button. The General Case Data segment page displays: This segment contains generalCase Information such as OR room, Wound Class, etc.Note: When you click the Next button it saves your data, and will update the Case Tracking Board.Patient in the Room event is set in Case Tracking by entering the time and then going to the Nextsegment.7Updated June 2018Questions or problems? Call Children’s IT Service Desk 24/7 952-992-5000 (4-5000 internal)
Surgery Circulator’s Guide6Ask the Anesthesia team for the required ASA.Note: The information comes from default values. You must update the information if circumstancesin the case are different than the default values. Be sure to check that the wound classification iscorrect or filled in.7Click Next button. The Surgical Procedures segment page displays: This segment contains thesurgical procedures assigned to the case, surgeon(s), and surgery times.Notes: The Circulating RN must validate that the correct procedure has been documented in the EMR.This is required by Universal Protocol. For scheduled cases, the Procedure, Surgeon, Service, Anesthesia, and Wound classification willdefault in from Scheduling. Surgical Case Manager cases will not have the free text field filledin, since there is no field for the Nursing Supervisor to fill that in. Modifiers are not used at Children’s, but the field cannot be removed - Do not use this field.8Updated June 2018Questions or problems? Call Children’s IT Service Desk 24/7 952-992-5000 (4-5000 internal)
Surgery Circulator’s Guide8Click on the procedure in the list box. The Surgeon’s Procedure Description box will display thedescription added in Scheduling. Verbally validate with the surgeon that the Procedure Description isan accurate reflection of the operative procedure. This is considered the legal description of theprocedure.Changing a ProcedureIf the procedure code is not correct, do not use “modify” to make the correction. Modifying a procedurecode may cause pick list errors and may corrupt the file.1If the procedure code was incorrectly scheduled, first add the correct Procedure Code, and anyappropriate information such as surgeon, surgical service, anesthesia class, etc. Click Add. In theexample below, the procedure was incorrectly scheduled as an Appendectomy, and will be changed toExploratory Laparotomy.Now both procedures are in the list box.2Next, remove the incorrect procedure code - Highlight incorrect procedure code, and click theRemove button. In the popup window, click Yes.9Updated June 2018Questions or problems? Call Children’s IT Service Desk 24/7 952-992-5000 (4-5000 internal)
Surgery Circulator’s Guide3In the Add Pick List message box, click Yes or No.If you select Yes, the Select Preference Card message box displays. Click Yes.4You will be prompted to answer supply questions. See page 17 for further information.5If the scheduled procedure was attempted, but the procedure changed during surgery, thedocumentation needs to include both procedure codes.For example, a closed reduction was attempted and the procedure progressed to an open reduction.Documentation for the attempted procedure should include wound class, attendees, times, prep, etc.An additional procedure code of Open Reduction needs to be added and documented on accordingly.In the example below, an attempted closed reduction of a right arm fracture has progressed to an openreduction of the same arm.In this example, including both procedures gives a complete picture of the surgical case.10Updated June 2018Questions or problems? Call Children’s IT Service Desk 24/7 952-992-5000 (4-5000 internal)
Surgery Circulator’s GuideChanging the Primary ProcedureIf this is a multi-procedure case, and you need to change the primary procedure, you must designate theprimary procedure first, or the patient will fall off the Tracking Board.Note: The definition of Primary Procedure is the procedure with the highest level or, if equal levels, theprocedure with the longest duration.1Click on the procedure that says No, click on Yes in Primary Procedure, and click Modify.Now, both procedures are Primary Yes.2Change the non-primary procedure to No.11Updated June 2018Questions or problems? Call Children’s IT Service Desk 24/7 952-992-5000 (4-5000 internal)
Surgery Circulator’s GuideAdd a Procedure1 To add a procedure, click in the Procedure field, and begin typing the procedure name.2Click the arrow button to display the list of procedure codes that match your entry, and click on theprocedure. Choose Yes or No for primary procedure.3Click Add.4When you add a new procedure/surgeon, you will see the following messages:5Click Yes or No.6If you select Yes, the Select Preference Card message box displays:7Click Yes.12Updated June 2018Questions or problems? Call Children’s IT Service Desk 24/7 952-992-5000 (4-5000 internal)
Surgery Circulator’s GuideCancel a Procedure1 To cancel (remove) a procedure in the Surgical Procedures segment: Click on the procedure tocancel. Then click the Remove button, and click Next.2The Delete Current Entry message displays. Click YesNote: DO NOT DELETE the only procedure designated as the primary procedure. This will dropthe entire case from the Case Tracking Board.3The system will ask if you want to disassociate this procedure from other segments: Click Yes.13Updated June 2018Questions or problems? Call Children’s IT Service Desk 24/7 952-992-5000 (4-5000 internal)
Surgery Circulator’s Guide4The system will ask you if you want to retain your picklist items: Click Yes or No.5In the Adjust Picklist Quantities window, verify or update the picklist quantities, and click Save.6The system will ask you if you want to save your picklist changes. Click Yes7The UPE On Arrival segment displays. Click Next.14Updated June 2018Questions or problems? Call Children’s IT Service Desk 24/7 952-992-5000 (4-5000 internal)
Surgery Circulator’s GuideUsing Free-Text Items When Adding Supplies During DocumentationWhen documenting intra-operatively (either on the Documentation or Pick List tab), and you are unable tofind an item in the database, add a Free-Text Item. If an item is not found in the database, it must bedocumented as a free-text item both in the appropriate segment on the intra-op record, and on the picklist.Note: We encourage you to add it to the Documentation tab first, rather than to the Pick List tab.When you add it to the Documentation tab, it will update to the Pick List.1Before you free-text an item, search for it using the Find All feature. Click on the ellipsis box todisplay the Find: All Items window.2Type your item in the Search
Questions or problems? Call Children’s IT Service Desk 24/7 952-992-5000 (4-5000 internal) Intra-Op Documentation . Overview . Intra-Op Documentation is a record of patient data that is collected in the OR. Once the Intra-Op documentation has been finalized, it will display in the Note