Transcription
USER MANUALLG SuperSignCMShttp://partner.lge.com
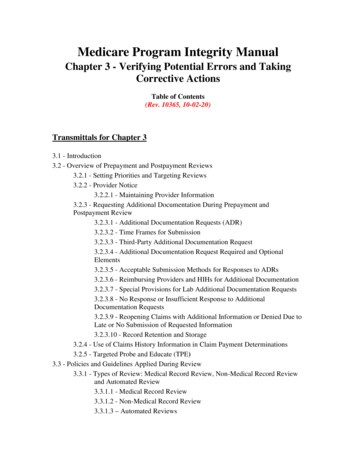
2EnglishCONTENTSLG SUPERSIGN CMS.4-- SuperSign Server.4-- SuperSign Editor.4-- Display.4SUPERSIGN SERVER.5-- System Requirements.5-- Server.5-- Client.5-- Installing and Uninstalling LG SuperSign CMS.6InstallationUninstall-- Launching LG SuperSign CMS.10-- Starting SuperSign Server.11-- [Login].11-- [Logout].12-- Register the Product Licence.12-- [Create an account].13-- [View Mobile version].14-- [Home].15-- [Content].27List Screen Layout and Functions[Import][Copy] and [Move]-- [Playlist].30List Screen Layout and Functions[Import][Create New][Copy] and [Move]-- [Schedule](Schedule).33Structure and function of the list screen[Import][Create New][Copy] and [Move]-- [Distribution].36List Screen Layout and Functions[Create New]-- [Player].41List Screen Layout and FunctionsScreen Layout and Functions[Player search][Dashboard][Control][Software Update]-- Common Functions.18[Workgroup][Folder][Move][Clone Settings][Calender View]-- [Videowall].49[Filter]List Screen Layout and Functions[Approval status] Management[Create New][Save List][Log Report][Export]
3[Profile][User][Role][Systems][Trouble Notice][Data service]SuperSign Master[OpenAPI][Font][Active Directory][Information]SUPERSIGN EDITOR. 71-- Starting SuperSign Editor.71-- [Home].71Screen Layout and Functions-- Creating Project.73-- Exporting Project.78-- Importing Project.78-- Story Board.79Screen Layout and FunctionsAdd TemplateProject SettingsTimelineAdd Template Transition effectsPreview-- [Template Editor].82Screen Layout and FunctionsAdd ItemChange Item PropertiesDelete ItemAPPENDIX. 89-- LG SuperSign CMS Network Connection.89-- LAN Network Connection.891:1 Connection1:N Connection-- Internet Connection.90Hierarchical ConnectionInternet Connection-- Wireless Network Connection.91Wired/Wireless RouterWired/Wireless Network-- Available Ports.92English-- [Settings].56
4EnglishLG SuperSign CMSLG SuperSign CMS is network-based software for digital advertising communications developed by LG Electronics. It isan integrated management program that supports the creation and management of digital media, content deployment,video play and remote control, etc.Consisting of the Server and the Editor, LG SuperSign CMS can be used together with displays that are LG Signageproducts.SuperSign ServerLG SuperSign CMS provides the all-in-one SuperSign Server that allows you to manage displays and create and distributemedia.SuperSign EditorThe SuperSign Editor is software for creating and editing content that can be played on displays. It runs on the LGSuperSign CMS Server.DisplayConnect Signage display products to LG SuperSign CMS and play your own advertising contents on them. Control basicfunctions (e.g. screen brightness, resolution and volume) of displays that support the LG RS232C protocol, using LGSuperSign CMS.
5SuperSign Server is a network-based integrated management program that supports the creation and management ofdigital media, content distribution, video play and remote control, etc.System RequirementsPlease check the system requirements for proper operation.ServerItemCPUMemoryHDDNetworkOperating SystemBrowserSpecificationsUnder 50 playersIntel Core 2 Duo (2.5 GHz) or higherBetween 50 and 500 playersIntel i7 or higher500 players or moreIntel XEON E5-2676 v3 8 Core or higher4 GB or more40 GB or more of free space100 Mbps or higherWindows 7Windows 8.1Windows Server 2012 R2Windows 10Windows Server 2016Internet Explorer 10 or laterChrome 50 or laterNOTE Cloud services are not supported.ClientItemSpecificationsPC BrowserInternet Explorer 10 or laterChrome 50 or laterMobile BrowserSafari v10.3.1 or laterChrome v57.0.2987 or laterEnglishSuperSign Server
6Installing and Uninstalling LG SuperSign CMSEnglishInstallationDouble-click the LGSuperSignCMS setup.exe file.1 Select a language to use during the installation process.2 Read the instructions and then click Next to continue.
73 When the License Agreement screen appears, please read the terms carefully, click I Agree.English
84 Select a directory where the program will be installed and click Next.English5 Set the HTTP/HTTPS port to use with LG SuperSign CMS and click the Install button. The program will installautomatically.
96 When the installation is complete, click Finish. The service will start automatically.EnglishNOTE Once installed, the LG SuperSign CMS service becomes registered and starts automatically.
10UninstallEnglishTo uninstall LG SuperSign CMS from your computer, click Start All Programs LG SuperSign CMS Uninstall LGSuperSign CMS.CAUTION Use the uninstaller provided with LG SuperSign CMS to remove LG SuperSign CMS from your computer. You may not be able to remove LG SuperSign CMS completely while the web browser is running. Close all the browsersbefore uninstalling LG SuperSign CMS.Launching LG SuperSign CMSTo launch LG SuperSign CMS, click Start All Programs LG SuperSign CMS LG SuperSign CMS or click the LGSuperSign CMS icon on your computer desktop.NOTE A license must be issued if you are using LG SuperSign CMS for the first time or its installation environment haschanged. Please contact the retailer from which you made your purchase for instructions on how to obtain a license. The number of players that can be connected is determined by the license issued. To quit LG SuperSign CMS, clickin the upper right corner of the browser window.
11Starting SuperSign Server[Login]1 Double-click the LG SuperSign CMS icon to launch the program. The program login screen will appear.2 Enter your User [ID] and [Password]. Then click the [Login] button. The default User ID and Password are admin and 000000.NOTE The language selected on the login screen is used as the system language. The password for admin should be changed upon initial access.-- The password should be a combination of 8–20 alphabetical letters, numbers, and special characters. If you enter a wrong password 5 times, access is denied for 3 minutes. Go to SuperSignUtil for password initialization for Admin.-- Click Start All Programs LG SuperSign CMS SuperSignUtil.-- The initialized password for Admin is 000000.-- When the password renewal period exceeds 90 days, the password change required guidance screen is provided.EnglishThis section describes [Login], [Logout] and [Create an account] for the SuperSign Server.
12[Logout]English1 Clickon the upper right corner of the program screen. The Login screen is displayed.Register the Product LicenceUsers can receive and register the licences by clicking the Register Product Licence button on the login screen.1 On the login screen, click the [Register Product License] button.2 Request a licence through Step 1, Download DAT.3 If you already have a licence, click the Step 2, [Import license file] button to activate the product.
13[Create an account]1 On the Login screen, click the [Create an account] button.2 Enter the information required for account creation and click the [Apply] button.3 On the confirmation popup, click the [OK] button to finish account creation.NOTE The [Account] created can be used only after it is approved by the server administrator. For details on account approval, see the section on the [Settings] [User] menu.EnglishCreate an account by clicking the [Create an account] button.
14[View Mobile version]EnglishYou can use the View in Mobile Version button on the Login or Dashboard screen to use the functions of the SuperSignServer in a mobile version screen. Enter “http://IP Address:Port No./ssm” in your mobile browser to use the mobileversion of SuperSign Server.NOTE Mobile only screen function is only available for IPv4 connection.
15[Home]EnglishOn this main screen of LG SuperSign CMS, you can monitor the general system through the dashboard.Screen Layout and Functions51234768
16No.FunctionDescriptionEnglish1[Recent]Displays your list of recent tasks and moves to the lists for each item.2[Go to SuperSign Editor]Moves to the SuperSign Editor, where you can create content.3[View Mobile version]Provides the functions of the SuperSign Server in a mobile versionscreen.4SW Version and [Check forUpdate]Displays the current SW version and checks for updates.5Menu TabProvides the main functions of LG SuperSign CMS.6[Dashboard]Displays the [Delivery Status], login [User Information], [SystemSummary], and [Notice Board].7[Log Report]Displays the log information for the entire system.8[Settings]Provides settings you can use to change your user profile value or thesystem settings.NOTE The information displayed on the Home screen may vary depending on the permission level of the user currently loggedin.
17[Dashboard]ItemFunction[User Information]Shows the [Name], [Role], [Time of last login] and profile photo of the logged-inuser.[System Summary]Shows a summary of information registered with the system.[Server Storage]Shows used capacity and available capacity compared to the total capacity of theServer.[Device Information] (error)Shows the error information on the registered displays.-- Click the [Check] button to view the error log.[Approval status]Shows the number of approved items compared to the total number of items.-- Click the [Check] button to change the approval status of each list.[Number of registered contents]Shows the amount of registered content by type in a chart.[Notice Board]Allows you to add notices to the system or view them.[Software Update]Click the [Check for update] button on the Home screen to view the latest software update information and change log.1 If a latest version of the software is available, click the version information to download the latest softwareinstallation file.2 Click the installation file to upgrade your LG SuperSign CMS.3 Click [Change log]: [View] to view changes in the latest software.NOTE [Check for update] can only be used by users that have system-level permissions.EnglishUse the Dash Board to view information registered on the system and to display error statuses and notices.
18Common FunctionsEnglish[Workgroup]Users can separately manage [Content], [Playlist], [Schedule], [Distribution], [Player], and [Videowall] by dividing theworkgroup. Create and manage data for each workgroup separately.Changing a workgroupYou can view and change the workgroup to which you belong.You can divide your workgroups by usage to manage [Content], [Playlist], [Schedule], and [Player] and create items forvideowall and distribution.Changing in Dash BoardChange the workgroup shown on the Dash Board and view workgroup-specific information on the Dash Board.
19Changing from FilterEnglishOn the left filter of each tab, check the group list and select the items you want to change.
20Editing WorkgroupsEnglishUsers with administrator privileges can [Add], [Edit] or [Delete] workgroups using the workgroup filter on each tab.Click the [Edit] button in Workgroups to open a window where you can edit workgroups.Create Workgroup1234On the workgroup list under [Filter], click the [Edit] button.Click the [Add] button at the bottom of the workgroup list to open the Create Workgroup popup.Enter the name of a workgroup to create. Then click the [OK] button.The newly added workgroup appears on the list.Delete Workgroup1 On the workgroup list under [Filter], click the [Edit] button. The X buttons appear on the workgroup list.2 Click the X button next to a workgroup to delete it.Edit Workgroup1234On the workgroup list under [Filter], click the [Edit] button.Click a workgroup in edit mode to open an input field where you can rename the workgroup.Enter a new name for the workgroup. Then press the Enter key on the keyboard.The newly edited workgroup appears on the list.NOTE You can add up to 50 workgroups. Workgroups can be assigned to each user on the [Create an account] or [User] details page. All data are saved and loaded based on the currently selected workgroup. The default workgroup cannot be deleted.
21[Folder]Changing FolderView a list of folders available and select any one of them to be changed in each tab.EnglishSort, manage and view data using folders.
22Editing FolderEnglish[Add], [Edit] or [Delete] folders using the folder list in each tab.Click the [Edit] button on the folder list to open a window where you can edit folders.Create Folder1234On the folder list under [Filter], click the [Edit] button.Click the [Add] button at the bottom of the folder list to open the Create Folder popup.Enter the name of a folder to create. Then click the [OK] button.The newly added folder appears on the list.Delete Folder1 On the folder list under [Filter], click the [Edit] button. The X buttons appear on the folder list.2 Click the X button next to a folder to delete the folder.Edit Folder1234On the folder list under [Filter], click the [Edit] button.Double-click a folder in editing mode to open an input field where you can rename the folder.Enter a new name for the folder. Then press the Enter key on the keyboard.The newly edited folder appears on the list.NOTE Up to three levels of sub-folders can be created. The default folder cannot be deleted.
23[Filter]Configuring Filter SettingsConfigure filter keywords and settings to retrieve the information that matches the criteria.Saving FiltersSelect a filter and click the [Save] button at the bottom to save the filter settings and use the filter immediately.NOTE Up to five filters can be saved. Available filters vary by tab.EnglishWhen searching the list by function, use filter to search the data matching the selected [Workgroup], [Folder], [File Type]and [Approval status].
24[Approval status] ManagementEnglishItems registered on the SuperSign Server can be used based on their approval status.Approving Items1234Select an item to approve on the list of a tab.Click the [Approve] button at the top of the list.Select the [OK] button on the Check approval popup.When approval is complete, the list is updated.Rejecting Items1234Select an item to reject on the list of a tab.Click the [Reject] button at the top of the list.Select the [Reject] button on the Check rejection popup.When rejection is complete, the list is updated.NOTE You can use filter settings to retrieve items based on their approval status. When [Auto approval] is set to [On] in [Settings] [Profile], newly added items are automatically approved. If you set [Auto approval] to [Off] in [Setting] [Profile], newly added items will be unapproved.
25[Save List]Saving List1 Click Menu Tab of a menu to save a list.2 Click the [Save List] button at the top of the list.3 The retrieved list is saved as an Excel file.[Log Report]View the log data recorded in the database by selecting a list in each menu.NOTE The items in the log report may vary by model.Retrieving Logs1234Click Menu Tab of a menu to retrieve a log.Select an item on the list to view the log.Click the [Log Report] button at the top of the list.The log of the selected item is displayed on the Log Report screen. Export the retrieved log data as a file by clicking [Export Log File].NOTE You can retrieve a log for a specific duration by changing the dates.EnglishSave the retrieved list of a tab as a file and manage the list.
26[Export]EnglishFrom the [Content]/[Playlist] tab, you can export files to a USB storage device and play them on a SuperSign player.Exporting SuperSign contents File1234Press Menu Tab of the menu you wish to export from the list, then select the items to export.Press the [Export] button at the bottom of the details page.Download the file (.zip) and unzip it.Move the unzipped folder to a USB storage device and connect the device to the USB port of the player.Exporting Normal File1 Press Menu Tab of the menu you wish to export from the list, then select the items to export.2 Press the [Export] button at the bottom of the details page.3 Move the file to a USB storage device and connect the device to the USB port of the player.NOTE Use a compression program that supports UTF-8 encoding. (For example, ALZip, WinRAR) SuperSign content files can be played automatically on the player if the name of the folder moved to the USB storagedevice is changed to Normal or AutoPlay. Regular files can be played automatically on the player if a Normal or AutoPlay folder was created in the USB storagedevice and files are moved to the folder. When Normal and AutoPlay folders both exist, the Normal folder usually has priority.
27[Content]EnglishCreate the desired content using various templates and layouts.For details on creating and editing content, see the description of the SuperSign Editor.List Screen Layout and Functions21345No.1Category[Filter]DescriptionThe content list is retrieved based on the [Filter] settings. [Search]: Retrieves a list of items that include the keyword. [Workgroup]: Retrieves a list of items that belong to the selected workgroup. [Folder]: Retrieves a list of items that belong to the selected folder. [File type]: Sort list according to selected file type [Approval Status]: Retrieves a list of items that belong to the selected approval status.
28No.English2CategoryTop ButtonAreaDescriptionContent management functions are provided as buttons. Available buttons vary by theitem selected. [Import]: Adds files from your PC as content [Create New]: Creates new content using the SuperSign Editor [Save List]: Saves the retrieved content list as an Excel file [Add Playlist]: Creates a new playlist with the selected content [Copy]: Copies the selected content to another workgroup or to another folder in thecurrent workgroup [Delete]: Deletes the selected content [Approve]: Approves the selected content [Reject]:
4 English LG SuperSign CMS LG SuperSign CMS is network-based software for digital advertising communications developed by LG Electronics. It is an integrated management program that supports the crea
