Transcription
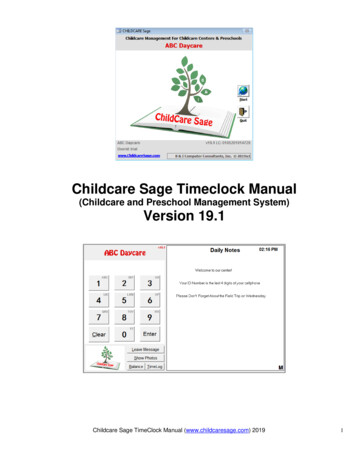
Childcare Sage Manual(Childcare and Preschool Management System)Version 19.1www.ChildCareSage.com 2019
IntroductionThe ChildCare Sage is the most feature rich, easy to learn, and most affordable childcare management system available.It is an easy to use system designed to save time and increase productivity for childcare administrators with any level ofcomputer skills or experience.You can learn about the ChildCare Sage and learn how to use the system from our website: www.childcaresage.comOur website also includes introduction and training videos to help you learn our system. To watch the videos, go to ourwebsite and click Resources from the menu along the top of the page. Click on any video to watch it on your computer.Software Requirements:a) Microsoft Windows XP or newer (Vista, 7, 8, 10, 32 bit, 64 bit, etc.)b) Microsoft Access 2002/XP or newer (2003, 2007, 2010, 2013, 2016, Office 365 *32 bit only, etc)(Access 2002/XP Runtime is provided with the ChildCare Sage; Access 2003/2010/2013/2016 Runtimes available byrequest.)Hardware requirements:The ChildCare Sage system is comprised of the ChildCare Sage and Timeclock programs. The minimum requirementsare based on which program you want to run on each computer, and the version of windows on that computer.ChildCare Sage- any dual core or faster computer, 1GB or higher RAM (2GB for Windows vista/7/8/10)TimeClock- pentium 4 or faster, 1GB or higher RAM (2GB for Windows vista/7/8/10)Support Information:Automated support options include:1) complete manuals and user guides,2) complete access to our user forums at www.childcaresage.com ,3) online training videos on our Resources page at www.childcaresage.com ,4) email support at support@childcaresage.com ,Live support options are available 9am to 5pm, Monday-Friday Eastern Time, and include:5) phone support at 866-842-7806, and6) on-line support through GoToAssist.ChildCare Sage Support includes helping you setup the ChildCare Sage on your computer and/or existing network aslong as you have a high-speed internet connection at each computer that you want to use the ChildCare Sage. Pleasekeep in mind that we can not help you set up a network at your center, and that all of the computers that you want to runthe ChildCare Sage on must be able to see each other.To check if the computers can see each other for:Windows XP: click the Start button in Windows, then My Network Places (left side), then View Workgroup ComputersWindows Vista/7: click the Start button in Windows, then Computer (right side), then Network (left side)Windows 8/10: go into the desktop, click the Folder icon (bottom left), then click Network (left side)Our systems interface with programs from Microsoft Office (Word, Excel, Outlook,) and other applications. We cannotprovide support for software that we did not create, even if our systems can interface and use that software. Pleasedirect all support questions about outside programs to the developers of those programs.Transfer Information from another system:We can transfer information from many other systems into the Childcare Sage.System Functions Passwords: (all passwords are user settable)Main ProgramTimeclockDefault system passwordSetup TimeclocksystemPost Batch Charges/PaymentsEdit All TimesheetspostCopy Batch Timesheets/FunctionsEdit Child Timesheets OnlypostSave Rates/Schedules (batch)Edit Center Notes on TimeclockupdatePayroll SystemEdit Child MessagespayrollDefault Admin passwordBatch/List Functionsccs191ChildCare Sage (www.childcaresage.com) 2019openopenchildnotesmessagesbatch2
TABLE OF CONTENTSIntroductionSystem InformationSystem Function PasswordsManualControlsStart screenMain MenuRecordsFamilies screenContacts screenDisplaying PhotosSelecting ID NumbersFamily tabCenter tabChild tabCharges tabPayments tabRates tabImmunizations tabMedical tabEmergency tabPickup tabAttachments tabAdd/Copy screenTimesheets screenFind Contacts screenContacts List screenAppointment Calendar screenAppointments screenAppointment Reminder screenContact JournalEasy EnrollBatch Rates & SchedulesChild Billing MenuEasy Charge screenCharge Accounts screenBatch Charges screenBarcode Charges screenChild Payments MenuBatch Payments EntryLate PaymentsTimesheets MenuBatch Timesheets EntryBatch Session EntryBatch Schedule EntryBatch Timesheets FunctionsReports MenuCenter FunctionsDaily ActivitiesActivity PlannerCenter JournalCenter LedgerMenu Planner CalendarBatch Meal tility MenuChild/Staff Account ResetMeal RulesSetup MenuSetup screenChoices screenMenu Choices screenMeal Setup screenEdit Merge Files screenEmails Setup screenChart of Schedules screenSchedule of Charges screenCharge Menu Setup screenRecurring Expenses screenSearch GuideTime Use/Space % Calculation GuideChildcare Sage RatesSetting Up Billing Rates IntroductionSetting Up Billing Rates step-by-stepRate FunctionsSample RatesChildCare Sage Payment Services (CC & ACH)PayrollPayroll IntroductionSetting Up Tax TablesSetting Up DeductionsSetting Up Staff PayrollSetting Up Staff BenefitsRunning PayrollBatch WagesBatch PayrollEdit PayrollSample ReportsChildCare Sage (www.childcaresage.com) 626263646566676768693
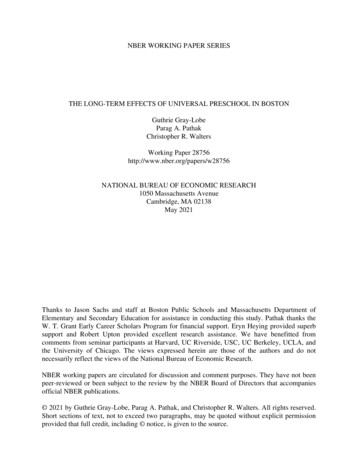
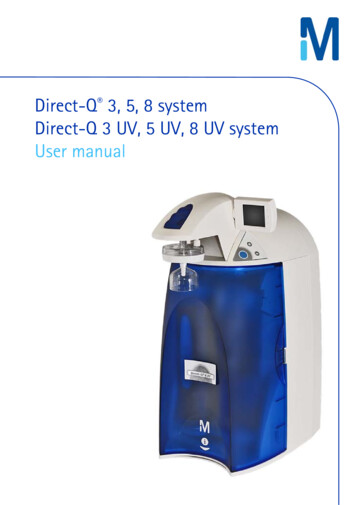
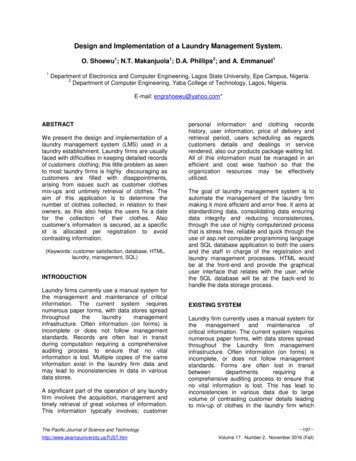
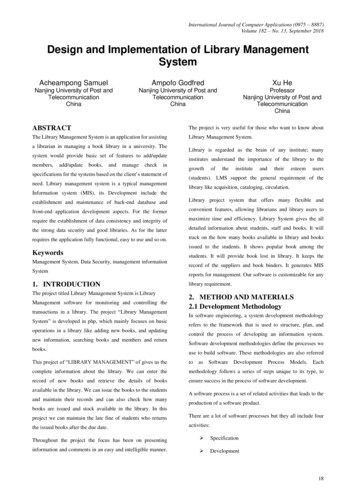
Childcare Sage ManualKeyboard shortcuts:Tab: move between fields and buttonsF6: switch panes (panes are sections of the screen separated by horizontal grey lines)Alt letter under button: click that buttonAlt down arrow: see combo box choicesCommon FunctionsFigure 1:All Childcare Sage screens have a common menu at the top of the application window. The menu item functions are:Save Settings: Saves resized screens. This is used for screens that display lists such as the contact list screen or batchpayment screens. To change the height on these screens, move the mouse over the lower blue border and drag the arrowcursor down. Once you have resized the screen, click Save Settings. Save Settings only saves the height of the expandedscreen and will not work if you maximize the screen.Undox: Un-does the last data change (undoes all changes since you started editing the current child/staff member.)Click Here for Help: Opens the childcare sage web help page (the web page has online video tutorials and training videos,tips, and answers to childcare sage questions.)Open GotoAssist: Opens the gotoassist.com web help page (our support person will give provide you with the supportkey.)Open Your Childcare Sage Account: Opens the account login page on our website where you can download our programand updates, and renew your support.Childcare Sage Start screenFigure 2:This is the first screen in the Childcare Sage. If the password system is enabled, youwill be asked to enter one of the system passwords or your username and passwordto start using the system. (You can set the passwords in the Passwords tab on theSetup screen opened from the Setup Menu.)Figure 3:open the main menuStart:closes the Childcare SageQuit:skips the online version andaccount lookup (click if yourinternet is down)The ChildCare Sage will automatically back itself up daily to your computer, andweekly to our servers. If you are opening the Childcare Sage for the first time only,you will also have the option to Load Sample Center Data.Main Menu screenFigure 4:ChildCare Sage (www.childcaresage.com) 20194
This is the main menu in the Childcare Sage. From this menu, you can open all of the screens and functions in theprogram. The Main Menu is broken into functional areas.RecordsContacts: opens contact screenFilter Records Menu: select which records to display (children/staff/families/etc.) (see figure 3a)Families: displays family records for children only (siblings are shown together)Easy Enroll: batch family enroll screen that automatically creates and links sibling account, payee accounts, and rates andschedules in one stepBatch Rates and Schedules: batch copies rates and schedules into selectable groups of children and staffChild and Staff BillingChild Billing Menu: open the menu to batch charge accountsChild Payments Menu: opens the menu to batch record paymentsUpdate Ledger: recalculates account balances and ledger historiesStaff Payroll Menu: opens payroll menu to calculate staff wages, run payroll, and print tax reportsTimesheetsTimesheets Menu: opens the menu to batch enter timesheetsTimeclock Loader: load contacts and transfer timesheets between the Childcare Sage and the TimeclockReports: print accounting reports, informations reports, batch bills, and timesheet logsCenter TasksCenter Functions: opens the menu for center functions including menus, activities, center ledger, and journalsUtilities Menu: opens the menu for utility functions including setup, backup, cleanup, etcSetup Menu: opens the menu for system setup and journal editingFilter Records Menu:Figure 4a:Menu to filter which contacts (children/staff/payers/etc) are shown on the contactscreenEnrolled Children: contacts with category ChildCurrent Staff: contacts with category StaffEnrolled Children w/o Other Payer Accounts: child contacts excluding other payerson child accounts (state, vouchers, etc.)Enrolled Families w/o Other Payer Accounts: one child sibling per family excludingother payers on all sibling child accounts (state, vouchers, etc.)All Payer Accounts: one child sibling per family plus all payers on sibling childaccountsHelp:Figure 4b:The manuals and guides for the Childcare Sage are in Adobe Acrobat PDF format. Ifyou don’t have Adobe Acrobat on your computer, please install it from the ChildcareSage CD, or download it from:http://www.adobe.com .The Drop In Manual covers functions unique to the Childcare Sage Drop In Centerversion.Help / Training Videos: opens the Childcare Sage Internet Help SiteChildCare Sage (www.childcaresage.com) 20195
RecordsFamily ScreenFigure 5:This screen shows family accounts in theChildcare Sage. You can not enter or change anyinformation on this screen. To go to a specificchild on the contact information screen, click thechild’s picture or name in the top center of thescreen. To move between families, select a familyfrom the list on the left side of this screen.New children and staff can only be entered on thecontact information screen (figure 6).Contact Information screenFigure 6:This screen shows individual contact information.Contacts are always ordered alphabetically bylastname. There are record selector buttons at thetop left of the screen, a contact selector list on theleft side of the screen, and command buttons onthe top right and along the bottom of the screen.Using the Contact Selector:The contact list on the left side of the screen shows all of the contacts and their current balances for the criteria or filterchosen. (Clicking Filter Records Menu, then Enrolled Children on the main menu creates a filter to only show activechildren, etc.) If applicable, the category and class for the current filter is shown at the bottom of the contact selector list.You can change the filter to show any category and/or class by selecting the category and/or class that you want to seeand then clicking Filter Contacts. To turn off the filter and show all contacts, click Reset. Clicking HB hides the balances inthe contact selector (used when you want to show a parent their child’s record, but don’t want them to see familybalances.)Taking and Selecting Photos:Photos are not stored directly in the Childcare Sage. They are kept on your hard drive and imported when you open achild’s screen. Because the photos must be imported and the photo areas are small, do the following when taking photos:1) set your digital camera or phone to the lowest resolution (640x480 vga),2) try to zoom in onto the person’s face to create a head shot.ChildCare Sage (www.childcaresage.com) 20196
After you take the person’s picture, copy that picture file into the designated Childcare Sage photo folder (default folder isc:\ccsage\ ). Your picture files should not be larger than 100kb each. If they are, the system will slow down significantlywhen you move from contact to contact. If your files are larger, please use a photo editor to reduce the size of thepictures. For future pictures, set your digital camera or phone to the lowest resolution (640x480 vga).Photos should be saved in .jpg format. Once the photo file is transferred to the photo folder, click the photo area andselect the file from the file selector box that appears. You can also click the Photo icon to select the photos for the currentcontact from drop lists.If your need to resize your photos, or convert your photos to a different format (.jpg - .bmp, etc,) we suggest that youdownload and install the free FastStone Photo Resizer from http://www.faststone.org/FSResizerDetail.htm .The top selector buttons have the following functions: first previous next last contactUpdate Ledger: updates the ledger for the current child/familyAttendance: (for category: child) opens the timesheet screen for the current childTimesheet: (for category: staff) opens the timesheet screen for the current staff memberCumulative Bill: prints a cumulative bill for the current contact from the account start date to the current date.Invoice Bill: prints an invoice bill for the current contact for the current day/week/month depending on the default billingperiod for that child set in the Rates tab.The date and dollar amount (in yellow) at the top right is the account balance for the contact shown through the period inthe date. To update the balance, click Update Ledger on the main menu or on the contact screen, click Cumulative Bill orInvoice Bill, or run an account balance report from the Report Menu.Fill Child Address: (at the bottom of the family tab) copies the address information from the parent areas in the Family tabto the account address next to the contact’s name. We recommend that you first fill in the parent’s addresses. You canthen copy the parent address into the child’s address by selecting which address you want to copy (Father/Mother) andthen clicking Fill.Swap Parents: swaps the parents information (father- mother,mother- father. This is usually used after data conversionsto make sure that data is in the correct place.Copy Information: lets you copy selected information from another contact into the current record (used to copy pickuppersons, charges, payments, etc from one contact to another.)Copy Addresses: copies the address and phone number from 1 parent to the other (only works if 1 parent’s address isblank)The bottom half of this screen is broken into tabs that display information about the contact. The tabs shown changebased on the yellow contact category selected at the top left of the screen.Tabs visible for category: Child- child, charges, payments, ledger, rates, immunizations, medical, emergency pickup,pickup, attachmentsTabs visible for category: Staff- staff, charges, payments, ledger, rates, certifications, attachmentsTabs visible for all categories- family, center (the schedule area in the center tab is only enabled for children, staff, andwaitlist.)ID NumbersID numbers are the codes that children, parents, and pickup persons will use to sign children in/out, and that staff will useto sign in/out. ID numbers must be numeric and can be any length from 1 to 5 digits. For child master id numbers, wesuggest the last 4 digits of the child’s home or parent’s cell phone plus a digit for each sibling (if there are 2 siblings andthe last 4 of the sibling’s home phone is 1234, make the master id numbers 12341 for sibling 1, and 12342 for sibling 2.)For staff id numbers, we suggest the last 4 of the staff’s cell phone number. For parent and pickup person ID numbers, wesuggest the last 4 digits of that person’s cell phone number.There are a total of 11 id numbers (master ID number, 2 parents, 4 pickup persons, and 4 emergency contacts) that canbe used in the timeclock sign in/out program for each child.For staff with children that attend the center, you should setup 2 id numbers, one for the child and one for the staffmember. The reason for this is so the staff member can sign in/out for breaks without having to also sign their child in/out.ChildCare Sage (www.childcaresage.com) 20197
Family Tab (figure 6)Siblings linkThe siblings link combines the charges and payments for all of the siblings in a family into one family billSiblings can either be added initially via the Easy Enroll screen, or later using the Add/Copy function on the ContactInformation screen. You can add up to 8 siblings to a sibling link.To manually add sibling accounts for children that are already entered into the ChildCare Sage:1) click Add/Copy at the bottom of the original child’s record (figure 7)2) click Add Sibling of Current Child3) change the name to the sibling’s name and select which information you want to copy at the bottom left4) click Add5) repeat steps 1-4 for all other siblingsThe youngest child should always be the first sibling in the sibling link. The first sibling entered is also the master siblingand their Title box text will be used on the combined balance reports and bills.Payee linksEarly versions of the Childcare Sage had an add-copay button and copay amount in the rates area for each child. Thesystem would simply track the copay charges and all payments on the account would be flagged with the payee. Thedrawback to this was that the system couldn’t charge extra charges such as late payments, late pickups, registration fees,etc to a specific payee. Because of this, the centers couldn’t give the parents a separate bill that included only the extracharges and the copays. One solution could have been to mark each charge and payment with a payee. This wouldrequire extra work whenever a charge or payment was entered and this method was also prone data entry mistakes.We solved this problem with payee links. The payee links function allows up to 4 payers to pay a child’s bill, such as theparents and the state. The function lets each account in the link have its own ledger and balance, and lets each accountuse the child’s timesheet hours to calculate what that account or payer owes. Generally payee links are used for childrenon subsidy, or if 2 parents want to split a child’s bill.Before creating payee links, we recommend that you define a separate class (added to the list of classes that includesinfant, toddler, preschool, etc,) for each type of responsible party other than the parent (State, CIS, DCS, etc). You canadd new classes on the Screen Choices screen opened from the Setup Menu.Payees can by added by:A) automatically add the accounts when adding children on the Easy Enroll screen by checking Agency in the sibling rowand then selecting an agency class,ORB) manually add payee accounts for children that are alreadyentered into the ChildCare Sage:1) click Add/Copy at the bottom of the original child’srecord2) click Add Payee for Current Child3) select the agency in the Class selector4) Select which information you want to copy at the bottomleft5) click Addrepeat steps 1-5 for all other payeesOnce the payee accounts are added and linked, change the rates in each payee account to what that party is responsiblefor.ChildCare Sage (www.childcaresage.com) 20198
Center Information TabFigure 6a:Enroll Date: when the child first started at the centerEnd Date: when the child withdrew from the center (leave blank until the child withdraws or leaves)To track meals for children, check the Track Meals checkbox. The Timesheet Loader will automatically check off mealsthat the child consumed while they were at the center. If you are not using the Timeclock, the Childcare Sage will alsocheck off meals that the child consumed when you transcribe the child’s timesheets on the batch timesheets screens. Youcan also enter meal specifics manually on the attendance screen, or on the Batch Meal Entry screen.For CACFP reimbursement
The ChildCare Sage is the most feature rich, easy to learn, and most affordable childcare management system available. It is an easy to use system designed to save time and increase pr