Transcription
424@ OWNER’S MANUAL3D0023100A
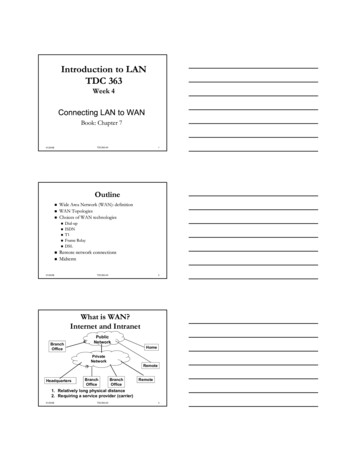
Table Of ContentsSafety InstructionsIntroductionThe Recording SystemThe three steps to multitrackUnderstanding the MixerSignal flow in the 424 MKIII mixerTape cue monitor systemMultitrack Cassette RecorderTrack Format and Tape RecommendationsPORTASTUDIO 424 MKIII Brief GuideStep-By-Step Operations GuideLet's try the 424 MKIII mixerHow to record on track 1Track 1 playback through TAPE CUEHow to make an overdub on track 2How to record tracks 3 and 4How to record many sources onto asingle trackHow to record a mix onto two trackssimultaneouslyRecording on more than two trackssimultaneously : DIRECTHow to mix downUsing Memory Location PointsLoading MEMO pointsLocating the tapeRepeat PlayPUNCH-IN or INSERT RecordingPreliminaryRehearsal and auto in/out proceduresManual punch-inBouncing Tracks (Ping-Pong)Ping-pong 325-2625262728-3228293133-3433Using Effects with thePORTASTUDIO 424 MKIIISetting effect send levelsSetting the output level of effect devicesSetting the mix/balance controlon effect devicesHow to connect your effects devicesSyncing MIDI-Tape—Using theTASCAM MTS-30TroubleshootingFeatures and Controls424 MKIII MixerInput sectionStereo input sectionMonitor sectionMaster sectionOutput section424 MKIII RecorderCassette loading and dbx systemTransport controlsTrack controlsDisplaysAutolocatorsOptional AccessoriesCare and MaintenanceHow the dbx WorksSpecificationsBlock DiagramLevel Diagram" Copyright 1998, TEAC Corporation"All rights reserved under international and Pan American copyright conventions.This book may not be reproduced in whole or in part, by mimeograph or any other means,without permission."The following marking is located on the bottom of the unit."CAUTIONRISK OF ELECTRIC SHOCKDO NOT OPENCAUTION: TO REDUCE THE RISK OF ELECTRIC SHOCK, DO NOTREMOVE COVER (OR BACK). NO USER-SERVICEABLE PARTSINSIDE. REFER SERVICING TO QUALIFIED SERVICE PERSONNEL.The lightning flash with arrowhead symbol, within equilateral triangle, is intended to alertthe user to the presence of uninsulated "dangerous voltage" within the product's enclosurethat may be of sufficient magnitude to constitute a risk of electric shock to person.The exclamation point within an equilateral triangle is intended to alert the user to thepresence of important operating and maintenance (servicing) instructions in theliterature accompanying the appliance.This appliance has a serial number locatedon the rear panel. Please record the modelnumber and serial number and retain themfor your records.Model numberSerial number2WARNING: TO PRIVENT FIRE OR SHOCKHAZARD, DO NOT EXPOSE THISAPPLIANCE TO RAIN OR 44748-494950-5253-5455
Safety InstructionsCAUTION: Read all of these Instructions. Save these Instructions for later use. Follow all Warnings and Instructions marked on theaudio equipment.1) Read instructions — All the safety and operating instructionsshould be read before the product is operated.2) Retain instructions — The safety and operating instructions shouldbe retained for future reference.3) Heed Warnings — All warnings on the product and in the operatinginstructions should be adhered to.4) Follow instructions — All operating and use instructions shoud befollowed.5) Cleaning — Unplug this product from the wall outlet before cleaning.Do not use liquid cleaners or aerosol cleaners. Use a damp cloth forcleaning.6) Attachments — Do not use attachments not recommended by theproduct manufacturer as they may cause hazards.7) Water and Moisture — Do not use this product near water forexample, near a bath tub, wash bowl, kitchen sink, or laundry tub; in a wetbasement; or near a swimming pool; and the like.8) Accessories — Do not place this product on an unstable cart, stand,tripod, bracket, or table. The product may fall, causing serious injury to achild or adult, and serious damage to the product. Use only with a cart,stand, tripod, bracket, or table recommended by the manufacturer, or soldwith the product. Any mounting of the product should follow themanufacturer’s instructions, and should use a mounting accessoryrecommended by the manufacturer.9) A product and cart combination should be moved with care. Quickstops, excessive force, and uneven surfaces may cause the product and cartcombination to overturn.10) Ventilation — Slots and openings in the cabinet are provided forventilation and to ensure reliable operation of the product and to protect itfrom overheating, and these openings must not be blocked or covered. Theopenings should never be blocked by placing the product on a bed, sofa,rug, or other similar surface. This product should not be placed in a built-ininstallation such as a bookcase or rack unless proper ventilation is providedor the manufacturer’s instructions have been adhered to.11) Power Sources — This product should be operated only from thetype of power source indicated on the marking label. If you are not sure ofthe type of power supply to your home, consult your product dealer or localpower company. For products intended to operate from battery power, orother sources, refer to the operating instructions.12) Grounding or Polarization — This procuct may be equipped witha polarized alternating-current line plug (a plug having one blade widerthan the other). This plug will fit into the power outlet only one way. Thisis a safety feature. If you are unable to insert the plug fully into the outlet,try reversing the plug. If the plug should still fail to fit, contact yourelectrician to replace your obsolete outlet. Do not defeat the safety purposeof the polarized plug.13) Power-Cord Protection — Power-supply cords shoud be routed sothat they are not likely to be walked on or pinched by items placed upon oragainst them, paying particular attention to cords at plugs, conveniencereceptacles, and the point where they exit from the product.14) Outdoor Antenna Grounding — If an outside antenna or cablesystem is connected to the product, be sure the antenna or cable system isgrounded so as to provide some protection against voltage surges and builtup static charges. Article 810 of the National Electrical Code, ANSI/NFPA70, provides information with regard to proper grounding of the mast andsupporting structure, grounding of the lead-in wire to an antenna dischargeunit, size of grounding conductors, location of antenna-discharge unit,connection to grounding electrodes, and requirements for the groundingelectrode."Note to CATV system installer:This reminder is provided to call the CATV system installer’s attention toSection 820-40 of the NEC which provides guidelines for proper groundingand, in particular, specifies that the cable ground shall be connected to thegrounding system of the building, as close to the point of cable entry aspractical.Example of Antenna Grounding as perNational Electrical Code, ANSI/NFPA 70ANTENNALEAD INWIREGROUNDCLAMPANTENNADISCHARGE UNIT(NEC SECTION 810-20)ELECTRICSERVICEEQUIPMENTGROUNDING CONDUCTORS(NEC SECTION 810-21)GROUND CLAMPSPOWER SERVICE GROUNDINGELECTRODE SYSTEM(NEC ART 250. PART H)NEC - NATIONAL ELECTRICAL CODE15) Lightning — For added protection for this product during a lightningstorm, or when it is left unattended and unused for long periods of time,unplug it from the wall outlet and disconnect the antenna or cable system.This will prevent damage to the product due to lightning and power-linesurges.16) Power Lines — An outside antenna system should not be located inthe vicinity of overhead power lines or other electric light or power circuits,or where it can fall into such power lines or circuits. When installing anoutside antenna system, extreme care should be taken to keep fromtouching such power lines or circuits as contact with them might be fatal.17) Overloading — Do not overload wall outlets, extension cords, orintegral convenience receptacles as this can result in risk of fire or electricshock.18) Object and Liquid Entry — Never push objects of any kind intothis product through openings as they may touch dangerous voltage pointsor short-out parts that could result in a fire or electric shock. Never spillliquid of any kind on the product.19) Servicing — Do not attempt to service this product yourself asopening or removing covers may expose you to dangerous voltage or otherhazards. Refer all servicing to qualified service personnel.20) Damage Requiring Service — Unplug this product from the walloutlet and refer servicing to qualified service personnel under the followingconditions:a) when the power-supply cord or plug is damaged.b) if liquid has been spilled, or objects have fallen into the product.c) if the product has been exposed to rain or water.d) if the product does not operate normally by following the operatinginstructions. Adjust only those controls that are covered by the operatinginstructions as an improper adjustment of other controls may result indamage and will often require extensive work by a qualified technician torestore the product to its normal operation.e) if the product has been dropped or damaged in any way.f ) when the product exhibits a distinct change in performance thisindicates a need for service.21) Replacement Parts — When replacement parts are required, besure the service technician has used replacement parts specified by themanufacturer or have the same characteristics as the original part.Unauthorized substitutions may result in fire, electric shock, or otherhazards.22) Safety Check — Upon completion of any service or repairs to thisproduct, ask the service technician to perform safety checks to determinethat the product is in proper operating condition.23) Wall or Ceiling Mouting — The product shoud be mounted to awall or ceiling only as recommended by the manufacturer.24) Heat — The product should be situated away from heat sources suchas radiators, heat registers, stoves, or other products (including amplifiers)that produce heat.3
IntroductionThe PORTASTUDIO 424 MKIII is.The PORTASTUDIO 424 MKIII is a 4-track"Multitrack Master" cassette tape recorder and afull-function mixer with 8 inputs/stereo outputscombined into a single workstation.Its high audio quality and creative flexibilityreflect the experience and innovation that haveallowed TASCAM to earn its reputation inprofessional audio production fields, and its userfriendly design makes the 424 MKIII suitable foranyone, from expert to novice.CAUTION : TO PREVENT ELECTRIC SHOCK,MATCH WIDE BLADE OF PLUG TO WIDESLOT, FULLY INSERTATTENTION : POUR ÉVITER LES CHOCSÉLECTRIQUES, INTRODUIRE LA LAME LAPLUS LARGE DE LA FICHE DANS LA BORNECORRESPONDANTE DE LA PRISE ETPOUSSER JUSQU' AU FOND.Using this manual : To get the most out of your424 MKIII, please take the time to read throughthis manual. Some time spent now will keep youfrom overlooking some of the features that makethe 424 MKIII a more creative tool. You maydiscover some new tricks you haven't triedbefore.Use of capital letters : In general, we use all uppercase type to designate a particular switch,control, jack name or label (like PAN). Transportmodes and some features are described with anupper case first letter (like Record mode).About the weld lineThere is a patterned stripe-like effect on thebottom surface of the 424 unit. This effect iscalled a "weld line" and is a natural result ofthe resin molding process employed in themanufacture of the 424 unit. It is not a crackor scratch, and will cause no problems withthe operation of the 424 unit.NOTE FOR U.K. CUSTOMERSDO NOT cut off the mains plug from thisequipment. If the plug fitted is not suitable for thepower points in your home or the cable is tooshort to reach a power point, then obtain anappropriate safety approved extension lead orconsult your dealer.As these colours may not correspond with thecoloured markings identifying the terminals inyour plug proceed as follows:The wire which is coloured BLUE must beconnected to the terminal which is marked withthe letter N or coloured BLACK.If nonetheless the mains plug is cut off, removethe fuse and dispose of the plug immediately, toavoid a possible shock hazard by inadvertentconnection to the mains supply.The wire which is coloured BROWN must beconnected to the terminal which is marked withthe letter L or coloured RED.If this product is not provided with a mains plug,or one has to be fitted, then follow theinstructions given below:When replacing the fuse only a correctly ratedapproved type should be used and be sure to refit the fuse cover.IMPORTANT. DO NOT make any connection tothe larger terminal which is marked with the letterE or by the safety earth symbol ç or colouredGREEN or GREEN-and-YELLOW.IF IN DOUBT — CONSULT A COMPETENTELECTRICIAN.The wires in the mains lead on this product arecoloured in accordance with the following code:BLUE:BROWN:4NEUTRALLIVE
The Recording SystemThe PORTASTUDIO 424 MKIII is a complete audioproduction facility in a single box. It is dividedinto two major sections: a full-function mixer andan 4-channel, multitrack cassette recorder.To complete the recording system, you'lladditionally need these: Input devices(microphones, instruments), Output devices(headphones), 2 track recorder, Effectsprocessors, etc.The Three Steps to MultitrackIn TRACKING and Overdubbing, the mixer inputsare usually microphones or instruments, going todifferent tracks of the recorder.In MIXDOWN, signal comes from the multitrackand is sent to an external 2-track recorder.In OVERDUBBING, the MONITOR section andTAPE CUE of the mixer must be used to listen toprevious tracks while you record new ones, sothere is a two-way flow through the console.5
Understanding the MixerSignal Flow in the 424 MKIII MixerThe illustration below shows how input signalspass through the 424 MKIII Mixer section. Afterthe MASTER fader they go to the L/R LINE OUT6jacks. This is the most important signal route inthe mixer and is called "Main Mix".
Tape Cue Monitor SystemThe TAPE CUE mix and MONITOR switches arealso crucial for successful multitrack recording,because they control what you hear in theheadpnones. This CUE mix is totally independentfrom the Main Mix going to tape. If you don't usethe CUE mix, you run the risk of accidentally"bouncing tracks" every time you record newmaterial.The 4 TAPE CUE controls act like a separate 4x1mixer, dedicated solely to enabling you to hearplayback from the multitrack recorder in yourheadphones. The settings of these controls don’taffect the mix going to tape. When theEFFECT/CUE switch is set to the center position(EFFECT 2/CUE), the EFFECT 2/TAPE CUE switchis set to TAPE CUE, the TAPE CUE of the tracksyou want to hear are turned clockwise, and theMONITOR LEVEL is turned up, you can hear thetape playback in the headphones and MONITORoutputs. You can adjust the monitor level of eachtrack by adjusting its TAPE CUE control. Thechannels of the Main Mix remain free to handleexternal inputs for recording.If you can hear tape playback in your headphoneswhen TAPE CUE is off (in the left position), itmeans you're hearing tape through the Main Mix.This is correct for mixdown and bouncing tracks,but during overdubbing it can cause previoustracks to be mixed together with new tracks,instead of each part remaining separate. Use theTAPE CUE to avoid this.The MONITOR SELECT LINE OUT switch affectswhether you will hear the off-tape signal (OFF), orthe LINE OUT signals in MONO or stereo (L-R).When you are recording, you should set thisswitch to OFF, the EFFECT/CUE switch to EFFECT2/CUE, and the EFFECT 2/TAPE CUE switch toTAPE CUE.7
Multitrack Cassette RecorderThe 424 MKIII records on readily availablestandard (Philips) Compact Cassette tape, highbias Type II. The recorder has 4 tracks while themixer has a stereo output; however, using theDIRECT feature you can record on any or all ofthe 4 tracks at one time. For more details, see"Recording on More Than Two TracksSimultaneously", page 22.The 424 MKIII's dbx Noise Reduction virtuallyeliminates unwanted tape noise. A special SYNCfeature tuns off the dbx on track 4 separately,making it possible to record and play back theMIDI sync tones or SMPTE/EBU time codewithout being affected by the dbx encode/decode.This ensures that the sync tones/code arerecorded and played back without unnecessaryprocessing. With proper operating techniques, itis not necessary to leave a guard band betweenmusic and sync tone tracks because of the lowcrosstalk of the TASCAM heads.The transport controls of the 424 MKIII are microprocessor operated, allowing highly reliablefunctions that make the unit easier to use:8 A three-point autolocator (MEMO/LOC 1 and 2and RTZ) lets the tape STOP at, or PLAY frompreset points. REPEAT allows a section to be played overand over between the MEMO 1 and MEMO 2points. REHEARSAL programs the 424 MKIII to repeata punch-in/out sequence as many times asyou wish, and AUTO PUNCH actually executesit on tape exactly as you "previewed" inREHEARSAL. Two tape speeds offer HIGH for greaterfidelity, and NORMAL for compatibility withstandard cassette tapes. The tape speed can be increased or decreasedwith the PITCH CONTROL dial in bothplayback and record, to match pitch or forspecial effects.
Track Format and Tape RecommendationsTape Speed and Track FormatThe Portastudio 424 MKIII uses a HIGH speed of9.5 cm/sec. (3-3/4 inches per second) which is twotimes (2X) the normal speed of a standard audiocassette. Its NORMAL speed is 4.8 cm/sec (1-7/8i.p.s.), the same as that used by conventionalrecorders.Playing back standard (stereo) prerecordedtapes: Tapes recorded on stereo cassetterecorders can play back properly on the 424 MKIIIif you set the track playback, tape speed, andnoise reduction type correctly. Tracks 1 and 2roughly follow the standard "stereo" format, buttracks 3 and 4 use the "Side B" (reverse side)tracks. So you must turn off Track 3-4 playback toavoid hearing the flip side playing backwards. Ifthe cassette was recorded with Dolby B typenoise reduction, the DBX NR switch should be setto OFF.For the same reasons, tapes recorded on thePortastudio 424 MKIII will not play back properlyon stereo cassette recorders. Material recordedon the 424 MKIII must be mixed down to stereofor final distribution.The 424 MKIII needs the entire width of the tapeto record its four tracks, eliminating the option ofrecording on both sides (actually, it's bothdirections). Therefore, you should decide whichIt also employs a discrete 4-channel format headdeveloped especially by TEAC for TASCAMmultitrack cassette recorders. Here is acomparison of various cassette formats:side (side "A" or side "B") you want to use anduse that side exclusively. It's a good idea to getinto habit of consistently using the same side onall multitrack tapes.Tape TypeThe Portastudio 424 MKIII is internally adjustedfor HIGH BIAS Type II tape. This means that forbest results, you should only use tapes of thistype. TDK SA, Maxell XL-II or equivalentformulations are recommended. We stronglysuggest that you select one good quality brandand use it exclusively. The time you spendcreating your multitrack master is much morevaluable than the money you save by buyinginferior tape. The cassette shell essentiallybecomes a part of the 424 MKIII's transport. Poorquality shells can cause wrinkles, snarls andshredding of the edges of the tape with use. Evensmall scratches on the tape oxide can cause"dropouts" (temporary loss of signal) on one ormore tracks. High quality tapes are less likely tocause problems in the long run.9
Accidental Erase/Record ProtectionTo protect a finished master tape, it is necessaryto punch out both record protect tabs. Eventhough you are recording in only one direction,the 424 MKIII uses the entire width of the tape, asmentioned above. If, for example, you removeonly one of the tabs, you could accidentally insertthe cassette into the 424 MKIII backwards anderase all four tracks of t
The PORTASTUDIO 424 MKIII is a 4-track "Multitrack Master" cassette tape recorder and a full-function mixer with 8 inputs/stereo outputs . appropriate safety approved extension lead or consult your dealer. If nonetheless the mains plug is cut o