Transcription
Version 9Installation Guide:Insperity ExpensAble Office and Mobile AppInsperity Expense Management2211 Michelson Drive, Suite 520Irvine, CA 92612Phone: 949-751-2800Technical Support: 1 ght 2012 ExpensAble, Inc.
Table of ContentsInstallation and Configuration for Insperity ExpensAble Office and Mobile AppOverviewSystem RequirementsWindowsMacExpensAble Office Users Migrating to ExpensAble Office 9Installing ExpensAble Office (Windows)Installing ExpensAble Office (Mac)Launching ExpensAble Office for the First Time (New User or New Data File)Launching ExpensAble Office for the First Time (Existing User with Existing Data File)Email Verification of InstallationMobile Application InstallationConfiguring the Mobile Application - SettingsMobile Application use with ExpensAble OfficeInstallation and Configuration for Insperity ExpensAble Office and Mobile AppThe following sections will guide you through the installation and configuration of InsperityExpensAble Office and its companion mobile application.OverviewExpensAble Office 9 has been designed to work faster and better. And the big news is thecompanion mobile application for your smartphone (iPhone now, Android very soon) that allows you tocapture your expenses along with a photo of the receipt and send it to ExpensAble Office. When youopen ExpensAble Office on your PC or MAC, those mobile expenses will be displayed so you can easilyadd those expenses to your expense reports.System RequirementsYour computer must meet the following system requirements in order to successfully install and useExpensAble Office version 9.Windows Mac100 MB available disk space1024 x 640 or higher resolution monitorMicrosoft Windows XP, Windows 7Internet Explorer 7 or betterInternet connection to access online features and use mobile application 100MB available Disk Space 1024 x 640 or higher resolution monitorPage 2
Mac OS X 10.5 or better Safari 5 or better Internet connection to access online features and use mobile applicationExpensAble Office Users Migrating to ExpensAble Office 9Older versions of ExpensAble Desktop must be uninstalled via Control Panel Programs UninstallPrograms (Windows 7) or Control Panel Add/Remove Programs (Windows XP) prior to installingExpensAble Office 9.Note: Uninstalling ExpensAble Desktop will not remove your existing data file. When you install andlaunch ExpensAble Office 9, your old data file should be found and loaded automatically. If not, a screenwill appear allowing you to locate the file.Installing ExpensAble Office (Windows)This section assumes you have already downloaded the ExpensAble installation program(ExpensAbleOffice9.msi) to your computer from the ExpensAble e-Store web-site or via the email youreceived from the e-Store.To install ExpensAble Office 9 on Windows, perform the following steps:Note: Close all other applications during installation1. Locate the downloaded file ExpensAbleOffice9.msi on your computer and double-click it tolaunch the installer. Click Next.ExpensAble Office Setup Wizard2. Click Next to install ExpensAble Office in the directory specified in the Select Installation Folderscreen.The default directory is: C:\Program Files (x86)\ExpensAbleNote: This is also the directory that will contain the User Guide and the End User License Agreement.Page 3
Select Installation Folder3. The Ready to Install screen is displayed. Click Install.Ready to Install4. Click Next to complete the installation.Page 4
Installation in Progress5. Click Finish.Installation Completed6. ExpensAble Office has been installed and a shortcut will be displayed on your desktop.Desktop ShortcutInstalling ExpensAble Office (Mac)This section assumes you have already downloaded the ExpensAble installation program(ExpensAbleOffice9.dmg) to your computer from the ExpensAble e-Store web-site or via the email youreceived from the e-Store.To install ExpensAble Office 9 on Mac, perform the following steps:Page 5
1. Double-click the downloaded file ExpensAbleOffice9.dmg to create and open the ExpensAbleOffice mount.Open ExpensAble Office Mount2. Drag the ExpensAble envelope icon onto the Applications folder icon.Drag ExpensAble icon to Application iconOnce the icon is dragged to the Applications folder, the copy process occurs completing theinstallation process:Installing ExpensAble Office3. For your convenience the other icons represent the User Guide, End User License Agreement,Readme and Copyright documents and can be dragged into another folder or the desktop foreasy access.Page 6
4. ExpensAble Office has been installed and an icon will be displayed in the Applications area of theFinder.5. For faster access, drag the ExpensAble Office to the desktop to create a shortcut.Optional Cleanup: To remove the ExpensAble Office mount, right-click on it and select Eject “ExpensAble Office 9”. To remove the file ExpensAbleOffice9.dmg, right-click on it and select Move to TrashLaunching ExpensAble Office for the First Time (New User or New Data File)ExpensAble Office saves all expense report envelopes, smart lists and other configuration data in adata file. When ExpensAble Office is run for the first time you are prompted to either create the data fileor locate an existing data file. All new users will need to create a new data file. Existing users have thechoice to either use their existing data file or create a new data file. Anyone that chooses to create anew data file will follow the steps shown here.1. Double-click the ExpensAble Office desktop icon:2. If the Welcome to ExpensAble screen appears and Create a new file is selected:Welcome to ExpensAblea. You are a new user and a new data file needs to be created. Clickb. Enter a name for the data file. Click Save.Note: Only enter a name for the file (e.g. expenses). ExpensAble Office will automatically add the fileextension (e.g. expenses.qex)3. The ExpensAble End User License Agreement is displayed. Select I accept the terms in thelicense agreement. ClickNote: Read the terms included in the License Agreement before accepting.Page 7
End User License Agreement4. Once the license agreement is accepted, the Guided Setup appears. Enter your registration codeand the email address. ClickNote: When you install and launch the mobile application you will be prompted to enter these twofields. They must match in order to link the two programs together.Guided Setup - Customer Information5. This screen is used to tell the software whether or not to try and connect for registration afterGuided Setup is complete. Select Yes if you currently have access to the Internet. Select No ifyou do not have access. ClickNote: You can access the Guided Setup at any time to register your software by clicking Administration Guided Setup from the left navigation panel.Page 8
Guided Setup – Internet Access6. The next screen allows you to edit your name as it will appear on the printed expense reports.ClickGuided Setup – Printed Name7. Edit your company name to match how you want it to appear on the printed expense reports.ClickGuided Setup – Printed Company NamePage 9
8. Enter your department name if you want it printed on the expense reports. ClickGuided Setup – Printed Department Name9. Enter your phone number if you want it printed on the expense reports. ClickGuided Setup – Printed Phone Number10.If you have an employee number and want it printed on the expense reports, enter it here. ClickGuided Setup – Printed Employee NumberPage 10
11.If you have a mail stop, enter it here. ClickGuided Setup – Company Mail Stop12.Select your home currency from the drop-down list. ClickGuided Setup – Home Currency13.Enter your mileage reimbursement rate. ClickGuided Setup – Mileage RatePage 11
14.The next screen relates to value-added taxes charged outside of the United States. If most ofyour expenses occur within the US, select No. If most of your expenses do occur outside of theU.S., select Yes. ClickGuided Setup – International Taxesa. Clicking Yes will display a screen allowing you to select which value-added tax to includein your expense entry screen. ClickGuided Setup – Select Special Tax15.Your completed profile is displayed. Clickcontinue.Page 12to go back and edit entries. Clickto
Guided Setup – Completed Profile16.Enter your personal address in this screen. ClickGuided Setup – Personal Address17.Edit your company address if different from personal address. ClickGuided Setup – Company Address18.Select the options desired. ClickPage 13
Guided Setup – Notification Options19.The registration benefits screen is displayed. ClickGuided Setup – Submit Registration20.If you selected Yes to the earlier question pertaining to having Internet access, ExpensAbleOffice will attempt an Internet connection and validate your registration:Validating Registrationa. Once completed, you will be navigated to this encryption screen. If you selected No, youwill be navigated directly to this encryption screen. Select No if you want to use the normal level protection of sensitive data. Click Select Yes if you would like to use encryption for a stronger level of security.Page 14
Guided Setup – Encryptionb. If you select Yes, the password screen is displayed. Enter a new password, confirm thepassword. ClickGuided Setup – Encryption Password21.The Guided Setup is complete. Select the Start the Account Guided Setup interview checkbox ifyou are ready to setup your payment methods now. Instructions for the Account Guided Setupcan be viewed in the User Guide. ClickNote: The User Guide for Windows can be found in the directory in which ExpensAble Office wasinstalled. The default was C:\Program Files (x86)\ExpensAbleNote: The User Guide for Mac will be in the folder you moved it to during the installation process.Page 15
Guided Setup - CompleteLaunching ExpensAble Office for the First Time (Existing User with Existing Data File)ExpensAble Office saves all expense report envelopes, smart lists and other configuration data in adata file. When ExpensAble Office is run for the first time you are prompted to either create the data fileor locate an existing data file. Existing users who used older versions of ExpensAble Desktop have thechoice to either locate and use their existing data file or create a new data file (see section above).Note: if the data file (*.qex) was never moved or renamed ExpensAble Office 9 will locate and open thefile. The default, system created data file was named expensese.qex and was stored in your Documentsfolder.1. Double-click the ExpensAble Office desktop icon:1. If the Welcome to ExpensAble screen does not appear, you are an existing user and ExpensAbleOffice successfully located your existing data file and loaded it automatically. You will see theEnd User License Agreement (step 3.)2. If the Welcome to ExpensAble screen appears and Locate your ExpensAble file is selected:Welcome to ExpensAblea. You are an existing user but your data file was either moved or renamed and cannot belocated.to locate your data file.b. ClickPage 16
Note: If you are not sure what your data file was named, look for files ending with the extension .qex.These are ExpensAble data files.3. The ExpensAble End User License Agreement is displayed. Accept the terms and ClickNote: Read the terms included in the License Agreement before accepting.End User License Agreement4. The ExpensAble License Details screen is displayed. Enter your Registration Code and ClickRegistration Code5. Once saved, ExpensAble Office will attempt to validate the registration code. If you areconnected to the Internet the validation screen will appear:Validating RegistrationInstallation and registration are complete. You are ready to use ExpensAble Office version 9. Pleaserefer to the User’s Guide for details on the Guided Setup, entering expenses and other functionality.Note: The User Guide for Windows can be found in the directory in which ExpensAble Office wasinstalled. The default was C:\Program Files (x86)\ExpensAblePage 17
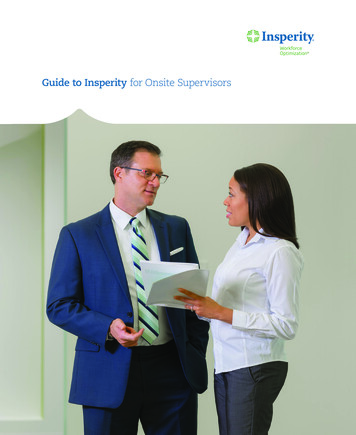
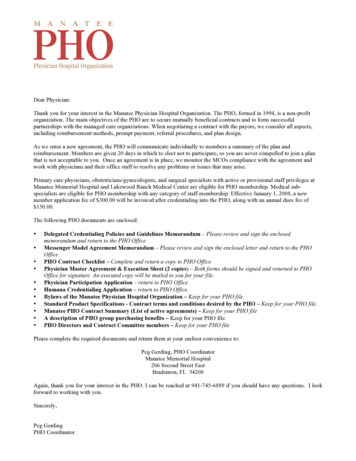
Note: The User Guide for Mac will be in the folder you moved it to during the installation process.Email Verification of InstallationOnce registration is complete, you will receive an email verifying the installation of ExpensAbleOffice. This email provides the Registration Code and User ID you need to enter in the mobileapplication to link it to ExpensAble Office. The User ID is the email you entered when registeringExpensAble Office.ExpensAble Office Installed EmailMobile Application InstallationOnce you have successfully registered ExpensAble Office and have received the verification email,you can now install the Mobile Application on your iPhone or iPad.1. Tap the icon labeled “App Store” on your iPhone or iPad.2. Click in the search field and enter ‘ExpensAble’.3. You will see two matches for ExpensAble. One mobile app is tuned for ExpensAble Office andthe other for our ExpensAble Corporate product. Take a moment and read the productdescription to ensure you are installing the correct version.Page 18
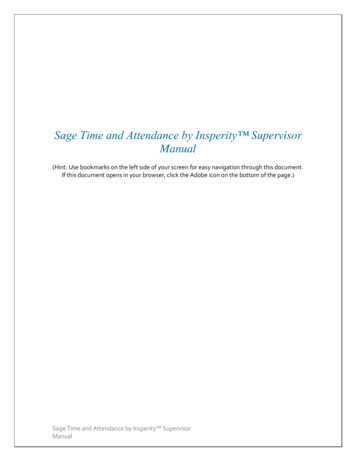
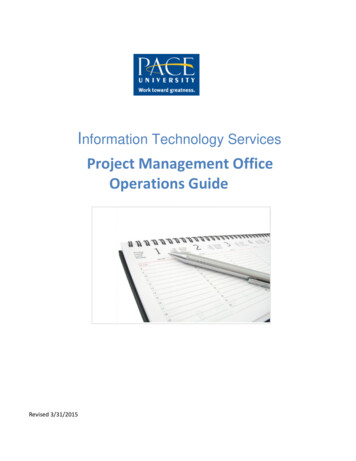
4. Note: An alternate to steps 1 - 3 is to open the email verifying installation (see section above)using your device and tap the link provided.5. Tap the application containing the following icon and label reading Insperity ExpensAble Officeto install:Insperity ExpensAble Office6. Tap Install and enter your iTunes credentials.7. The application is installed onto your device.Configuring the Mobile Application - SettingsOnce installed, tap on theicon to launch the application and open the Settings screen.Mobile App Settings ScreenYou are prompted to enter: The email address that you used during the ExpensAble Office guided setup Your Registration code (e.g. NSP-E9C )Note: The email must be the same as the email entered when you registered ExpensAble Office onyour computer.Tap Save (or Done on the keyboard) and the mobile app will validate the entries. Once properlyconfigured, the screen will display the Home screen and you can begin to capture and submitPage 19
expenses. If configuration fails, verify the Registration Code and email address entered and tryagain.Mobile Application use with ExpensAble OfficeWhen expenses are sent from the mobile application they are stored until you open ExpensAbleOffice and a connection to the Internet is found. The expenses will be downloaded and you will see analert appear:Mobile Expenses Download PromptNote: You can also download mobile expense by clicking Online Download Mobile Expenses.The downloaded mobile expenses are found by clicking My Accounts E-Bin, click E-Bin envelope:Page 20
Mobile Expenses Downloaded to E-Bin in ExpensAble OfficeOnce expenses are in ExpensAble Office they are the same as all expenses; they can be dragged intoexpense reports, edited and even deleted if no longer valid. The main exception from other expenses isthat any photos of receipts are attached to the expense. The photo receipt cannot be detached from theexpense and can be viewed two ways; you can hold (hover) the mouse over the gold paperclip iconswithin the Expenses tab or click the Attachments tab to view all receipts.Hover View of Receipt attached to ExpensePage 21
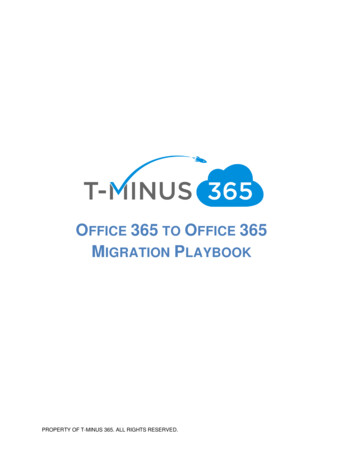
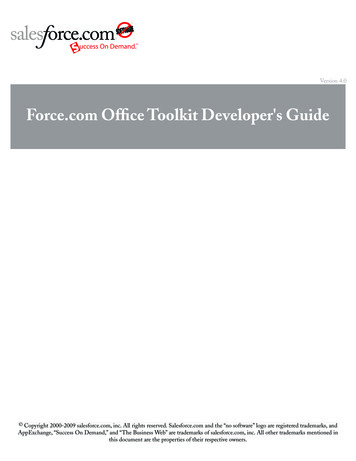
Photo receipts attached to mobile expenses will also be attached to the expense report they aremoved into and can be viewed via the Attachments tab:View of Receipts Attached to Report via Attachments TabBoth methods of viewing mobile receipts provide tools that allow you to zoom in/out or rotate theimage. If the image is rotated, you can save the rotation by clicking the disk icon.Image Tools for Save, Zoom and RotateWhen viewing the image via the hover method, the image will go away when the mouse is movedoff of the icon. If any changes were made to the image you will be prompted to save the changes.Page 22
Insperity ExpensAble Office and M obile App . Insperity Expense Management . 2211 Michelson Drive, Suite 520 . Irvine, CA 92612 . Phone: 949-751-2800 . Technical Su