Transcription
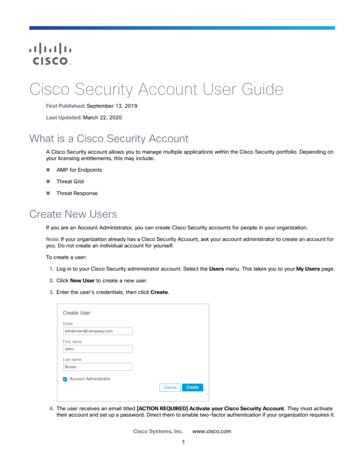
Cisco Security Account User GuideFirst Published: September 13, 2019Last Updated: March 22, 2020What is a Cisco Security AccountA Cisco Security account allows you to manage multiple applications within the Cisco Security portfolio. Depending onyour licensing entitlements, this may include: AMP for Endpoints Threat Grid Threat ResponseCreate New UsersIf you are an Account Administrator, you can create Cisco Security accounts for people in your organization.Note: If your organization already has a Cisco Security Account, ask your account administrator to create an account foryou. Do not create an individual account for yourself.To create a user:1. Log in to your Cisco Security administrator account. Select the Users menu. This takes you to your My Users page.2. Click New User to create a new user.3. Enter the user’s credentials, then click Create.4. The user receives an email titled [ACTION REQUIRED] Activate your Cisco Security Account. They must activatetheir account and set up a password. Direct them to enable two-factor authentication if your organization requires it.Cisco Systems, Inc.1www.cisco.com
Cisco Security Account User GuideResend Activation EmailsResend Activation EmailsIf your user missed or deleted their activation email before they activated their account, you can resend their activationemail.To resend an activation email:1. Log in to your Cisco Security administrator account. Select the Users menu. This takes you to your My Users page.2. Under the Actions column, click View next to the user’s name to see their information.3. Click Resend Activation Email to resend the user’s activation email.4. The user receives an email titled [ACTION REQUIRED] Activate your Cisco Security Account. They must activatetheir account and set up a password. Direct them to set up two-factor authentication if your organization requires it.Delete UsersIf you are an Account Administrator, you can delete Cisco Security accounts for people in your organization. Note thatonly active users can be deleted. To activate a user, you can resend their activation email to have them activate theiraccount.To delete a user:1. Log in to your Cisco Security administrator account. Select the Users menu. This takes you to your My Users page.A list of users is shown.2. Under the Actions column, click the trash can icon to delete the user.2
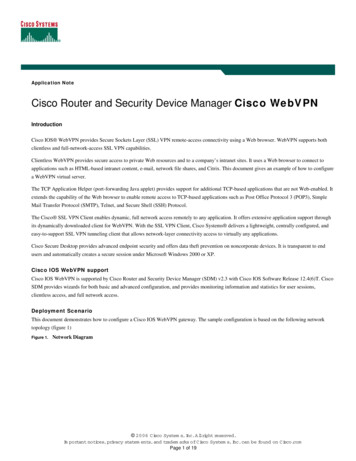
Cisco Security Account User GuideTwo-Factor AuthenticationTwo-Factor AuthenticationTwo-factor authentication provides an additional layer of security against unauthorized attempts to access your CiscoSecurity account. It uses an RFC 6238 compatible application such as Google Authenticator to generate one-timeverification codes to be used in conjunction with your password.Enable Two-Factor AuthenticationTo enable two-factor authentication:1. Go to your My Account page by selecting the Users menu, then clicking your name on the My Users page.2. Click the Manage Two-Factor Authentication link on your My Account page.3. Follow the in-app steps to set up two-factor authentication:1. Download a third-party authenticator such as Google Authenticator to your device.2. Scan a one-time QR code with the authenticator app.3. Enter the verification code provided by the authenticator app to enable two-factor authentication.A list of backup codes is generated in case you do not have access to your device in the future. It is important to keep acopy of your backup codes in a safe location in case you are unable to access the device with your authenticator app.Once you have successfully enabled two-factor authentication on your account, the Manage Two-FactorAuthentication link will take you to a page where you can generate new backup codes or disable two-factorauthentication.3
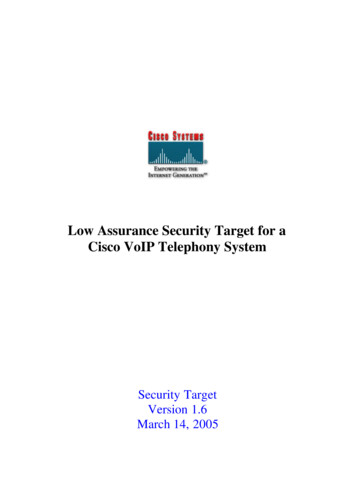
Cisco Security Account User GuideTwo-Factor AuthenticationNote: Each backup code can only be used one time. After you have used all your backup codes you can return to thispage to generate new ones.The next time you log in to your Cisco Security account you will be prompted for a verification code after you enter youremail address and password.Disable Two-Factor AuthenticationTo disable two-factor authentication on your account:1. Go to your My Account page by selecting the Users menu, then clicking your name.2. Click the Manage Two-Factor Authentication link on your My Account page.3. Click the Disable button under the Disable TFA heading.4
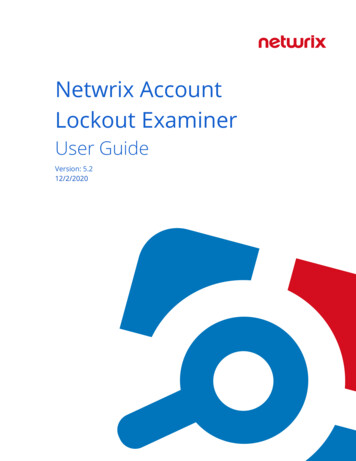
Cisco Security Account User GuideSingle Sign-On (SSO)Single Sign-On (SSO)Single sign-on (SSO) streamlines the user login process while enhancing security. SSO involves three parts: the user,third-party identity provider (IdP), and Cisco Security. Once SSO is enabled, authentication takes the following steps:1. The user connects to the Cisco Security SSO login page and attempts to authenticate by entering their username.2. If the username is valid, Cisco Security redirects the user’s authentication request to the third-party identity provider.3. The third-party identity provider validates the user.4. On successful authentication, Cisco Security gives the user access to the their account.Set Up SSO for Your BusinessCisco Security single sign-on supports SAML 2.0. You can configure Cisco Security to use Cisco Secure Sign-On, or youcan use a custom third-party identity provider. This document assumes your identity provider is set up with your users.You can learn more about Cisco Secure Sign-On at https://cisco.com/go/securesignon.CaveatsKeep the following caveats in mind when enabling single sign-on: All users must have an account with an email address that has a corresponding email address at the identity provider.If you have any users who do not have a matching email address at the identity provider, those users will no longerbe able to log in. Contact support to have single sign-on disabled for those users. Using Cisco Secure Sign-On as your SAML provider requires all accounts in your organization to have existing CiscoSecure Sign-On accounts. You can create Cisco Secure Sign-On accounts at https://sign-on.security.cisco.com.Users will receive an email and must activate their accounts within 7 days. Users without an account will not be ableto sign in. All user passwords will be reset to prevent users from logging in using the standard username and passwordmechanism. Admin users will be able to create a one-time password through Cisco Security. Two-factor authentication will be disabled for each user. You will need to re-enable two-factor authentication if youdisable single sign-on. You can create a new user in the AMP console with single sign-on disabled. This can be useful if your identityprovider is offline or unreachable and you still need to access Cisco Security.Enable SSO Using Cisco Secure Sign-OnTo enable Cisco Secure Sign-On for your business:1. Log in to your Cisco Security administrator account.2. Select the SAML Configuration menu.3. Select Cisco Secure Sign-On. This takes you to the SAML Configuration page.5
Cisco Security Account User GuideSingle Sign-On (SSO)4. Go to https://sign-on.security.cisco.com and click Sign up to create a Cisco Secure Sign-On account. For moreinformation about creating this account, see Cisco Secure Sign-On Quick Start Guide.Note: Using Cisco Secure Sign-On as your SAML provider requires all accounts in your organization to have existingCisco Secure Sign-On accounts. You can create Cisco Secure Sign-On accounts athttps://sign-on.security.cisco.com. Users without an account will not be able to sign in.5. Once your account is created, return to the SAML Configuration page, and click Verify Configuration.6. Sign in with the credentials provided when you created the Cisco Secure Sign-On account. You are prompted to login with Duo Security as a second authentication factor.7. Once you have verified your configuration, note the caveats listed on the SAML configuration page then click EnableCisco Secure Sign-On to complete the setup.8. An email is sent to each user with instructions on how to log in. Instead of entering their username and password,users must now log in by clicking Use Single Sign-On on the log in page, entering their email address, then clickingLog In. If the user has not already authenticated to the identity provider they are redirected to do so.6
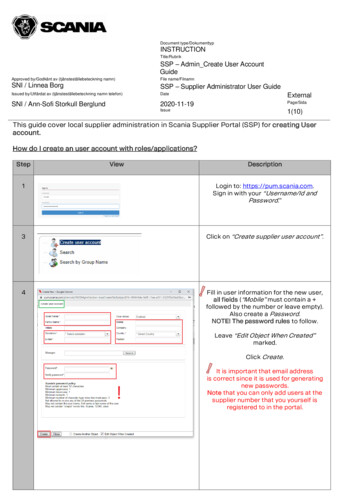
Cisco Security Account User GuideSingle Sign-On (SSO)Enable SSO Using Custom Single Sign-OnTo enable single sign-on for your business using your existing third-party identity provider:1. Log in to your Cisco Security administrator account.2. Go to the SAML Configuration page by selecting the SAML Configuration menu.3. Configure your third-party identity provider for use with Cisco Security:a.b.Enter the information provided under Service Provider Settings into the appropriate setup page on your identityprovider. The items may have different names on your identity provider’s system. For example: Assertion Consumer Service URL may be called SAML Assertion Consumer Service (ACS) or SingleSign-on URL. Entity ID may be called SP Entity ID or Audience URI.Enter any additional information your identity provider requires, noting the following: For Active Directory set Outgoing Claim Type to Email Address. For Okta set Name ID format to EmailAddress and Application username to Email.4. Download the SAML metadata file from your third-party identity provider or copy the SAML metadata URL.5. Under Identity Provider Settings, upload the SAML metadata file or paste the SAML metadata URL.7
Cisco Security Account User GuideSingle Sign-On (SSO)6. Click Save SAML Configuration.7. Click Test to test your configuration. You are prompted to log in to your identity provider. If the test is successful,move on to the next step.8. Click Enable SAML Authentication to complete the setup.9. An email is sent to each of your users with instructions on how to log in. Users must log in by clicking Use SingleSign-On on the log in page and entering their email address.If the user has not already authenticated to the identity provider they are redirected to do so.Disable SSO for Your BusinessTo disable single sign-on for your business:1. Log in to your Cisco Security administrator account.2. Go to the SAML Configuration page by selecting the SAML Configuration menu.8
Cisco Security Account User GuideSingle Sign-On (SSO)3. Click Disable SAML Authentication or Disable Cisco Secure Sign-On to disable single sign-on.4. A password reset email is sent to all single sign-on users in your business who had single sign-on enabled. Usersmust reset their password before they can log in to their Cisco Security accounts.Note: If you are the administrator who is disabling single sign-on, you can reset your password immediately. You donot need to wait for the password reset email.Cisco and the Cisco logo are trademarks or registered trademarks of Cisco and/or its affiliates in the U.S. and other countries. To view a list of Cisco trademarks, go to thisURL: www.cisco.com/go/trademarks. Third-party trademarks mentioned are the property of their respective owners. The use of the word partner does not imply a partnershiprelationship between Cisco and any other company. (1721R) 2019 Cisco Systems, Inc. All rights reserved.9
Using Cisco Secure Sign-On as your SAML provider requires all accounts in your organization to have existing Cisco Secure Sign-On accounts. You can create Cisco Secure Sign-On accounts at https://sign-on.security.cisco.com. Users will receive an email and must activate their accounts