Transcription
Unicenter Service Desk v11 (USD)Training Materials for Analysts1
Table of ContentsIntroduction. 3Logging In as an Analyst. 4Reading the Scoreboard . 5My Requests. 5Viewing “My Group Unassigned Requests” . 7Creating a New Request . 9Using the Profile Browser. 9Adding Properties to a Request. 14Viewing a Request History for a Contact . 16Viewing Notification History . 18Responding to and/or Updating Requests . 19Changing the Priority Level of a Request. 20Changing the Status of a Request . 21Adding and Viewing Assets. 22Adding an Asset. 22Viewing an Asset . 24Manual Notifications . 25Viewing a Closed Request . 30Personalizing Responses. 32Creating a New Personalized Response. 32Accessing the Personalized Response or Global Personalized Response . 33Closing a Request. 35Printing Forms . 38Logging Out. 39Logging In to USD as an Employee. 40Creating a New Request. 41To change the Request Area field:. 42Viewing My Request . 44Auto Notifications. 452
IntroductionWelcome to the MCPS Unicenter Service Desk (USD). USD is an online application that can beused by all MCPS staff to request technology assistance. Analysts (Help Desk, ITSS, andsecond-level supports) will use USD to open, transfer, manage, respond to, and close technologyrequests. Analysts can also use USD and its search tools to track technology requests.Communications with customers can be associated with a request and documented using themanual email function.3
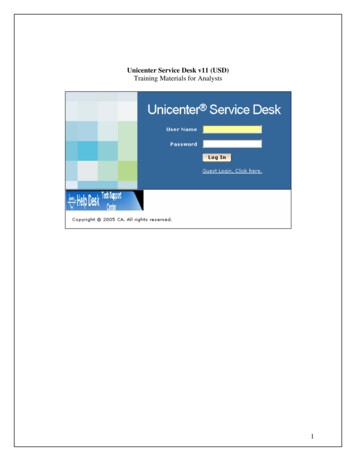
Logging In as an AnalystNOTE: Users will only have access to USD Online from an MCPS location. Users willNOT have access to USD at home.1.2.3.4.Go to the MCPS website: http://www.montgomeryschoolsmd.org/Click on Staff.In the Technology column, locate the Unicenter Service Desk link.Click on the Unicenter Service Desk link to login to the site.USD Login Screen5. Use your Outlook username and password to login. The Help Desk Tech SupportCenter home page will display.USD Home Page4
Reading the ScoreboardThere are different ways to view requests using the Scoreboard. Analysts may view requestsassigned to themselves, requests assigned to their group, and/or search for requests.My RequestsThe Scoreboard shows the current requests for the analyst.1. Look at the Scoreboard region on the left of your screen and locate the My Queue menu.Scoreboard Region2. Click on the symbol to the left of My Queue. The menu will expand.3. Click on the My Requests link. A list of assigned tickets will display.My Queue Expanded Menu5
Analyst’s Assigned Requests listThe Headers will display the following:Column NameDescriptionRequest #LocationStatusRequest NumberAllows request to be tracked by specified location of problemRequest is either open (active), closed (inactive), being researched, or workin progress.Date request was created4 is Normal, 3 is High, 2 is VIP, and 1 is EmergencyGroup is the group to which the request is assigned. If there is a parentrequest for the problem, it will be listed thereAssigneeOpen DatePriority LevelGroup/ParentContactNOTE: Some of the Headers are sortable.4. Click on a Request # to open and view the request. The Request Detail will display.Request Detail6
Viewing “My Group Unassigned Requests”All analysts will be able to access Group Unassigned Requests in order to view requests not yetassigned to anyone in the group that the analyst belongs to. For example, an ES ITSS maychoose to view the Group Unassigned Requests at the end of the work day to check for anyunassigned requests from end-users from their schools that have not yet been assigned by theHelp Desk.1. Look at the Scoreboard region on the left of your screen.My Group Unassigned Requests link2. Click on the My Group Unassigned Requests link. The Request List for the group willdisplay.Request List for group3. Headers display the following:Column NameDescriptionRequest #LocationStatusRequest NumberAllows request to be tracked by specified location of problemRequest is either open (active), closed (inactive), being researched, or workin progress.Date request was createdOpen Date7
Priority LevelGroup/ParentContact4 is Normal, 3 is High, 2 is VIP, and 1 is EmergencyGroup is the group it’s assigned to and Parent is if there is a parent requestfor the problem, it will be listed there.AssigneeNOTE: The location should match the end-user’s school number or department number.4. Click on a Request # to open and view the request. The Request Detail will display.Request Detail5. Type in a request number in the top right corner next to Request to do a quick search bythe request number and click the Go button.Searching by Request NumberNOTE: Group/Parent Header: This is a system used by the Help Desk. It is notcurrently used by other analysts.Request List for Analyst8
6. The Headers will display the following:Column NameDescriptionRequest #LocationStatusRequest NumberAllows request to be tracked by specified location of problemRequest is either open (active), closed (inactive), researching, and work inprogress.Date request was created4 is Normal, 3 is High, 2 is VIP, and 1 is EmergencyGroup is the group it’s assigned to and Parent is if there is a parent requestfor the problem, it will be listed there.AssigneeOpen DatePriority LevelGroup/ParentContactNOTE: The location should match the requester’s school number or department number.7. Click on a Request # to open and view the request. The Request Detail will display.Creating a New RequestThere are different ways to create New Requests. One of the ways is to use Profile Browser,which is explained below.Using the Profile BrowserThe quickest and easiest way to create a new request is to use the Profile Browser. Using theProfile Browser will allow you to add information much more efficiently, since many of its fieldswill automatically populate with information pulled in from the Profile Browser Contact Search.Scenario: The ITSS receives an email from a teacher requesting support to fix a TV thatwill not display the DE Streaming video in full screen. The ITSS will create a new requestusing the Profile Browser.9
1. Click the View menu from the USD home page.View Menu2. Select Profile Browser. The Profile Browser Contact Search window will display.Profile Browser Contact Search Window3. Click in the Last Name field and type the end user’s last name.NOTE: If unsure of the spelling of the last name, type in a few letters of the last nameand click the tab key for a list of contact names.4. Click in the First Name field and type the user’s first name.5. Click on the Search button. The Profile Browser Contact List window will display.Profile Browser Contact List10
6. Click on the name of the contact. The Contact Information window will open.Contact Information window7. In the scratchpad region at the bottom of the window, type the issue details.NOTE: Click on the Spelling button to check spelling in the Scratchpad.Scratchpad Region8. Click the New button.11
9. The Contact Information for the end user will populate in the request.Create New Request PageNOTE: The Affected End User, Location Description, Summary, Description Field, andAssignee will populate. The fields with an asterisk are required fields. If you are NOT theperson assigned to resolve this request, delete your name as the Assignee under the Assigneefield.10. Fields are described below:Field NameDescriptionAffected End UserWill auto-fill with the end user’s nameRequest AreaClick in the field to selectthe customer’s request areafrom the Request AreaSelection.12
StatusWill default to Open, but can be changed byusing the drop down menu.PriorityWill always default to 4-Normal and can be changed by an analystusing the drop down menu.Analyst to whom the request is to be assigned.Click the Group heading to select theassigned analyst’s group from the list.AssigneeGroupLocation and LocationDescriptionCall Back Date/TimeWill auto-fill with the customer’s school # and school nameSummaryDescriptionWill auto-fill with a few words from the Description field.Will auto-fill with what is entered in the Scratch Pad region on theCreate a New Request screen.Select an option if a call back isnecessary using the drop down menu.11. Click Save.13
Adding Properties to a RequestProperties must be added when hardware replacement for printers or computers is requested.1. Open a Request.Open Request2. Click the Edit button.3. Click on the Request Area field heading. The Request Area menu will display.Request Area menu4. Expand the Request area that corresponds with the end-user’s location by clicking theplus sign to the left of the Request Area name.Expanded Request Area menu14
5. Expand the Hardware Repair link.Expanded Hardware Repair menu6. Select the hardware (computer, printer) that corresponds to the request. The RequestArea field will populate with this information.7. In the Summary Information, click the Properties tab. The Properties tab will display.Properties Tab8. Fill in thefields in thePropertiesSummaryInformationArea. Thesefields include:Computermanufacturer,Computermodel, Currentlocation forcomputer,serial numberand barcode.Adding Properties in the Summary Information15
NOTE: Viewing Assets will help analysts who have limited information regarding thehardware. For example, if the analyst is missing the barcode or serial number, viewing theAsset will allow the analyst to access the missing hardware information.Viewing a Request History for a ContactViewing the Request History of the End-User will allow the analyst to gain backgroundinformation regarding request history. The analyst will be able to view any open, or closedrequest information as well as the assignee information. This information may help to quicklyidentify additional information that may be needed to resolve the request.1. Click the View menu from the USD home page.View Menu2. Select Profile Browser. The Profile Browser Contact Search window will display.Profile Browser Contact Search Window3. Click in the Last Name field and type the end user’s last name.NOTE: If unsure of the spelling of the last name, type in a few letters of the last nameand click the tab key for a list of contact names.4. Click in the First Name field and type the end-user’s first name.16
5. Click on the Search button. The Profile Browser Contact List window will display.Profile Browser Contact List6. Click on the name of the contact. The Contact Information window will open.Contact Information window17
7. Click the Request History link in the Contact region on the left of the screen. The enduser’s Request History will display.End-user Request HistoryViewing Notification HistoryAnalysts can view the Notification History of an end-user to get background information on anon-going request.1. From the Request History, click on the request # of the request to be opened. Therequest information will display.Customer Request History18
2. From the Request Detail page, click on View and choose Notification History.Request Detail3. The Notification History information will display.Notification History for Request#Responding to and/or Updating RequestsThere are different ways to view requests using the Scoreboard. Users may view requestsassignment to themselves19
Changing the Priority Level of a Request1. From the request list, right click on the request # of the request to be opened. A menu isdisplayed.2. Select Escalate. The Escalate Request Window is displayed.Escalate Request window3. Select the priority level from the drop-down menu in the New Priority field.Priority Options4. Click Save.20
Changing the Status of a RequestNOTE: The End-user will receive an auto-notification message via Outlook when thestatus of the request is updated.1. Open the Request Detail window.Request Detail Window2. Click the Activities menu on the Navigation bar.Activities Menu3. Select the activity to be updated. The following table explains each:Field NameDescriptionUpdate StatusCallbackAllows analyst to choose Close, Research, Fix in progress, or Hold a requestAnalysts can use callback as a reminder to call customer back. All callbackscan be stored and viewed.Additional information is needed, possibly from vendor, customer, or anotheranalyst.Allows analyst to transfer request to another analyst.Allows analyst to escalate request to a higher priority for resolutionAllows analyst to give additional information regarding request.Allows analyst to send email to customer regarding request. Allows analyst tosend email to another analyst or second-level support or technologyResearchTransferEscalateLog CommentManual Notify21
consultant. Provides a history of all transactions attached to the request.4. Click Save after updates have been made.NOTE: A shortcut to update the status of a request is to right click on the Request # fromthe Request List and choose the activity from the drop down menu.Adding and Viewing AssetsAnalysts may use Assets to view missing information for a hardware replacement, such asbarcode or serial number. This does NOT take the place of Properties since Assets will notprovide the Current Location or Requested Location for the hardware.Adding an Asset1. From the request list, right click on the request # of the request to be opened. A menu isdisplayed.2. Select Edit. The Update Request window is displayed.Update Request window3. Click the Asset field heading.22
4. In the Name field, type in the barcode number or the serial number of the hardware.Asset Search Window5. Click the Search button.6. The Asset Search list will display.7. Click thename ofthe asset.Asset List Window1. Right-click on the Asset Name in the Asset List.2. Choose View in the Right-click Menu.23
3. The Asset information will display the Asset Detail field.NOTE: The analyst can view the missing information, such as the barcode, serialnumber, model or manufacturer, and add it to the Properties tab.Viewing the Asset Detail for a Ticket8. Click Save.Update Request Window via Asset InformationViewing an AssetIf the analyst needs to view hardware details they can view this information from the assetdetails.1. From therequest list,right click onthe request #of the requestto be opened.A menu isdisplayed.Asset details24
2. Select Edit. The Update Request window is displayed.Update Request Area3. Click on the Asset.4. The Asset information will display the Asset Detail.Viewing the Asset Detail for a TicketManual NotificationsManual Notifications are used when you want to send an email and associate it with the request.Examples: Correspondence with the end-user for follow-up questions, contact another analyst, orsecond level support for additional info, or contact a principal for confirmation of rights. Thesent message is logged in the Activities tab so there is a record of what was sent to whom.1. From the request list, right click on the request # of the request to be opened. A menu isdisplayed.Request Listwith rightclick menu25
2. Select Manual Notify from the menu. The Manual Notification for Request will display.Manual Notification for Request Area3. Click the Add Recipient button.4. Type the name of the recipient for your manual notification.Contact Search Area5. Select the recipient from the list.6. Click thearrow symbol.7. Click the OK button.26
8. Type the Message Title and Message Text.9. Click on the Clear Text button to delete text from the manual notification.10. Click the Notify button to send your Manual Notification.Manual Notification Message ExampleNOTE: The Manual Notification will be sent automatically to the recipient in Outlook,including a link to view the Request.Manual Notification via Outlook Example27
Searching for a RequestAn analyst can search for a request using a variety of search filters.1. Click the Search button on the navigation bar.Navigation bar2. Select Requests. The Request List screen will display.Requests Selection3. Click on the Show Filter button.Request List4. The Search filter region is displayed.Search filter region28
5. Enter the search criteria; you can enter as many criteria as you want.Field NameDescriptionAssignment StatusAssigneeGroupStatusPriorityActiveRequest AreaConfiguration ItemReported byEnd User NameEnd User IDEnd User LocationEnd User OrganizationDetermines if the request is assigned or unassigned to an analyst.Person who assigned the requestGroup to which the request is assignedDetermines if the request is active or inactive.4 is Normal, 3 is High, 2 is VIP and 1 is EmergencyDefines the request as closed or open.CategoryAssetEnd-User or Analyst that created the initial requestName of the person having difficultyEnd-User ID of the person having difficultyLocation of the person having difficultyOrganization of the person having difficultyNOTE: Activated wildcard search: Analysts can enter a few letters without entering thewildcard % symbol. When the Tab key is tapped the result will be as if the wildcard % wasused. An example would be kli for klingman in the End User Name field.6. Click the More button (displayed.)
Welcome to the MCPS Unicenter Service Desk (USD). USD is an online application that can be used by all MCPS staff to request technology assistance. Analysts (Help Desk, ITSS, and second-level supports) will use USD to open, tra