Transcription
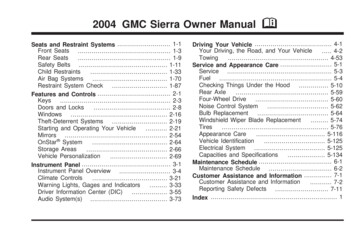
2004 GMC Sierra Owner ManualSeats and Restraint Systems . 1-1Front Seats . 1-3Rear Seats. 1-9Safety Belts . 1-11Child Restraints. 1-33Air Bag Systems. 1-70Restraint System Check. 1-87Features and Controls . 2-1Keys. 2-3Doors and Locks. 2-8Windows . 2-16Theft-Deterrent Systems . 2-19Starting and Operating Your Vehicle. 2-21Mirrors . 2-54OnStar System. 2-64Storage Areas. 2-66Vehicle Personalization. 2-69Instrument Panel . 3-1Instrument Panel Overview . 3-4Climate Controls. 3-21Warning Lights, Gages and Indicators. 3-33Driver Information Center (DIC). 3-55Audio System(s) . 3-73MDriving Your Vehicle . 4-1Your Driving, the Road, and Your Vehicle. 4-2Towing. 4-53Service and Appearance Care . 5-1Service . 5-3Fuel . 5-4Checking Things Under the Hood. 5-10Rear Axle. 5-59Four-Wheel Drive. 5-60Noise Control System. 5-62Bulb Replacement. 5-64Windshield Wiper Blade Replacement. 5-74Tires. 5-76Appearance Care. 5-116Vehicle Identification. 5-125Electrical System . 5-125Capacities and Specifications. 5-134Maintenance Schedule . 6-1Maintenance Schedule . 6-2Customer Assistance and Information . 7-1Customer Assistance and Information. 7-2Reporting Safety Defects . 7-11Index . 1
Canadian OwnersYou can obtain a French copy of this manual from yourdealer or from:Helm, IncorporatedP.O. Box 07130Detroit, MI 48207GENERAL MOTORS, GM, the GM Emblem, GMC, theGMC Truck Emblem and the name SIERRA areregistered trademarks of General Motors Corporation.This manual includes the latest information at the time itwas printed. We reserve the right to make changesafter that time without further notice. For vehicles firstsold in Canada, substitute the name “General Motors ofCanada Limited” for GMC whenever it appears in thismanual.Please keep this manual in your vehicle, so it will bethere if you ever need it when you’re on the road. If yousell the vehicle, please leave this manual in it so thenew owner can use it.Litho in U.S.A.Part No. X2415 A First EditioniiHow to Use This ManualMany people read their owner’s manual from beginningto end when they first receive their new vehicle. Ifyou do this, it will help you learn about the features andcontrols for your vehicle. In this manual, you will findthat pictures and words work together to explain things.IndexA good place to look for what you need is the Index inback of the manual. It is an alphabetical list of whatis in the manual, and the page number where you willfind it. Copyright General Motors Corporation 06/23/03All Rights Reserved
Safety Warnings and SymbolsYou will find a number of safety cautions in this book.We use a box and the word CAUTION to tell you aboutthings that could hurt you if you were to ignore thewarning.You will also find a circlewith a slash through it inthis book. This safetysymbol means “Don’t,”“Don’t do this” or “Don’t letthis happen.”{CAUTION:These mean there is something that could hurtyou or other people.In the caution area, we tell you what the hazard is.Then we tell you what to do to help avoid or reduce thehazard. Please read these cautions. If you don’t, youor others could be hurt.iii
Vehicle Damage WarningsVehicle SymbolsAlso, in this book you will find these notices:Your vehicle has components and labels that usesymbols instead of text. Symbols, used on your vehicle,are shown along with the text describing the operationor information relating to a specific component, control,message, gage or indicator.Notice: These mean there is something that coulddamage your vehicle.A notice will tell you about something that can damageyour vehicle. Many times, this damage would not becovered by your warranty, and it could be costly. But thenotice will tell you what to do to help avoid thedamage.When you read other manuals, you might see CAUTIONand NOTICE warnings in different colors or in differentwords.You’ll also see warning labels on your vehicle. They usethe same words, CAUTION or NOTICE.ivIf you need help figuring out a specific name of acomponent, gage or indicator, reference the followingtopics: Seats and Restraint Systems in Section 1Features and Controls in Section 2Instrument Panel Overview in Section 3Climate Controls in Section 3Warning Lights, Gages and Indicators in Section 3Audio System(s) in Section 3Engine Compartment Overview in Section 5
These are some examples of symbols you may find on your vehicle:v
Model ReferenceThis manual covers these models:Regular Cab PickupviExtended Cab PickupCrew Cab Chassis Cab
Section 1Seats and Restraint SystemsFront Seats .1-3Manual Seats .1-3Power Seats .1-4Power Lumbar .1-5Heated Seats .1-6Reclining Seatbacks .1-6Head Restraints .1-8Seatback Latches .1-8Rear Seats .1-9Rear Seat Operation (Extended Cab) .1-9Rear Seat Operation (Crew Cab) .1-9Safety Belts .1-11Safety Belts: They Are for Everyone .1-11Questions and Answers About Safety Belts .1-15How to Wear Safety Belts Properly .1-16Driver Position .1-16Safety Belt Use During Pregnancy .1-24Right Front Passenger Position .1-25Center Passenger Position .1-25Rear Seat Passengers .1-27Rear Safety Belt Comfort Guides for Childrenand Small Adults .1-30Safety Belt Extender .1-32Child Restraints .1-33Older Children .1-33Infants and Young Children .1-35Child Restraint Systems .1-39Where to Put the Restraint .1-42Top Strap .1-43Top Strap Anchor Location .1-45Lower Anchorages and Top Tethers forChildren (LATCH System) .1-48Securing a Child Restraint Designed for theLATCH System (Rear) .1-50Securing a Child Restraint Designed for theLATCH System (Front) .1-51Securing a Child Restraint in a Rear OutsideSeat Position .1-55Securing a Child Restraint in a Center RearSeat Position .1-58Securing a Child Restraint in the Center FrontSeat Position .1-60Securing a Child Restraint in the Right FrontSeat Position(Crew Cab) .1-61Securing a Child Restraint in the Right FrontSeat Position (Regular and Extended Cab) .1-641-1
Section 1Seats and Restraint SystemsAir Bag Systems .1-70Where Are the Air Bags? .1-72When Should an Air Bag Inflate? .1-73What Makes an Air Bag Inflate? .1-74How Does an Air Bag Restrain? .1-75What Will You See After an Air Bag Inflates? .1-75Air Bag Off Switch .1-76Passenger Sensing System .1-811-2Servicing Your Air Bag-Equipped Vehicle .1-86Adding Equipment to Your Air Bag-EquippedVehicle .1-86Restraint System Check .1-87Checking Your Restraint Systems .1-87Replacing Restraint System Parts After aCrash .1-88
Front SeatsManual Seats{CAUTION:You can lose control of the vehicle if you try toadjust a manual driver’s seat while the vehicleis moving. The sudden movement could startleand confuse you, or make you push a pedalwhen you don’t want to. Adjust the driver’sseat only when the vehicle is not moving.If your vehicle has a manual bucket or a split benchseat, you can adjust it with this lever located at the frontof the seat.Lift the lever to unlock the seat. Using your body, slidethe seat to where you want it and release the lever.Try to move the seat with your body to make sure theseat is locked into place.1-3
Power SeatsIf your vehicle has a power seat, you can adjust it withthese controls located on the outboard sides of theseats. Raise or lower the front of the seat cushion byraising or lowering the forward edge of thehorizontal control. Move the seat forward or rearward by moving thewhole horizontal control forward or rearward. Raise or lower the rear of the seat cushion byraising or lowering the rear edge of the horizontalcontrol. Moving the whole horizontal control up or downraises or lowers the entire seat cushion.If your vehicle has power reclining seats, you can usethe vertical control to adjust the angle of the seatback.Move the reclining front seatback rearward or forwardby moving the control toward the rear or the front of thevehicle. See Reclining Seatbacks on page 1-6.1-4
Power LumbarYou can increase ordecrease lumbar supportin an area of the lowerseatback.To increase support, press and hold the front of thecontrol. To decrease support, press and hold the rear ofthe control. Let go of the control when the lowerseatback reaches the desired level of support.You can also reshape the side wing area of the lowerseatback for more lateral support.To increase support, press and hold the top of thecontrol. To decrease support, press and hold the bottomof the control. Let go of the control when the lowerseatback reaches the desired level of support.Your vehicle may have a memory function which allowsseat settings to be saved and recalled. See MemorySeat on page 2-69 for more information.1-5
Heated SeatsReclining SeatbacksIf your vehicle has thisfeature, the button used tocontrol the driver’sheated seat is located onthe driver’s door panel.The button used to controlthe passenger’s heatedseat is located on thepassenger’s door panel.To heat the entire seat, press the horizontal button.Press the button to cycle through the temperaturesettings of high, medium, and low. The indicator lightwill glow to indicate the level of heat selected.To heat only the seatback, press the vertical button withthe heated seatback symbol. An indicator light on thebutton will glow to designate that only the seatbackis being heated.The engine must be running for them to operate.The heated front seats will be canceled after the ignitionis turned off. If you still want to use the heated frontseat feature after you restart your vehicle, you will needto press the heated seat button again.1-6To adjust the front seatback, lift the manual leverlocated on the outboard side of the seat. Release thelever to lock the seatback where you want it. Liftthe lever again without pushing on the seatback and theseatback will go to an upright position.If your vehicle has power seats with a power recliner,see Power Seats on page 1-4 for further information onhow to operate the reclining seatback feature.
{CAUTION:Sitting in a reclined position when your vehicleis in motion can be dangerous. Even if youbuckle up, your safety belts can’t do their jobwhen you’re reclined like this.The shoulder belt can’t do its job. In a crash,you could go into it, receiving neck or otherinjuries.The lap belt can’t do its job either. In a crashthe belt could go up over your abdomen. Thebelt forces would be there, not at your pelvicbones. This could cause serious internalinjuries.But don’t have a seatback reclined if your vehicle ismoving.For proper protection when the vehicle is inmotion, have the seatback upright. Then sitwell back in the seat and wear your safety beltproperly.1-7
Head RestraintsThe rear seat head restraints in your vehicle may beadjustable. They work the same as the front seat headrestraints, except they do not tilt forward and rearward.Seatback Latches{CAUTION:If the seatback isn’t locked, it could moveforward in a sudden stop or crash. That
with a slash through it in this book. This safety symbol means “Don’t,” “Don’t do this” or “Don’t let this happen.” iii. Vehicle Damage Warnings Also, in this book you will find these notices: Notice: These mean there is something that could damage your vehicle. A notice will tell you about something that can damage your vehicle. Many times, this damage would not be covered .
