Transcription
LAB MANUALCraig Zacker
This page is intentionally left blank
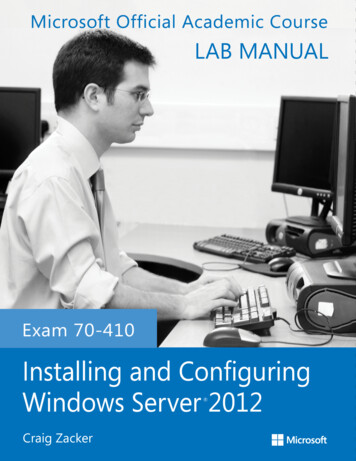
Installing and Configuring Windows Server 2012Exam 70-410Lab ManualCraig Zacker
EXECUTIVE EDITORJohn KaneEDITORIAL ASSISTANTAllison WinkleDIRECTOR OF SALESMitchell BeatonEXECUTIVE MARKETING MANAGERChris RuelSENIOR PRODUCTION & MANUFACTURING MANAGERJanis SooPRODUCTION EDITOREugenia LeeCopyright 2014 by John Wiley & Sons, Inc. All rights reserved.No part of this publication may be reproduced, stored in a retrieval system or transmitted in any form or by anymeans, electronic, mechanical, photocopying, recording, scanning or otherwise, except as permitted under Sections107 or 108 of the 1976 United States Copyright Act, without either the prior written permission of the Publisher,or authorization through payment of the appropriate per-copy fee to the Copyright Clearance Center, Inc. 222Rosewood Drive, Danvers, MA 01923, website www.copyright.com. Requests to the Publisher for permissionshould be addressed to the Permissions Department, John Wiley & Sons, Inc., 111 River Street, Hoboken, NJ07030-5774, (201) 748-6011, fax (201) 748-6008, website college/microsoftorcall the MOAC Toll-Free Number: 888-764-7001 (U.S. & Canada only)ISBN 978-1-118-51158-9Printed in the United States of America10 9 8 7 6 5 4 3 2 1
BRIEF CONTENTSLab 1: Installing ServersLab 2: Configuring ServersLab 3: Configuring Local StorageLab 4: Configuring File and Share AccessLab 5: Configuring Print and Document ServicesLab 6: Configuring Servers for Remote ManagementLab 7: Creating and Configuring Virtual Machine SettingsLab 8: Creating and Configuring Virtual Machine StorageLab 9: Creating and Configuring Virtual NetworksLab 10: Configuring IPv4 and IPv6 AddressingLab 11: Deploying and Configuring the DHCP ServiceLab 12: Deploying and Configuring the DNS ServiceLab 13: Installing Domain ControllersLab 14: Creating and Managing Active Directory Users and ComputersLab 15: Creating and Managing Active Directory Groups andOrganizational UnitsLab 16: Creating Group Policy ObjectsLab 17: Configuring Security PoliciesLab 18: Configuring Application Restriction PoliciesLab 19: Configuring Windows FirewallAppendix: Lab Setup Guideiii
This page is intentionally left blank
CONTENTS1. Installing Servers1Exercise 1.1: Performing a CleanInstallation 2Exercise 1.2: Performing an UpgradeInstallation 4Exercise 1.3: Installing WindowsServer Migration Tools (WSMT) 6Lab Challenge: Accessing a WSMTDistribution Point 82. Configuring ServersExercise 3.1:Exercise 3.2:Volumes 20Exercise 3.3:Pool 22Lab Challenge:Components917Initializing Disks 18Creating SimpleCreating a StorageRemoving Storage244. Configuring File and ShareAccess35Exercise 5.1: Installing a Printer 36Exercise 5.2: Deploying Printers UsingActive Directory 38Exercise 5.3: Scheduling PrinterAccess 40Lab Challenge: Creating a PrinterPool 43Exercise 2.1: Completing PostInstallation Tasks 10Exercise 2.2: Adding Roles andFeatures 13Exercise 2.3: Converting the GUIInterface to Server Core 15Lab Challenge: Using the Server CoreInterface 163. Configuring Local Storage5. Configuring Print and DocumentServices25Exercise 4.1: Sharing a Folder 26Exercise 4.2: Testing Share Access 28Exercise 4.3: Working with NTFSPermissions 29Exercise 4.4: Creating Shares withServer Manager 31Lab Challenge: Creating Shares withWindows PowerShell 336. Configuring Servers for RemoteManagement45Exercise 6.1: Adding Servers to ServerManager 46Exercise 6.2: Working with RemoteServers 47Lab Challenge: Configuring WindowsFirewall 49Exercise 6.3: Using Remote ServerAdministration Tools 507. Creating and Configuring VirtualMachine Settings53Exercise 7.1: Installing the Hyper-VRole 54Exercise 7.2: Creating a VirtualMachine 56Lab Challenge: Creating a VirtualMachine Using WindowsPowerShell 57Exercise 7.3: Configuring DynamicMemory 57Lab Challenge: Configuring DynamicMemory Using WindowsPowerShell 598. Creating and Configuring VirtualMachine Storage61Exercise 8.1:Disk 62Creating a Virtual Hard
Exercise 8.2: Editing a Virtual HardDisk File 64Exercise 8.3: Creating a VirtualMachine with an Existing Virtual HardDisk 65Exercise 8.4: Creating a Pass-ThroughDisk 67Lab Challenge: Creating aSnapshot 69Exercise 12.2: Creating a DNSZone 99Exercise 12.3: Creating DNSDomains 100Exercise 12.4: Creating DNS ResourceRecords 101Lab Challenge: Using Reverse NameResolution 10313. Installing Domain Controllers9. Creating and Configuring VirtualNetworks71Exercise 9.1: Creating a VirtualSwitch 72Exercise 9.2: Creating a VirtualNetwork 74Lab Challenge: Creating an IsolatedNetwork 7510. Configuring IPv4 and IPv6Addressing77Exercise 10.1: Calculating IPAddresses 78Exercise 10.2: Manually ConfiguringTCP/IP 80Lab Challenge: Configuring TCP/IPUsing Windows PowerShell 83Exercise 10.3: Testing NetworkConnections 8311. Deploying and Configuring theDHCP Service85Exercise 11.1: Installing the DHCPServer Role 86Exercise 11.2: Creating a DHCPv4Scope 88Exercise 11.3: Creating a DHCPv6Scope 90Exercise 11.4: Activating DHCP 91Lab Challenge: Confirming DHCP 9312. Deploying and Configuring theDNS ServiceExercise 12.1: Designing a DNSNamespace 97Lab Challenge: Remote DNSAdministration 9995105Exercise 13.1: Installing ActiveDirectory Domain Services Role 106Exercise 13.2: Creating a NewForest 108Exercise 13.3: Creating a ChildDomain 110Lab Challenge: Installing AD DS onServer Core 11114. Creating and Managing ActiveDirectory Users and Computers 113Exercise 14.1: Creating ComputerObjects 114Exercise 14.2: Creating a SingleUser 116Exercise 14.3: Using Active DirectoryAdministrative Center 117Lab Challenge: Creating Users withWindows PowerShell 119Lab Challenge: Creating MultipleUsers with LDIFDE 11915. Creating and Managing ActiveDirectory Groups and OrganizationalUnits121Exercise 15.1: Creating OrganizationalUnits 122Exercise 15.2: Creating Domain LocalGroups 125Exercise 15.3: Creating GlobalGroups 126Lab Challenge: Nesting Groups 127Exercise 15.4: DelegatingAdministration 12716. Creating Group Policy Objects129Exercise 16.1: Installing Group PolicyManagement 130
Exercise 16.2: Creating a StarterGPO 131Exercise 16.3: Creating Group PolicyObjects 132Exercise 16.4: Linking a Group PolicyObject 133Lab Challenge: Confirming GPOApplication 13517. Configuring Security Policies137Exercise 17.1: Configuring SecurityPolicies 138Lab Challenge: Assigning UserRights 140Exercise 17.2: Configuring AuditPolicies 141Lab Challenge: Viewing AuditingData 143Exercise 18.2: Using AppLocker 148Lab Challenge: Creating AdditionalRules 15119. Configuring Windows Firewall153Exercise 19.1: Installing InternetInformation Services 154Exercise 19.2: Testing IISConnectivity 157Exercise 19.3: Allowing Apps throughthe Windows Firewall ControlPanel 159Exercise 19.4: Creating WindowsFirewall Rules 160Lab Challenge: Creating an FTP ServerRule 163Appendix: Lab Setup Guide16518. Configuring Application RestrictionPolicies145Exercise 18.1: Configuring SoftwareRestriction Policies 146vii
This page is intentionally left blank
LAB 1INSTALLING SERVERSTHIS LAB CONTAINS THE FOLLOWING EXERCISES AND ACTIVITIES:Exercise 1.1Performing a Clean InstallationExercise 1.2Performing an Upgrade InstallationExercise 1.3Installing Windows Server Migration Tools (WSMT)Lab ChallengeAccessing a WSMT Distribution PointBEFORE YOU BEGINThe lab environment consists of computers connected to a local area network. The computersrequired for this lab are listed in Table 1-1.Table 1-1Computers Required for Lab 1ComputerOperating SystemComputer NameNew serverBare metalSVR-SO-AServer for upgradeWindows Server 2008 R2SVR-SO-BServer for migrationWindows Server 2008 R2SVR-SO-CIn addition to the computers, you also require the software listed in Table 1-2 to completeLab 1.1
2 Installing and Configuring Windows Server 2012Table 1-2Software Required for Lab 1SoftwareLocationInstallation disk for Windows Server 2012Mounted on SVR-SO-AInstallation disk for Windows Server 2012Mounted on SVR-SO-BLab 1 student worksheetLab01 worksheet.docx (provided by instructor)Working with Lab WorksheetsEach lab in this manual requires that you answer questions, create screen shots, andperform other activities that you will document in a worksheet named for the lab, such asLab01 worksheet.docx. It is recommended that you use a USB flash drive to store yourworksheets, so you can submit them to your instructor for review. As you perform theexercises in each lab, open the appropriate worksheet file, fill in the required information,and save the file to your flash drive.After completing this lab, you will be able to: Perform a clean Windows Server 2012 installation on a bare metal computerUpgrade a server to Windows Server 2012Install the Windows Server Migration ToolsEstimated lab time: 60 minutesExercise 1.1Performing a Clean InstallationOverviewIn this exercise, you install Windows Server 2012 on a new computerwith no previously installed operating system.MindsetIn many cases, organizations purchase servers without operating systemsinstalled—sometimes called bare metal servers—either because they havean existing license agreement or because they intend to purchase the OSthrough another channel. In these cases, you perform what is known as aclean operating system installation, which is a procedure that creates a newserver with its default operating system settings.Completion time10 minutes1.Select the SVR-SO-A computer, on which the Windows Server 2012 installation disk ismounted and loaded. The Windows Setup page appears.2.Click Next to accept the default values for the Language to install, Time and currencyformat, and Keyboard or input method parameters. Another Windows Setup pageappears.
Lab 1: Installing Servers 33.Click the Install now button. The Select the operating system you want to install pageappears.4.Select Windows Server 2012 Datacenter (Server with a GUI) and click Next. The Licenseterms page appears.5.Select I accept the license terms and click Next. The Which type of installation do youwant? page appears.6.Click Custom: Install Windows only (advanced). The Where do you want to installWindows? page appears (see Figure 1-1).Figure 1-1The Where do you want to install Windows? page7.Select Drive 0 Unallocated Space and click Next. The Installing Windows page appearsas the system installs Windows Server 2012.Question1What should you do if the drive on which you want to installWindows Server 2012 already has a partition on it containingan operating system and data you do not need?Question2What should you do if the Where do you want to installWindows? page appears, but it does not list any drives orpartitions?8. After several minutes and a system restart, the Settings page appears.
4 Installing and Configuring Windows Server 20129. In the Password and Reenter password text boxes, type Pa w0rd and click Finish. TheWindows security page appears, showing the time.10. Press Ctrl Alt Del and log on using the Administrator account with the passwordPa w0rd. The Server Manager console appears.11. Click Local Server in left pane, then click the Computer Name link. The SystemProperties sheet appears.12. Click Change. The Computer Name/Domain Changes dialog box appears.13. In the Computer name text box, type SVR-SO-A and click OK. A message box appears,telling you to restart the computer.14. Click OK. Then click Close. Another message box appears.15. Click Restart Now. The system restarts.End of exercise. You can leave the windows open for the next exercise.Exercise 1.2Performing an Upgrade InstallationOverviewIn this exercise, you install Windows Server 2012 on a computerrunning Windows Server 2008 R2.MindsetAssuming that a server meets all the requirements and has compatibledrivers and applications installed, it is possible to perform an in-placeupgrade, which retains all the system’s software, data, and configurationsettings. However, the more complex the server configuration, the morelikely it will be for incompatibilities to arise, resulting in an end result thatis unstable or otherwise problematic.Completion time20 minutes1. Log on to the SVR-SO-B computer using the domain Administrator account and thepassword Pa w0rd, which loads Windows Server 2008 R2 and displays the ServerManager console.2. Using Server Manager, determine which roles are installed on the server and make a noteof them in the space on your worksheet.3. Click Start Run. The Run dialog box appears.
Lab 1: Installing Servers 54. In the Open text box, type d:\setup.exe and click OK. The Windows Setup window forWindows Server 2012 appears.5. Click Install Now. The Get important updates for Windows Setup page appears.6. Click No thanks. The Select the operating system you want to install page appears.7. Select Windows Server 2012 Datacenter (Server with a GUI) and click Next. The Licenseterms page appears.8. Select I accept the license terms and click Next. The Which type of installation do youwant? page appears.9. Click Upgrade: Install Windows and keep files, settings, and applications. Thecompatibility report page appears.Question3Under what conditions would the Upgrade option not beavailable to you during the Windows Server 2012 installationprocess.10. Review the compatibility information provided and click Next. The Upgrading Windowspage appears.Question4The compatibility notes that appear during this exercise arerecommendations; they do not prevent you from performingthe upgrade. However, in a real-world upgrade situation, thismight not be the case. Give an example of a compatibilitynote that will stop the upgrade process and force you to takeaction before restarting the installation.NOTE11. The upgrade process installs Windows Server 2012 and any compatible applications thatexisted on the server before you began the upgrade. The computer restarts several timesand ends up on the main logon screen.The length of time required for the Windows Serve
MOAC_70_410_LM.indd 1 4/24/13 12:45 PM. This page is intentionally left blank. Installing and Configuring . call the MOAC Toll-Free Number: 888-764-7001 (U.S. & Canada only) ISBN 978-1-118-51158-9 Printed in the United States of America 10 9 8 7 6 5 4 3 2 1. iii BRIEF CONTENTS Lab 1: Installing Servers Lab 2: Configuring Servers Lab 3: Configuring Local Storage Lab 4: Configuring File