Transcription
shiny#shiny
Table of ContentsAbout1Chapter 1: Getting started with shiny2Remarks2Examples2Installation or Setup2When would I use shiny?2Simple App2Including plots4Including tables4Chapter 2: How to write MCVE (Minimal, Complete, and Verifiable example) Shiny apps6Introduction6Examples6Basic structure6Avoid unnecessary details7WRONG7RIGHT7Chapter 3: Javascript API9Syntax9Examples9Sending data from server to client9Sending data from client to server9Chapter 4: reactive, reactiveValue and eventReactive, observe and observeEvent in er 5: Upload Data to shiny16
Examples16Upload .RData Files to shiny with fileInput()16Uploading csv files to Shiny16Credits18
AboutYou can share this PDF with anyone you feel could benefit from it, downloaded the latest versionfrom: shinyIt is an unofficial and free shiny ebook created for educational purposes. All the content isextracted from Stack Overflow Documentation, which is written by many hardworking individuals atStack Overflow. It is neither affiliated with Stack Overflow nor official shiny.The content is released under Creative Commons BY-SA, and the list of contributors to eachchapter are provided in the credits section at the end of this book. Images may be copyright oftheir respective owners unless otherwise specified. All trademarks and registered trademarks arethe property of their respective company owners.Use the content presented in this book at your own risk; it is not guaranteed to be correct noraccurate, please send your feedback and corrections to info@zzzprojects.comhttps://riptutorial.com/1
Chapter 1: Getting started with shinyRemarksThis section provides an overview of what shiny is, and why a developer might want to use it.It should also mention any large subjects within shiny, and link out to the related topics. Since theDocumentation for shiny is new, you may need to create initial versions of those related topics.ExamplesInstallation or SetupShiny can run as a standalone application on your local computer, on a server that can provideshiny apps to multiple users (using shiny server), or on shinyapps.io.1. Installing Shiny on a local computer: in R/RStudio, run install.packages("shiny") ifinstalling from CRAN, or devtools::install github("rstudio/shiny") if installing from theRStudio Github repository. The Github repository hosts a development version of Shinywhich can possibly have more features when compared to the CRAN version, but it may alsobe unstable.When would I use shiny?1. I have some data analysis done on some data and have many 'non-coding' people on theteam, who have similar data like mine, and have similar analysis requirements. In suchcases, I can build a web application with shiny, which takes in user specific input data files,and generate analyses.2. I need to share analyzed data or relevant plots with others in the team. Shiny web apps canbe useful in such situations.3. I don't have significant experience with web application programming, but need to quicklyassemble a simple interface. Shiny to the rescue with easy UI and server elements andminimum coding.4. Interactive elements allow your users to explore what element of the data is relevant to them.For example, you could have data for the whole company loaded, but have a dropdown perdepartment like "Sales", "Production", "Finance" that can summarise the data the way theusers want to view it. The alternative would be producing a huge report pack with analysesfor each department, but they only read their chapter and the total.Simple AppEach shiny app contains two parts: A user interface definition (UI) and a server script (server). Thisexample shows how you can print "Hello world" from UI or from server.UI.Rhttps://riptutorial.com/2
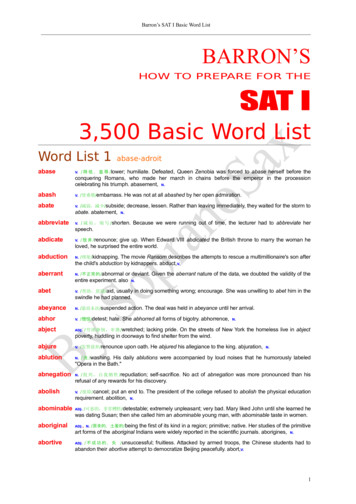
In the UI you can place some view objects (div, inputs, buttons, etc).library(shiny)# Define UI for application print "Hello world"shinyUI(# Create bootstrap pagefluidPage(# Paragraph "Hello world"p("Hello world"),# Create button to print "Hello world" from serveractionButton(inputId "Print Hello", label "Print Hello World"),# Create position for server side texttextOutput("Server Hello")))Server.RIn the server script you can define methods which manipulate data or listen to actions.# Define server logic required to print "Hello World" when button is clickedshinyServer(function(input, output) {# Create action when actionButton is clickedobserveEvent(input Print Hello,{# Change text of Server Hellooutput Server Hello renderText("Hello world from server side")})})How to run?You can run your app in several ways:1. Create two different files and place them into one directory, then use runApp('your dir path')2. You can define two variables (ui and server, for example) and then use shinyApp(ui,server)to run your appResultIn this example you will see some text and a button:https://riptutorial.com/3
And after button click the server responds:Including plotsThe simplest way to include plots in your shinyApp is to use plotOutput in the ui and renderPlot inthe server. This will work with base graphics as well as ggPlotslibrary(shiny)library(ggplot2)ui - t'))server - function(input, output, session){output myPlot renderPlot({hist(rnorm(1000))})output myGgPlot - renderPlot({ggplot(iris, aes(Sepal.Length, Sepal.Width, color Species)) geom point()})}shinyApp(ui, server)Including tablesTables are most easily included with the DT package, which is an R interface to the JavaScriptlibrary DataTables.library(shiny)library(DT)ui - fluidPage(dataTableOutput('myTable'))server - function(input, output, session){https://riptutorial.com/4
output myTable - renderDataTable({datatable(iris)})}shinyApp(ui, server)Read Getting started with shiny online: tarted-withshinyhttps://riptutorial.com/5
Chapter 2: How to write MCVE (Minimal,Complete, and Verifiable example) ShinyappsIntroductionIf you are having issues with your Shiny apps, it is good practice to create an app that illustratesyour point. This app should be as simple as possible while still reflecting your problem. Thismeans using simple datasets, self-explanatory naming (especially for I/O IDs) and replacing plotswith simpler ones.It is also advisable to create your MCVE in a way that as little non-standard libraries as possibleare required.ExamplesBasic structureMCVE's should start the Shiny app when they are copied in the console. An easy way to do this isusing the shinyApp function. For example:why is my checkbox not responding?library(shiny)ui - fluidPage(checkboxInput('checkbox', 'click me'),verbatimTextOutput('text'))server - function(input, output, session){output text - renderText({isolate(input checkbox)})}shinyApp(ui, server)Alternatively, you can also not assign variables to ui and put('checkbox', 'click al.com/6
function(input, output, session){output text - renderText({isolate(input checkbox)})})shinyApp(ui, server)Avoid unnecessary detailsIn practice, shiny Apps are often very complicated and full of features that have been developedover time. More often than not, those additional details are not necessary to reproduce your issue.It is best if you skip such details when writing MCVE's.WRONGWhy is my plot not showing?library(shiny)library(ggplot2)ui - fluidPage(plotOutput('plot'))server - function(input, output, session){df - data.frame(treatment rep(letters[1:3], times 3),context rep(LETTERS[1:3], each 3),effect runif(9,0,1))df treat.con - paste(df treatment,df context, sep ".")df treat.con - reorder(df treat.con, -df effect, )output plot renderPlot({myPlot - ggplot(df, aes(x treat.con, y effect)) geom point() facet wrap( context,scales "free x",ncol 1)})}shinyApp(ui, server)RIGHTWhy is my Plot not showing?library(shiny)library(ggplot2)ui - m/7
)server - function(input, output, session){output plot renderPlot({myPlot - ggplot(mtcars, aes(mpg, wt)) geom point()})}shinyApp(ui, server)Read How to write MCVE (Minimal, Complete, and Verifiable example) Shiny apps eexample--shiny-appshttps://riptutorial.com/8
Chapter 3: Javascript APISyntax session sendCustomMessage(name,list of parameters) Shiny.addCustomMessageHandler(name, JS function that accepts list of parameters) Shiny.onInputChange(name,value)ExamplesSending data from server to clientIn many instances, you will want to send data from the R server to the JS client. Here is a verysimple example:library(shiny)runApp(list(ui fluidPage(tags script("Shiny.addCustomMessageHandler('message', function(params) { alert(params); });"),actionButton("btn","Press Me")),server function(input, output, session) {observeEvent(input btn,{randomNumber - runif(1,0,100)session er," is a random number!")))})}))The workhorses here are the session sendCustomMessage function in R and theShiny.addCustomMessageHandler function in javascript.The session sendCustomMessage function lets you send parameters from R to a javascript function,and Shiny.addCustomMessageHandler let's you define the javascript function that accepts theparameters from R.Note: Lists are converted to JSON when they are passed from R to javascriptSending data from client to serverIn some instances, you will want to send data from JS client to the R server. Here is a basicexample using javascript's Shiny.onInputChange com/9
list(ui fluidPage(# create password inputHTML(' input type "password" id "passwordInput" '),# use jquery to write function that sends value to# server when changedtags script(' ("#passwordInput").on("change",function() {Shiny.onInputChange("myInput",this.value);})'),# show passwordverbatimTextOutput("test")),server function(input, output, session) {# read in then show passwordoutput test - renderPrint(input myInput)}))Here we create a password input with id passwordInput. We add a Javascript function on the UI thatreacts to changes in passwordInput, and sends the value to the server using Shiny.onInputChange.Shiny.onInputChangeinput *name*takes two parameters, a name for the input *name*, plus a value forThen you can use input *name* like any other Shiny input.Read Javascript API online: t-apihttps://riptutorial.com/10
Chapter 4: reactive, reactiveValue andeventReactive, observe and observeEvent inShinyIntroductionreactive, reactiveValue and eventReactive are various kinds of reactive expressions in Shiny.They yield output which can be used as input in other expressions, which will in turn take adependency on the reactive expression.observe and observeEvent are similar to reactive expressions. The big difference is that theobservers do not yield any output and thus they are only useful for their side effects.Examples of their use are given in this document.ExamplesreactiveA reactive can be used to make output depend on another expression. In the example below, theoutput text element is dependent on text reactive, which in turn is dependent on input user text.Whenever input user text changes, output text element and text reactive become invalidated.They are recalculated based on the new value for input user text.library(shiny)ui - fluidPage(headerPanel("Example reactive"),mainPanel(# input fieldtextInput("user text", label "Enter some text:", placeholder "Please enter sometext."),# display text outputtextOutput("text")))server - function(input, output) {# reactive expressiontext reactive - reactive({input user text})# text outputoutput text - renderText({https://riptutorial.com/11
text reactive()})}shinyApp(ui ui, server server)eventReactiveeventReactives are similar to reactives, they are constructed as follows:eventReactive( event {code to run})eventReactives are not dependent on all reactive expressions in their body ('code to run' in thesnippet above). Instead, they are only dependent on the expressions specified in the eventsection.In the example below, we have added a submit button, and created an eventReactive. Wheneverinput user text changes, the eventReactive is not invalidated, since the eventReactive is onlydependent on the actionButton input submit. Whenever that button is pressed, text reactive andsubsequently output text are invalidated, and will be recalulated based on the updatedinput user text.library(shiny)ui - fluidPage(headerPanel("Example eventReactive"),mainPanel(# input fieldtextInput("user text", label "Enter some text:", placeholder "Please enter sometext."),# submit buttonactionButton("submit", label "Submit"),# display text outputtextOutput("text")))server - function(input, output) {# reactive expressiontext reactive - eventReactive( input submit, {input user text})# text outputoutput text - renderText({text reactive()})}https://riptutorial.com/12
shinyApp(ui ui, server server)reactiveValuesreactiveValues can be used to store objects, to which other expressions can take a dependency.In the example below, a reactiveValues object is initialized with value "No text has been submittedyet.". A separate observer is created to update the reactiveValues object whenever the submitbutton is pressed. Note that the reactiveValues itself does not take a dependency on theexpressions in its body.library(shiny)ui - fluidPage(headerPanel("Example reactiveValues"),mainPanel(# input fieldtextInput("user text", label "Enter some text:", placeholder "Please enter sometext."),actionButton("submit", label "Submit"),# display text outputtextOutput("text")))server - function(input, output) {# observe event for updating the reactiveValuesobserveEvent(input submit,{text reactive text - input user text})# reactiveValuestext reactive - reactiveValues(text "No text has been submitted yet.")# text outputoutput text - renderText({text reactive text})}shinyApp(ui ui, server server)observeEventAn observeEvent object can be used to trigger a piece of code when a certain event occurs. It isconstructed as:observeEvent( event {code to runhttps://riptutorial.com/13
})The observeEvent will only be dependent on the 'event' section in the small piece of code above. Itwill not be dependent on anything in the 'code to run' part. An example implementation can befound below:library(shiny)ui - fluidPage(headerPanel("Example reactive"),mainPanel(# action buttonsactionButton("button1","Button 1"),actionButton("button2","Button 2")))server - function(input, output) {# observe button 1 press.observeEvent(input button1, {# The observeEvent takes no dependency on button 2, even though we refer to the input inthe following line.input button2showModal(modalDialog(title "Button pressed","You pressed one of the buttons!"))})}shinyApp(ui ui, server server)observeAn observe expression is triggered every time one of its inputs changes. The major difference withregards to a reactive expression is that it yields no output, and it should only be used for its sideeffects (such as modifying a reactiveValues object, or triggering a pop-up).Also, note that observe does not ignore NULL's, therefore it will fire even if its inputs are stillNULL. observeEvent by default does ignore NULL, as is almost always desirable.library(shiny)ui - fluidPage(headerPanel("Example reactive"),mainPanel(# action buttonsactionButton("button1","Button 1"),actionButton("button2","Button 2")))https://riptutorial.com/14
server - function(input, output) {# observe button 1 press.observe({input button1input button2showModal(modalDialog(title "Button pressed","You pressed one of the buttons!"))})}shinyApp(ui ui, server server)Read reactive, reactiveValue and eventReactive, observe and observeEvent in Shiny andobserveevent-in-shinyhttps://riptutorial.com/15
Chapter 5: Upload Data to shinyExamplesUpload .RData Files to shiny with fileInput()The example allows you to upload .RData files. The approach with load and get allows you toassign the loaded data to a variable name of your choice. For the matter of the example being"standalone" I inserted the top section that stores two vectors to your disk in order to load and plotthem later.library(shiny)# Define two datasets and store them to diskx - rnorm(100)save(x, file "x.RData")rm(x)y - rnorm(100, mean 2)save(y, file "y.RData")rm(y)# Define UIui - shinyUI(fluidPage(titlePanel(".RData File Upload Test"),mainPanel(fileInput("file", label ""),actionButton(inputId "plot","Plot"),plotOutput("hist"))))# Define server logicserver - shinyServer(function(input, output) {observeEvent(input plot,{if ( is.null(input file)) return(NULL)inFile - input filefile - inFile datapath# load the file into new environment and get it from theree new.env()name - load(file, envir e)data - e[[name]]# Plot the dataoutput hist - renderPlot({hist(data)})})})# Run the applicationshinyApp(ui ui, server server)Uploading csv files to Shinyhttps://riptutorial.com/16
It is also possible to have an user upload csv's to your Shiny app. The code below shows a smallexample on how this can be achieved. It also includes a radioButton input so the user caninteractively choose the separator to be used.library(shiny)library(DT)# Define UIui - shinyUI(fluidPage(fileInput('target upload', 'Choose file to upload',accept ),radioButtons("separator","Separator: ",choices c(";",",",":"), selected ";",inline TRUE),DT::dataTableOutput("sample table")))# Define server logicserver - shinyServer(function(input, output) {df products upload - reactive({inFile - input target uploadif (is.null(inFile))return(NULL)df - read.csv(inFile datapath, header TRUE,sep input separator)return(df)})output sample table - DT::renderDataTable({df - df products upload()DT::datatable(df)})})# Run the applicationshinyApp(ui ui, server server)Read Upload Data to shiny online: ta-to-shinyhttps://riptutorial.com/17
CreditsS.NoChaptersContributors1Getting started withshinyBatanichek, Bogdan Rau, chrki, Community, Florian, Gregor deCillia, jsb, Mathias711, micstr, sigmabeta2How to write MCVE(Minimal, Complete,and Verifiableexample) Shiny appsFlorian, Gregor de Cillia3Javascript APICarl, Tomás Barcellos4reactive,reactiveValue andeventReactive,observe andobserveEvent inShinyFlorian5Upload Data to shinyFlorian, symbolrushhttps://riptutorial.com/18
Shiny can run as a standalone application on your local computer, on a server that can provide shiny apps to multiple users (using shiny server), or on shinyapps.io. Installing Shiny on a local computer: in R/RStudio, run install.packages("shiny") if installing from CRAN, or devtools::install_github("rstudio/shiny") if installing from the