Transcription
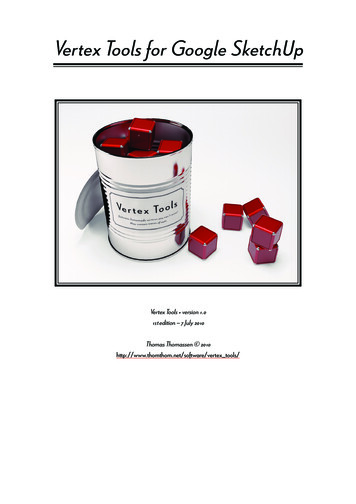
Vertex Tools for Google SketchUpVertex Tools version 1.01st edition – 7 July 2010Thomas Thomassen 2010http://www.thomthom.net/software/vertex tools/
ContentsG e t t i n g S ta r t e d444 InstallingUninstallingActivating / DeactivatingU s e r I n t e r f ac e55566666 Too l s778889999 MenusContext MenusAuto-SmoothShow NormalsToolbarsVertex Mode ToolbarSketchUp ToolbarInformation PanelSelectSelection ShapesSoft SelectionIgnore BackfacesMoveRotateScaleInsertMake Planar
Shortcuts10 10 11 Proxy FunctionsAvailable Proxy FunctionsExamplePr e f e r e n c e s121212121313 LanguageInitial ToolVertex SizeNormal SizeToolbarContext MenuTr a n s l at i o n s14 15 .lang File Format SpecificationTips and recommendationsK n ow n I s s u e s / L i m i tat i o n sK n ow n Bu g sCreditsCo n tac t
G e t t i n g S ta r t e dI nstallingThe zip file with Vertex Tools contains a file, tt vertex.rb and a folder TT Vertex. These should be extracted toSketchUp’s plugin folder. The location of this folder differs from platform to platform. On Windows it is in whatever folderSketchUp was installed to. On OSX it is at a fixed location.Windows 32-bit: (Default location for SketchUp 7)C:\Program Files\Google\Google SketchUp 7\Plugins\Windows 64-bit: (Default location for SketchUp 7)C:\Program Files (x86)\Google\Google SketchUp 7\Plugins\OSX: (SketchUp 7)/Library/Application Support/Google/Google SketchUp 7/SketchUp/plugins/For other SketchUp version replace the version number in the path.Note OSX users: The path is under the root Library folder, not under your user folder!The footprint of Vertex Tools in the Plugins folder is: [.]/Google SketchUp 7/SketchUp/plugins/TT Vertex/ [.]/Google SketchUp 7/SketchUp/plugins/tt vertex.rbIf you run into problems installing ensure that the files are located in the correct location.U ninstallingRemove the file tt vertex.rb and the folderTT Vertex folder from where Vertex Tools wasinstalled.Activating / De activatin gVertex Tools can be activated and deactivated viaSketchUp’s extension manager. If you don't see Vertex Tools in your Tools menu, ensure that the plugin isenabled under Window » Preferences » Extensions.4
U s e r I n t e r f ac eM e nusVertex Tools’ menus are located under SketchUp’s Tool menu. Vertex editing mode canbe activated from its submenus. Edit Vertices and Preferences are the main items in thesub-menu. The other menus, such as Move, Rotate, Scale, etc. are there primarily toact as shortcut hooks so that SketchUp’s Shortcut manager can be used to assign shortcuts to the various functions. This is described in detail in the Shortcuts section.C ont ext M e nusWhile vertex editing a different context menu is available. It gives access to functionsand preferences dependent on the active vertex editing tool. The context menu containssome items that are only accessible from the context menu:Auto-SmoothWhen a face is deformed in such a way that its vertices are no longer coplanar, Sketchup Autofolds the face by adding newedges. These edges are normally not soft or smooth which as a result produce a faceted surface.When Auto-Smooth is enabled these new edges will be softened and smoothed ensuring a continuous surface.5
Show NormalsTurn this on for visual clue representing the normals for the surfaces connectedto the vertex. The normals point in the same direction as the front side of theconnected faces.ToolbarsVertex Mode ToolbarVertex Tools’ main toolbar appears only when vertex editing mode is activated. It is drawn directly onto SketchUp’s viewport and because of that it doesnot behave exactly like the normal toolbars in SketchUp. It cannot float over other windows. It cannot move outside SketchUp’s viewport.SketchUp ToolbarA normal SketchUp toolbar is available that provides a single button to activate vertex mode. This toolbar is bydefault not visible. Due to SketchUp’s tendencies under Windows to shuffle toolbars around the procedure to enable it is different than the OSX version.OSX: View » Toolbars » Vertex ToolsWindows: Tools » Vertex Tools » Preferences – ToolbarI nformation Pan e lThe information panel floats on the screen while editing vertices displaying vertexstatistics of the current selection. It can be moved around by clicking and draggingwithin the dotted frame that appear when the mouse is over it.6
To o l sThe tools available to modify vertices tries to mirror SketchUp’s native tools as closely as possible. Where new tools areintroduced without a native counterpart their behaviour tries to keep with normal SketchUp conventions.Known Issue: Due to limitation of SketchUp 6, inferences cannot correctly lock to user defined axis when theuser presses the arrow keys.S el e ctAlso accessible via Tools » Vertex Tools » SelectActivates the last used selection shape tool. Normal selection modifies applies to all selection shapes: Adding to selection: Press and hold Ctrl (Microsoft Windows) or Options (OS X). Toggle selection status: Press and hold Shift. Remove from selection: Press and hold Ctrl and Shift (Microsoft Windows) or Option (OS X).When a selection tool is active a second row of buttons becomes available.Selection ShapesRectangular Select – Press and hold down the left mouse button to create a rectangular selection area or click a vertexto add individual vertices.Circular Select – Press and hold down the left mouse button to create a circular selection area or click a vertex to addindividual vertices.Polygon Select – Click to add points to polygon selection. Double click to finish polygon.Freehand Select – Press and hold down the left mouse button while moving the cursor to create a freehand selectionshape.7
Soft SelectionSoft Selection is set by typing in a Length in the VCBwhile a selection tool is active. Vertices within this distance from the selected vertices are also affected bytools that modify the geometry. The further away fromthe selection, the less they are affected. This is illustratedby colour-coding the vertices from Red, Orange, Yellow,Green and Blue – where Red is 100% and Blue is 0%.There are two types of fall-off for the soft-selction radius:Linear fall-offCosine fall-offLinear falloff affects the vertices directly proportional to their distance from the selected. Cosine falloff affects the verticesusing a cosine curve.Ignore BackfacesTurn this on to prevent selecting vertices attached to faces pointing away from the camera.Note that this is not the same as selecting only visible vertices. Vertices connected to faces pointing towardsthe camera but obscured by other objects will still be selected.M ov eAlso accessible via Tools » Vertex Tools » Move1. Pick a point for the origin of the move.2. Move the cursor to move the selected vertices. The distance is displayed in the VCB.3. To complete the move, either click a second time or enter a distance in the VCB for an accurate displacement.Inference and axis lock is available for the Move tool. After completing a Move operation the distance can be corrected bytyping a length in the VCB immediately afterwards.8
R otateAlso accessible via Tools » Vertex Tools » Rotate1. Pick a point for the origin of the rotation. Like the native rotate tool you can infer and lock the plane of rotation bypressing and holding Shift before placing the first point. The same goes for the click-drag method of defining the rotationplane.2. Pick a second point to define a reference axis.3. Move the cursor to rotate. The angle is displayed in the VCB.4. To complete the rotation, either click a third time or enter an angle in the VCB for accurate rotation.After completing a rotation the angle can be adjusted by typing a new angle in the VCB.If ‘Enable angle snapping’ is checked in the Units Panel of the Model Info dialogue window, the protractor will snap to thespecified angle — just like the native Rotate tool.Scal eAlso accessible via Tools » Vertex Tools » Scale1. Pick the centre point to scale about or type a scale ratio into the VCB. If the VCB is used the centre point of theselection is used as the point to scale about.2. Pick a second point to define a reference length.3. Move the cursor to scale. The scale is displayed in the VCB.4. To complete the scaling, click a third time or enter a scale ratio.After completing a scale operation the ratio can be adjusted by typing a new value into the VCB.I ns ertAlso accessible via Tools » Vertex Tools » Insert Vertex1. Pick a point on an Edge or a Face.Edges are split at the point picked.When the point picked is on a Face, new edges are created from eachvertex of the Face towards the point provided they do not cross any existingedges. Press Ctrl to toggle between soft & smooth versus hard edges.The tool makes use of snapping inference, but no inference locking.Mak e PlanarAlso accessible via Tools » Vertex Tools » Make PlanarSelected vertices will be projected to a best fitting plane.Soft selected vertices are affected but do not contribute to thecomputation of the plane.9
ShortcutsShortcuts to Vertex Tools’ functions are assigned using SketchUp shortcut manager – Window » Preferences » Shortcuts.To quickly locate Vertex Tool’s functions use the Filter box above the function list.P roxy F unctionsSome of Vertex Tools' menus have double functions. Using Tools » Vertex Tools » Move as an example: When vertex mode is active this trigger Vertex Tools’ Move tool. When not editing vertices this trigger SketchUp’s native Move tool.This allows user to have their shortcuts functioning inside and outside vertex mode because the menus act as proxies thatknows which tool to activate.Available Proxy Functions Select (All select variant will trigger the native select tool when outside vertex mode) Move Rotate Scale Select All Select None Invert Selection10
ExampleIf any of Vertex Tools’ menus for Select is activated while a vertex select tools is already active it will exit vertex mode:1. Space has been assigned to Vertex Tools » Select:2. Vertex mode is active; the Move tool is the active tool.3. The user presses Space, the Vertex Select tool is activated.4. The user presses Space a second time, vertex mode is ended and SketchUp’s native Select tools become active.Limitations: The Delete key can’t be remapped in SketchUp. This is a SketchUp limitation.Note: When changing the language of Vertex Tools any shortcuts must be reassigned. This is becauseSketchUp use the menu text to identify the correct function to trigger.Note: If shortcuts are assigned to Vertex Tools’ functions and Vertex Tools is uninstalled, the shortcuts must bemanually mapped back to their original functions. SketchUp will not do this automatically.11
Pr e f e r e n c e sAccessible via Tools » Vertex Tools » PreferencesL an g uag eList of available languages for Vertex Tools. SketchUp must be restarted forthe new language to take effect.Note: If shortcuts has been assigned to Vertex Tools’ functions theymust be remapped after changing language.I nitial ToolBy default Vertex Tools will start with the last used vertex tool when entering vertex mode. This can be overridden here toalways select a specific tool.V ert e x S i z eThis value affects the visual size and clickable area of a vertex. Thevalue must be between 4 and 10.Normal S i z eVertex normals indicate the direction of the faces connected to eachvertex. Faces connected by a soft edge will share a normal indicatoraveraging the normals of the faces.12
ToolbarThe purpose for this setting is mainly for PC users. It is a work around for the Windows version of SketchUp which has anunfortunate tendency to shuffle about the user’s toolbars whenever a plugin with a toolbar is added. Because of this theVertex Tools’ toolbar is not available from View » Toolbars by default under Windows. The toolbar must be enabled throughthis setting before it becomes available.Note that it will still cause SketchUp to shuffle about the toolbars, but it gives users that do not wish to use thetoolbar an option to avoid being affected.OSX users do not have to use this preference as the toolbar will be available from View » Toolbars by default.C ont ext M e nuEnable this to add a "Edit Vertices"menu item in SketchUp’s context menu to activate vertex mode.Tr a n s l at i o n sVertex Tools can be translated into different languages by creating simple .lang files located in the Localisationfolder.Use the Norwegian language file (no-nb.lang) as a template when translating as it will always be updated and containall the strings available. Additionally it includes comments with hints and a description of the file format.13
.lang F ile F ormat S pe cificationI. File MUST be plain text UTF-8 encoded. BOM is supported. If any .lang file is not UTF-8 encoded strange characters will appear and it can affect all other translations. Refer to your chosen text editor for how to encode filesin UTF-8.II.The filename MUST be saved with ASCII range characters. SketchUp’s Ruby version (1.8) does not handle fileswith non-ASCII characters.III.Please name your .lang file using the language code SketchUp reports for that language. This will ensure thatVertex Tools tries to load the language which matches the current SketchUp language. A list of language codescan be found here:http://download.sketchup.com/OnlineDoc/gsu6 ruby/Docs/ruby-sketchup.html#get localeExample for French language file: “fr.lang”If you can’t find the language listed, just use any name as long as it does not conflict with any of the languagecodes on the list.IV.@title MUST be the first line in the file. This is a special tag that contains the name of the language which ap-pears in the list of available Languages under Preferences. The title should be the name of the language in itsnative language – not English.V.@author and @contact are two optional tags that MUST appear right after the @title tag in any order. Thisis the credit and contact information that appear under the chosen language under Preferences.VI.@contact tag MUST start with “http://”, “https://” or “mailto:”.VII.Except the header tags the content of the file can be in any order.VIII.After the header tags comments can be added by prefixing the line with #.IX.The % symbol is a special character. It represents a variable and MUST be included. If you need to add a percentsymbol to the strings you can do so by using a double percent sign: %%Example: “Hello %% World” becomes “Hello % World”All the strings are sprintf formatted.For more info: 62X.Another set of variables are @@n - where n represent a number. These are used by webdialogs. When presentin the original string they MUST appear in the translated string. Example: “Hello @@1 World” becomes“Hello 123 World”14
XI.Do not insert line breaks. The strings must appear on a single line.T ips and re comm e ndationsPlease include your name, contact info and the date the file was last revised.To check for missing string you can open the Ruby Console and type TT Vertex::S.check This will compare all thelanguage files against the Norwegian file and list any missing strings for all the languages.Do not literally translate the words, translate the meaning.If possible, use the same terms used in SketchUp if SketchUp exist in the target language. Look at other 3d modelling andgraphic software products to figure out what the norm is.Great repository of translations terms in Microsoft’s products: aspxLook for guidance for translating to your own language. Often you can find guides provided by Open Source projects.K n ow n I s s u e s / L i m i tations No way to hook into the use of the Delete key. SketchUp limitation. SketchUp 6 does not recognize user defined model axis. Rotation tool might rotate the rotation plane if the user moves the cursor too quickly after placing the initial referencepoint. Deviation from the native Rotate tool. Investigating. VCB is always enabled, even for tools that do not accept input. Technical limitation.K n ow n Bu g s Insert Vertex occasionally creates new faces when there are holes in the face. Investigating. Rotation Gizmo’s guide line does not always appear as an infinite line. Investigating.15
CreditsThanks to all the beta testers that provided invaluable feedback and support.Thanks to the translators who contributed translations and interesting semantic discussions.Thanks to Sketchucation for the support during the development.Thanks to Google for letting me use some of SketchUp’s cursors and toolbar icons.Big thanks to TBD and AdamB for helping me get started with Ruby C Extensions when I needed to crunch numbers in aspeedy manner.Co n tac tUse the contact form at Vertex Tools’ website for any questions or feedback.http://www.thomthom.net/software/vertex tools/contactI can also be found lingering around the forums at Sketchucation.16
OSX: (SketchUp 7) /Library/Application Support/Google/Google SketchUp 7/SketchUp/plugins/ For other SketchUp version replace the version number in the path. Note OSX users: The path is under the root Library folder, not under your user folder! The footprint of Vertex Tools in the Plugins folder is: [.]/Google SketchUp 7/SketchUp/plugins/TT .

