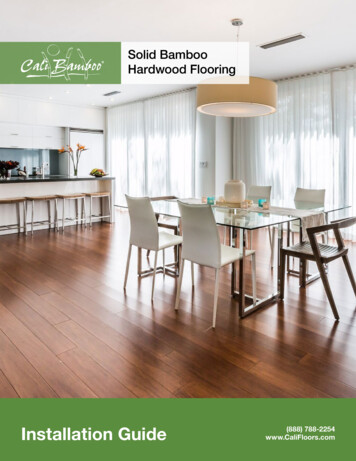
Transcription
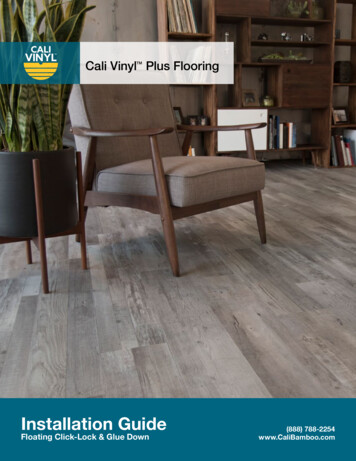
CALI vinyl mute step Gray AshInstallation GuideFloating Click-Lock & Glue Down(888) 788-2254www.CALIFloors.com
Table of ContentsThe CALI vinyl pro with mute step Collection and AccessoriesPage 3P.A.C.E. and Pre-Installation: Floating Click-LockPages 4 - 8Installation Guide: Floating Click-LockPages 8 - 11P.A.C.E. and Pre-Installation: Glue-DownPages 12 - 15Installation Guide: Glue-DownPages 16 - 17Vinyl Pro with Mute Step Flooring Installation GuidePage 2Questions? (888) 788-2254CaliFloors.com
The CollectionFlooring SystemWide Click7-1/4” WidePlank Dims:48” L x 7-1/4” W x 6.5mm HFlooring AccessoriesQuarter RoundReducerT-MoldingThresholdStair NosingStair TreadVinyl Pro with Mute Step Flooring Installation GuidePage 3Questions? (888) 788-2254CaliFloors.com
FLOATING CLICK-LOCKINSTALL GUIDEVinyl Pro with Mute Step Flooring Installation GuidePage 4Questions? (888) 788-2254CaliFloors.com
Pre-InstallationFloating Click-Lock Luxury Vinyl Pro with Mute Step Plank InstallationBefore you begin installation, remember to P.A.C.E. yourself with the checklist below. Full installationinstructions and maintenance guidelines can also be found online at www.CALIFloors.comPA C EPREPARETHE SUBFLOORPA C EACCLIMATEFLOORINGUse 6mil Plastic on ConcreteMake sure the subfloor is flat, level, clean and free ofdebris. New concrete must be cured for at least 60days. Test the subfloor moisture prior to installationand apply an appropriate moisture barrier such as6mil Plastic on concrete subfloors or Silicon VaporShield on plywood.PA C ECONTROLENVIRONMENTNo Acclimation Needed.PA C EEXPANSIONGAPSBaseboard1/4” Spacer-25-140 F1/4” Expansion GapVinyl flooring can be used in areas rangingfrom -25 F to 140 F.CALIProvinyl step VinylwithproMutewithStepmuteFlooringInstallation GuideFlooringInstallationGuidePage 5Page 5Leave at least 1/4” expansion spaces between flooringand ALL vertical objects (walls, cabinets, pipes, etc.) Largeflooring runs may require additional expansion space.Undercut door jambs and casings to provide adequateexpansion space. Do not screw or nail cabinetry or otherpermanent fixtures to a floating 54www.CALIFloors.comCaliFloors.com
Pre-InstallationFloating Click-Lock Luxury Vinyl Pro with Mute Step Plank InstallationNote: Flooring not used for its intended purpose will not be covered under warranty.Whether you’re a pro or DIY homeowner, installing vinyl plank flooring couldn’t be easier. No power saws needed; CALIvinyl flooring scores and snaps with a simple utility knife. Fast and easy floating click-lock installation without all thesawdust and mess! Follow the simple guidelines below and see how easy it is to do it yourself. Upon ordering of vinyl floor materials consider adding an additional 5% to allow for cutting waste and gradingallowance. CALI bamboo flooring is manufactured in accordance with accepted industry standards, which permitmanufacturing, grading and natural deficiencies not to exceed 5%. If more than 5% of the material is unusable,do not install the flooring. Immediately contact the distributor/retailer from which the flooring was purchased. Noclaim will be accepted for materials with visible defects once they are installed. Installation of any material servesas acceptance of the material delivered. Installer/Owner assumes all responsibility to inspect all flooring before installation. Planks deemed unacceptablein appearance can be placed in closets, near walls or simply not be used. Pieces with glaring defects that can beseen from a standing position should be cut off or not be used as use constitutes acceptance. It is the responsibility of the installer/homeowner to determine if the job site conditions, environmental conditionsand sub-floor are acceptable for the installation of CALI bamboo vinyl plank flooring. Prior to installation, theinstaller/owner must determine that the jobsite meets or exceeds all applicable World Floor Covering AssociationInstallation Guidelines. CALI bamboo does NOT warrant against failure resulting from or connected with subfloor,job site damage, or environmental deficiencies after installation. CALI bamboo makes no warranty or guaranteeof the quality of the chosen installer’s work or of a particular installation performed by him or her. CALI bamboodisclaims all liability for any errors or improprieties in the installation of its products by an installer. Floor noise is normal and will vary from one installation type to the next. Occasional noise is due to structuralmovement and may relate to sub-floor type, flatness, deflection, and/or related to the fasteners, changes inenvironmental conditions, relative humidity and the amount of topside pressure applied to the flooring. For thesereasons floor noise is not considered a product or manufacturer defect. During installation, it is the installer’s responsibility to document all jobsite conditions and measurementsincluding the installation date, site relative humidity, temperature, and subfloor moisture content. This informationmust be retained by the installer and left with the property owner as a permanent record. For a complete list ofpoints to address prior to installation, refer to the NWFA Jobsite checklist Do not install flooring under permanent or fixed cabinetry. Never nail or screw anything through a FLOATED floor.Transport, Storage, Acclimation Transport and store cartons in lay down, flat position. Stack boxes no more than 8 cartons (4ft.) high. Keep away from direct sunlight Room temperature and relative humidity must be consistent with year-round living conditions for at least 5 daysprior to installation. Due to the nature of CALI bamboo CALI vinyl pro, acclimation is not needed. Installation can start immediately.Pre-Installation PreparationPrior to installation, inspect planks in daylight for visible faults/damage. Check if subfloor/site conditions comply withthe specifications described in these instructions. If you are not satisfied do not install, and contact your supplier. CALIbamboo is not responsible for flooring that is installed with visible defects.Recommended Tools Tape measure Chalk line Utility knife Rubber mallet Miter saw Pencil 1/4” spacers Table saw Double-sided prybar Tapping block (required)Due to the nature of CALI bamboo vinyl pro with mute step, it isacceptable to use the score and snap method for your end cuts.It is still recommended to use a table or miter saw for any ripcuts.Vinyl Pro with Mute Step Flooring Installation GuidePage 6Questions? (888) 788-2254CaliFloors.com
Pre-InstallationSubfloor RequirementsGeneral Floating floors can be laid on top of most hard surfaces (e.g. concrete, ceramics, wood)Soft subfloors (e.g. carpets) must be removedThe subfloor must be level – Flat to 3/16” per 10-foot radiusThe subfloor must be clean Thoroughly swept and free of all debrisThe subfloor must be dryThe subfloor must be structurally soundEven though CALI bamboo vinyl plank flooring is waterproof it is NOT considered a moisture barrier. CALI alwaysrecommends the use of a moisture barrier (like 6mil plastic) on concrete.Acceptable Subfloor Types CD Exposure 1 plywood (grade stamped US PS1-95)OSB Exposure 1subfloor panelsUnderlayment grade particleboardConcrete slabExisting woodCeramic tile (must fill in grout lines with a compatible patch compound)Resilient tile and sheet vinylAcceptable Subloor thickness Requirements:’Joist System Spacing (inches on center)Minimum Thickness12”5/8”12” to 16”3/4”16” to 19.2”7/8”19.3” to 24”1-1/8”Wood subfloors must be securely fastened. A best practice is to nail or screw every 6” along joists to avoid squeaking.If leveling is needed, sand down high spots and fill in low spots with a Portland based leveling compound.Quick Tip! If your plywood, OSB or particle board subfloor is reading higher than 13% MC it is advised to find and correctthe source of moisture intrusion before continuing installation. CALI bamboo is not responsible for any damage caused bymoisture intrusion.Concrete subfloors must be fully cured and at least 60 days old, preferably 90 days old. If leveling is needed, grinddown high spots and level low spots with a Portland based leveling compound.Quick Tip! When laying 6 mil plastic it is always advised to overlap the seams at least 6” and cover all seams with duct tape.Slabs on or below grade must be free of hydrostatic pressure.Important: CALI bamboo vinyl plank flooring is waterproof, however moisture intrusions from concrete hydrostaticpressure, flooding, or plumbing leaks, along with high levels of alkalinity, can affect the floor over time. Moisture canalso be trapped below the flooring and create mold or mildew. The installer, not CALI bamboo is responsible formaking sure the concrete moisture and alkalinity are suitable prior to installing this floor.Ceramic Tile, resilient tile and sheet vinyl must be well-bonded to subfloor, in good condition, clean and level. We donot recommend sanding existing vinyl floors, as they may contain asbestos. We do recommend filling any grout linesor embossing with a compatible patch compound. Any damaged caused by skipping this step will not be covered byCALI bamboo.Crawlspaces must have a minimum of a 6-mil polyethylene sheeting covering any exposed earth. Crawl spaces musthave adequate ventilation and a minimum of 18” of air space between the ground and the floor joist.Vinyl Pro with Mute Step Flooring Installation GuidePage 7Questions? (888) 788-2254CaliFloors.com
Pre-InstallationRadiant Heat SystemsCALI bamboo vinyl flooring is only recommended for use over radiant heat systems if the special requirementsspecified by the National Wood Flooring Association are met (please refer to the NWFA’s Radiant Heat Guidelines).Ensuring stable job site conditions, subfloor suitability and proper acclimation are especially important when installingover a radiant heat system. It is the responsibility of the installer to ensure that the recommended environmentalconditions are met for installation. Refer to your radiant heat system manufacturer to determine its compatibility withvinyl flooring, and to learn the specific requirements for installation. Because of the wide variety of systems on the market (Hydronic, embedded in concrete, electrical wire/coil,heating film/mat) each with its own features and applications it is recommended that the user consult with theradiant heating provider for best practices, installation methods and proper subfloors. With CALI vinyl the floating installation method is the only method recommended for use with radiant heatsystems. Radiant heat system must be turned on and in operation for at least one week before installation. The flooring must be acclimated per CALI bamboo’s vinyl flooring acclimation instruction -flooring/) over the radiant heat with the system turned on throughoutthe acclimation timeframe. The system must be turned down to 65 F and maintained 24 hours prior to installation. Once install is complete, turn system back on and slowly bring back up to normal operating temperature over aperiod 4-5 days. Increase the temperature in 5 degree increments to avoid overheating. Floor should never be heated over 85 F. Consult with your radiant heating system manufacturer to successfullylimit the maximum temperature. Always remember that rugs placed over radiant heated flooring can increase the surface temperature in that areaby 3 - 5 F degrees. Relative Humidity must be maintained between 20-80%. When turning off the radiant heat system it must be turned down slowly at a rate of 1.5 degrees per day. Youshould never just turn the system off. For additional information on radiant heating systems please refer to http://www.radiantpanelassociation.org orthe NWFA’s Radiant Heat Guidelines.Installation of CALI vinyl Flooring by CALI bambooBefore laying: Measure the room at right angle to the direction of the planks. Planks in the final row should be atleast 1/3 the width of a plank. Due to this rule, planks in the first row can be cut to smaller size. Shuffle planks in orderto obtain a pleasant blend of shades. Lay planks preferably following the direction of the main source of light. Werecommend laying on wooden floors crossways to the existing floorboard. You should never nail or screw planks to thesubfloor. Floor should be installed from several cartons at the same time to ensure good color, shade and appearance. CALIbamboo vinyl plank will have multiple patterns for each product.Expansion gaps: Even though CALI bamboo vinyl plank will have very minimal expansion and contraction it is stillrequired to leave 1/4” expansion space around the perimeter as well as all fixed objects (tile, fireplace, cabinets). If the installation area exceeds 80 feet in either direction transition pieces are needed. To cover your expansion space, CALI bamboo carries matching bamboo flooring moldings that include reducers,t-moldings, baseboards, quarter rounds, and thresholds. Matching stair parts are also available; including stairnosing, treads and risers. Please visit CALI bamboo’s Flooring Accessories webpage.Quick Tip! When installing around pipes, drill the hole 3/4” larger than the diameter of the pipes.Vinyl Pro with Mute Step Flooring Installation GuidePage 8Questions? (888) 788-2254CaliFloors.com
InstallationInstalling the First Row:1. Starting from the left with the tongue-side facingthe wall, carefully place the first board in place, usingspacers to leave a 1/4” expansion gap between wall andedges of the plank.2. Install the second piece by aligning the butt end withthe end of the first piece at a 45 degree angle. Softlypush the second piece down until the tongue andgroove lock together to secure the joint on the ends.Continue in this manner until reaching the final board inthe first row.3. Cut the final board piece to length and install it in the same manner as the previous piece. Use the extra cut piece to startyour next row if it is longer than 8”.Next Steps:8 inchminimum1. If the cut plank is at least 8” in length, it can be used asa starter piece in your next row. When laying the nextrow and future rows, make sure that there is at least 8”between the plank end joints on adjacent rows. Avoid an“H” pattern by varying the size of your starter piece. Fora natural look rows and patterns should be staggered.Vinyl Pro with Mute Step Flooring Installation GuidePage 92. Position the first board in place by angling it upslightly, pushing forward and interlocking the sidetongue. The long side of the plank should fit snugwith no gapping. Slide this plank towards the buttend seam of your starter plank until the tongue restsnear the groove.Questions? (888) 788-2254CaliFloors.com
InstallationBridge3. Use a tapping block and hammer to ensure engagementalong the length of the plank . Avoid excessive forceas it will cause the plank seams to peak. Any gappingcan affect the whole floor, so you want to make sure toensure a tight fit for every plank.Piece4. To engage the butt end seams properly, use a scrap offlooring at least 6” as a bridge piece to hold the plankstogether.5. Use a tapping block and hammer at the end of the plank (exposed butt end seam) to engage the ends the plankstogether. Only tap the top edge of the plank so that you do not damage the clicking mechanism. Remove the bridgepiece and continue the row in the same fashion. Using the bridge piece ensures that the butt end seams are properlyengaged to prevent any gapping.6. Use a pull bar and a hammer to engage the final plank in the row. Insert a spacer to ensure proper expansion space isleft. Continue installing the rest of the rows in the same manner.Quick Tip! Carefully inspect the long edge and short ends of the planks for any gapping before moving on to the next row.If you notice any gaps, STOP, and reinstall the boards to ensure a snug fit.Vinyl Pro with Mute Step Flooring Installation GuidePage 10Questions? (888) 788-2254CaliFloors.com
InstallationInstalling the Final Row:1. The last row may need to be cut lengthwise (ripped). Make sure ripped piece is at least 1/3 the size of the overall width ofthe plank. Cut the last board to size. Use pull bar and hammer to engage the length of the last plank.After Install/Floor Care Maintenance: For Cleaning, we recommend dry or damp mopping as needed using Bona Stone Tile & Laminate cleaner orsimilar. Do not use anything abrasive or harsh chemicals to clean the floor. Never use any of the following products onyour floor: ammonia-based cleaners, mineral spirits, acrylic finishes, wax-based products, detergents, bleach,polishes, oil soap, abrasive cleaning soaps, acidic materials such as vinegar. Never apply wax treatments or top coats to the floor. Do not drag furniture across the floor, use felt pads on chair and furniture legs. Keep pet’s nails trimmed to avoid excess scratching. Sweep or vacuum the floor regularly to remove loose dirt. Do NOT use vacuums that use a beater bar or turnbeater bar off. Place quality walk-off mats at all entrances to retain tracked in dirt, grit and moisture, never use latex or rubberbacked mats as they can permanently stain the floor. Area rugs are also recommended in front of kitchen sinks and in high traffic areas. Although the CALI vinyl plank flooring is water proof, it is still a best practice to avoid excessive moisture on thefloor. Therefore, we recommend soaking up spills immediately using a dry towel or dry mop. Limit direct sunlight on floor by using curtains and blinds in areas that are exposed to high UV rays. Heating units or non-insulated ductwork close to the flooring or subfloor may cause “hot spots” which must beeliminated prior to installation. Heavy furniture (500 lbs.) may obstruct the free, natural movement of a floated floor. Restricting this movementin certain areas can lead to problems such as buckling or separation when the floor experiences natural expansionand/or contraction.Vinyl Pro with Mute Step Flooring Installation GuidePage 11Questions? (888) 788-2254CaliFloors.com
GLUE-DOWNINSTALL GUIDEVinyl Pro with Mute Step Flooring Installation GuidePage 12Questions? (888) 788-2254CaliFloors.com
Pre-InstallationGlue Down Luxury Vinyl Pro with Mute Step Plank InstallationBefore you begin installation, remember to P.A.C.E. yourself with the checklist below. Full installationinstructions and maintenance guidelines can also be found online at www.CALIFloors.comPA C EPREPARETHE SUBFLOORPA C EACCLIMATEFLOORINGRequired Adhesive will act as Moisture BarrierMake sure the subfloor is flat, level, clean and free ofdebris. New concrete must be cured for at least 60days. Test the subfloor moisture prior to installationand apply an appropriate moisture barrier onconcrete subfloors or a vapor barrier on plywood.(Required adhesive will act as moisture/vaporbarrier.)PA C ECONTROLENVIRONMENTNo Acclimation Needed.PA C EEXPANSIONGAPSBaseboard1/4” Spacer-25-140 F1/4” Expansion GapVinyl flooring can be used in areas rangingfrom -25 F to 140 F.CALI vinylwithstep Vinyl ProwithproMuteStepmuteFlooringInstallation GuideFlooringPage 13 Installation GuidePage 13Leave at least 1/4” expansion spaces betweenflooring and ALL vertical objects (walls, cabinets,pipes, etc.) Large flooring runs may requireadditional expansion space. Undercut door jambsand casings to provide adequate expansionspace. Cali Bamboo does not recommendscrewing or nailing cabinetry or other permanentfixtures to the -2254www.CALIFloors.comCaliFloors.com
Pre-InstallationGlue Down Luxury Vinyl Pro with Mute Step Plank InstallationNote: Flooring not used for its intended purpose will not be covered under warranty.Whether you’re a pro or DIY homeowner, installing vinyl plank flooring couldn’t be easier. No power saws needed; CALIvinyl flooring scores and snaps with a simple utility knife. Follow the simple guidelines below and see how easy it is todo it yourself. Upon ordering of vinyl floor materials consider adding an additional 5% to allow for cutting waste and gradingallowance. CALI bamboo flooring is manufactured in accordance with accepted industry standards, which permitmanufacturing, grading and natural deficiencies not to exceed 5%. If more than 5% of the material is unusable,do not install the flooring. Immediately contact the distributor/retailer from which the flooring was purchased. Noclaim will be accepted for materials with visible defects once they are installed. Installation of any material servesas acceptance of the material delivered. Installer/Owner assumes all responsibility to inspect all flooring before installation. Planks deemed unacceptablein appearance can be placed in closets, near walls or simply not be used. Pieces with glaring defects that can beseen from a standing position should be cut off or not be used as use constitutes acceptance. It is the responsibility of the installer/homeowner to determine if the job site conditions, environmental conditionsand sub-floor are acceptable for the installation of CALI bamboo vinyl plank flooring. Prior to installation, theinstaller/owner must determine that the jobsite meets or exceeds all applicable World Floor Covering AssociationInstallation Guidelines. CALI bamboo does NOT warrant against failure resulting from or connected with subfloor,job site damage, or environmental deficiencies after installation. CALI bamboo makes no warranty or guaranteeof the quality of the chosen installer’s work or of a particular installation performed by him or her. CALI bamboodisclaims all liability for any errors or improprieties in the installation of its products by an installer. Floor noise is normal and will vary from one installation type to the next. Occasional noise is due to structuralmovement and may relate to sub-floor type, flatness, deflection, and/or related to the fasteners, changes inenvironmental conditions, relative humidity and the amount of topside pressure applied to the flooring. For thesereasons floor noise is not considered a product or manufacturer defect. During installation, it is the installer’s responsibility to document all jobsite conditions and measurementsincluding the installation date, site relative humidity, temperature, and subfloor moisture content. This informationmust be retained by the installer and left with the property owner as a permanent record. For a complete list ofpoints to address prior to installation, refer to the NWFA Jobsite checklist. Do not install flooring under permanent or fixed cabinetry.Transport, Storage, Acclimation Transport and store cartons in lay down, flat position. Stack boxes no more than 8 cartons (4ft.) high. Keep away from direct sunlight Room temperature and relative humidity must be consistent with year-round living conditions for at least 5 daysprior to installation. Due to the nature of CALI bamboo CALI vinyl pro, acclimation is not needed. Installation can start immediately.Pre-Installation PreparationPrior to installation, inspect planks in daylight for visible faults/damage and color/print. Check if subfloor/siteconditions comply with the specifications described in these instructions. If you are not satisfied do not install, andcontact your supplier. CALI bamboo is not responsible for flooring that is installed with visible defects or incorrectcolor/print.Recommended Tools Tape measure Chalk line Utility knife Rubber mallet Miter saw Pencil 1/4” spacers Table saw Double-sided prybar Tapping block 1/8” x 1/8” x 1/8” Square notch towelDue to the nature of CALI vinyl pro with mute step, it is acceptable to use the score and snap method for your end cuts. It isstill recommended to use a table or miter saw for any rip cuts.Vinyl Pro with Mute Step Flooring Installation GuidePage 14Questions? (888) 788-2254CaliFloors.com
Pre-InstallationSubfloor RequirementsGeneral General Soft subfloors (e.g. carpets) must be removedThe subfloor must be level – Flat to 3/16” per 10-foot radiusThe subfloor must be clean Thoroughly swept and free of all debrisThe subfloor must be dryThe subfloor must be structurally soundEven though CALI bamboo vinyl plank flooring is waterproof it is NOT considered a moisture barrier. Hence, we alwaysrequire laying down a vapor barrier on plywood and a moisture barrier on concrete. When using the glue downmethod for install the glue will act as your vapor/moisture barrier.Acceptable Subfloor Types CD Exposure 1 plywood (grade stamped US PS1-95)OSB Exposure 1subfloor panelsUnderlayment grade particleboardExisting wood (must be sanded to its raw state)ConcreteLight weight concrete (may require a primer – see Titebond manufacturer for details)Ceramic tile (check with Titebond manufacture to see what prep will be needed: patch, self-lever, primer, etc.)Acceptable Subloor thickness Requirements:Joist System Spacing (inches on center)Minimum Thickness12”5/8”12” to 16”3/4”16” to 19.2”7/8”19.3” to 24”1-1/8”Glue Down DetailsCALI bamboo requires the use of Titebond 675 when gluing CALI vinyl pro with mute step. Make sure to follow allTitebond 675 guidelines which include but are not limited to: Plywood/OSB/Particle board subfloor moisture must not be over 13% Concrete Moisture should not read over 8lbs when using a Calcium Chloride test or 90% RH when using an in-situprobe or Lignomat SDM Concrete alkaline levels should not be more than 9.0 pH Use a 1/16” Square notch trowel For more details please see Titebond 675 product page flooring/62a57e94-6380-4de4-aa0e-45158d58160dWood subfloors must be securely fastened. A best practice is to nail or screw every 6” along joists to avoid squeaking.If leveling is needed, sand down high spots and fill in low spots with a Portland based leveling compound.Tip: If your plywood, OSB or particle board subfloor is reading higher than 13% MC it is advised to find and correctthe source of moisture intrusion before continuing installation. CALI bamboo is not responsible for any damagecaused by moisture intrusion.Concrete subfloors must be fully cured and at least 60 days old, preferably 90 days old. If leveling is needed, grinddown high spots and level low spots with a Portland based leveling compound. Slabs on or below grade must be freeof hydrostatic pressure.Important: CALI bamboo vinyl plank flooring is waterproof, however moisture intrusions from concrete hydrostaticpressure, flooding, or plumbing leaks, along with high levels of alkalinity, can affect the floor over time. Moisture canalso be trapped below the flooring and create mold or mildew. The installer, not CALI bamboo is responsible formaking sure the concrete moisture and relative humidity are suitable prior to installing this floor.Crawlspaces must have a minimum of a 6-mil polyethylene sheeting covering any exposed earth. Crawl spaces musthave adequate ventilation and a minimum of 18” of air space between the ground and the floor joist.Radiant Heat SystemsWhen glued down, CALI vinyl is not compatible for use with radiant heat systems.Vinyl Pro with Mute Step Flooring Installation GuidePage 15Questions? (888) 788-2254CaliFloors.com
InstallationInstallation of CALI vinyl Flooring by CALI bambooBefore laying: Measure the room at right angle to the direction of the planks. Planks in the final row should be atleast 1/3 the width of a plank. Due to this rule, planks in the first row can be cut to smaller size. Shuffle planks in orderto obtain a pleasant blend of shades. Lay planks preferably following the direction of the main source of light. Werecommend laying on wooden floors crossways to the existing floorboard. You should never nail or screw planks to thesubfloor. Floor should be installed from several cartons at the same time to ensure good color, shade and appearance. CALIbamboo vinyl plank will have multiple patterns for each product.Expansion gaps: Even though CALI bamboo vinyl plank will have very minimal expansion and contraction it is stillrequired to leave ¼” expansion space around the perimeter as well as all fixed objects (tile, fireplace, cabinets). When installing using the glue down method the use of transition pieces becomes optional. To cover your expansion space, CALI bamboo carries matching bamboo flooring moldings that include reducers,t-moldings, baseboards, quarter rounds, and thresholds. Matching stair parts are also available; including stairnosing, treads and risers. Please visit CALI bamboo’s Flooring Accessories webpage.Quick Tip! When installing around pipes, drill the hole ¾” larger than the diameter of the pipes.Installing the First Row:Measure the room at right angle to the direction of the planks. Planks in the final row should be at least 1/3 the widthof a plank. Due to this rule, planks in the first row can be cut to smaller size. Shuffle planks in order to obtain a pleasantblend of shades. Lay planks preferably following the direction of the main source of light. We recommend laying onwooden floors crossways to the existing floorboard. You should never nail or screw planks to the subfloor.1. Start out by pouring adhesive on to the subfloor. Make sure you do not pour out to much at one time. CALIbamboo does not recommend spreading more than an arm’s length (6 to 8 feet) worth of adhesive at a time. Thiswill help to ensure the glue does not flash over before you can adhere the planks.2. Use tapping block as necessary to fit planks together, but be careful not to let installed floor move on the wetadhesive while you are working. Repeat these steps as you move along with the installation.3. Starting from the left with the tongue-side facing the wall, carefully place the first board in place, using spacers toleave a 1/4” expansion gap between wall and edges of the plank.4. Install the second piec
Vinyl Pro with Mute Step Flooring Installation Guide Page 8 Questions? (888) 788-2254 CaliFloors.com Radiant Heat Systems CALI bamboo vinyl flooring is only recommended for use over radiant heat systems if the special requirements specified by the National Wood Flooring Association are met (please refer to the NWFA's Radiant Heat Guidelines).