Transcription
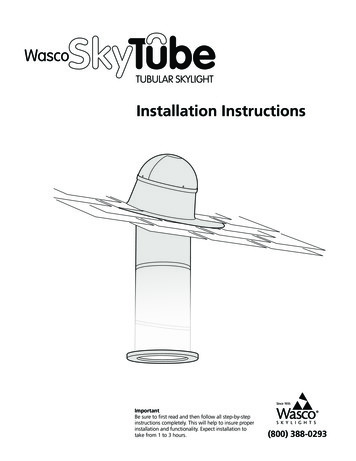
TUBULARSKYLIGHTInstallation InstructionsImportantBe sure to first read and then follow all step-by-stepinstructions completely. This will help to insure properinstallation and functionality. Expect installation totake from 1 to 3 hours.(800) 388-0293
Section iWhat You Need To KnowREVIEW THIS INFORMATION PRIOR TO BEGINNING INSTALLATIONThese instructions have been designed to help install your Wasco Skytube easily and safely. We’ve included a parts list,list of tools required, installation instructions for a variety of ceiling types, handy tips, and safety precautions. Please readthese instructions thoroughly before installing your Wasco Skytube. Pay particular attention to the assembly diagrams,assembly order, and part names. Identify and organize all parts before assembly. Make a list of the tools and componentsyou will need for each installation location. Following these instructions carefully will greatly enhance your ability to installyour Skytube and enjoy flawless performance for many years.CautionThe Skytube is not designed to hold your weight orthe weight of tools or other objects.Walking/placing objects on the SkyTube could causepersonal injury and property damage. A damagedSkyTube should be repaired immediately.Pre-Installation Items to Review:Tube Installation/Location Your Skytube kit comes with enoughtubing for a 30" installation (50" for a Pro 3 Kit) – ifyou require more tubing, you can purchase additionalextension tubes through your retailer. For best results always attempt to install the tubeas straight as possible (this would locate thedome/flashing directly above the ceiling diffuser). Make sure that the location you pick on your rooffor your dome/flashing is exposed to direct sunlightthroughout the day. You will not want any trees,chimneys, etc. to cast a shadow on your tube. Before installation, carefully survey the attic areaof your desired location. Make sure your tube canavoid any wiring, plumbing, roof valleys, ceilingmounted registers/fans, etc.For safe installation and use, do not deviate fromthese installation instructions.Warning:Working on a roof is potentially dangerous butyou can significantly reduce the risk by followingthese precautions: Never work in wet, windy or cold conditions.Roofing materials can be slippery when wet;asphalt shingles are brittle when cold and maycrumble underfoot. Plan your installation fora calm, dry day. Wear shoes with slip-resistant soles.WARNINGFor cathedral ceiling, see Section 10.For long tube shaft installation, see Section 11.For 14” skylight with 16” on-center rafter spacingsee Section 5.Building Codes: Consult your local building official about localconstruction ordinances before starting yourinstallation. Consult your community covenants. Somesubdivisions may not allow Skytube installed on thestreet side of home.Determining roof pitch: “Roof Pitch” is how far the roof drops verticallyfor every 12” of horizontal run. Spun metal flashings can be used on flat roof to12:12 roof pitch. Sloped composite flashings require a minimum pitchof 3:12 and a maximum of 12:12.POTENTIAL FIRE HAZARD. After removingthe film lining from the interior of tube shaft,a reflective inner surface is created. DO NOTleave tube shaft components unattended orexposed to direct sunlight prior to full installation.Exposed surfaces may catch fire or incur heatdamage as a result of focused sunlight until thetube shaft is fully installed with diffuser in place.Safety information: Wear safety glasses and work gloves whenusing power tools. Use protective work gloves while handling tubesections to protect hands from sharp edges.2
Section iiLimited Warranty for Wasco SkytubeEffective 12/11Warranty CoverageRemediesSubject to the conditions, exclusions and limitations herein,Wasco Products, Inc. (“Wasco”) warrants that its SkytubeProduct (“Product”) is free from defects in material andworkmanship that would render the Product unfit for itsnormal and recommended use.After receiving a valid claim, Wasco will, at its option, providea replacement Product (or part, as appropriate) of like kindand design.If Wasco elects to provide a replacement Product, the limitedwarranty on the replacement will last only for the balance ofthe original Product warranty period. If the Customer fails toprovide satisfactory proof of the date of purchase, the date ofmanufacture shall be used instead.THIS LIMITED LIFETIME WARRANTY APPLIES AND EXTENDSONLY TO THE ORIGINAL CONSUMER PURCHASING THISPRODUCT. THE DURATION OF THIS WARRANTY BEGINSON THE DATE OF PURCHASE BY THE CONSUMER.WASCO’S LIABILITY UNDER THIS WARRANTY IS LIMITED TOTHE ABOVE, AND Wasco WILL IN NO EVENT BE RESPONSIBLEFOR SHIPPING, LABOR, REMOVAL OF ORIGINAL PRODUCT,INSTALLATION OF REPLACEMENT PRODUCT, FINISHINGEXPENSES, OR OTHER CHARGES, COSTS OR CLAIMSINCURRED BY THE CONSUMER.Exclusions from CoverageThis warranty does not cover: Defects or damages arising out of shipment by commoncarriers, private transportation or other means oftransportation. Defects or damages arising out of improper handling orcleaning, defective or improper installation (includinginstallation not in accordance with Wasco’s installationinstructions), accident, act of God, intentional human act,misuse or abuse, or any other circumstances beyond thecontrol of Wasco. Products installed in or submitted to high heat, high moisture,high vibration, or extreme temperature changes. Products subjected to stress resulting from (i) localizedapplication of heat, (ii) movement of building and /or buildingcomponents, or (iii) expansion or contraction of framingmembers. Replacement products beyond the balance of the remainingwarranty period applicable to the original Product oraccessory which is replaced. Labor, shipping or other charges incurred or claimedby the Customer. Accessories, flashing or other installation materialsmanufactured or sold by persons other than Wasco.Disclaimer of WarrantyNO IMPLIED WARRANTY, INCLUDING WARRANTY OFMERCHANTABILITY OR OF FITNESS FOR A PARTICULARPURPOSE, SHALL APPLY TO THE PRODUCT (OR ANYREPLACEMENT) BEYOND THE DURATION OF THIS WRITTENWARRANTY. (Some states/provinces do not allow limitations onhow long an implied warranty lasts, so the above limitationmay not apply to you.)Limitation of RemediesTHE REMEDIES SET FORTH ABOVE ARE THE CONSUMER’SEXCLUSIVE REMEDIES FOR BREACH OF WARRANTY ORNEGLIGENCE. IN NO CASE SHALL Wasco BE LIABLE TO THECONSUMER OR ANY OTHER PERSON FOR ANY GENERAL,SPECIAL, INCIDENTAL OR CONSEQUENTIAL DAMAGES.(Some states/provinces do not allow the exclusion or limitation ofincidental or consequential damages, so the above limitationsor exclusions may not apply to you.)Warranty Claim ProceduresUnless modified in a later writing signed by both Wasco andConsumer, this warranty is the complete and exclusive warrantyrelated to the Product, and it supersedes all earlier agreementsand other communications relating to the Product. No employeeof Wasco or any other party is authorized to make any warrantyin addition to this warranty. Invalidation of any one or more ofthe other provisions of this warranty shall not invalidate or affectone of the other provisions. This warranty is not transferable.If within the applicable warranty period the Customer discoversa defect in the Product or an accessory which is covered by thiswarranty, the Customer must follow this procedure:1. The Customer must promptly present a written claimto the Customer Service Manager, Wasco Products, Inc.,85 Spencer Drive, Unit A, Wells, ME 04090.2. The Customer must use reasonable diligence to includein the written claim all of the following:This warranty gives the Consumer specific legal rights, and theConsumer may also have other legal rights which may vary fromstate to state, or province to province.a. An adequate description of the claimed defect(s);b. Identification of Product (size, design, type and modelnumber).; c. Date ing.9Place the tube section back into the ceiling makingsure to align and center it inside the roof flashingcollar. Place shim back across the cut-out.10Open the diffuser assembly box and separate theceiling ring from the diffuser. Install only the CeilingRing into the cut-out.11You can now remove the shim from the ceiling andallow the tube to rest centered over the ceiling ring.GlovesladderMetal ShearsSafety EquipmentBottom Adjustable TubeCeiling Ring676819111017
Section 10cCathedral Ceiling/Short Shaft Installation – On The RoofIMPORTANTTOOLS & PARTSUse protective work gloves — The trimmed edge of thetube will be sharp!LadderPhillips Screwdriver12While wearing gloves, carefully press downward onthe trimmed end of the tube. It will lock down intothe 3 plastic locking tabs located in the Ceiling TrimRing, securing the tube into the rubber gasket in theceiling trim ring.13Install the Solar Lens Dome onto the flashing collar.See dome install instructions Section 4c, then returnto this page for further instructions.14Rotate the Insulated Ceiling Diffuser onto the CeilingTrim Ring. See Section 9.Safety Equipment3/4 Dome ScrewsDome WashersBottom Adjustable TubeDiffuserSolar Lens Dome12Installation Complete!131418
Section 11Long Shaft InstallationLong Shaft InstallationFor long shaft installation, use steps listed below, referring tothose listed on previous pages for more specific install details.TOOLS & PARTS(2) 2-1/2” Pan Head SheetMetal Screws (Not Included)3/32” Bit1On roof, locate and install Top Adjustable Tube intoroof flashing. Install Ceiling Ring at ceiling. InstallBottom Adjustable Tube in attic as seen in diagram.2Frame 2 x 4 support between joists. Span from roofto ceiling with a length of 2 x 4 flat to outside of eachAdjustable Tube, creating a “spine”.3Put a (2) 2-1/2” pan-head, sheet metal screw (notincluded) in each connecting extension.4Slide next tube section in and attach with screw/s.Continue until all but one extension is connected. Cutand install last section of extension tube.5Tape ALL joints. Go to Section 9 to continue standard install.DrillPhillips Drill BitMeasuring Tape1Top AdjustableTube3(2) 2-1/2”Sheet MetalScrews5Extension Tube(s)22 x 4 Support51BottomAdjustable Tube19
1For new homes and projects requiring building permits, cut outthis NFRC label once product installation is complete.2Affix to diffuser ring as shown and secure with tape.3Label to remain in place until final inspection to qualify projectfor Energy Star.WASCO PRODUCTS, INC.SkyTube Tubular n Resistance20
FIRST-CLASSPOSTAGEREQUIREDAttn: Customer ServiceWASCO PRODUCTS, INC.85 SPENCER DRIVE, UNIT AWELLS, ME 04090FOLD HEREThank you for your purchase of this Wasco product.If you would like additionalinformation on Wasco products, visitour website at www.wascoskylights.com orcall our toll free number: 1-800-388-0293.Wasco Products, Inc.85 Spencer Drive, Unit AWells, ME 04090www.wascoskylights.comTAPE HERE DO NOT STAPLE21
Warranty Registration CardTo validate your warranty, please complete and return within the next 10 days.1.Date of Purchase: / / 2.Purchaser's Name: Address: City: State/Province: Zip: Country: Phone: E-mail:3. Purchaser's Gender:q Male q9. What three factors most influenced yourdecision to purchase this product?q Limited Lifetime warrantyq Leak proof designq Energy efficient designq Easy installation and performanceq 95% reflective tubesq Accessoriesq Solar lens dome with reflex opticsq Made in the U.S.A.q Dark space in home need more lightq 150 to 300 sqft space illuminatedq Other Specify:Female4. Type of dwelling where the Skylight willbe installed?q Residentialq Commercial5. Please specify the Skylight purchased?q 10" Tubeq 14" Tube6. Who installed the Skylight?q Homeownerq Installerq Other Specify:10. Please rate the overall satisfactionq Excellentq Fairq Poor7. Please specify the retailer where youpurchased the Skylight?Retailer name:11. Any additional comments?8. How did you learn about the Skylight?q In-store packaging/displaysq Mailing to your homeq Store sales staffq Recommended by a friendq Magazine advertising q TVq Newspaper advertisingq Internet searchq Other Specify:Visit our website at www.wascoskylights.com to learn about our other innovative products.Thank you for your purchase of this Wasco product.22
85 Spencer Drive, Unit AWells, ME 04090www.wascoskylights.com(16593-879) W1126 (4/12)
SKYLIGHT (800) 388-0293 Important Be sure to first read and then follow all step-by-step instructions completely. This will help to insure proper installation and functionality. Expect installation to take from 1 to 3 hours. Installation Instructions
