Transcription
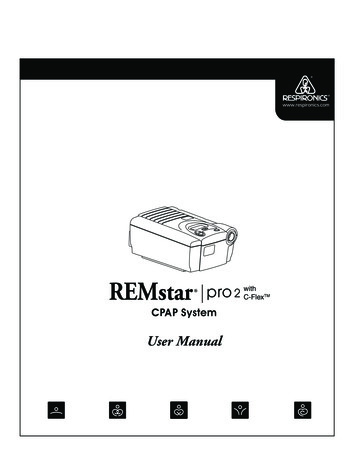
www .res pironic s.c omCPAP SystemUser Manual
Table of ContentsSymbol Key . 2Intended Use & Contraindications . 3Specifications . 4Warnings & Cautions . 5System Features . 7First Time Setup . 8 Installing the Filter . 9 Device Settings . 10 Assembling the Circuit . 14Accessories . Adding a Humidifier . Adding Oxygen to the System . Using DC Power with the System .15151515Routine Use . Connecting the Circuit . Adjusting the Circuit . Ramp Button . Turning the System Off . Helpful Hints . Taking the FOSQ Test .Routine Maintenance . Cleaning the Filter . Cleaning the System . Reordering . Service .161616171717181919192020Traveling with the System . 20Troubleshooting . 21EMC Requirements . 23Warranty . 27REMstar Pro 2 with C-Flex User Manual 1
Symbols!Attention, consultaccompanying documentsAC PowerDC PowerType BF Applied PartClass II (Double Insulated)IPX0 Ordinary Equipment RatingNotified Body Approvalfor Standards ComplianceCanadian/US CertificationREMstar Pro 2 with C-Flex CPAP system is the subject of U.S. patent #5239995 and #6105575. Other patents pending.REMstar, Whisper Swivel and Encore Pro SmartCard are registered trademarks of Respironics, Inc.NOTE: The C-Flex mark is used under license. Respironics, Inc. 20042 REMstar Pro 2 with C-Flex User Manual
Intended UseIntended UseThe Respironics REMstar Pro 2 with C-Flex system is a CPAP (ContinuousPositive Airway Pressure) device designed for the treatment of adult Obstructive Sleep Apnea (OSA) only.The REMstar Pro 2 with C-Flex is to be used only on the instruction of alicensed health care professional. Your home care provider will make thecorrect pressure settings according to your health care professional’sprescription.Several accessories are available to make your OSA treatment with theREMstar Pro 2 with C-Flex CPAP system as convenient and comfortable aspossible. To ensure that you receive the safe, effective therapy prescribedfor you, use only Respironics accessories.IMPORTANT!Read and understand the entire user manual before operating this system.If you have any questions concerning the use of this system, contact yourhome care provider or health care professional.Contraindications Studies have shown that the following pre-existing conditions maycontraindicate the use of positive airway pressure therapy for some patients: Bullous Lung Disease Bypassed Upper Airway Pneumothorax Pathologically Low Blood Pressure Pneumocephalus has been reported in a patient using nasalContinuous Positive Airway Pressure. Caution should be used whenprescribing CPAP for susceptible patients such as those with: cerebralspinal fluid (CSF) leaks, abnormalities of the cribriform plate, priorhistory of head trauma, and/or pneumocephalus.(Chest 1989; 96:1425-1426)The use of positive airway pressure therapy may be temporarily contraindicated if you exhibit signs of a sinus or middle ear infection. Contact yourhealth care professional if you have any questions concerning your therapy.REMstar Pro 2 with C-Flex User Manual 3
SpecificationsDevice SizeProduct Use,Transport, andStorageStandardsComplianceDimensions:Weight:9 1/2” x 6 7/8” x 4 1/2” (24 x 17 x 12 cm) 4.0 lbs. ( 1.8 kg)OperationTemperature:41 to 95 F (5 to 35 C)Humidity:15 to 95% Non-condensingAtmospheric Pressure: 83 to 102 kPascalsTransport & Storage-4 to 140 F (-20 to 60 C)15 to 95% Non-condensingN/AThis device is designed to conform to the following standard:IEC 60601-1 General Requirements for Safety of Medical Electrical EquipmentIEC 60601-1-2:2001-09 Electromagnetic Compatibility - Requirements and TestsEN ISO 17510-1 Sleep Apnea Breathing Therapy DevicesMode of OperationContinuousAC Power Consumption 100 - 240 VAC, 50/60 Hz, 1.0 A max.Type of ProtectionAgainst Electric ShockClass II EquipmentDegree of ProtectionAgainst Electric ShockType BF Applied PartIPX0 - Ordinary EquipmentDegree of ProtectionAgainst Ingress of WaterPressure Range4 to 20 cm H2O (in 0.5 cm increments)Pressure Stability4 to 10 cm H2O ( 0.5 cm H2O) 10 to 20 cm H2O ( 1.0 cm H2O)Measured in accordance with EN 17510 @ 6.6, 13.2, & 20 cm H2O @ 500 ml with BPM set to 10, 15, & 20 BPMperformed at 23 C ( 2 C), 50% RH ( 5%), and an atmospheric pressure of 101.54 kPascals.Sound Pressure Level 30 dB(A)Measured in accordance with EN 17510 @ 10 cm H2O at the patient circuit. This measurement applies to the REMstarPro 2 with C-Flex with or without the optional REMstar Heated Humidifier.Maximum Flow34 LPMMeasured in accordance with EN 17510 @ 6.6, 13.2, & 20 cm H2O @ 500 ml with BPM set to 10, 15, & 20 BPM @23 C ( 2 C), 50% RH ( 5%), and an atmospheric pressure of 101.54 kPascals.4 REMstar Pro 2 with C-Flex User Manual
Warnings & CautionsCAUTION! US federal law restricts this device to sale by or on the orderof a physician.WARNING! The instructions in this manual are not intended to supersede establishedmedical protocols.Indicates thepossibility forinjury to the useror the operator. This device is intended for adult use only. This device is not intended for life support. CPAP devices have the potential to allow rebreathing of exhaled air.To reduce this potential, observe the following:- Use Respironics circuit accessories.- Do not wear the mask and headgear for more than a few minuteswhile the device is not operating.- Do not block or try to seal the vent holes in the exhalation port.As with most CPAP devices: At low CPAP pressures, some exhaled gas(CO2) may remain in the mask and be rebreathed. Do not use this device if the room temperature is warmer than95 F (35 C). If this device is used at room temperatures warmer than95 F (35 C), the temperature of the airflow may exceed 106 F (41 C).This could cause irritation to your airway. This equipment is not suitable for use in the presence of a flammableanaesthetic mixture in combination with oxygen or air, or in the presence ofnitrous oxide. If you notice any unexplained changes in the performance of theREMstar Pro 2 with C-Flex, if it is making unusual or harsh sounds, if ithas been dropped or mishandled, if the enclosure is broken, or if waterhas entered the enclosure, disconnect the power cord and discontinue use.Contact your home care provider. To avoid electrical shock, disconnect the power cord before cleaning.DO NOT immerse the device in any fluids. Contact your health care professional if symptoms of sleep apnea recur. Pins of connectors identified with the ESD warning symbol should not betouched. Connections should not be made to these connectors unless ESDprecautionary procedures are used. Precautionary procedures includemethods to prevent build-up of electrostatic discharge (e.g., air conditioning, humidification, conductive floor coverings, non-synthetic clothing),discharging one’s body to the frame of the equipment or system or toearth or a large metal object, and bonding oneself by means of a wriststrap to the equipment or system or to earth.REMstar Pro 2 with C-Flex User Manual 5
Unpacking the SystemCAUTION!Indicates thepossibility of damageto the device. Tobacco smoke may cause tar build-up within the REMstar Pro 2 with C-Flex thatmay result in the REMstar Pro 2 with C-Flex malfunctioning. The use of accessories other than those specified, with the exception of cables sold bythe manufacturer of the equipment or system as replacement parts for internalcomponents, may result in increased emissions or decreased immunity of the equipment or system.Additional warnings and cautions are located throughout this manual as they apply.After unpacking the system, make sure you have everything shown here:Devicewith SmartCardCarryingCaseFilter CapPowerCordPollen FiltersUltra-fineFilterIMPORTANT!Flexible Tubing6 ft. (1.83 m) x 22 mm I.D.UserManualIf any of the above parts are missing, contact your home care provider.The Encore Pro SmartCard records CPAP usage. The SmartCard also can record your answers tothe FOSQ “Quality of Life” questionnaire. Your health care professional or home care provider mayask you to periodically complete this questionnaire. Your answers can be recorded on the SmartCardor you can circle your answers on the enclosed FOSQ brochure.6 REMstar Pro 2 with C-Flex User ManualFOSQ
System FeaturesSmartCard!!HumidifierButtonDC InletFilter(s) andFilter CapDisplayScreenMedicalEquipmentNote (on bottom)AC InletPressureStart / StopButtonRampButtonUser ButtonsAir OutletAC Inlet . Connect/disconnect the AC power cord here.Air Outlet . Connect the flexible tubing here.DC Inlet . Connect the optional DC power cord here.Display Screen . All system settings, total operating time, and therapy hours will appearhere. Displays the pressure settings.Filter Cap & Filters . The pollen filter screens out normal household dust and pollens. Theoptional, ultra-fine filter is also included for more complete filtration ofvery fine particles. The filter cap is designed to reduce the noise fromthe REMstar Pro 2 with C-Flex.Humidifier Button . This button turns the REMstar Heated Humidifier on/off and allows theheat setting to be adjusted. The humidifier is an optional accessory thatmay be purchased separately.Medical Product Note . For ease at airport security stations, there is a note on the bottom of theREMstar Pro 2 with C-Flex stating that it is medical equipment. It mayhelp if you also take this manual with you when you travel.Pressure Start/StopButton . This button starts/stops the airflow.Ramp Button . This button starts the ramp cycle or accesses the REMstar Pro 2 with CFlex settings.SmartCard . The SmartCard records device usage information (e.g., length of time thesystem was used for therapy). Contact your home care provider forfurther information about the SmartCard.User Buttons . These buttons can be used to change some of the system settings and toanswer the FOSQ quality of life questionnaire.REMstar Pro 2 with C-Flex User Manual 7
First Time SetupWARNING!Do not use the REMstar Pro 2 with C-Flex system until anappropriate professional adjusts the settings! To order anyaccessories not included with this system, contact your home careprovider.Note to home care provider: Before beginning setup, be sure that youhave available the REMstar Pro 2 with C-Flex Home Care ProviderSetup Instructions. Setup instructions are not provided in thismanual.WARNING!DO NOT connect any equipment to the REMstar Pro 2 with C-Flexunless recommended by Respironics or your health care provider.CAUTION!If the REMstar Pro 2 with C-Flex has been exposed to either very hotor very cold temperatures, allow it to adjust to room temperature(approximately 2 hours) before beginning setup.SmartCardATTENTION!The REMstar Pro 2 with C-Flex comeswith a SmartCard installed in the side ofthe device to record information for thehome care provider. Your home careprovider may ask you to periodicallyremove the SmartCard and send it tohim/her for evaluation.The SmartCard does not need to be installed for the REMstar Pro 2with C-Flex to work properly. The SmartCard records device usageinformation for use by your home care provider. Contact your homecare provider if you have any questions about the SmartCard.8 REMstar Pro 2 with C-Flex User Manual
First Time SetupInstalling the Filter 1. Install the filters and filter cap.CAUTION!The pollen filter must be in place at all times whenthe REMstar Pro 2 with C-Flex is operating. Thewhite ultra-fine filter is optional and can be usedin addition to the pollen filter. The ultra-fine filteris recommended for people who are sensitive totobacco smoke or other small particles.!!white,ultra-fine filtergray,pollen filterfilter capa. Place one of the pollen filters over the ultra-fine filter. If you arenot using the ultra-fine filter, simply place the pollen filter intothe filter area on the back of the REMstar Pro 2 with C-Flex. Anextra filter is included for your convenience.b. Attach the filter cap. Position the cap so that the small opening on thecap is facing down. Insert the cap’s tabs into the filter area opening.Power Cord2. Connect the power cord. Plug the socket end ofthe power cord into the AC inlet on the back ofthe REMstar Pro 2 with C-Flex. Plug thepronged end of the power cord into an electricaloutlet.!!IMPORTANT!To remove AC power, disconnect the power cord from the electricaloutlet.WARNING!Inspect the power cord often for any signs of damage. Replace adamaged cord immediately.WARNING!The REMstar Pro 2 with C-Flex is activated and ready for use when thepower cord is connected. The pressure start / stopbutton turns the blower on/off.CAUTION!3. Place the REMstar Pro 2 with C-Flex on afirm, flat surface.Make sure the REMstar Pro 2 with C-Flex is away from any heating orcooling equipment (e.g., forced air vents, radiators, air conditioners).Also make sure that bedding, curtains, or other items are not blocking thefilter or vents of the device. Air must flow freely around the device for thesystem to work properly.REMstar Pro 2 with C-Flex User Manual 9
First Time SetupDeviceSettingsOnce the power cord is plugged in, REMstar Pro 2 with C-Flex’ssystem version number, the total hours of use, and then the total therapyhours will appear. The word “Card” in the lower right corner of thedisplay screen signifies that the SmartCard is uttonHEATRAMPUserButtonsSTARTSTOPPressureStart / StopButtonDisplay Screen: All device settings will appear here.Pressure Start/Stop Button: Use this button to start/stop theairflow. DO NOT start the airflow until the circuit tubing is connected.Heated Humidifier Button: Use this button when the optionalREMstar Heated Humidifier has been prescribed. This button willcontrol the optional heated humidifier’s output. Follow the instructionsincluded with the humidifier.Ramp Button: When the airflow is turned on, use this button to startthe ramp cycle (which lowers the airflow pressure). This will allowyou to fall asleep more comfortably. When the airflow is turned off,use this button to access the patient menu. Note: The ramp feature isnot prescribed for all users.User Buttons: These buttons can be used when entering variousmenus to change some of the REMstar Pro 2 with C-Flex settings.IMPORTANT!In the Setup Menu, the humidifier andramp buttons operate as up and downkeys to change the settings, the left/rightuser buttons are used to go to theprevious/next question or setting, and thestart/stop button will allow you to exit theSettings Menu.10 REMstar Pro 2 with C-Flex User ManualPrevious NextHEATRAMPExitSettingsSTARTSTOP
First Time SetupDeviceSettings4. Verify/Change the REMstar Pro 2 with C-Flex settings. To startthe setup menu, press and hold the ramp button until the devicebeeps (The airflow must be turned off.)IMPORTANT!Pressing the ramp button (when the airflow is turned on) will lowerthe airflow pressure, if prescribed.WARNING!DO NOT use the REMstar Pro 2 with C-Flex if the display is erratic.Contact your home care provider for further instructions.IMPORTANT!If at any time you wish to exit the setup menu, press the pressure on/off button and the display will go back to the main screen.TherapyHoursa. The number of nights theREMstar Pro 2 with C-Flex was used NIGHTS 4 HRSfor therapy for more than 4 hourswill appear. This screen is only forreference. Your home care providermay periodically ask you for this information.Press the right user button to go to the next setting.Setting theC-FlexTMLevelb. The C-Flex level setting displays theC-Flex level set by your home careprovider. Note: This setting willonly appear if C-Flex was prescribedfor you.This setting allows you to adjust thelevel of air pressure relief that you feel when you exhale duringtherapy.Your home care provider will have already set a C-Flex level.If this is not comfortable for you, you can increase or decreasethe setting. The setting of “1” provides a small amount ofpressure relief. To increase the pressure relief, change thesetting to “2” or “3.”To change the setting, press the ramp or humidifier button.Press the right user button to go to the next setting.REMstar Pro 2 with C-Flex User Manual 11
First Time SetupSetting theRampStartingPressurec. The ramp starting pressure willappear. Note: This setting will onlyappear if ramp was prescribed for you.RAMPSTART4.0The ramp feature will reduce thepressure and then gradually increase(ramp) the pressure to the prescriptionpressure setting so that you can fall asleep more comfortably.Your home care provider will have already set a ramp startingpressure. If you feel the ramp starting pressure is set too low or toohigh, you can change the setting.(Range: 4 cm H2O - Prescription Pressure)To change the setting, press the ramp or humidifier button.(You can hold the button down to make the setting change faster.)Turning theAlert ToneOn or Offd. The patient disconnect alert settingwill appear and flash. This setting hastwo functions. When a large,continuous air leak (such as maskALERTremoval) has been detected in thecircuit, it enables/disables the audiblealert (a beeping sound) and the Auto-off feature that allows theREMstar Pro 2 with C-Flex to automatically turn the airflow OFF.You have the option of turning the alert tone on or off.1 on0 offTo change the setting, press the ramp or humidifier buttonuntil the correct setting appears.Press the right user button to go to the next setting.Setting theButtonLightse. The button lights setting will appearand flash. This setting allows you tohave the lights behind the buttonsturned on or off while the airflow isturned on. (The lights will always beon when the airflow is off.)1 onLED0 offTo change the setting, press the ramp or humidifier buttonuntil the correct setting appears.12 Press the right user button to go to the next setting.REMstar Pro 2 with C-Flex User Manual
First Time Setupf. FOSQ will appear and flash.Note: FOSQ will only appear if the SmartCardhas been installed. If the SmartCard is notinstalled, go to Step c.FOSQFOSQCARDFOSQ is a “quality of life” questionnairedesigned specifically for people with sleep disorders. The results allowhealth care professionals to see how therapy has improved the quality ofyour life. The REMstar Pro 2 with C-Flex has the ability to record youranswers on the SmartCard for later review by your health careprofessional.To take the FOSQ test, go to page 18 for instructions.To skip the FOSQ test and continue with the settings, press the rightuser button.The settings are complete. Press the pressure start/stopbutton to exit the settings menu. Or, if you want to return tostep a, press the right user button.REMstar Pro 2 with C-Flex User Manual 13
First Time SetupAssemblingthe Circuit5. Assemble the circuit. To use the system, you will need the following accessories in order to assemble the recommended circuit. Respironics nasal mask with integrated exhalation port(or Respironics mask with separate exhalation port such as the Whisper Swivel II) Respironics 6 ft. (1.83 m) x 22 mm I.D. flexible tubing Respironics headgear (for the mask)WARNING!If the REMstar Pro 2 with C-Flex is used for multiple persons (e.g.,rental devices) a low-resistance, main flow bacteria filter should beinstalled in-line between the REMstar Pro 2 with C-Flex and thecircuit tubing. Pressures must be verified by your home care providerwhen alternate or optional accessories are in place.a. Connect the flexible tubing to the airoutlet on the front of theREMstar Pro 2 with C-Flex.b. If you are using a maskwith a built-inexhalation port, connectthe mask’s connector tothe flexible tubing.Mask'sConnectorFlexibleTubingIf you are using a mask with a separateexhalation port, connect the flexible tubing tothe exhalation port. Position the exhalationport so that the vented air is blowing awayfrom your face. Connect the mask’s connector to the exhalation port.WARNING!RotatingConnectorWhisperSwivel IIVent HolesFlexibleTubingDo not block or otherwise try to seal the air openings (vent holes) onthe exhalation port. Explanation of the warning: The REMstar Pro 2 with C-Flexis intended to be used with masks and circuits that have an exhalation port designed toexhaust CO2 from the circuit. When the REMstar Pro 2 with C-Flex is turned on andfunctioning properly, new air from the REMstar Pro 2 with C-Flex flushes the exhaledair out through the exhalation port. When the REMstar Pro 2 with C-Flex is turnedoff, enough fresh air will not be provided through the mask, and exhaled air may berebreathed. Rebreathing of exhaled air for longer than several minutes can, in somecircumstances, lead to suffocation. This warning applies to most CPAP devices.WARNING!If you are using a full face mask (i.e., a mask covering both yourmouth and your nose), the mask must be equipped with a safety(entrainment) valve.14 REMstar Pro 2 with C-Flex User Manual
AccessoriesContact your home care provider for additional information on theaccessories available for the REMstar Pro 2 with C-Flex system. Whenusing optional accessories, always follow the instructions enclosed withthe accessories.Adding aHumidifierWARNING!Adding OxygenThe REMstar Heated Humidifier and Pass-overhumidifier are available from your home careprovider. The humidifiers may reduce nasaldryness and irritation by adding moisture (andheat if applicable) to the airflow.Always place the humidifier at the same level or lower than theREMstar Pro 2 with C-Flex device and the mask so that any excesscondensation in the tubing drains back into the water chamber. Thehumidifier must be level for proper operation. DC power cannot be usedto operate the heated humidifier.Oxygen may be added at the mask connection. Please note the warningslisted below when using oxygen with the REMstar Pro 2 with C-Flex.WARNING!The oxygen supply must comply with the local regulations for medicaloxygen.WARNING!A Respironics Pressure Valve (part number 302418) must be placed inline with the patient circuit.WARNING!Oxygen accelerates fires. Keep the REMstar Pro 2 with C-Flex and theoxygen container away from heat, open flames, any oily substance, orother sources of ignition. DO NOT smoke in the area near the REMstarPro 2 with C-Flex or the oxygen container.WARNING!If oxygen is used with this CPAP machine, the oxygen flow must beturned off when the CPAP machine is not operating.Explanation of warning: When the CPAP device is not in operation andthe oxygen flow is left on, oxygen delivered to the ventilator tubing mayaccumulate within the CPAP machine enclosure. Oxygen accumulated inthe CPAP machine enclosure will create a risk of fire. This warningapplies to most types of CPAP machines.WARNING!At a fixed flow rate of supplemental oxygen flow, the inhaled oxygenconcentration will vary depending on the pressure settings, patientbreathing pattern, mask selection and leak rate. This warning applies tomost types of CPAP machines.REMstar Pro 2 with C-Flex User Manual 15
Routine UseUsingDC PowerCAUTION!Connectingthe CircuitIMPORTANT!You can also use the REMstar Pro 2 with C-Flex in astationary recreational vehicle, boat, or motor homewith a 12 volt DC power source. Do not operate theREMstar Pro 2 with C-Flex while the vehicle is inmotion. Contact your home care provider foradditional information.Use only the Respironics DC power systemavailable from your home care provider. Use ofany other system may cause damage to theREMstar Pro 2 with C-Flex or your vehicle.1. Connect the circuit.Before each use, examine the flexible tubing for any damageor debris. If necessary, clean the tubing to remove the debris.Replace any damaged tubing.a. Connect the mask to the headgear, following the instructionsincluded with the headgear.b. Put on the mask and headgear, and breathe normallythrough your nose. The airflow should automatically startwhen you begin breathing through the circuit. If the airflowdoes not start within four breaths, press the pressure start/stopbutton on the top of the REMstar Pro 2 with C-Flex. Whenoperating the system with some mask types or some circuitconfigurations, the airflow may NOT start automatically.PressureStart / StopButtonSTARTSTOPAdjustingthe Circuit2. Adjust the circuit. Lie down on your bed, and adjust the flexible tubingso it is free to move if you turn in your sleep. Adjust the mask andheadgear until you have a comfortable fit and there are no airflow leaksinto your eyes.16 REMstar Pro 2 with C-Flex User Manual
Routine UseUsing theRamp ButtonPressing the Ramp button will reduce the air pressure when you aretrying to fall asleep. The air pressure will gradually increase until yourprescription pressure is reached. If your health care professionalprescribed ramp for you, pressing the button will reduce thepressure and then gradually increase (ramp) the pressure to thetherapeutic pressure setting so that you can fall asleep morecomfortably. Note: The ramp feature is not prescribed for all users.3. Press the Ramp button on the top of theREMstar Pro 2 with C-Flex. You can usethe Ramp button as often as you wish duringthe night.RampButtonRAMPTurning theSystem OFF4. Remove the mask and headgear.Press the pressure on/off button onthe top of the REMstar Pro 2 with CFlex to turn the airflow OFF.PressureStart / StopButtonOr, if the patient disconnect alert settingSTARThas been turned on, the airflow willSTOPautomatically turn off. When youremove the mask, the airflow willdecrease to a low pressure. After approximately 45 seconds thealert tone will sound. Then the airflow will automatically turn off(in less than 2 minutes after you remove the mask).IMPORTANT!HEATHelpful HintsThe humidifier button is active only when a REMstar HeatedHumidifier is connected or when the REMstar Pro 2 with CFlex is in the Setup Menu. Refer to the REMstar HeatedHumidifier’s instructions for additional information. If the alert tone sounds, press any button on the REMstar Pro 2 withC-Flex to silence the alert tone. Refer to the “Troubleshooting”section of the manual for further instructions. Make sure that bedding, curtains, or other items are not blocking thefilter or vents of the REMstar Pro 2 with C-Flex. Air must flowfreely around the REMstar Pro 2 with C-Flex for the system to workproperly. If the airflow from the REMstar Pro 2 with C-Flex feels cold,reposition the circuit tubing so that it runs under your bed covers toreduce heat loss while you sleep.REMstar Pro 2 with C-Flex User Manual 17
FOSQTaking theFOSQ TestIf your health care professional or home care provider instructs you tocomplete the FOSQ “quality of life” questionnaire, you can enter youranswers into the REMstar Pro 2 with C-Flex.1. Make sure that the SmartCard is installed inthe side of the REMstar Pro 2 with C-Flex.Answers to the questions are saved onto theSmartCard.2. To start the questionnaire, pressand hold the ramp button untilthe REMstar Pro 2 with C-Flexbeeps. (The airflow must beturned off.) The number ofnights the REMstar Pro 2 withC-Flex was used for therapy formore than 4 hours will appear.This screen is only for reference.DisplayScreenNIGHTS 4 TARTSTOPPress thisbutton tostartPress the left user button.AnswerFOSQQuestion3. The word FOSQ will appear on thedisplay and flash. In the lower rightcorner of the screen, the word “Card”will appear so that you know theSmartCard has been installed properly.CARDPress tochangeanswersHEATRAMPPress to goto previousquestionPress togo to nextquestionPress the humidifier button. The wordFOSQ will stop flashing. The number ofthe question will appear to the left of the colon, and the answer willappear to the right and flash. Using the FOSQ brochure (from yourhome care provider), read each question. The answer selection willbe printed below the question.Press the humidifier or ramp button to change the an
REMstar Pro 2 with C-Flex User Manual 3 The Respironics REMstar Pro 2 with C-Flex system is a CPAP (Continuous Positive Airway Pressure) device designed for the treatment of adult Obstruc-tive Sleep Apnea (OSA) only. The REMstar Pro 2 with C-Flex is to be used only on the instruction of a licensed health care professional.


