Transcription
ExercisesExercise 1 Create a Notebook and Add Sections.3Exercise 2 Add Pages.5Exercise 3 Type a Note and Format Text.7Exercise 4 Insert and Modify a Table.9Exercise 5 Apply a Template and Make a Subpage.12Exercise 6 Add Content to a Template.13Exercise 7 Tag a Note.15Exercise 8 Insert a File and a Link.17Exercise 9 Check Spelling.19Exercise 10 Delete a Page and Insert Pictures.20Exercise 11 Insert Video.22Exercise 12 Send to OneNote and Change the Page Background.23Exercise 13 Use Pen Mode and Convert Handwriting to Type.24Exercise 14 Insert an Outlook Meeting.26Exercise 15 Format a List and Insert a Screen Clipping.27Exercise 16 Insert Audio.29Exercise 17 Search a Notebook.30Exercise 18 Save to Different Formats. 31Exercise 19 Print from OneNote.33Exercise 20 Share a Notebook.34Practice It ActivitiesActivity 1 Create a Notebook, Sections, and Pages.36Activity 2 Apply a Template and Make a Subpage.37Activity 3 Insert a File.38Activity 4 Add Content to a Template.39Activity 5 Insert a Table.40Activity 6 Modify a Table.41Activity 7 Add a Screen Clipping.42Activity 8 Send to OneNote.43OneNote TutorialCONTENTS1
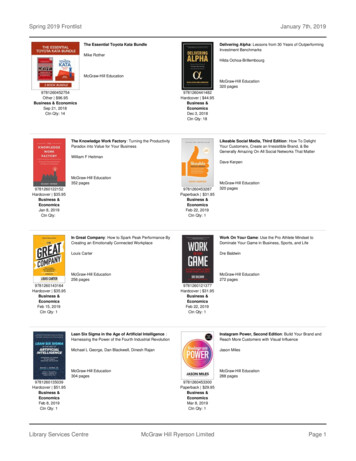
INTRODUCTIONMicrosoft OneNote 2010 functions as a digital notebook, a single place to store and access information aboutschool, work, and your personal life. It takes just a few minutes to create a new OneNote notebook with tabbedsections and pages. You can then add typed and handwritten notes, tables, files, links, pictures, screen clippings,audio, and video. OneNote offers powerful search capabilities to help you find filed information later. Plus,OneNote notebooks are easy to share and synchronize, facilitating collaboration with peers and coworkers.Using OneNote to gather, organize, find, and share information helps you stay on top of your tasks andresponsibilities. Having a centralized resource for important data lets you use your time more efficiently andeffectively, thereby increasing your productivity. OneNote also offers graphical templates and backgrounds forarranging ideas logically and making pages visually appealing, so note-taking is simpler and more enjoyable.Figure 1SectionPageSubpageNotebookContentOneNote TutorialINTRODUCTION2
Exercise 1 Create a Notebook and Add SectionsIn completing the following exercises, keep in mind that OneNote saves automatically as you take notes andwhenever you close a notebook. You do not save your work manually in OneNote.When you create a notebook in OneNote, it can be stored on your computer for personal use, or on the Web or anetwork for sharing. After a notebook is created, it appears in the Navigation Bar at the left of the screen. A newsection is generated automatically. You can give the new section a meaningful name and add more sections. Tabsrepresenting sections appear at the top of the screen.1.To launch OneNote, select Start All Programs Microsoft Office Microsoft OneNote 2010.2. On the ribbon, select the File tab. Choose New.3. Under New Notebook, in Step 1, select My Computer. In Step 2, key: School. (Ask your teacher if thename of your notebook should also include your first and last names.) In Step 3, click Browse, navigateto the location specified by your teacher, and click Select. Click Create Notebook.4. If necessary, click the arrow at the left of the screen to expand the Navigation Bar. Locate the Schoolnotebook you just created.5.Your screen should look similar to Figure 2.Figure 2File tabNavigation barSchoolnotebookOneNote TutorialEXERCISE 13
Exercise 16. At the top of the screen, locate the tab for the first section of your School notebook. To rename the tab,double-click New Section 1, key: Classes, and press Enter.7.To create a new section, click the smaller tab with a star to the right of the Classes tab. Key: Field tripsand press Enter.8.Repeat Step 7 to add the following four tabs: Bake sale, Newspaper, Science fair, and Studentcouncil.9. To reorder the tabs, as an example, click the Student council tab, drag it to the left of the Science fairtab, and release.10.Your screen should look similar to Figure 3.Figure 3Section tabCreate a newsectionSection tabYou can change the color of a section tab byright-clicking on it, selecting Section Color,and choosing a color.OneNote TutorialOneNote lets you group several sections intoa section group, which appears as a specialicon next to the regular section tabs.EXERCISE 14
Exercise 2 Add PagesWhen a new section is created in OneNote, an untitled page is generated automatically. You can give the newpage a meaningful name and add more pages. Tabs representing pages appear in the Page Tabs at the right of thescreen. Pages can have subpages, which will be discussed in a later exercise.1.In your School notebook, click the Classes tab at the top of the screen or in the Navigation Bar.2. If necessary, click the arrow at the right of the screen to expand the Page Tabs.3. To rename the page, at the blinking cursor, key: Class Schedule and press Enter.4.To create a new page, in the Page Tabs, click New Page. At the blinking cursor, key: English and pressEnter5. Repeat Step 4 to create the following six additional pages: U.S. History, Algebra II, Chemistry,French II, Computer Science, and Newspaper.OneNote includes specialized tools for taking math notes.You can use a OneNote notebook to organize aspects ofyour personal life, with sections and pages devoted totasks; books, movies, and music; shopping; travel; etc.OneNote TutorialEXERCISE 25
Exercise 26. Your screen should look similar to Figure 4.Figure 4Page tabsPage titleNew pagePage titleThe title bar on a OneNote screen displays thename of the current page.OneNote TutorialEXERCISE 26
Exercise 3 Type a Note and Format TextNotes in OneNote are contained in frames. After a page is named, a note frame with a blinking cursor appearsautomatically below the title. You can start a new note by clicking anywhere on a page and typing. The basic toolsfor formatting text in OneNote are similar to those found in other Microsoft applications.1.In your School notebook, click the Classes tab. In the Page Tabs, click the Class Schedule page.2. In the note frame, at the blinking cursor, key: First Semester:.3.Select the text First Semester: by clicking and dragging over it.4. On the ribbon, on the Home tab, click the Font Size drop-down arrow and select 14. Click Bold. Clickthe Font Color drop-down arrow and select Dark Blue. Deselect the text.OneNote has an Unfiled Notes section forstoring notes and clippings until you have achance to move them to the relevant page.OneNote has an equation editor for adding math equations tonotes. You can start from scratch by inserting symbols or get ahead start by choosing a predefined equation.OneNote TutorialEXERCISE 37
Exercise 35. Your screen should look similar to Figure 5.Figure 5Home tabNoteIn addition to keying new text, you can copytext from another source and paste it intoOneNote.OneNote TutorialEXERCISE 38
Exercise 4 Insert and Modify a TableTables are used in OneNote to organize information. A table with a specific number of rows and columns can beinserted on a page. Another way to create a table in OneNote is to start typing a note and then press Tab to inserta new column and Enter to insert a new row. OneNote offers tools to modify columns and rows and to formattables.1.In your School notebook, in the Classes section, on the Class Schedule page, click to the right of thenote frame.2. On the Insert tab, click the Table button. In the Insert Table box, select 2x2 Table.3. In the first cell of the first row of the table, key: Period. Press Tab. Key: Subject. Press Tab.4. In the first cell of the second row, key: 1. Press Tab. Key: English. Press Tab.5. Repeat Step 4 to add the following rows to the table:Period234567OneNote TutorialSubjectU.S. HistoryAlgebra IIChemistryFrench IIComputer ScienceNewspaperEXERCISE 49
Exercise 46. Your screen should look similar to Figure 6.Figure 67. Position the cursor anywhere in the second column. On the Layout tab, click the Insert Right button.8. Click in the top row of the new column. Key: Teacher. Press the down arrow.9.10.In the second row of the new column, key: Linden. Press the down arrow.Repeat Step 9 to add the following information to the 6Kuo7HawthorneOneNote TutorialEXERCISE 410
Exercise 411. Select all the cells in the first column of the table. On the Layout tab, click the Center button.12. Select all the cells in the first row of the table. On the Home tab, click Bold. Deselect the cells.13. Your screen should look similar to Figure 7.Figure 7BoldBold rowCenteredcolumnAs you add content to a table in OneNote, thecolumns stretch automatically to accommodatethe widest entry.OneNote TutorialEXERCISE 411
Exercise 5 Apply a Template and Make a SubpageOneNote 2010 includes built-in templates for organizing and adding visual interest to the pages of a notebook.The templates in OneNote are categorized as academic, blank, business, decorative, and planners. You can apply atemplate only to a new page. You cannot apply a template to an existing page.1.In your School notebook, on the Classes tab, click the New Page drop-down arrow and select PageTemplates. In the Templates pane, click Academic. In the list that appears, click Simple LectureNotes. A new page appears as the last page in the section.2.Click on the tab for the new page and drag it up until you see a thick black line at the bottom of the tabfor the English page. Release. Close the Templates pane.3. Right-click on the new page in the Page Tabs and select Make Subpage.4. On the new subpage, select Title. Key: Day 1 and press Enter.5.Your screen should look similar to Figure 8.Figure 8TemplateNew pagedrop-downarrowSubpageInstead of applying one of OneNote’s built-in templates, you can accessadditional templates at Office Online or create your own template.OneNote TutorialEXERCISE 512
Exercise 6 Add Content to a TemplateOneNote’s page templates may include insertion points for text and placeholder text that can be modified orreplaced.1.In your School notebook, on the Classes tab, on the Day 1 subpage, under Today’s Topics:, click tothe right of the first bullet. Key: Shakespeare. Click to the right of the second bullet and key: Sonnets.2.Under Most Important Facts Covered Today:, click to the right of the first bullet. Key: WilliamShakespeare was an English poet and playwright who lived from 1564 to 1616.3. Repeat Step 2 to add the following text next to the second and third bullets:Shakespeare wrote 154 sonnets.A Shakespearean sonnet is a poem consisting of 14 linesof iambic pentameter.4. Your screen should look similar to Figure 9.Figure 9Content addedTo modify general and many specific options for working with OneNote, go to File Options.OneNote TutorialEXERCISE 613
Exercise 65. Click below the bottom note frame and key: Definitions:. Select Definitions:. On the Home tab, in theStyles group, select Heading 3. Click after Definitions: and press Enter twice.6.Key: Meter: The rhythm of lines or verses in a poem. Select Meter. In the toolbar that appears, clickBold. Click at the end of the line and press Enter.7.Repeat Step 6 to add and style the following text:Foot: The smallest unit of rhythm in a poem.Iamb: A metrical foot consisting of an unstressedthen a stressed syllable.Iambic pentameter: A metrical line consisting offive iambs.8. Your screen should look similar to Figure 10.Figure 10Heading 3OneNote TutorialEXERCISE 614
Exercise 7 Tag a NoteWhen you work with a large notebook or with several notebooks, tags provide an option for locatinginformation. Any piece of content can be tagged. For example, you might tag notes that are to-do items, contacts,or Web sites to visit. Tagged content appears with a special symbol or formatting indicating the specific tag thathas been applied. OneNote tags can be searched and sorted.1.In your School notebook, on the Classes tab, on the Day 1 subpage, select Meter: The rhythm oflines or verses in a poem.2.Click the Home tab. Click the Tags drop-down arrow to display the various default tags available. SelectDefinition. The text has now been tagged as a definition.3.Repeat Step 2 to tag the other three definitions.4.On the Home tab, in the Tags group, click the Find Tags button. In the Tags Summary pane, noticethe links to the recently tagged definitions.In OneNote, you can create a custom tag ormodify an existing tag’s symbol, font color, orhighlight color.You can tag a to-do item in OneNote bypressing Ctrl 1. You can tag a contact bypressing Ctrl 7.OneNote TutorialEXERCISE 715
Exercise 75. Your screen should look similar to Figure 11.6. Close the Tags Summary pane.Figure 11Find tagsbuttonTags summarypaneTags dropdown arrowTaggeddefinitionsTaggeddefinitionsOneNote TutorialEXERCISE 716
Exercise 8 Insert a File and a LinkThe information you need to manage often exists in many places and formats. You can centralize files by insertingthem in a OneNote notebook, where they can be opened in their native applications. Another way to organizescattered information is to insert hyperlinks to files, documents, Web pages, and even other locations inOneNote.1.In your School notebook, on the Classes tab, on the Day 1 subpage, under Homework:, click to theright of the first bullet. Key: Read Shakespeare’s Sonnet 18. Click to the right of the second bullet.Key: Research Shakespeare’s life.2.Click to the right of the note frame for Most Important Facts Covered Today:. On the Insert tab,click the Attach File button.3.In the Choose a file or a set of files to insert dialog box, navigate to the OneNote student data files.Select the Sonnet 18 Word document. Click Insert.4.Double-click the Sonnet 18 icon to open the file. Close the Word document.5.Your screen should look similar to Figure 12.Figure 12Attachfile buttonInsertedfileOneNote TutorialEXERCISE 817
Exercise 86.Click below the definitions. On the Insert tab, click the Link button.7.In the Link dialog box, in the Text to display box, key: Folger Shakespeare Library. In the Addressbox, key: http://www.folger.edu. Click OK.8.Click the link. The Web site opens in your default Web browser. Close the browser window.9.Your screen should look similar to Figure 13.Figure 13LinkbuttonInsertedlinkThe ability to easily create links in OneNote toother notebooks, sections, and pages (called“wiki linking”) is new in OneNote 2010.OneNote TutorialEXERCISE 818
Exercise 9 Check SpellingOneNote lets you include a limitless amount of text, and it is important that the text be spelled correctly. Likeother Microsoft applications, OneNote offers an AutoCorrect feature that fixes common mistakes as you type. Inaddition, you can run a full check of the spelling on a page.1.In your School notebook, on the Classes tab, on the Day 1 subpage, click the Review tab. Click theSpelling button. The Spelling pane opens at the right of the page.2. Your screen should look similar to Figure 14.3. For each word identified, either ignore the suggested spellings or correct the spelling.4. Click OK in the box indicating that the spelling check is complete. The Spelling pane closes.Figure 14Review tabSpellingbuttonTo enable the Math AutoCorrect function in OneNote, goto File Options Proofing, click AutoCorrect Options,click the Math AutoCorrect tab, and check Replace text asyou type.OneNote TutorialSpelling paneThe keyboard shortcut for checking spellingis F7.EXERCISE 919
Exercise 10 Delete a Page and Insert PicturesFiles, including picture files, can be inserted directly into a OneNote page. Once placed, images can be resizedand repositioned.1.In your School notebook, on the Field trips tab, click the New Page drop-down arrow and select PageTemplates. In the Templates pane, click Decorative. Click Blue Clouds. Close the Templates pane.2. To name the page, key: Botanic Garden and press Enter.3.In the Page Tabs, right-click on Untitled page. In the drop-down menu, select Delete.4.On the Botanic Garden page, the cursor should be blinking in a note frame below the title. On theInsert tab, click the Picture button. Navigate to the OneNote student data files. Select the butterflyimage file. Click Insert. Click on the page.5.Your screen should look similar to Figure 15.Figure 15Picture buttonInsertedpicture6. Navigate to the OneNote student data files. Repeat Step 5 to insert the cactus, trees, and wildflowersimage files. (You will adjust the placement of the images later.)OneNote TutorialEXERCISE 1020
Exercise 107.Click the butterfly image to select it. Click the double-arrow over the bottom right corner. Drag to makethe image smaller or bigger, as desired. Adjust the sizes of all four images as desired.8.Click one of the images to select it. When the four-headed arrow appears, drag the image to the desiredposition. Adjust the positions of all four images as desired.9.Your screen should look similar to Figure 16.Figure 16Inserted, resized,and repositionedpicturesAn extensive list of popular and lesser-used graphics formats can be added to OneNote,including JPEG, PNG, GIF, BMP, PICT, TIFF, and even CorelDraw files.OneNote TutorialEXERCISE 1021
Exercise 11 Insert VideoYou can record video using a camera built into or connected to your computer and insert the clip directly intoOneNote, where it can be played back. A handy feature is that notes taken while recording video are linked to it.Clicking such a note plays the part of the video that was recorded when the note was taken. In this exercise, youwill insert a prerecorded video.1.In your School notebook, on the Field trips tab, on the Botanic Garden page, click in an open spot.2.On the Insert tab, click the Attach File button. Navigate to the OneNote student data files. Doubleclick the pond video file.3.On the Botanic Garden page, select the pond video icon.4.On the Playback tab, click the Play button. The video opens and plays in a new window.5.Your screen should look similar to Figure 17.Figure 17Play buttonPlayback tabInserted viedeofile being playedGo to File Options Audio & Video to modifyOneNote’s video recording settings.OneNote TutorialEXERCISE 1122
Exercise 12 Send to OneNote & Change BackgroundA very convenient feature of OneNote is the “Send to OneNote” printer option. This functionality makes it easyto insert text, charts, images, and other content from a Web site or a Microsoft application directly into aOneNote page. Keep in mind that content inserted using this technique can be resized and repositioned but notmodified. In OneNote, various styles of rules and grids can be added to a page to facilitate writing and drawing.You will learn how to write on a OneNote page in the next exercise.1.In your School notebook, click the Bake sale tab. To name the page, key: Projections and press Enter.2. Navigate to the OneNote student data files. Open the bake sale Excel file. On the File tab, click Print.In the Printer menu, select Send To OneNote 2010. Click the Print button.3.In OneNote, in the Select Location in OneNote dialog box, click Projections (current page). ClickOK. Close the Excel file.4.Select the new content. At the bottom right corner, click and drag the double-arrow to make the framesmaller.5.On the View tab, click the Rule Lines drop-down arrow. Select Standard Ruled.6. Your screen should look similar to Figure 18.Figure 18Rule lines buttonView tabInserted contentOneNote TutorialFor color-codingand visual appeal,OneNote lets youchoose a color forthe background ofa page. You canalso set an insertedgraphic as thebackground.EXERCISE 1223
Exercise 13 Use Pen Mode & Convert HandwritingUsing a tablet PC or a tablet attached to your computer, you can create your own drawings and handwrittennotes in OneNote. If you don’t have a tablet, you can draw or write by clicking and moving the mouse or byclicking and moving your finger on the trackpad. A powerful feature of OneNote is the ability to converthandwritten text into type.1.If you have a computer tablet and pen, attach the tablet to your computer for this exercise. Otherwise,you can use your mouse or trackpad.2.In your School notebook, on the Bake sale tab, on the Projections page, click the Draw tab. Clickthe Tools drop-down arrow and select Black Pen (0.5 mm).3.Next to the inserted content, using the page rules as a guide, use your tablet pen to write: Goal: 1,000. If you do not have a tablet and pen, you can write by clicking and moving the mouse or byclicking and moving your finger on the trackpad.4.Your screen should look similar to Figure 19.Figure 19Draw tabTools drop-downarrowHandwritingOneNote TutorialEXERCISE 1324
Exercise 135.On the Draw tab, click the Lasso Select button. Click and drag around Goal: 1,000 to select the entirehandwritten item.6. On the Draw tab, in the Convert group, click the Ink to Text button.7.Click the Select & Type button and correct any errors in the conversion.8.Your screen should look similar to Figure 20.Figure 20Lasso SelectbuttonConvert groupSelect &Type buttonHandwritingconverted to typeThe default Pen Mode is Create BothHandwriting and Drawings. Other modesinclude Create Drawings Only, CreateHandwriting Only, and Use Pen as Pointer.OneNote TutorialIn OneNote, you can convert a handwrittenmathematical expression to text by selecting thehandwritten item and clicking the Ink to Mathbutton on the Draw tab.EXERCISE 1325
Exercise 14 Insert an Outlook MeetingOneNote integrates closely with Microsoft Outlook. OneNote can track meetings and appointments that are setup in your Outlook calendar. In this exercise, you will insert the details of an Outlook meeting into OneNote.1.Create a Microsoft Outlook appointment for a bake sale on an upcoming date. Refer to the Outlook2010 tutorial if you need help.2.In your School notebook, on the Bake sale tab, on the Projections page, click in an open spot.3.On the Home tab, in the Outlook group, click the Meeting Details button. Click Choose a Meetingfrom Another Day.4.In the Insert Outlook Meeting Details dialog box, click the right arrow to navigate to the date of thebake sale. Select the bake sale appointment. Click Insert Details.5.Reposition of the text frame containing the meeting details as desired.6.Your screen should look similar to Figure 21.Figure 21Meeting DetailsbrowserInserted Outlookmeeting detailsOneNote TutorialOneNote also letsyou work withOutlook tasks andsend pageinformation bye-mail.EXERCISE 1426
Exercise 15 Format a List & Insert a Screen ClippingCreating a numbered list in OneNote is as simple as picking a format from the Numbering Library. Inserting ascreen clipping involves taking a picture of all or part of your computer screen and choosing a OneNote page onwhich to place the image.1.In your School notebook, click the Newspaper tab. At the blinking cursor, key the page title: OpinionArticle and press Enter.2.In the note frame that appears, key: Find a local news story. Press Enter. Key: Interview students andteachers to get their opinions about the story. Press Enter. Key: Write the article.3. Select the text you just entered. On the Home tab, in the Basic Text group, click the Numbering dropdown arrow. From the Numbering Library, select the format showing numbers followed by periods.4. Your screen should look similar to Figure 22.Figure 22Numbering dropdown arrow5.Open a Web browser window and go to http://www.msnbc.msn.com/id/3098358/ns/local newslocal news. Navigate to the news about your city or town. Alternately, you can go to another Web sitecontaining local news. Find a local news story that interests you.OneNote TutorialEXERCISE 1527
Exercise 156. Keeping the Web browser window open, return to OneNote. Click below the text frame containing thenumbered list.7.On the Insert tab, in the Images group, click the Screen Clipping button.8. Click and drag over all or part of your chosen news story to select it.9. Your screen should look similar to Figure 23. Close the browser window.Figure 23Screen ClippingbuttonInserted screenclippingPressing Windows S is equivalent to clickingthe Screen Clipping button. It lets you copypart of the current screen to insert as an imageon a OneNote page.OneNote TutorialEXERCISE 1528
Exercise 16 Insert AudioYou can record audio using a microphone built into or connected to your computer and insert the clip directlyinto OneNote, where it can be played back. As with video, notes taken while recording audio are linked to it.Clicking such a note plays the part of the audio that was recorded when the note was taken. In this exercise, youwill insert a prerecorded sound clip.1.In your School notebook, in the Newspaper section, on the Opinion Article page, click to the right ofthe text frame containing the numbered list.2. On the Insert tab, click the Attach File button. Navigate to the OneNote student data files. Doubleclick the interview audio file.3.On the Opinion Article page, select the interview audio icon.4.On the Playback tab, click the Play button. The audio plays.5.Your screen should look similar to Figure 24.Figure 24Inserted audio fileGo to File Options Audio & Video to set the number of seconds to rewind from thestart of the paragraph when playing linked audio.OneNote TutorialEXERCISE 1629
Exercise 17 Search a NotebookOneNote offers search capabilities that let you quickly find specific content within a selected search scope, such asa notebook. As you type more characters in the search box, the results narrow. Links within the search results takeyou to the pages on which the search item appears.6.In your School notebook, on any page, in the search box above the Page Tabs, key: English. Click theChange Search Scope drop-down arrow and select This Notebook.7.In the search results, click Day 1. Notice that English is highlighted on the Day 1 page.8.In the search results, click Class Schedule. Notice that English is highlighted on the Class Schedulepage.9. In the search box, key: story. Click the Change Search Scope drop-down arrow and select ThisNotebook.10.In the search results, click Opinion Article. Notice that story is highlighted on the Opinion Articlepage.11. Your screen should look similar to Figure 25.Figure 25Search boxHighlightedsearch itemOneNote TutorialChange Search Scopedrop-down arrowEXERCISE 1730
Exercise 18 Save to Different FormatsYou can share a OneNote 2010 notebook, section, or page with someone who does not have OneNote 2010 bysaving it in another format. Depending on the recipient’s resources, you might convert a OneNote 2010 notebookback to OneNote 2007 or save it as a Word document, PDF file, XPS file, or single-file Web page.1.In your School notebook, on the Classes tab, on the Day 1 subpage, click the File tab.2. Click Save As. In Step 1, select
To launch OneNote, select Start All Programs Microsoft Office Microsoft OneNote 2010. 2. On the ribbon, select the File tab. Choose New. 3. Under New Notebook, in Step 1, select My Computer. In Step 2, key: School. (Ask your teacher if the name of your notebook should also include your first and last names.)