Transcription
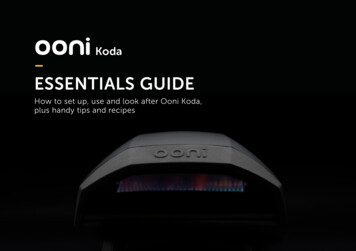
KodaESSENTIALS GUIDEHow to set up, use and look after Ooni Koda,plus handy tips and recipes
ContentsImportantYour safety is paramount. Please read theOoni Koda safety manual carefully.Keep Ooni Koda company while preheating andcooking. It must not be left unattended while lit.Ooni Koda is designed for outdoor use only.Ensure children and pets are kept at a safe distanceand supervised at all times around Ooni Koda.Ooni Koda has been designed to run at up to 932 F(500 C). If Ooni Koda exceeds these temperatures, switchoff the flame and allow to cool.Ooni Koda will get hot. Do not touch the outershell while in use.Say hello to Ooni Koda3Getting the most from Ooni Koda4Ooni Koda Features5RecipesOoni Classic Pizza Dough14Pizza Sauce16Burrata Pizza17Pumpkin, Zucchini and Chilli Pizza18Setting up, extinguishing and storing Ooni Koda6Cayenne Spiced Shrimp19Tools for cooking7Care & Maintenance20Assembly and connecting to propane tank8Troubleshooting21Keep in touch25Lighting11What makes Ooni Koda pizza exceptional?131
Say hello to Ooni Koda!Our goal at Ooni is to connect people through exceptional foodexperiences. Ooni Koda has been designed to offer unparalleled intuitive use.Our first gas-powered pizza oven, Ooni Koda is capable of extreme speedand heat which in turn delivers amazing results and a great experience.Ooni Koda will change the way that you cook and enjoy food outdoors.Ooni Koda is ready to cook at searingly hot temperatures in just15 minutes. With an insulated shell and custom-made stone baking boardoptimised for even heat distribution, Ooni Koda bakes restaurant-qualitypizza in just 60 seconds.Ooni Koda is more than just perfect pizza. You can make mouth-wateringsteaks, delicious roast vegetables and much more.Like all Ooni products, cooking with Ooni Koda is simple, fun and unique.Whether you’re a beginner or pro, use this guide to help you enjoy theOoni Koda experience. Remember to keep a hold of the Essentials Guide forhints, tips and delicious recipes.Thank you for being part of the Ooni Community and enjoyOoni Koda - We know that you will love it,Kristian and the Ooni team3
Getting the most from Ooni KodaBefore you begin, rememberto read your manualcarefully and to store it forfuture reference.CautionOoni koda is for outdooruse only.4Ooni Koda FeaturesBefore you cookCheck the connections onthe propane tank, hose andregulator. They should besecured and checked forleaks before every cook.CookingOoni Koda has been designedto run at up to 932 F (500 C).The perfect pizza cookingtemperature is around 752 F(400 C).Learn moreWe have video guides tohelp you get the best fromOoni Koda. You’ll alsofind delicious recipes andinspiration at ooni.com.Seasoning Ooni Koda willburn off any oils or coatingsthat are remnants from themanufacturing process sothat you are ready to cook. Itwill also give you the chanceto familiarise yourselves withthe features of Ooni Koda.Ooni Koda should not be leftrunning for extended periodswithout cooking. If you aretaking a break from cooking,give Ooni Koda a break tooby switching off or loweringthe flame output using thegas control knob.If you have any questions or want to send us somepictures of your deliciousOoni Koda dishes - you canalways reach us atsupport@ooni.com. We lovetalking all things pizza andOoni.To season, run Ooni Kodaat top temperatures for 30minutes before extinguishing.Once cool, wipe down theinside with dry paper towels.Children and pets must bekept at a safe distance whileOoni Koda is hot.25613741.Stone baking board 100% custom-made from cordieritestone for optimised heat retention and the perfect pizzabase.4.Collapsable legs for easy storage and transport. Thetipped feet keep Ooni Koda steady and keep your surfacesscratch free.2.Fully insulated shell to hold in heat and provide the searingair temperatures required for 60-second pizza.5.Gas control knob for lighting Ooni Koda and adjustingflame output.3.Serial number. Register for your warranty extension atooni.com/warranty6.Viewing hole to see the flame and check that Ooni Koda is lit.7.Gas terminal for attaching your propane source.5
Setting up, extinguishing and storing Ooni KodaWe love to see your amazingoutdoor kitchens and theadventures you share withOoni Koda. Choose yourperfect outdoor space andand remember to send usa photo!CautionDo not expose Ooni Kodato moisture or attempt tocool with water. This willresult in damage.Setting upOoni Koda will perform bestwhen sheltered from wind.Choose a spot that is at least1m (3ft) away from buildingsand structures.Place Ooni Koda on anoutdoor table measuring atleast 40cm wide x 70cm long(18”x32”) with at least 15cm(6”) of clearance from theback leg to the edge of thetable. The table should besturdy enough to hold weightsupwards of 30lbs (15kg). OoniKoda has tipped feet to protectthe wooden, metal or stonesurface you choose.Glass and plastic tables arenot recommended.6ExtinguishingAfter you have enjoyed yourOoni Koda food and are readyto pack up, simply turn off theflame using the gas controlknob and detach the regulatorfrom the propane tank.Wait at least 1 hour afterextinguishing beforeattempting to move or clean.Ooni Koda must be dry andcompletely cool beforestoring.StoringTo keep Ooni Koda lookinggreat, store indoors duringperiods without use andduring harsh weatherconditions such as strongwinds, heavy rain, or snow.We recommend that thestone baking board is storedin a dry environment foroptimised performance.The Ooni Koda Carry Coverprovides a sleek, durable andwaterproof way to store OoniKoda. The Carry Cover strapsallow you to take Ooni Kodaon the go so you can fire upat the beach, the hills or at afriend’s house.Tools for cookingInfrared ThermometerGet an instant accurate temperature reading by aiming thelaser at the middle of the stone baking board. The Ooni InfraredThermometer is the must have tool for gauging the temperature ofthe stone baking board before you begin cooking. It will allow you toachieve a perfect base to your pizza.PeelOur peels have been designed specifically for use with Ooni ovensand are sleek and easy to transport and store. Having an additionalpeel helps to speed up the pizza supply chain so that you can invitemore friends and family to enjoy your exceptional food.Cast IronCast iron is perfect for seared meat, baked fish and delicious roastvegetables. The Ooni cast iron range is designed to withstand thehigh temperatures inside Ooni Koda.7
Assembly and connecting to propane tankSetting up Ooni Koda is aseasy as 1, 2, 3 and can bedone in less than 5 minutes.1Remove Ooni Koda frompackaging including thestone baking board sleeve2 Unfold the legs3Connect to gasPlease refer to your manualfor country specific123Patio gas regulator (UK, EU)This is a push-on gas fitting. Ensure that theblack switch is in the horizontal position.Depress the button located below the blackswitch and press the regulator on to the tankvalve until it locks into place.QCC1 (US, Canada)This is a clockwise threaded gas fitting.Ensure the tank is fully turned off and screwthe regulator on to the propane tank valvefitting until tight.instructionsPOL (Australia and Europe)This gas fitting is counter-clockwise. Makesure that the tank is completely switched offand screw the regulator as far as possible intothe propane tank valve.Tank connection type will vary by region.89
LightingOnce your regulator is connected, open up the gas from yourpropane tank.Push in and slowly turn the control knob counter-clockwiseuntil you hear a click and the burner ignites.Continue to push in the control knob for 5 seconds afterignition and then release.Ooni Koda should run quietly when lit. If you hear a roaringnoise from the gas burner, switch the gas off for 5 minutesand re-light.What to do if the flames go out?Our priority is for you to enjoy Ooni Koda in a safe and funenvironment. To ensure this, Ooni Koda has a Flame SafeDevice (FSD) built in. This means, if the flame is extinguishedwhile the gas supply is on, the FSD will automatically cut offthe gas supply in to Ooni Koda safely.If you notice that the flames have gone out, turn off the gassupply and detach Ooni Koda from the propane tank.Leave for 5 minutes before re-lighting.CautionOoni Koda should run quietly when lit. If you hear a roaring noisefrom the gas burner, switch the gas off for 5 minutes and re-light.10Push, slowly turn andhold for 5 seconds to lightMin. powerMax. powerOff11
TipIf your toppings are cooked before your base, simply turn down theflames and the stone baking board will continue to cook from below.What makes Ooni Koda pizza exceptional?We are passionate about pizza and know that you are too.You can now create your favourite dish with Ooni Koda.Think of the best pizza you’ve ever eaten: The crust, beautifullycharred and crisp on the outside, light and chewy on theinside with the occasional ping pong ball sized bubble - risenand ready to crunch with a pop. The base, thin and evenlyleoparded and the toppings, light, fresh and beautifully meltedand seared from the intense heat of the oven.Top Tips Use high quality ’00’ flour and fresh ingredients.Less is more for your toppings Stretch your dough out thinly, leaving a centimetre wide crust Aim for 752 F (400 C) in the centre of your stone baking boardbefore you add your pizza Rotate your pizza every 20-30 seconds to aim fora nice even char on your crustsThe custom-made cordierite stone inside Ooni Koda willretain heat and absorb moisture from the dough, giving you aperfectly cooked base The intense heat in the oven will cookthe toppings with an even char and Ooni Koda pizza will beready to eat in 60 seconds.The stone-baked base and the super-high cookingtemperatures of Ooni Koda make quite extraordinary pizza.Ooni Peel available at ooni.com1213
Ooni Classic Pizza DoughMethod500g (4½ cups) ’00’ flour, plus extra for dustingPlace two-thirds of the water in a large bowl. In a saucepanor microwave, bring the other third of water to the boil, thenadd it to the cold water in the bowl. This creates the correcttemperature for activating the yeast. Whisk the salt and theyeast into the warm water.300ml (1¼ cups) cold water10g (2 tsp) salt7g fresh yeast (for dried yeast, follow packet instructions)Makes 5 x 12in pizzas (5 x 160g / 5½ oz dough balls)If mixing by hand: Place the flour in a large bowl and pour theyeast mixture into it. Stir with a wooden spoon until a doughstarts to form. Continue mixing by hand until the dough comestogether in a ball. Turn it onto a lightly floured surface andknead with both hands for about 10 minutes, until it is firm andstretchy. Return the dough to the bowl. Cover with clingfilm(plastic wrap) and leave to prove (rise) in a warm place for 1-2hours.If using a mixer: Fit the mixer with the dough hook, and placethe flour in the mixer bowl. Turn the machine on at a lowspeed and gradually add the yeast mixture to the flour. Oncecombined, leave the dough to keep mixing at the same speedfor 5-10 minutes, or until the dough is firm and stretchy. Coverthe dough with clingfilm (plastic wrap) and a cloth and leave toprove (rise) in a warm place for 1-2 hours.Cold proveclingfilm (plastic wrap) and leave to prove (rise) for another 20minutes, or until doubled in size.Kneading and stretching the dough: Our top tip is always tostart with a perfectly rounded ball of dough as this helps tokeep the shape of the pizza base circular during the stretchingprocess. Place the ball on a lightly floured surface, flouryour hands and use your fingertips to press the dough intoa small, flat disc. Working from the centre, push the doughoutwards while spreading your fingers, making the disc slightlybigger. Pick up the dough and gently pinch it all around theedge, allowing gravity to pull it downwards into a 12in circle.Neapolitan-style pizza bases are very thin, so you should beable to see through the base when you hold it up to the light.Take care when doing this – you don’t want it to tear.It’s also possible to cold-prove your dough, a techniquethat allows the yeast to work on the sugars in the flourfor longer, thus helping the dough to develop a deeperflavour. To do this, use half the amount of yeast listed in theingredients, and leave the dough to prove (rise) in the fridgefor 24-72 hours – basically, until the day you need it. Dividethe dough and cover it as described in the main recipe,then set aside (not in the fridge) for at least 5 hours, until itis up to room temperature.Once the dough is fully stretched, lightly flour your pizza peeland lay the base on it. If at this point you see any small holes inthe dough, gently pinch them together to seal the dough. Addyour toppings and bake as indicated in your chosen recipe.When the dough has proved, divide it into 3 or 5 equal pieces,depending on what size you want your pizzas to be. Placeeach piece of dough in a separate bowl or tray, cover with1415
Classic Pizza SauceMethodBurrata Pizza1 clove of garlicFirst, chop the garlic.5.8oz (165g) Ooni Classic Pizza Dough ballOlive oil (1 tbs)Passata, (500g)Salt (½ tsp)Sugar (½ tbs)Black pepper (1 tsp)Handful of chopped basilPut a tablespoon of olive oil into a pan and fry the garlic in theoil. Be careful it doesn’t brown.Keep it on a medium-high heat. Now add the passatta, salt,sugar, black pepper and basil.Simmer on a low heat for 20 minutes.Wait for the sauce to cool down to room temperature beforeusing it on a pizza.5 tablespoons (90ml) Classic Pizza Sauce2-3 slices prosciutto9oz (150g) burrataHandful of small basil leaves2 tablespoons (40ml) extra virgin olive oilMethodMakes one 12” pizzaWhen your dough and sauce are ready, fire up Ooni Koda. Aimfor approximately 752 F (400 C) on the stone baking board.You can check the temperature quickly and easily using theOoni Infrared Thermometer.Take the burrata out of the fridge so that it warms up to roomtemperature. The burrata isn’t cooked in the oven on top of thepizza, but added to the pizza once it’s co
Remember to keep a hold of the Essentials Guide for hints, tips and delicious recipes. Thank you for being part of the Ooni Community and enjoy Ooni Koda - We know that you will love it, Kristian and the Ooni team Say hello to Ooni Koda! 3. Before you begin, remember to read your manual carefully and to store it for future reference. Before you cook Check the connections on the propane tank .