Transcription
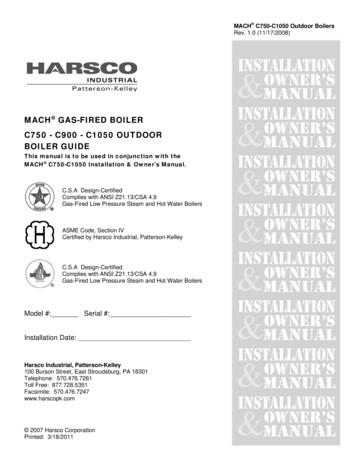
MACH C750-C1050 Outdoor BoilersRev. 1.0 (11/17/2008)MACH GAS-FIRED BOILERC750 - C900 - C1050 OUTDOORBOILER GUIDEThis manual is to be used in conjunction with theMACH C750-C1050 Installation & Owner’s Manual.C.S.A Design-CertifiedComplies with ANSI Z21.13/CSA 4.9Gas-Fired Low Pressure Steam and Hot Water BoilersASME Code, Section IVCertified by Harsco Industrial, Patterson-KelleyC.S.A Design-CertifiedComplies with ANSI Z21.13/CSA 4.9Gas-Fired Low Pressure Steam and Hot Water BoilersModel #: Serial #:Installation Date:Harsco Industrial, Patterson-Kelley100 Burson Street, East Stroudsburg, PA 18301Telephone: 570.476.7261Toll Free: 877.728.5351Facsimile: 570.476.7247www.harscopk.com 2007 Harsco CorporationPrinted: 3/18/2011
MACH C750-C1050 Outdoor BoilersThe information contained in this document is subject to changewithout notice from Harsco Industrial, Patterson Kelley.Harsco Industrial, Patterson-Kelley makes no warranty, of anykind, with respect to this material, including, but not limited toimplied warranties of merchantability and fitness for a particularTABLE OF CONTENTSMACH C750-C1050 Outdoor Boilers .1Table of Contents .21BOILER MODIFICATIONS . 31.1 Completed Outdoor Boiler .31.2 Required Tools & Parts.42FIELD INSTALLED COMPONENTS . 52.1 Install Power Cord Seal .52.2 Gas Inlet Assembly .52.3 PVC Air Inlet Pipe Assembly .62.4 Exhaust Vent Installation .72.4.1 Exhaust Vent System Installation.72.4.2 Stainless Steel Exhaust System .72.4.3 Stainless Steel Adapter .72.5 CPVC Exhaust Vent System .72.5.1 Stainless Steel Adapter for CPVC.72.6 Hood Assembly .82.7 Hood Support .934MAINTENANCE . 10ASSEMBLY DRAWING . 114.1 Assembly Drawing .11application. Harsco Industrial, PattersonKelley is not liable for errors appearing inthis guide or for incidental or consequentialdamages occurring in connection with thefurnishing, performance or use of thismaterial.
MACH C750-C1050 Outdoor Boilers1 Boiler Modifications1.1COMPLETED OUTDOOR BOILERFRONT VIEWREAR VIEWThis boiler has been modified by the factory and shipped as an outdoor boiler; additional assembly isrequired to complete the outdoor boiler. These additional assemblies are listed in this manual and theMACH C750-C1050 Installation & Owner’s Manual.Be sure to identify your boiler and its specific installation requirements. It is essential to read, understand,and follow the recommendations of this manual before installing, operating, or servicing this equipment.Failure to do so could result in serious injury, death, and/or property damage.3
MACH C750-C1050 Outdoor BoilersShut off and disconnect electric and gas before installing the MACH Outdoor Boiler.See this MACH C750-C1050 Outdoor Boiler Manual & MACH C750-C1050 Installation & Owner’s Manual foradditional information. Incorrect installation may result in severe injury or death. The boiler and these instructions is for outdoor use only. Do not install in anyenclosure. All exhaust venting and air intake must be outdoors. All installations of venting systems should bedone only by qualified venting systems personnel. Venting must be installed in accordance with vent systemmanufacturer’s installation instructions and this manual. Installing a boiler or vent system using improperinstallation methods or materials can result in serious injury or death due to fire or asphyxiation from carbonmonoxide or other poisonous gases. Breathing exhaust fumes may cause serious personal injury or death.!WARNINGImproper use mayresult in fire or injury.Read instructions/safetymanual before installing,operating or servicing boiler.c 1998 HCS, Inc. 800-748-02411.2Reorder No. 6020-V2WHPKSee MACH C750-C1050 Installation & Owner’sManual for specific safety requirements, warnings, installation requirementsand diagrams. These instructions are a supplemental document which shouldbe used in conjunction with the MACH C750-C1050 Installation & Owner’sManual for your specific MACH Boiler. The boiler and these instructions is foroutdoor use only. Incorrect installation may result in injury or death.REQUIRED TOOLS & PARTSThe following tools are required for the installation of the MACH Outdoor Boiler loose parts on a newMACH Outdoor Boiler.Pipe wrench (for 1” pipe elbow).Tape measure.Cordless drill / screw driver.Phillipshead driver / screwdiver¼” socket driver for #6 self tapping screws.Approved gas pipe sealant.(See section 2.2)Small tube of 100% silicone.Approved exhaust vent sealer. (See Section 2.3 / 2.4)Approved PVC cleaner & solvent.Customer Supplied PartsExhaust AdapterExhaust pipeSeal tight connectorWaterproof conduit4
MACH C750-C1050 Outdoor Boilers2 Field Installed Components2.1INSTALL POWER CORD SEAL(Customer Supplied)For this OUTDOOR boiler use water proof conduit and sealtight connectors to the boiler. Before starting theboiler, check to ensure that the proper electrical service is connected to the boiler.Use waterproofconduit &seal tightconnectorSee MACH C750-C1050 Installation & Owner’s Manual for specificelectrical requirements and diagrams. Incorrect electrical connections may result in severe injury ordeath.2.2GAS INLET ASSEMBLYSee Drawing # BP000002181.Remove gas shut-off valve.2.Assemble one (1) 1” street 90º elbow (item #1) tooutlet of boiler and assemble gas shut-off valve to theelbow. This allows clearance for the air inlet stack.Use approved pipe sealer that resists the action ofFuel Gases such as Natural Gas or LPG. DO NOTUSE Teflon tape.SeeMACH C750-C1050Installation & Owner’s Manual for specific gas connectionrequirements and diagrams. Incorrect gas connections may90º street elbow5
MACH C750-C1050 Outdoor Boilers2.3PVC AIR INLET PIPE ASSEMBLYSee Drawing # BP000002181. Assemble 6” PVC “SD type” air inlet piping assembly. Assemble 4” long straight pipe (ITEM#7), to 90 degree elbow (ITEM #6) to 27” long straight pipe (ITEM #5), using approved PVCcleaner and solvent.2. Place the assembled inlet pipe over the inlet collar, position pipe to be straight and parallel tothe back of the boiler and secure using (3) #6 x ½” self tapping screws (ITEM#8) evenlyspaced around the pipe. Silicone (customer supplied) around the seam of the PVC pipe andcollar.3. Install screen (ITEM #4) in top of inlet vent.Check that pipe issquare & parallel tothe back of the boiler.Silicone sealseam betweencollar and pipe.Secure pipe tocollar with (3) #6x ½” self tappingscrews, evenlyspaced.6
MACH C750-C1050 Outdoor Boilers2.4EXHAUST VENT INSTALLATIONThis MACH Outdoor Boiler is designed for outdoor use only.See MACH C750-C1050 Installation & Owner’s Manual for additional venting requirements.The boiler vent should be installed per this manuals instruction. Theinformation contained herein should be used as a guide only and is not intended to be used in lieu ofqualified technical expertise. Failure to comply may result in injury or death.2.4.1Exhaust Vent System Installation(Customer Supplied)The exhaust vent should extend a minimum of 12 inches above the hood or at least two (2) feet abovethe highest part of any independent structure within ten (10) feet of the vent.Boiler clearance for combustibles / non-combustibles should be maintained per MACH C750-C1050Installation & Owner’s Manual.2.4.2Stainless Steel Exhaust SystemInstall manufactured exhaust vent systems in accordance with the manufacturer’s listing and instructions.2.4.3Stainless Steel AdapterAn adapter is required to be installed between the boiler and the stainless venting. Below is atable containing the available adapter for each MACH boiler size. Installer should use Adapterslisted below or equivalent.MACH Boiler SizeNominal StackSizeStainless Adapter for Stainless VentSupplier / Part NumberC-750,C-900,C-10508"Heat-Fab / 9801MACHStainless Steel Adapter for Stainless Steel Vent2.5CPVC EXHAUST VENT SYSTEMThis MACH Outdoor Boiler is designed for outdoor use only.See MACH C750-C1050 Installation & Owner’s Manual for additional venting requirements.2.5.1Stainless Steel Adapter for CPVCAn adapter is required to be installed between the boiler and the CPVC venting. Below is a tablecontaining the available adapter for each MACH boiler size. Installer should use Adapters listedbelow or equivalent.7
MACH C750-C1050 Outdoor BoilersMACH Boiler SizeNominal StackSizeStainless Adapter for CPVC VentSupplier / Part NumberC-750,C-900,C-10508"Heat-Fab / 9801PKCPVCStainless Steel Adapter for CPVC VentWhen constructing a venting system from CPVC, use only CPVC ASTMF441 Schedule 40 pipe & ASTM F439 Schedule 80 fittings. Cement and primer must conform toASTM F493.Failure to comply may result in failure of venting system. This may cause severe injury or death.Use approved high temperature silicone between the adapter and exhaust connections.See MACH C750-C1050 Installation & Owner’s Manual for additional information.2.6HOOD ASSEMBLYSee Drawing # BP00000218Position exhaustpipe in center ofhood gasket.1. Place hood assembly (ITEM #3) on boiler withthe stack hole facing the back of the boiler.2. The hood will rest on the 4 angle brackets (inside the hood).3. The 4 rectangular spacers will be on the sides of the cabinet.4. Assemble the exhaust vent and place it through the hoodthen into the exhaust outlet on the boiler.5. There are 4 holes located on the sides of the hood. Insert (4)¼” quick release pins (ITEM #2), through the hood into thecabinet until the pin is locked in place.6. Secure & seal exhaust venting. See section 2.48
MACH C750-C1050 Outdoor Boilers2.7HOOD SUPPORTBe sure to correctly support the hood using the hinged boiler cover as aprop engaging the angle supports inside the hood. Failure to do this could result in the hood falling andmay cause severe injury or death.1. When working on the back section of the boiler the hood can be raised and supported by thehinged top section of the boiler. This is similar to the hood of a car and prop-rod support.2. Remove the 2 rear quick release pins only.3. Remove the screws holding the rear top hinged section of the boiler.4. Raise the hood until the top section can be raised and placed behind the angle supports, slowlylower the hood until it is supported by the top section.Remove the 2 rear quick releasepins only! Set hinged top sectionbehind “L” brackets on the hoodand slowly lower hood until it issupported by the top section.For further instructions on installation see MACH C750-C1050 Installation& Owner’s Manual.9
MACH C750-C1050 Outdoor Boilers3MaintenanceThe MACH outdoor boiler requires maintenance as described in MACH Installation & Owner’s Manual(latest edition) as well as the additional maintenance listed below.General WarningThese additional maintenance items should be performed monthly.1. Check for flue gas recirculation into the air inlet. Flue gas recirculation indicates that the vent isnot installed properly for local conditions.2. Check for freezing of the condensate lines. Frozen lines will result in boiler malfunction. Operationof the boiler in cold temperatures may require the use of heat trace lines for the boiler condensatetrap and drain.3. Check for inlet air box, vent and safety relief valve obstructions due to outdoor debris such as butnot limited to, leaves, insects, snow, branches and other blockages.10
MACH C750-C1050 Outdoor Boilers44.1Assembly DrawingASSEMBLY DRAWING11
2007 Harsco CorporationPrinted: 3/18/2011
boiler, check to ensure that the proper electrical service is connected to the boiler. 2.2 GAS INLET ASSEMBLY See Drawing # BP00000218 1. Remove gas shut-off valve. 2. Assemble one (1) 1" street 90º elbow (item #1) to outlet of boiler and assemble gas shut-off valve to the
