Transcription
LogitekULTRA-VULED BARGRAPHAUDIO METEROperation & Service Manual
Logitek Software License AgreementThe Ultra-VU unit you have purchased contains embedded software.The software is owned by Logitek Electronic Systems, Inc. and is protected by United States copyright laws and international treaty provisions.Logitek grants to you the right to use one copy of the embedded software in each Ultra-VU meter you purchase. You may not rent or lease thesoftware. You may not reverse engineer, decompile, disassemble, or create derivative works from the software. You may not create copies of thesoftware.This statement will be governed by the laws of the State of Texas,U.S.A. Logitek reserves all rights not specifically granted in this statement.All information contained herein is confidential. No portions of this manual may be reproduced by any means without written permission fromLogitek Electronic Systems, Inc.COPYRIGHT 1995, LOGITEK ELECTRONIC SYSTEMS, INC.Logitek Electronic Systems, Inc.5622 Edgemoor DRIVE HOUSTON, TX 77081 USA 800-231-5870 (OUTSIDE USA & CANADA 713-664-4470) FAX 713-664-4479
Ultra-VU LED MeterOPERATION & SERVICE MANUALTABLE OF CONTENTSSECTION 1— GENERAL INFORMATION1-11-21-31-41-5General Description . . . . . . . . . . . . . . . . . . . . . . . . . . . . . . . . . . . . . . . . . . . . . 3Electrical Specifications . . . . . . . . . . . . . . . . . . . . . . . . . . . . . . . . . . . . . . . . . . 3Standards . . . . . . . . . . . . . . . . . . . . . . . . . . . . . . . . . . . . . . . . . . . . . . . . . . . . 3Instrument Identification . . . . . . . . . . . . . . . . . . . . . . . . . . . . . . . . . . . . . . . . . . . . . . . . . . . . 3Where to Find Help . . . . . . . . . . . . . . . . . . . . . . . . . . . . . . . . . . . . . . . . . . . . . 3SECTION 2 — PREPARATION FOR USE2-12-22-32-42-52-62-72-82-9Initial Inspection . . . . . . . . . . . . . . . . . . . . . . . . . . . . . . . . . . . . . . . . . . . . . . . . 4Claims . . . . . . . . . . . . . . . . . . . . . . . . . . . . . . . . . . . . . . . . . . . . . . . . . . . . . . . 4Repacking for Shipment . . . . . . . . . . . . . . . . . . . . . . . . . . . . . . . . . . . . . . . . . 4Installation . . . . . . . . . . . . . . . . . . . . . . . . . . . . . . . . . . . . . . . . . . . . . . . . . . . . 4Connecting Mains Power. . . . . . . . . . . . . . . . . . . . . . . . . . . . . . . . . . . . . . . . . 4Input Selection on Dual Input Models . . . . . . . . . . . . . . . . . . . . . . . . . . . . . . . 4Connecting Digital Input Models . . . . . . . . . . . . . . . . . . . . . . . . . . . . . . . . . . . 4Connecting Analog Input Models. . . . . . . . . . . . . . . . . . . . . . . . . . . . . . . . . . . 5Rear Panel Programming Switches. . . . . . . . . . . . . . . . . . . . . . . . . . . . . . . . . 5SECTION 3 — OPERATING graph Description . . . . . . . . . . . . . . . . . . . . . . . . . . . . . . . . . . . . . . . . . . . . 6VU Display . . . . . . . . . . . . . . . . . . . . . . . . . . . . . . . . . . . . . . . . . . . . . . . . . . . . 6PPM Display . . . . . . . . . . . . . . . . . . . . . . . . . . . . . . . . . . . . . . . . . . . . . . . . . . 6Peak Hold Display . . . . . . . . . . . . . . . . . . . . . . . . . . . . . . . . . . . . . . . . . . . . . . 6LOUD — Loudness Filter. . . . . . . . . . . . . . . . . . . . . . . . . . . . . . . . . . . . . . . . . 6I-S — Image/Sum Display . . . . . . . . . . . . . . . . . . . . . . . . . . . . . . . . . . . . . . . . 6FINE — High Resolution Mode . . . . . . . . . . . . . . . . . . . . . . . . . . . . . . . . . . . . 7Auxiliary Data Display . . . . . . . . . . . . . . . . . . . . . . . . . . . . . . . . . . . . . . . . . . . 7Changing Display Brightness. . . . . . . . . . . . . . . . . . . . . . . . . . . . . . . . . . . . . . 7CLIP indicator set point . . . . . . . . . . . . . . . . . . . . . . . . . . . . . . . . . . . . . . . . . . 7Resetting the Program. . . . . . . . . . . . . . . . . . . . . . . . . . . . . . . . . . . . . . . . . . . 7SECTION 4 — MAINTENANCE4-14-24-34-44-54-64-74-84-9General Information . . . . . . . . . . . . . . . . . . . . . . . . . . . . . . . . . . . . . . . . . . . . . 8Fuse. . . . . . . . . . . . . . . . . . . . . . . . . . . . . . . . . . . . . . . . . . . . . . . . . . . . . . . . . 8Handling of CMOS Integrated Circuits. . . . . . . . . . . . . . . . . . . . . . . . . . . . . . . 8Access to Circuit Cards . . . . . . . . . . . . . . . . . . . . . . . . . . . . . . . . . . . . . . . . . . 8Power Supply LG-253. . . . . . . . . . . . . . . . . . . . . . . . . . . . . . . . . . . . . . . . . . . 8Analog Input Control Card LG-266 . . . . . . . . . . . . . . . . . . . . . . . . . . . . . . . . . 8Digital/Dual Input Control Card LG-265 . . . . . . . . . . . . . . . . . . . . . . . . . . . . . 9Display Assembly LG-267 . . . . . . . . . . . . . . . . . . . . . . . . . . . . . . . . . . . . . . 10ADC Input Card LG-264 . . . . . . . . . . . . . . . . . . . . . . . . . . . . . . . . . . . . . . . . 10SECTION 5 — REPLACEMENT PARTS LIST5-15-25-35-45-5Power Supply. . . . . . . . . . . . . . . . . . . . . . . . . . . . . . . . . . . . . . . . . . . . . . . . . 11Analog Input Control Card . . . . . . . . . . . . . . . . . . . . . . . . . . . . . . . . . . . . . . . 11Digital/Dual Input Control Card . . . . . . . . . . . . . . . . . . . . . . . . . . . . . . . . . . . 12Display Assembly . . . . . . . . . . . . . . . . . . . . . . . . . . . . . . . . . . . . . . . . . . . . . 13ADC Input Card . . . . . . . . . . . . . . . . . . . . . . . . . . . . . . . . . . . . . . . . . . . . . . . 14SECTION 6 — MANUFACTURERS LISTSECTION 7 — DIAGRAMS7-17-27-37-47-5Power Supply. . . . . . . . . . . . . . . . . . . . . . . . . . . . . . . . . . . . . . . . . . . . . . . . . 17Analog Input Control Card . . . . . . . . . . . . . . . . . . . . . . . . . . . . . . . . . . . . . . . 19Dual Input Control Card . . . . . . . . . . . . . . . . . . . . . . . . . . . . . . . . . . . . . . . . . 21Display Assembly . . . . . . . . . . . . . . . . . . . . . . . . . . . . . . . . . . . . . . . . . . . . . 23ADC Input Card . . . . . . . . . . . . . . . . . . . . . . . . . . . . . . . . . . . . . . . . . . . . . . . 27SECTION 8 — QUICK REFERENCE GUIDE
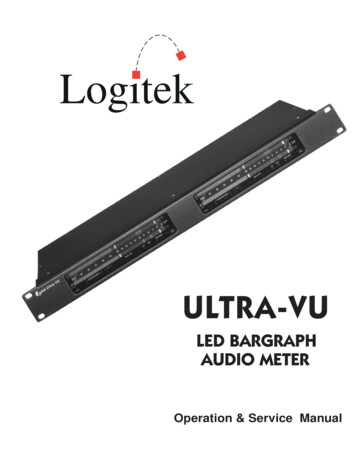
SECTION 1— GENERAL INFORMATION1-1 General DescriptionThe Logitek Ultra-VU is a bargraph type audio meter featuring two tricolor LED bargraphs with clip indicators. Two function buttons and several auxiliarydata indicators are also included on the front panel.1-2 Electrical SpecificationsBargraphs per meter:TwoIndicators per bargraph:63Normal Range: -70 dB to 0 dB plus clip - digital-50 dB to 20 dB plus clip - analogFine Range:.2 dB per segment around ref pt.Reference Point: -10,-12,-14,-16,-18 or -20 dBPeak Markers:8,9,10,12,14,16,18 dB above ref ptBallistics:VU Mode300 mS/20dB attack & releasePPM Mode0 mS attack, 2.8S/24dB releasePeak Hold0 mS attack, 2 or 5 Second holdMax Hold0 mS attack, pushbutton releaseImage/Phase4 Sec hold on max imageClip Indicator:trigger on 1 or 4 consecutiveclipped samplesFrequency Response:Normal /-.1 dB 20 Hz - 20 KHzLoudness Filter58 dBSPL auditory curve-40 dB 20 Hz, 0 dB 1250 Hz, -50 dB 20 KHzBrightness control:8 levelsAnalog Input:Sensitivity-10 to 20 dBu for full scalerear panel adjustableOverload Level 24 dBuImpedance40 Kohm balancedConnector3-pin XLRDigital Input:FormatsImpedancePass-throughTerminationAC Line Input Voltage:50-60 Hz(switch settable)AES/EBU or S/PDIF110 Ohm (XLR)75 Ohm (coax adapter)2200 Ohm (XLR)transformer balancedDimensions:1RU enclosureDesk top enclosure1-3 StandardsThe Ultra-VU meters are designed to conform tothe ballistic standards described in IEEE documentG.2.1.2/13, IEC document 268 and EBU document3205-E. This ensures that the bargraph motion willclosely track other standard mechanical and electronic meters.The one exception to these standards is the PPMattack time. The Ultra-VU uses a true peak measurement scheme that always displays the highest peakof the input signal. The PPM standard specifies ashort averaging period for peak signals that keepssounds with durations too short to be heard well frombeing displayed, no matter how loud they are. The delay also allows mechanical meters to keep up withfast changing inputs. Under most circumstancesthere is no noticeable difference between true peakand PPM peak readings. However, if you do need theUltra-VU to conform to the PPM peak standard thenplease contact the Logitek factory for further information.1-4 Instrument IdentificationThe Ultra-VU is identified by a model number anda three or four digit serial number. The model numberand serial number appear on a label on the back ofthe unit near the power cord. All correspondence toyour Logitek dealer or to the Logitek factory shouldrefer to the model number and serial number.1-5 Where to Find HelpLogitek customer service personnel are availableto help with any questions, comments or problemsyou might have with the Ultra-VU meter, both duringand after the warranty period. Our hours of operationare 8AM to 5PM central time. We may be contacted inone of the following ways.By Phone:By Fax:105-129 VAC or220-240 VACBy Email:By Mail:Power Requirement:UV1-(all), UDT-(all)UV2-(all)** Ultra-VU Operation & Service Manual **10 Watts20 Watts19" W x 7" D x 1 3 4 ’ H8 14 “ W x 9" D x 2 14 ” H877-231-5870 (USA & Canada)or ek Electronic Systems, Inc.5622 Edgemoor DriveHouston, Texas 77081USAPage 4
SECTION 2 — PREPARATION FOR USE2-1 Initial InspectionCheck the shipping carton carefully for externaldamage. If the carton shows evidence of abuse, askthe carrier’s agent to be present when the unit is unpacked. Carefully unpack the unit to avoid damagingthe equipment through the use of careless procedures. Inspect all equipment for damages immediately after unpacking. Bent and broken parts, dents andscratches should be noted. If damage is found, referto paragraph 2-2 for recommended claim procedures. Keep all packing material for possible futureuse.2-2 ClaimsIf the unit has been damaged, notify the carrier immediately. File a claim with the carrier and advise Logitek of such action to arrange for repair orreplacement without waiting for a claim to be settledwith the carrier.2-3 Repacking for ShipmentIf the unit must be returned to Logitek, attach a letter to it showing the owner’s name and address. A description of necessary service should be included inthe letter. The original shipping carton and packagingmaterials should be used for reshipment if possible.Use FRAGILE labels on each surface. Return the unitfreight prepaid. Be sure to insure the unit for its fullvalue. The unit will be repaired promptly and returnedfreight prepaid.2-4 InstallationRackmount EnclosureThe Ultra-VU rackmount models are designed tobe mounted in a standard 19" equipment rack by using the four mounting holes in the corners of the frontpanel. Plastic washers should be used to keep themounting screw for marring the front panel finish.Desktop EnclosureThe Ultra-VU desktop enclosure is designed to siton any flat surface. The front of the meter may be angled up for easier viewing by raising the bale locatedon the bottom of the box.While flow through ventilation is not necessary,the units should not be mounted directly aboveequipment which produces significant heat, such asequipment using vacuum tubes. The unit shouldnever be operated if the ambient temperature isabove 55 degrees C (131 degrees F).operation unless specifically labeled otherwise, but230VAC operation can be selected via a slide switchlocated next to the power transformer inside the unit.To gain access to the voltage select switch, removethe enclosure top cover. The switch is located adjacent to the large power transformer.2-6 Input Selection on Dual Input ModelsIf the digital receiver can lock onto an input signalthen the meter will display that signal whether it contains errors or not. If no signal is connected to thedigital input or the data rate is out of the receiver’scapture range, then the meter will display the analogsignal. This happens even if nothing is connected tothe analog inputs. The Ultra-VU can be forced to display only one input by connecting a remote switch tothe unit. Consult the factory for details.2-7 Connecting Digital Input ModelsThe Ultra-VU accepts AES/EBU or S/PDIF serialdata at sample rates of 30,000 to 50,000 samples persecond via a female XLR connector on the rear panel.The input is also wired directly to the male XLR connector on the back panel for use in loop-throughmode. The loop-through connector provides a convenient way to daisy-chain several pieces of equipment off of one digital output. Loop-through workswell with AES/EBU signals but should be limited to 10feet with S/PDIF signals and cables.S/PDIF signals using RCA type plugs may be connected to the input using an RCA to XLR adapter.Coax cables using BNC connectors can be connected to the input using a BNC to XLR adapter. Bothadapters are available from Logitek.AES/EBU ConnectionPin 1ShieldPin 2Signal Pin 3Signal It is also important to set the two input loadswitches located between the two XLR connectors.Input Load Switch op-through modebalanced twisted pair (XLR)unbalanced coax (RCA & BNC)do NOT use this combination2-5 Connecting Mains PowerConnect the meter to the power mains with the enclosed power cord. The unit is factory set for 115VACPage 5** Ultra-VU Operation & Service Manual **
2-8 Connecting Analog Input ModelsPeak Marker SettingThe Ultra-VU accepts balanced or unbalanced inputs via rear panel XLR connectors on analog inputonly models or 3-circuit 1/4" phone plugs on dual input models. The connectors are wired as follows:Balanced ConnectionPin 1 or SleevePin 2 or TipPin 3 or RingShieldSignal Signal -Unbalanced ConnectionPin 1 or SleevePin 2 or TipPin 3 or RingShieldCenter HotConnect to pin 1The Ultra-VU shield pins are bonded directly to thechassis at the connector and do not share any groundpaths with the internal circuitry. This allows cableshields to be connected at both ends without causinghum problems.The zero reference level for each input can be setanywhere between -10 dBu and 20 dBu by adjustingthe multiturn gain control located adjacent to each input connector. A small flat blade screwdriver isneeded to adjust the gain.2-9 Rear Panel Programming SwitchesA block of eight mode setting switches is locatedon the rear panel of the meter to the right of the inputXLR connectors. The switches are numbered 1through 8 and are set by pushing the white levers upor down with a small screwdriver or pen nUpDnUpDnUpDnFunction 18 dB above reference 16 dB above reference 14 dB above reference 12 dB above reference 10 dB above reference 9 13 dB above reference 8 dB above referenceOffSwitch 1 turns the peak display on and off. This is asingle red dot with a fast attack time and a slow release time. Peak hold is controlled from the frontpanel and is unaffected by switch 1. Switch 2 sets thedynamics of the peak display. True peak shows thelargest single peak. This mode is useful for avoidingdigital clipping. PPM mode averages the peak reading over a short period and is comparable to PPM mechanical meters. The green average display isunaffected by switch 2 and is always VU response.Bargraph SettingsSw1 Sw2 FunctionUpPeak display OFFDnPeak display ONUpTrue peak dynamicsDnPPM dynamicsThe programming switches are only checked occasionally, so it may take up to two seconds for switchchanges to be reflected in the meter’s operation.The bargraph zero reference marker and the reference level of the zoom display is set via switches 6, 7and 8 as shown.Zero Reference DnUpDnUpDnUpDndBs below full scale-10 dB-12 dB-14 dB-16 dB-18 dB-20 dB-20 dB-20 dBA second set of orange markers indicate the desired peak operating level. Switches 3, 4 and 5 setthese markers a fixed number of dBs above the zeroreference level.** Ultra-VU Operation & Service Manual **Page 6
SECTION 3 — OPERATING INSTRUCTIONS3-1 Bargraph DescriptionThe Ultra-VU display contains two multi-LED bargraph displays mounted one above the other. The topbar shows either left channel (L) or image/phase(φ)information. The bottom bar shows either right channel (R) or mono sum (S) information. The bars aremarked at the left end to indicate their function. Thetricolor LEDs can be green, red or orange dependingon their function and cover the range from -70 dBFSto 0 dBFS.The top LED of each bar is larger and red only. It isused as a clipping indicator and can be set to illuminate on any clipped signal or only after four consecutive clipped samples.lectable amount of time. If the holding period expiresbefore the PPM dot equals or exceeds the peak holddot, then the peak hold dot will turn off. It will turn onagain when the PPM dot reaches a peak and startsfalling again.Two holding modes are available. Release (Rel)mode holds the peak reading for either 2 or 5 secondsdepending on the position of the rear panel programswitches. Maximum (Max) mode holds the highestpeak reading until it is manually reset by turning thepeak hold off and then on again.Peak hold can be cycled through Off, Rel and Maxmodes by repeatedly pressing the HOLD button atthe lower right corner of the meter front panel.The zero reference point of the meter is indicatedby a dim orange marker in the bargraph. The reference mark can be varied between -10 and -20 dBFSvia switches on the back panel. An optional peakmarker can be set from 8 to 18 dB above the zeroreference and is used as a reference indicator for thePPM display.3-5 LOUD — Loudness Filter3-2 VU DisplayThe loudness filter is calibrated for a listening levelof 58 dB SPL. The filter will be less accurate for listening levels above and below this point.VU is indicated by a solid green bar. VU representsthe perceived loudness of the input signal. The motion of the bars conforms to the industry standard 300mSec per 20 dB rise and fall times. Note that thespeed of the bar will appear faster near the top of themeter display because each segment there represents fewer dBs than at the bottom of the meter. TheVU display can be turned off by pressing the MODEbutton at the bottom left corner of the front panel repeatedly until the VU bars disappear.The VU display can be compensated to match thefrequency response of the human ear by enabling theloudness filter. This will cause the VU bars to moreclosely represent the actual loudness perceived bythe listener and allow better level matching betweendifferent kinds of program material.To activate the filter, press the MODE button in thelower left corner of the meter front panel until the“Loud” indicator is lit.Users of the digital input meters should note thatfiltering is a function of sample rate. The meter has aseparate filter for each of the five sample rates listedon the front panel. If a non listed sample rate is usedthe loudness filter will be deactivated.3-3 PPM DisplayPeak program meter (PPM) information is shownby a single red segment. PPM represents the highestpoint of the input signal. The display has a zero risetime and an industry standard 2.8 Sec per 24 dB falltime. The dot will appear to fall faster near the top ofthe meter range because each segment there represents fewer dBs than at the bottom of the meter. ThePPM display is always active unless it is turned off bythe programming switches on the back panel.The VU and PPM displays are calibrated so thatthey will read the same when connected to sine wavesignals. The red PPM dot will be on top of the highestgreen segment of the VU bar resulting in a bright orange dot. For dynamic signals the difference between the top of the VU bar the PPM dot isapproximately the crest factor.3-4 Peak
Desk top enclosure 81 4“Wx9"Dx21 4”H 1-3 Standards The Ultra-VU meters are designed to conform to the ballistic standards described in IEEE document G.2.1.2/13, IEC document 268 and EBU document 3205-E. This ensures that the bargraph motion will closely track other standard mechanical and
