Transcription
THE INSPIRATION SERIESTHE RESIDENTIAL METAL ROOFING COLLECTION BY VICWESTTable of ContentsPage(s)Important Notices3Residential Roofing Application4Trims & Accessories5Trim Glossary6, 7, 8Estimating Material9Eave Trim Installation10Connecting Eavestarters10Gable Trim10Valley Flashing10Sidewall Flashing11Endwall Flashing11Transition Trim/Hip Cap11SummersideTM Steel Shingle Installation12Shingle Installation with Valleys13Ridge Caps and Ventilation14Cottage Hip15Replacing a Shingle16, 17Dektite Combo Flashing18Warranty19vicwest.com
THE INSPIRATION SERIESTHE RESIDENTIAL METAL ROOFING COLLECTION BY VICWESTImportant NoticesThe following installation guide is a step by step procedure for applying the Vicwest SummersideTM Steel Shingle. Great care must be taken to useVicwest trims, flashings, underlayment and approved accessories to ensure a perfect, long lasting, leak proof roof. Many inexperienced applicatorstry to cut corners but the end result is a roof that fails! Please follow this guide. If you have any questions, contact your local authorized Vicwestdealer for further information. Vicwest offers this information as a guideline only and assumes no responsibility whatsoever regarding improperinstallation or improper use of its products.Roof PitchNew ConstructionSummerside Steel Shingles shouldonly be installed on roof slopesof 4/12 or greater.SummersideTM Steel Shingles are to be installed on a solid surfaceroof, (spruce plywood, OSB, pine roof boards). Please consult your localbuilding official for further information. Your entire roof surface willneed to be covered with either Vicwest Synthetic Underlayment orVicwest Peel & Stick Underlayment before beginning installation ofthe steel shingles. Vicwest recommends continuous venting at the ridge.With proper ventilation in the eaves of the structure this makes for themost effective form of ventilation for the roof.TMStorageSummersideTM Steel Shingles and accessories must be stored in a dry,ventilated area protected from moisture and chemicals. It is recommendedto install the shingle as soon as possible after purchase.Steel ShinglesSteel Shingles: Our shingles are manufactured from 28 gauge embossedsteel. Vicwest uses a Silicone Modified Polyester (SMP) paint system usesa proprietary resin to create a hard-wearing, no maintenance finish thatexhibits remarkable color and gloss retention, superior chalk resistanceand resistance to stains, abrasions and metal marking.WarrantyPlease refer to www.vicwest.com for warranty information on theSummersideTM Steel Shingle.Work SafetyMake sure to wear appropriate safety and fall restraint equipment as wellas soft soled shoes. Soft soled shoes will better grip the surface of theshingle as well as protect the painted finish. When stepping on theshingles place your foot in the centre, not on the interlocking edges.Re-Roofing Over Existing ShinglesSummersideTM Steel Shingles may be installed over one layer of existingasphalt shingles. Vicwest Synthetic Underlayment must be applied underthe SummersideTM Steel Shingle and over the existing asphalt shingle. Allforeign materials, damaged or curled shingles must be removed beforeinstallation of our metal shingles. Longer fasteners will be required whenapplying the steel shingle on this type of installation.The following steps must be done toensure a proper installation:1) Cut back existing shingles flush with the perimeter of the roof2) Remove any existing eave/gable flashings3) Remove all ridge/hip cap materials4) Use a chalk line when installing over the eavestarter.Do not depend on the roof edge to be straight or square.5) Install eavestarter as per instructions in Step 1:1 and 1:2.When ordering your new Vicwest SummersideTM Steel Shingle,inform your dealer of the type of installation of your project.vicwest.com
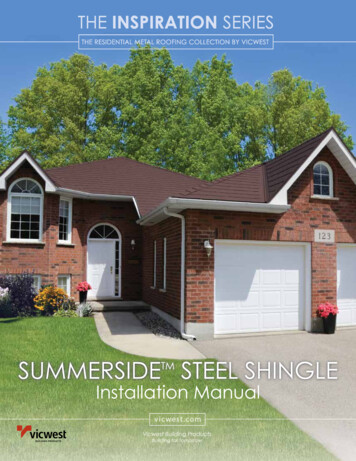
THE INSPIRATION SERIESTHE RESIDENTIAL METAL ROOFING COLLECTION BY VICWESTResidential Roofing ApplicationSummersideTM Steel ShinglesSummersideTM Steel Shingles are designed to outlast and outperform traditional roofingmaterials. They are precision engineered from 28 gauge steel with a double embossed finish,so they’re stronger than most other steel shingle roofing systems. The unique four wayinterlocking system tightens on all four sides to resist wind uplift and heavy snow loads.And because they are non-combustible, the steel panels cannot catch fire.Product OverviewPanel Size:21-1/2” x 12” (546 mm x 305 mm)Panel Width:12" (305 mm)Weight:Approx. 23 kg/box of 28 tilesPanel Exposure:.5 covered square/box of 28 tilesvicwest.com
THE INSPIRATION SERIESTHE RESIDENTIAL METAL ROOFING COLLECTION BY VICWESTTrims & Accessoriesvicwest.com
THE INSPIRATION SERIESTHE RESIDENTIAL METAL ROOFING COLLECTION BY VICWESTTrim GlossaryTRIM/ACCESSORYDESCRIPTIONGalvanized J Trim 28 ga.Galvanized10’-0” (3048 mm)Gable Cap EmbossedPre-painted10’-0” (3048 mm)Sidewall Cap EmbossedPre-painted10’-0” (3048 mm)Endwall EmbossedPre-painted10’-0” (3048 mm)Transition EmbossedPre-painted10’-0” (3048 mm)Hip Cap EmbossedPre-painted10’-0” (3048 mm)Valley EmbossedPre-painted10’-0” (3048 mm)Galvanized Starter Hook 24 ga.Galvanized10’-0” (3048 mm)Eavestarter Non-EmbossedPre-painted10’-0” (3048 mm)vicwest.com
THE INSPIRATION SERIESTHE RESIDENTIAL METAL ROOFING COLLECTION BY VICWESTTrim GlossaryTRIM/ACCESSORYDESCRIPTIONUnder Ridge Cap 26 ga.Galvanized10’-0” (3048 mm)Ridge Cap EmbossedPre-painted or Matte10’-0” (3048 mm)S125 Starter Eave Trim (Embossed)Pre-painted or Matte10’-0” (3048 mm)Vicwest Synthetic Underlayment41.5” x 145’ roll covers 500 sq.ft41.5” x 290’ roll covers 1000 sq.ft* Vicwest Self Adhering Underlayment36” x 66.7’ covers 200 sq.ftWoodgrip Screws(No Washers)#9 x 1-1/2” (38 mm)Galvanized or Colour MatchedWoodgrip Screws(No Washers)#9 x 2” (50.8 mm)Galvanized or Colour MatchedSnowstop PlusTMClear* Vicwest Self Adhering Underlayment is strongly recommended to cover 3' of roof perimeter and on all hips and valleysvicwest.com
THE INSPIRATION SERIESTHE RESIDENTIAL METAL ROOFING COLLECTION BY VICWESTTrim GlossaryTRIM/ACCESSORYDESCRIPTIONRidge VentSealantColour MatchedMetal Building Tape1/8” x 1/2” x 25’ longHip & Valley Sealer3/4” x 1” x 19’-10-1/4” long(19.05 mm x 25.4 mm x 6051.55 mm)Dektite Combo FlashingRECOMMENDED TOOLSBattery Operated DrillTru-Cut ShearCaulking GunMetal SnipsTape MeasureTSHD Turbo ShearVicwest ShearChalk LineFolding ToolLaddervicwest.com
THE INSPIRATION SERIESTHE RESIDENTIAL METAL ROOFING COLLECTION BY VICWESTDetermining How Much Material You’ll NeedQuick Step Method (approximate)1. Determine roof square footage without waste.Overall Fascia Length x (Rafter Length x2) Square Footage Without Waste2. Add total linear feet of all hips and valleys. Multiply by 2.3. Add totals from steps 1 and 2.4. Multiply total by 1.03. This yields roof square feet including waste.2 boxes of SummersideTM Steel Shingles 1 square (100 sq. ft. of roof material)vicwest.com
THE INSPIRATION SERIESTHE RESIDENTIAL METAL ROOFING COLLECTION BY VICWESTEave Trim InstallationGable TrimInsert the eavestarter between the Vicwest Underlayment and the wooddeck. (Diagram 1:1). Use Galvanized screws every 12” on centre to fastenthe trim to the roof deck. When re-roofing over existing shingles use aGalvanized screw that will penetrate the deck a minimum of 1”. If yourregion is subject to high winds it is recommended that fastening be doneinto the fascia through the face of the eavestarter as well.Galvanized J trim combined with the painted gable cap is used onall gable ends. Install the Galvanized J trim on top of the VicwestUnderlayment and the roof deck. A 1” painted screw should be fastenedinto the face of the painted gable cap minimum every 24”. Insert theshingle into the opening of the J trim. Finish by locking the gable cap intothe Galvanized trim; then, surface screw the cap into your fascia using aprepainted 1” fastener.Valley FlashingConnecting EavestartersEavestarter comes in 10 foot lengths only. There will be pointsof overlap. Notch the edge bend on the eavestarter leg about 1”.Now slide the notched eavestarter over top of the secured piece.Press the two pieces together and insert fasteners (Diagram 1:2).Note: never install fasteners through the joint, place approximately2” away.Valley flashing should follow the centre line of the roof valley. In orderto maintain a clean, even look ensure the valley runs straight. Begin byinstalling from the eave. The first section of valley flashing will overlap theeavestarter. Fasten valley every 16” up its length on both sides. The endof the valley should be cut on the angles matching the two adjoining roofsections.Overlap upper valley flashing a minimum of 6” on the top side of thelower valley flashing. This will allow for complete run off of water withoutpenetrating your valley flashing.vicwest.com
THE INSPIRATION SERIESTHE RESIDENTIAL METAL ROOFING COLLECTION BY VICWESTSidewall FlashingTransition Trim/Hip CapGalvanized J Trim and Sidewall Cap DetailVicwest Underlayment should run from the roof up the wall a minimumof 4”. Install the Galvanized J trim over the roofing underlaymentflush to the wall using fasteners a minimum of every 16”. Insert theSummersideTM Steel Shingle into the J trim and fasten to the roof.Install the sidewall cap by locking into the J trim. The vertical surfaceof the sidewall cap runs up the wall behind the siding or wall covering.Fasten through the vertical leg.Install the SummersideTM Steel Shingle as close to the point of thetransition/hip change. Measure 5 1/2” from the pitch change and snapa chalk line across the shingle. Install the Galvanized Starter Hook alongthis line. Lock the transition/hip cap into the starter hook. Fasten the upperleg of the trim to the upper roof with roofing nails at no more than 16” oncentre. On the upper leg of the transition/hip cap measure up to 1 1/2”from the angle change of the cap and snap a chalk line across the roof.Apply the Galvanized Starter Hook (hook pointing down the roof) onto theupper part of the caps using 1 1/2” Galvanized roofing screws no lessthan 16” on centre. Lock the upper row of shingles of the starter hook.Be sure to align your shingles to match the lower course of the roof.Transition TrimEndwall FlashingStarter Hook and Endwall Flashing DetailVicwest Underlayment should run from the roof up the wall a minimumof 4”. Install the SummersideTM Steel Shingle as close to the upper wallas possible. Measure 5 1/2” from wall and snap a chalk line across theshingle. Install the Galvanized Starter Hook along this line using 1 1/2”Galvanized roofing screws no less than 16” on centre. Lock the paintedendwall flashing into the starter hook. The vertical surface of theendwall cap should run up the wall behind the siding or wall covering.Fasten through the vertical leg.Hip Detailvicwest.com
THE INSPIRATION SERIESTHE RESIDENTIAL METAL ROOFING COLLECTION BY VICWESTSummersideTM Steel Shingle InstallationBegin by installing the shingle starting from either the left or the right side.The first row of shingles locks into the eavestarter. Subsequent rows lockinto place by sliding the bottom hook of each shingle into the screw stripof the previous row. The generous width of the locks allows alignment ofthe row to ensure symmetry. Insert two 1 1/2” Galvanized roofing screws,one into the far right screw hole and one into the far left screw hole.Each row of shingles will need to be offset from the previous row.To ensure a visually appealing alignment position the offset at thecentre notch of the screw strip. Other shingles can then be snappedin from there. Follow the same pattern for each row of shingles.Note: in high wind areas insert roofing screws into ALL screw holes.The inner lock of each shingle slides into the Z lock of the adjacentshingle, the push the shingle up the roof so the bottom hook snapsinto the screw strip.vicwest.com
THE INSPIRATION SERIESTHE RESIDENTIAL METAL ROOFING COLLECTION BY VICWESTShingle Installation with ValleysValley detail showing fold over and how to start.Where there is a valley we suggest applying the shingle from the valley towards the gable ends. Position a full shingle on the second row andoffset to match the existing pattern. Place a shingle over the valley to determine the angle of cut. Leave 3/4” to fold under which allows the shingleto lock into the valley clip. If the shingle section that is to lock into the valley is too narrow, you can pop rivet the shorter piece to the adjacent shingle,then install as one unit.vicwest.com
THE INSPIRATION SERIESTHE RESIDENTIAL METAL ROOFING COLLECTION BY VICWESTRidge Caps and VentilationTwo piece Ridge Cap and Quarrix Ridge Vent are required on all roofs. Install the SummersideTM Steel Shingle to within 2” of the peak of the roof.Measure 4” down from the peak and apply 1/8” by 1/2” foam tape along the entire roof, (both sides of peak). Lay down Quarrix Ridge Vent (20’ roll),then the 9” Galvanized Ridge Cap, fasten with 2” Galvanized roofing screws both sides at no more than 16” on centre. Apply the painted SummersideRidge Cap on top of the Galvanized cap using two 2” Galvanized roofing screws, locking the next section into the previous, fastening and continuingalong the entire ridge line. Ridge Caps should be installed moving in the direction of the prevailing wind. The first and last cap will need to be cut andfolded at the gable end and secured to the fascia.vicwest.com
THE INSPIRATION SERIESTHE RESIDENTIAL METAL ROOFING COLLECTION BY VICWESTCottage HipCut the angle required on the SummersideTM Steel Shingle and install to the point of the hip. Apply hip sealer foam down both sides, on top ofthe shingle, no more than 4” from peak of the hip. Starting at the lower part of the roof, cut a piece of Summerside Cap to the angle of the eaves.Fold over a minimum of 1” and lock the cap into the lower row of shingles. Screw the first cap in place and work your way up the hip fasteningeach piece. At the top of the hip, finish by installing the cap under the Summerside Ridge.vicwest.com
THE INSPIRATION SERIESTHE RESIDENTIAL METAL ROOFING COLLECTION BY VICWESTReplacing a ShingleThis is one suggested method to replace a damaged shingle1. Cut out the lower lock of the damaged shingle leaving the balanceof the shingle in place. If there is more than one shingle to replace cutacross as many that is required.4. Using a knife score the bend between the two sections of the right sidelock. Break this tab off.2. Trim off the top lock of a new shingle approx 1” up from the bottom edgeof the top lock.5. Trim an additional 1/8” off the remaining tab of the right side lock.3. New shingle with top lock trimmed.6. The side locks may need to be opened very slightly to slide thenew shingle in placevicwest.com
THE INSPIRATION SERIESTHE RESIDENTIAL METAL ROOFING COLLECTION BY VICWEST7. Insert the new shingle into the left side while hooking the right sideover the right lock of the existing shingle and gently slide the shingleupwards. The top of the new shingle will need to be slipped under thelock of the shingle above and hooked over the lock of the shingle below.9. The shingle is in place.8. A wood block and hammer can be used to tap the shingle upwardsinto place.10. A rivet gun could be used to place two rivets at the top of the new shingleto keep it from sliding down. Adhesive caulking could also be applied betweenthe new and old shingle to keep the new shingle in place.vicwest.com
THE INSPIRATION SERIESTHE RESIDENTIAL METAL ROOFING COLLECTION BY VICWESTDektite Combo FlashingDektite Combo Flashing InstallationFor use with hydro masts and vent pipes.Cut to size, place bead of silicone aroundmetal base from base to ribs or profile andthen fasten with skirt flange screws. Standard flashing and retrofit flashing all in one When retrofit is required just add clips for easy application Internal cone design provides 1/2” of continuous contact Pipe OD markings clearly shown on cutting groves Large base design to improve sealing on high rib metal roof sheets 20 Year Warranty1. TRIM - Cut opening 20% smallerthan pipe diameter.2. SLIDE - Slip Dektite ComboFlashing over pipe.3. SEAL - Apply urethane / siliconesealant between Dektite ComboFlashing and roofing.4. FORM - Bend aluminum base to fitirregularities. Use large slot screwdriverto press into tight angles.Available in Black(Grey EPDM & Red Silicone Available by Special Order)EPDM will withstand constant temperatures at the roofline of-50 C (-122 F ) to 115 C (239 F) & up to 150 C (302 F) intermittently.Red Silicone will withstand constant temperatures at the roofline of-50 C (-122 F) to 200 C ( 392 F) & up to 250 C (482 F) intermittently.1. When used in retrofit application apply silicone to both seam & underside2. Limited spacing may occur between clips3. Fasten clips using multigrips, working from top to base4 Fasten combo base by placing a fastener either side of clips first*Always use the neutral base low modulus silicone for sealing**In corrosive and coastal environments fix blind aluminum rivets5. FASTEN - Complete the seal usingcommon weather-resistant fasteners.CODEDESCRIPTIONPIPE SIZEMETRICPIPE SIZEIMPERIALROOF PITCHBASE MMINCHESCOLOURSMAX # OF DC CLIPS(TWINS) REQUIREDDC101Dektite Combo #15-60 mm1/4” - 2 1/2”0-40 or 10/12139 x 139 mm5 1/2” x 5 1/2”Black, Grey (EPDM)*Red Silicone*2DC102Dektite Combo #245-85 mm1 3/4” - 3 1/4”0-40 or 10/12177 x 177 mm7” x 7”Black, Grey (EPDM)*Red Silicone*3DC103Dektite Combo #35-127 mm1/4” - 5”0-40 or 10/12216 x 216 mm8 1/2” x 8 1/2”Black, Grey (EPDM)*Red Silicone*4DC104Dektite Combo #475-175 mm3” - 7”0-40 or 10/12285 x 285 mm11 1/4” x 11 1/4”Black, Grey (EPDM)*Red Silicone*5DC105Dektite Combo #5108-190 mm4 1/4” - 7 1/2”0-40 or 10/12365 x 365 mm14 1/4” x 14 1/4”Black, Grey (EPDM)*Red Silicone*6DC106Dektite Combo #6125-230 mm5” - 9”0-40 or 10/12366 x 366 mm14 1/4” x 14 1/4”Black, Grey (EPDM)*Red Silicone*6DC107Dektite Combo #7150-280 mm6” - 11”0-40 or 10/12454 x 454 mm17 3/4” x 17 3/4”Black, Grey (EPDM)*Red Silicone*7DC108Dektite Combo #8175-330 mm7” - 13”0-40 or 10/12454 x 454 mm17 3/4” x 17 3/4”Black, Grey (EPDM)*Red Silicone*7DC109Dektite Combo #9240-508 mm9 1/2” - 20”0-40 or 10/12685 x 685 mm27” x 27”Black, Grey (EPDM)*Red Silicone*12DC110Dektite Combo #10400-750 mm15 3/4” - 29 1/2”0-40 or 10/12995 x 965 mm38” x 38”Black (EPDM)*Red Silicone*9DC ClipCombo Clips Twin25 Twinsvicwest.com
THE INSPIRATION SERIESTHE RESIDENTIAL METAL ROOFING COLLECTION BY VICWESTWarranty RegistrationHomeowners can register online at www.vicwestwarranty.comUpon receipt of your registration, Vicwest will forward by email the warranty with certificate number. The homeowner should keep thisinformation in a safe place for future reference or in the event they need to submit a claim or wish to transfer the warranty where applicable.DisclaimerIt is the sole responsibility of the contractor to ensure installation is completedaccording to the directions herein, and that all construction by-laws and codesare met. The recommendations in the printed and the video versions of theinstallation guide are based on Vicwest’s continuing program of labratory testing,product research and comprehensive field experience. Vicwest does not andcannot cover damage of any kind resulting from faulty or improper installation.In accordance with ongoing efforts to improve our products and their performance, Vicwest reservesthe right to change without notice the specifications contained herein.The contents herein are for general information and illustrative purposes only and are not intendedto serve as any type of advice. Every effort is made to ensure the accuracy of the information includedin this brochure and it is believed that the information contained herein is accurate and reliable asof the date of publication. Vicwest, however, does not warrant or represent the accuracy or reliabilityof any information included in this brochure. Any reliance on any information without consultationwith Vicwest or a duly authorized representative shall be at the user’s own risk. 2014, Vicwest Inc. – All rights reservedJuly 2014vicwest.com
vicwest.com THE INSPIRATION SERIES THE RESIDENTIAL METAL ROOFING COLLECTION BY VICWEST Table of Contents Page(s) Important Notices 3 Residential Roofing Application 4 Trims & Accessories 5 Trim Glossary 6, 7, 8 Estimating Material 9 Eave Trim Installation 10 Connecting Eavestarters 10 Gable Trim 10 Valley Flashing 10 Sidewall Flashing 11