Transcription
2
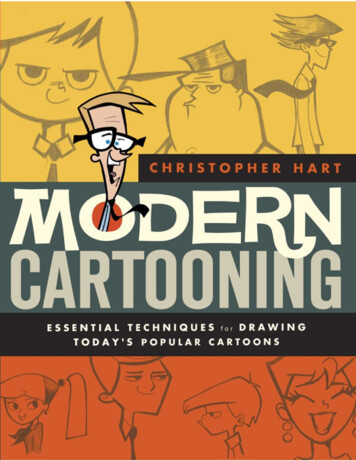
Copyright 2013 by Cartoon Craft LLCAll rights reserved.Published in the United States by Watson-Guptill Publications, an imprint of the Crown Publishing Group, a division of Random House, Inc., New ATSON-GUPTILL and the WG and Horse designs are registered trademarks of Random House, Inc.Library of Congress Cataloging-in-Publication DataHart, ChristopherM odern cartooning: essential techniques for drawing today’s popular cartoons / Christopher Hart. — First Edition.Includes index.1. Cartoon characters. 2. Cartooning—Technique. I. Title.NC1764.H377 2013741.51—dc232012013977eISBN: 978-0-8230-0715-8Book design by M .80 DesignCovert art by Christopher Hartv3.13
DEDICATED TO ALL ASPIRINGCARTOONISTS EVERYWHERE!4
CoverTitle PageCopyrightDedicationINTRODUCTIONBASIC HEAD SHAPEThe CircleFACIAL FEATURESThe EyesThe Nose ProblemThe MouthThe Eyes and Mouth Working TogetherMOVING BEYOND THE BASIC HEAD SHAPESmall Changes—Big ResultsThe Classic Cartoon Head ShapeSculpting the Head ShapeCharacter SketchingAdding Extreme Visual EffectsMEDIUM SHOTS: THE BEST, MOST OVERLOOKED ANGLEPretty Teen with Funny HatSporty AthleteFirst Snowflake5
THE UNIVERSAL BODY TYPEStandard Cartoon Body TypeRubbery TorsoBuilding the Total Figure from a Single ShapeUsing Clothing to Define Body ShapesDrawing the Female Body: Teens through AdultsBasic Construction on a Real Finished CartoonPUTTING YOUR CHARACTERS TOGETHERCan Never Have Enough ShoesFunny StanceMerry Christmas to Me!Enhancing an Existing DrawingDIFFERENT BODY TYPESDorky Dad1950s MomTrailer MomFunny SeniorMr. Bench PressADDING IMPORTANT DETAILSThe Line of ActionStretching and Condensing the BodySAVING THE BEST FOR LAST: STUFF YOU WON’T LEARN IN ART SCHOOLThe Fine PointsDrawing the Characters in Their Own ScenesINDEX6
7
This is the first cartooning book specifically designed for the person who has neverdrawn cartoons before. With carefully crafted, clear step-by-step drawings and anamazing abundance of hints and tips, you’ll gain the confidence and skill neededto draw cartoons the way you’ve always wanted to.I’ll show you how to draw great-looking characters right away. The trick is tolearn how to draw the basic head shapes and apply facial features from a wideselection of the most popular types in cartooning today. You’ll start with a circle,then discover new shapes. I’ll show you how to mold the head into new andunique shapes to convey humorous and highly entertaining attitudes.For this book, I created the “Universal Body Shape.” I’ll also show you how touse a basic rectangle to create the foundation for just about every type ofcharacter. How easy is that?You’ll learn all of these secrets and more. I’ll also show you how to takeestablished art techniques and tweak them to create humorous and often cluelesscartoon characters. You’ll amaze your friends. You’ll crush your enemies. Hey,how many cartooning books can promise all that?Welcome to the world of cartooning. The chapters ahead are funny, cute, andcrazy. So take out your pencil. Wait. That was a little slow. Try it again. Okay,ready? Now! Oh, almost! Oh, what the heck, let’s get started.8
9
First, let’s examine the various theories of cartooning from a contextual standpoint. Justkidding! Let’s just start drawing instead!You may wonder if it’s possible to create stylish and contemporary cartoons bybeginning at a basic level. You foolish, foolish mortal. The faces you’re going tobegin with are easy to draw, but they’re also character designs of a high level thatare entertaining and stuffed with personality. You can achieve these results by thecreative use of a few simple head shapes, combined with the right types of facialfeatures. But there’s more to it than that. My approach to cartooning stresses theconstruction of the head shape (in this case, a circle). Head shapes should remainconspicuous, even in the final character design. This technique causes the outline ofthe head to appear as a primary feature of your cartoon character, like cartooneyes or noses. The basic head construction does not just serve as a guideline forthe finished drawing; it becomes a caricature of a “regular” head.It used to be that the initial foundation of the head was there to simply get thedrawing started, and was later forgotten. Oh, how young and innocent cartoonistswere back then! But enough of this forced walk down memory lane—let’s getstarted!10
Many cartoonists start cartoons with a circle, but then modify it at their firstopportunity. Why? The circle is a pleasing shape. Roundness is an appealingelement in many character designs. But the simplicity of the circle can alsobecome a liability. The circle is such a common shape that it does not alwayscommand the viewer’s attention.But you can create excitement for your circle-based characters by making themso simplistic and round that they look amusingly absurd. And you don’t have tostart with a perfect circle! A sloppy hand-drawn circle is fine. You won’t get a badgrade for not doing everything perfectly. At least, not a really bad grade.The circle works best for boys, girls, and female teen characters. You can alsocreate older characters with this starting point, but it takes more inventiveness topull it off. Circles tend to make everyone look young.11
MISCHIEVOUS KIDHere’s a cute kid with mpd (mischievous personality disorder). Please don’t leaveany weapons-grade nuclear material near him—just to be extra cautious. Youdon’t want to know what almost happened last time someone forgot to put awaythe plutonium.Draw a circle—any circle—neat, sloppy, lopsided, it doesn’t matter.12
Divide the head in half with the center line.Place the eye line low across the head, and use guidelines to keep the eyes evenly aligned.13
Concentrate the features snuggly at the guidelines’ crossroads.14
Place the ears low on the head, keeping them aligned on the same level. Cut the eyes off at the top for a mischievouslook.15
Add wacky hair, way off to one side16
Use an arching guideline to keep points of the ruffled hair even.17
Add a little shadow under the hair to make the character stand out, and to give him a flat look.Notice how low on the face all the features are placed. The lower you go, the cuter he gets! Also, note how the gigantichairstyle creates a unique look, using only the circle for its foundation.18
YOUNG TEENAGERYoungsters of around twelve to fourteen make particularly popular cartooncharacters. They still have the round faces and big, perky eyes of youth. Add morestuff: makeup, pigtails, dangling earrings, and a summer top. Pigtails anddangling earrings enhance the appeal of this character. Aspiring cartoonists oftensee these touches as afterthoughts. They are not. They are an essential part of thecharacter design. Change her clothing, hair, and accessories, and you’vepractically created a new character.Start with a circle again (but you’ll end up with a totally different character this time).19
Add big, round eyes and a little nose.20
First draw the top lip to create the expression.21
Follow with the bottom lip.22
Extend the scalp to give fluffiness to the hair.Notice that big, solid pupils provide a good look.23
“Float” the eyelashes so that they don’t attach, but keep them short.24
Notice the size contrast of the features. It’s all about those feminine eyes (and, to some degree, the hair)! The nose, mouth, andears are kept small. This is not only a pretty look but also accentuates the size of those baby blues.25
SWEET SIXTEENThis character can be a girl by day and a superspy at night. All pretty teens incartoons are capable of fantastic adventures. But whether or not her hobby iscracking the codes of foreign governments, the secret of her charm lies in her cutebut capable appearance, her leadership abilities, and her meltdowns when hercrush fails to notice her.Compared to the younger teen on this page, the size of a mid-teen’s head issomewhat reduced, relative to her facial features. In other words, there is lesssurface area surrounding her eyes, nose, and mouth, giving her face a morestreamlined look—even though it is still based on a circle!26
Note how the eyes are almond-shaped and tilt up a touch at the ends.27
Add glamour with thick upper eyelids.28
Arch the eyebrows high over the eyes.29
Create her hairstyle independent of the shape of her head.30
More is less. Drawing a pretty character like this is very achievable. But many aspiring artists attempt to do too much to createa pretty look. Simplicity is key. A few pretty features on an uncluttered face, combined with a good hairstyle, is all you need.31
THE CIRCLE AT DIFFERENT ANGLESTHE CIRCLE IS AN EASY SHAPE TO TURN AT DIFFERENT ANGLES, BECAUSE THE SHAPESTAYS THE SAME. ALL YOU DO IS CHANGE THE PLACEMENT OF THE GUIDELINES.32
ROUND-HEAD ADULTYou don’t usually see adult cartoon characters whose faces are completely round.But when you do, they often appear to be somewhat roly-poly. That’s becauseolder characters based on real people have eyes set high on their heads, whichmakes everything below the eyes appear to be made up of cheek fat and giantjowls.Beards and facial hair on older adults are usually trim and neat. Note that themouth is effectively hidden underneath the mustache—a cute device. Andremember this immutable axiom—I call it the Law of Compensation—whendesigning funny adult characters: The less hair a guy has on the top of his head,the more hair he’ll grow on his face. (This is also known as the Please Don’t NoticeMy Baldness Maneuver.)33
Raise the eye line on adults and older characters.34
Place the eyes side by side for a goofy look.35
Draw the ears too low, even when placing the eyes high. Inconsistent placement can be funny.36
Draw the beard line in a U shape.37
Adjust the facial features on the head, raising or lowering them according to the age and personality. The ears, however, canstay fairly low at any age. If you’re wondering whether it looks anatomically incorrect to draw ears so far below the eyes, theanswer is: of course it looks anatomically incorrect! It’s supposed to look incorrect. It’s a cartoon. That’s what makes it funny!38
EYEBROW VARIATIONFloat the eyebrows when the eyes are too close to the top of the head.39
NECK LENGTH AND CHARACTER AGETHE OLDER A CHARACTER, THE SHORTER THE NECK, UNTIL THE NECK IS ACTUALLYREMOVED.See how awkward this senior citizen looks with a long neck.40
Omit the neck for a funnier look.41
42
Up until this point, I’ve focused on showing you how to draw the outline of the face. Now,let’s turn to the features, where the real fun starts !There are many types of features: eyes, noses, and mouths. And there are specifictypes of each, such as glamorous eyes or a mouth with a goofy underbite.Some people say that that there is no “right” way or “wrong” way to draw theeyes, nose, and mouth. And they’re correct. There’s no right or wrong way to drawanything. But some ways not only look better, they are also more visuallyappealing to viewers. Which is another way of saying they’re “popular.” Then,there’s the other way. Let’s go with the popular ones.43
There is a wide and popular range of eye shapes to choose from. You can also mixand match them to create your own combos. As you’ll see, some eyes are a betterfit for some characters than for others. This doesn’t mean you can’t add one eyetype to a character that usually takes a different eye type. But if you do, be bold.Have fun creating something unexpected.Give each of these eyes a practice draw to get the feel for it.44
POPULAR EYE SHAPESCIRCLEThis is the most common eye shape. It can be used for almost any character.TALL OVALThis shape is almost as common as the circle. Note that the eye is oval, but thepupil remains a circle. It’s often used in more humorous characters.FLATTENED OVALCartoonists often use this shape for droll characters, sarcastic characters, orsomewhat low-class characters. Note that the pupil is also an oval but can be a dotas well.SEVEREA large, horizontal oval, cut in half by a sharp eyelid, creates a funny, intense45
look.ALMONDNote: This common eye type is for females only. You can tilt these eyes up at theends to add a touch more femininity. Her top eyelid is always darker than thebottom, unless the character is spooky or weird. Using a glistening pupil and ahint of eye shadow adds glamour.46
PRACTICAL APPLICATIONBy adding the rest of the features to the eyes, you can see what a big impact theeyes have. They totally outshine the mouth—unless the mouth is used to create anextreme expression. You can tell what a character is thinking by his eyes. Eyebrowsare not just an afterthought. They are the exclamation point that drives home theexpression. From here, you’ll work with a set of two eyes rather than detailing theshape of a single eye. (Don’t worry about drawing the mouth yet, it’s just here tohelp to clarify the concept. I’ll cover mouths in a few pages.)Before you give these examples a try, read the special tips on this page, whichare probably the most important developments about cartoon eyes in the wholebook. Perhaps, they’re the most important developments about anything ever,right up there with the development of antibiotics and spray cheese in a can!CIRCLE (MALE)TALL OVAL (MALE)SEVERE OVAL (MALE)47
FLATTENED OVAL (MALE)CIRCLE (FEMALE)TALL OVAL (FEMALE)SEVERE OVAL (FEMALE)48
FLATTENED OVAL (FEMALE)ALMOND (FEMALE ONLY)49
SPECIAL TIPSTHE TYPE OF EYE YOU DRAW (THAT IS, GENDER, AGE, OR EXPRESSION) IS NOT NEARLY ASIMPORTANT TO THE ULTIMATE SUCCESS OF THE DRAWING AS THE FOLLOWING FOURGUIDELINES ON YOUR “I SHOULD REMEMBER THIS WHEN I’M TRYING TO DRAW CARTOON EYES”LIST. WITH THESE IN MIND, YOU CAN MOLD THE EYES INTO ANY SHAPE AND EXPRESSION YOUWANT.1. Tilt: Both eye
character design. Change her clothing, hair, and accessories, and you’ve practically created a new character. Start with a circle again (but you’ll end up with a totally different character this time). 19. Add big, round eyes and a little nose. 20. First draw the top lip to create the expression. 21. Follow with the bottom lip. 22. Extend the scalp to give fluffiness to the hair. Notice .