Transcription
Oracle Identity Governance11g R2 PS1 - SkinCustomizationOverviewCopyright 2013, Oracle and/or its affiliates. All rights reserved.Oracle Identity Governance 11g R2 PS1 - Skin CustomizationEffective 06/05/12Page 1 of 25CUSTOMRev 1
Overview of Customizing SkinsIn this tutorial, you perform the following tasks related to skin customization with the OracleIdentity Manager Catalog page: Preparing a sample (supplied) application workspace in JDeveloper Compiling and deploying the sample application Activating the sample skin to view the demo customizationPrerequisitesThis tutorial assumes have downloaded, installed and configured the following software: Oracle Identity Governance 11gR2 PS1Note: This tutorial assumes you have installed Oracle Identity Governance 11gR2 PS1in a directory structure called /u01/app/Oracle/Middleware/Oracle IDM1 andthat your WebLogic Server domain name is called base domain. If your installationpath and the instance name are different, make a note of the values. You may set anenvironment variable called OIM ORACLE HOME to this directory structure. Oracle JDeveloper 11.1.1.6.0Note: This tutorial assumes you have installed this product in a directory structurecalled /u01/app/jdeveloper. If your installation path is different, make a note of thevalue.In addition, this tutorial requires that you download the files required for the skin customizationdemonstration described in this practice. Therefore, before you can start working on tasks in thistutorial you must download the appropriate resources from Oracle web sites, by performing thefollowing steps:1.In a web browser window or tab page, access the Oracle Identity Manager 11g SampleAssets page by entering the following -mgmt/overview/oim-11g-assets504842.html.2.On the Oracle Identity Manager 11g Sample Assets page, scroll down and locate the SkinCustomization heading, and click the 11gR2 link as shown:Copyright 2013, Oracle and/or its affiliates. All rights reserved.Oracle Identity Governance 11g R2 PS1 - Skin CustomizationEffective 06/05/12Page 2 of 25CUSTOMRev 1
3.When prompted by your web browser, save the skin-customization-1868158.7z fileto a location of your choice.4.Using whatever technique or tool you use on your operating system, extract the contents ofthe skin-customization-1868158.7z to a temporary location.Note: On Linux systems, you may need to visit the p7zip(http://sourceforge.net/projects/p7zip/) web page to download and install a command linetool that can extract the contents of the 7z file on Linux systems. Extracting the contents ofthe 7z file creates a directory (folder) called Skin Customization, which contains thefollowing two files: IdentitySamples.zip Skin Customizations.docThe IdenitySamples.zip contains the files needed for this tutorial.5.Extract the contents of the IdentitySamples.zip file to a temporary location forexample: unzip IdentitySamples.zip -d /tmp/downloadsNext prepare JDeveloper with the sample application for the skin customization demonstration.Copyright 2013, Oracle and/or its affiliates. All rights reserved.Oracle Identity Governance 11g R2 PS1 - Skin CustomizationEffective 06/05/12Page 3 of 25CUSTOMRev 1
Task 1: Preparing the JDeveloper with the sample applicationOverviewIn this practice, you work with JDeveloper by using a sample application containing sources forcustomized versions of forms and skins. The files needed for this step should be located in thefolder you extracted the IdentitySamples.zip file into. For example: the/tmp/downloads/IdentitySamples folder.AssumptionsYou have downloaded and extracted the IdentitySamples.zip file from Oracle IdentityManager 11g Sample Assets web page.Tasks1.In a Terminal window, copy the IdentitySamples in the temporary folder to theIDM HOME/server folder by executing the following commands: export MW HOME /u01/app/Oracle/Middlewareexport IDM HOME MW HOME/Oracle IDM1cd /tmp/downloadscp –rv Identity* IDM HOME/serverNote: the IDM HOME environment variable should be referencing the directory (folder) pathin which Oracle Identity Manager 11g R2 software was installed. For example:2.3.IDM HOME /u01/app/Oracle/Middleware/Oracle IDM1Open JDeveloper, and in the JDeveloper window, click File Open.In the Open window, navigate to the/u01/app/Oracle/Middleware/Oracle IDM1/server/IdentitySamples folderand open IdentitySamples.jws.Copyright 2013, Oracle and/or its affiliates. All rights reserved.Oracle Identity Governance 11g R2 PS1 - Skin CustomizationEffective 06/05/12Page 4 of 25CUSTOMRev 1
Note: After opening the application, you can see sample projects available in thisapplication. The projects contain sources for sample UI customizations of User Form,Application Instance Form, Homepage portlets, and sample skins. For example:In the next section of this tutorial, you work with the sample skins – JDeveloper project Skins.The Skins project contains several customized skins. Skin customizations consist of customCSS file and images.Copyright 2013, Oracle and/or its affiliates. All rights reserved.Oracle Identity Governance 11g R2 PS1 - Skin CustomizationEffective 06/05/12Page 5 of 25CUSTOMRev 1
Task 2: Compiling and Deploying the Skin sampleOverviewIn this section of the tutorial, you prepare the environment to use the downloaded sample code.The sources provided in the sample JDeveloper application must be compiled and deployed onthe server. You must create several backend artifacts required by the sample code by using theOracle Identity Manager Deployment Manager to some import XML configuration files, and byusing the Oracle Identity Manager Administration Console to import a sample sandbox.Your tasks for this practice are: Compiling samples Deploying a custom shared library Importing backend artifacts Importing sample sandboxAssumptions You have copied the IdentitySamples folder into the server folder in the OracleIdentity Manager home folder. You have opened the IdentitySamples.jws file in Oracle JDeveloper.TasksCompiling Sample Code1. To compile and package the sample code in JDeveloper into a Web Archive (WAR) file,perform the following steps:a.In the JDeveloper window in the Application Navigator panel, right-click the MainUIproject entry, and select Deploy custom-shared-lib-war.Note: Use the following image as a guide:Copyright 2013, Oracle and/or its affiliates. All rights reserved.Oracle Identity Governance 11g R2 PS1 - Skin CustomizationEffective 06/05/12Page 6 of 25CUSTOMRev 1
b.In the Deploy custom-shared-lib-war window, perform the following actions:1)On the Deployment Action page, select Deploy to WAR, and click Next.2)On the Summary page, click Finish.Note: Deployment - Log window becomes active and JDeveloper starts building allthe projects. Among others, it builds the oracle.iam.ui.custom shared library(oracle.iam.ui.custom-dev-starter-pack.war file) that is used to deploythe custom code to the server.c.On the JDeveloper Deployment – Log tab page, you can verify that all the projectshave been built successfully.Copyright 2013, Oracle and/or its affiliates. All rights reserved.Oracle Identity Governance 11g R2 PS1 - Skin CustomizationEffective 06/05/12Page 7 of 25CUSTOMRev 1
Deploying the Custom Shared LibraryTo deploy oracle.iam.ui.custom shared library (oracle.iam.ui.custom-devstarter-pack.war file), you can use Oracle Weblogic Administration Console, and in theDeployments section, search for oracle.iam.ui.custom deployment, select to undeploy theapplication and then redeploy it. However, for the purpose of this practice, you overwrite theexisting IDM pack.warfile with the one you have built in JDeveloper.2.To overwrite the existing IDM ack.war file and make it active, perform the following steps:d.In a Terminal window, execute following commands: cd IDM HOME/server/IdentitySamples/stage/war cp oracle.iam.ui.custom-dev-starter-pack.war \ IDM HOME/server/appsNote: The backslash followed by Enter in the cp command allows you to continue thecommand over multiple lines. Alternatively, you can enter the command (without thebackslash) on a single line.e.To restart the Oracle Identity Manager server, perform the following actions:1)Either using Oracle WebLogic Server Administration Console (if NodeManager isconfigured) or command line tools stop the Oracle Identity Manager server. Forexample to use the command line form enter the following commands: cd MW HOME/user projects/domains/base domain bin/stopManagedWebLogic.sh oim server1Note: The path to your domain may differ from the example provided here, and thename of the Oracle Identity Manager server may also be different fromoim server1 depending on how you configured the Oracle Identity Manager serverinstance for your domain.2)Restart the Oracle Identity Manager server using whatever technique is applicableto your environment. If using the command line tools, the execute the followingcommands in a Terminal window: cd MW HOME/user projects/domains/base domain bin/startManagedWebLogic.sh oim server1Note: Wait until you see the server Server started in RUNNING mode message.Importing Backend ArtifactsThe demo customizations used in this tutorial require some backend artifacts to be created.These can be created by importing the FloraInc.xml file located in the/u01/app/Oracle/Middleware/Oracle IDM1/server/IdentitySamples/DM folder.3.To import the FloraInc.xml file, perform the following steps:a.In a web browser, access the Oracle Identity System Administration console byentering the URL https://localhost:140001/sysadmin and sign in with the User Idxelsysadm and the Password assigned to the user when you installed Oracle IdentityManager, for example password Welcome1.Copyright 2013, Oracle and/or its affiliates. All rights reserved.Oracle Identity Governance 11g R2 PS1 - Skin CustomizationEffective 06/05/12Page 8 of 25CUSTOMRev 1
b.On the Oracle Identity System Administration page, click Import under SystemManagement.c.In the “Select a file for import.” window, navigate to/u01/app/Oracle/Middleware/Oracle IDM1/server/IdentitySamples/DM, select FloraInc.xml, and click OK.Copyright 2013, Oracle and/or its affiliates. All rights reserved.Oracle Identity Governance 11g R2 PS1 - Skin CustomizationEffective 06/05/12Page 9 of 25CUSTOMRev 1
d.On the Deployment Manager File Preview page, click Add File.e.On the Deployment Manager – Import Substitutions page, click Next.f.On the Confirmation page, click Next.Copyright 2013, Oracle and/or its affiliates. All rights reserved.Oracle Identity Governance 11g R2 PS1 - Skin CustomizationEffective 06/05/12Page 10 of 25CUSTOMRev 1
g.On the Deployment Manager Provide IT Resource Instance Data page, click Skip.Note: You are prompted with multiple IT Resource Instance Data pages, click Skip foreach IT Resource, until you get to a Confirmation page.h.On the Confirmation page, click View Selections.Copyright 2013, Oracle and/or its affiliates. All rights reserved.Oracle Identity Governance 11g R2 PS1 - Skin CustomizationEffective 06/05/12Page 11 of 25CUSTOMRev 1
i.On the Deployment Manager – Import page showing content of the file being imported,click Import.j.In the Confirmation dialog box, Click Import.Copyright 2013, Oracle and/or its affiliates. All rights reserved.Oracle Identity Governance 11g R2 PS1 - Skin CustomizationEffective 06/05/12Page 12 of 25CUSTOMRev 1
Note: This import operation takes a few minutes. Wait for the Import Successful dialogmessage window.k.On the Success window, with the Import Successful message, click OK.l.Close the Deployment Manager – Import window.m. Sign out of the Oracle Identity System Administration console page.Importing the Sample SandboxIn this section of the practice, you deploy customizations that were created for the launch demo.All these customizations are captured by the FloraInc sandbox, which is available at/u01/app/Oracle/Middleware/Oracle IDM1/server/IdentitySamples/Sandboxes/sandbox FloraInc.zip file.4.To import the sandbox to Oracle Identity Manager, perform the following steps:a.In a web browser window, access the Oracle Identity Administration console page(using URL https://localhost:14001/sysadmin if needed), and log in with User IDxelsysadm and the password you assigned to the user, for example Welcome1.b.On the Oracle Identity Administration page, click the Sandboxes link in the upper rightcorner of the page.c.On the Manage Sandboxes tab page, click Import Sandbox.d.In the Import Sandbox dialog box, click Browse to locate the/u01/app/Oracle/Middleware/Oracle IDM1/server/IdentitySamples/Sandboxes folder, select the sandbox FloraInc.zip file and click Open.Copyright 2013, Oracle and/or its affiliates. All rights reserved.Oracle Identity Governance 11g R2 PS1 - Skin CustomizationEffective 06/05/12Page 13 of 25CUSTOMRev 1
e.On the Import Standbox page, click Import.f.On the Manage Sandboxes page, verify that the FloraInc sandbox has been importedand is visible in the Available Sandboxes table. If required, click Refresh to update theAvailable Sandboxes view.Copyright 2013, Oracle and/or its affiliates. All rights reserved.Oracle Identity Governance 11g R2 PS1 - Skin CustomizationEffective 06/05/12Page 14 of 25CUSTOMRev 1
Task 3: Testing Sample Skin CustomizationsOverviewIn this section of the tutorial, you test the sample skin customizations that have been deployedand prepared.Assumptions You have completed the steps in Task 1 and Task 2 above.TasksActivating the Sample Skin1. To activate the sample skin, perform the following steps:a.If needed, sign in to Oracle Identity System Administration Console (URLhttps://localhost:14001/sysadmin) with the User ID xelsysadm and use the Passwordassigned to that user, for example Welcome1.b.On the Oracle Identity System Administration page, under System Management, clickSystem Configuration.Note: The System Management window opens with a Search System Properties field.c.On the System Management System Configuration tab page, take the followingactions:1)Enter Skin Family for OIM UI in Search System Properties, and click thesearch arrow icon.2)In the search results, click the “Skin Family for OIM UI” link.Copyright 2013, Oracle and/or its affiliates. All rights reserved.Oracle Identity Governance 11g R2 PS1 - Skin CustomizationEffective 06/05/12Page 15 of 25CUSTOMRev 1
Note: The System Property Detail page is displayed in the right-hand panel of thebrowser window.d.On the “System Property Detail: Skin Family for OIM UI” page, change the Value field(from its default fusionFx) to luck, and click Save.Note: Use the following image as a guide:Note: Setting the Value informs Oracle Identity Manager which skin should be used.2.e.On the Message dialog, indicating the system property has been changed, click OK.f.Close the browser window with the System Management tab page, sign out of theOracle Identity System Administration console, and close web browser application.Restart the Oracle Identity Manager server instance, by perform the following actions orsimilar (as dictated by your environment):Copyright 2013, Oracle and/or its affiliates. All rights reserved.Oracle Identity Governance 11g R2 PS1 - Skin CustomizationEffective 06/05/12Page 16 of 25CUSTOMRev 1
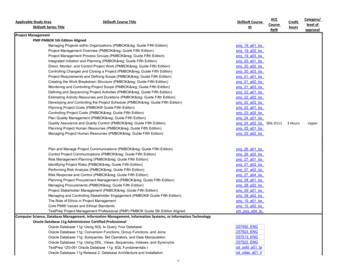
a.Either using Oracle WebLogic Server Administration Console (if NodeManager isconfigured) or command line tools stop the Oracle Identity Manager server. Forexample to use the command line form enter the following commands: cd MW HOME/user projects/domains/base domain bin/stopManagedWebLogic.sh oim server1Note: The path to your domain may differ from the example provided here, and thename of the Oracle Identity Manager server may also be different from oim server1depending on how you configured the Oracle Identity Manager server instance for yourdomain.b.Restart the Oracle Identity Manager server using whatever technique is applicable toyour environment. If using the command line tools, the execute the followingcommands in a Terminal window: cd MW HOME/user projects/domains/base domain bin/startManagedWebLogic.sh oim server1Note: Wait until you see the server Server started in RUNNING mode message.3.To view the changes after verifying the Oracle Identity Manager server has started, performthe following steps:a.Sign in to Oracle Identity Self Service console (URL https://localhost:14001/identity)with the User ID xelsysadm and Password Welcome1.Hint: You should immediately notice that the login screen skin has changed.b.After signing in, the Oracle Identity Self Service home page appears as shown in thefollowing image:Copyright 2013, Oracle and/or its affiliates. All rights reserved.Oracle Identity Governance 11g R2 PS1 - Skin CustomizationEffective 06/05/12Page 17 of 25CUSTOMRev 1
Note: The source files for the skin named luck are available in the Skins project in theIdentitySamples application workspace in JDeveloper that has been provided for thistutorial.Preparing Items for the CatalogBefore you can view the visual changes that are applied when you activate the Floralncsandbox, you create some roles that you synchronize to the Oracle Identity Manager Catalog sothat you have some items to search for when viewing the visual UI changes controlled by thechanges contained in the sandbox.Note: An Oracle Identity Manager sandbox is a ZIP file that may contain one or moreconfiguration changes.4.Assuming t hat you are still signed into the Oracle Identity Self Service web application, tocreate two roles called Role1 and Role2, perform the following steps:a.On the Oracle Identity Self Service page, under the Administration heading in thenavigation panel, click Roles.b.On the Roles tab page, in the Search Results section, click Create.Copyright 2013, Oracle and/or its affiliates. All rights reserved.Oracle Identity Governance 11g R2 PS1 - Skin CustomizationEffective 06/05/12Page 18 of 25CUSTOMRev 1
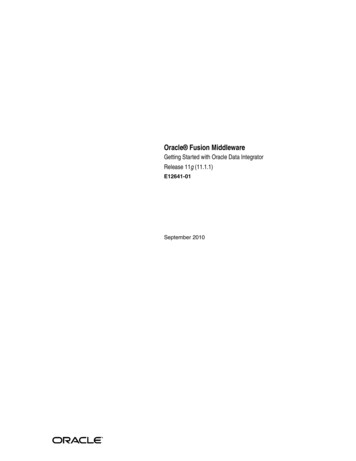
c.On the Create Role tab page, enter the Name Role1 and Display Name Role 1 (notethere is a space between the text Role and 1), and click Save.Note: Close the Role 1 tab page.d.Create a second role named Role2 with the Display Name Role 2 in the same wayas you created the Role1 role.Note: After saving Role2, close the Role 2 tab page.5.To ensure the two new roles are added to the Catalog, perform the following steps:e.If needed, sign in to Oracle Identity System Administration Console (URLhttps://localhost:14001/sysadmin) with the User ID xelsysadm and use the Passwordassigned to that user, for example Welcome1.a.On the Logo Here Identity System Administration page, under System Management,click Scheduler.Copyright 2013, Oracle and/or its affiliates. All rights reserved.Oracle Identity Governance 11g R2 PS1 - Skin CustomizationEffective 06/05/12Page 19 of 25CUSTOMRev 1
Note: The luck skin has changed the Oracle image logo to be the text “Logo Here”showing a visual clue to some difference in the UI appearance. This change has onlybeen done for the home page.b.On the Oracle Identity System Administration System Management Scheduler tabpage, type Catalog* in the Search Scheduled Jobs field and click the search arrow tothe right of the field. Click the Catalog Synchronization Job link that appears in thesearch result table below, as shown in the following image:c.On the Oracle Identity System Administration System Management tab page righthand panel with the Job Details: Catalog Synchronization Job page displayed, scrolldown and select the Yes option for the Process Roles parameter (in the Parameterssection), and click Apply.Copyright 2013, Oracle and/or its affiliates. All rights reserved.Oracle Identity Governance 11g R2 PS1 - Skin CustomizationEffective 06/05/12Page 20 of 25CUSTOMRev 1
Note: By default the Catalog Synchronization Job runs periodically every 15 minutesand does not include process the roles. Therefore, you apply the change to include roleinformation in the catalog and manually execute the job to ensure the catalog isupdated with the new role data.d.On the Job Details: Catalog Synchronization Job page, click Run Now.Note: You may wish to wait on this page, click Refresh and then scroll down to verifythat the job instance completed successfully by viewing the log information in the samepage.Copyright 2013, Oracle and/or its affiliates. All rights reserved.Oracle Identity Governance 11g R2 PS1 - Skin CustomizationEffective 06/05/12Page 21 of 25CUSTOMRev 1
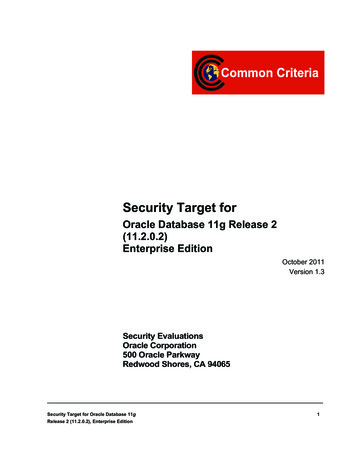
Viewing the Catalog Before Activating the Floralnc SandboxNow that you have some role data in the catalog, you search the catalog for the new roles toview the visual appearance of the Catalog page. After you view the initial visual appearance ofthe catalog you activate the Floralnc sandbox to observer possible modifications to the visualappearance of the catalog page.6.To view the catalog page before activating skin changes, perform the following steps:a.If needed, sign in to Oracle Identity Self Service application (URLhttps://localhost:14001/identity) with the User ID xelsysadm and use the Passwordassigned to that user, for example Welcome1.b.On the Oracle Identity Self Service page, under Requests click Catalog.c.On the Catalog tab page, enter R* in the search field and click the search arrow icon tothe right of the search field.d.When the Catalog Items table is populated with the Role 1 and Role 2 roles youcreated earlier, observe the visual attributes of the role entries, such as size of text andicons. Use the following image as a guide:e.Close the Catalog tab page.Note: All tab pages need to be closed before you can open the Manage Sandboxestab page to activate a sandbox.Copyright 2013, Oracle and/or its affiliates. All rights reserved.Oracle Identity Governance 11g R2 PS1 - Skin CustomizationEffective 06/05/12Page 22 of 25CUSTOMRev 1
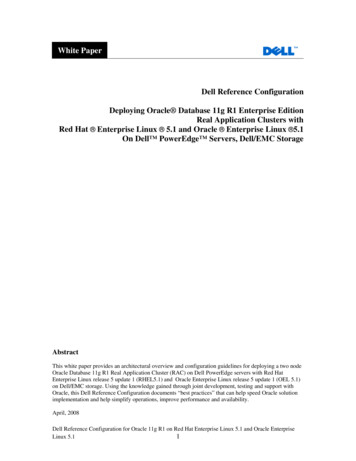
Activating the FloraInc Sandbox7. To explore the customizations that affect the catalog visual appearance in this OracleIdentity Manager tutorial, activate the FloraInc sandbox imported earlier in this tutorial, byperforming the following steps:a.While signed into the Oracle Identity Self Service console, click on the Sandboxes linkin the top right corner of the page.Note: First ensure that all other tab pages, such as the Catalog page are closed.b.On the Manage Sandboxes Available Sandboxes tab page, select the FloraIncsandbox entry in the table, and click on Activate Sandbox button in the table toolbar.Note: Initially the Active column is empty indicating that the sandbox is not active.c.On the Manage Sandboxes Available Sandboxes tab page, after the sandbox isactivated verify the green circle icon appears the Active column of the table indicatingthat the sandbox is now active. This means that the configurations changes defined inthe sandbox are temporarily applied just for this user session.Note: To verify that the sandbox configuration changes are active, you can view onechange in the title for the current page, which should now show the FloraInc logo textfollowed by the text My Access, instead of the Oracle logo followed by the text IdentitySelf Service as the heading, as shown in the following image:Copyright 2013, Oracle and/or its affiliates. All rights reserved.Oracle Identity Governance 11g R2 PS1 - Skin CustomizationEffective 06/05/12Page 23 of 25CUSTOMRev 1
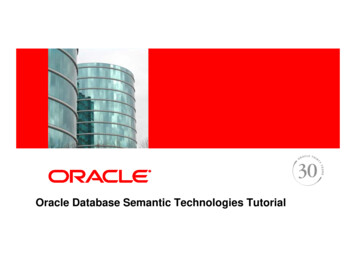
Viewing Sample Skin Customization ChangesThe activated sandbox contains some additional visual differences that affect the Catalog pageas compared to the out-of-the-box skin version.8.9.To view the visual changes of catalog items on the Catalog page, perform the followingsteps:a.On the FloraInc My Access home page, under Requests, click Catalog.b.On the Catalog page, search for some role entries (for example: R*) to search for rolesbeginning with the letter R, and observe the larger catalog item icons and otherchanges to the catalog item text appearance, as shown in the following image.Sign out of the Oracle Identity Self Service application, and close the browser window.Copyright 2013, Oracle and/or its affiliates. All rights reserved.Oracle Identity Governance 11g R2 PS1 - Skin CustomizationEffective 06/05/12Page 24 of 25CUSTOMRev 1
Note: When you sign out of the Oracle Identity Self Service application page the activesandbox is deactivated and the visual changes are no longer applied. If you are satisfiedwith the visual changes implemented after activating a sandbox you can make the changespermanent by publishing the sandbox. However, you cannot revert back after publishing asandbox unless you have saved the original configuration in another sandbox or have aback up of your environment.Finally and optionally, you can revert to the original skin used prior to applying the luck skin. Touse the default Oracle Identity Manager skin, follow the instructions in the subsection titled“Activating the Sample Skin” and change the value of the property back to fusionFx.Copyright 2013, Oracle and/or its affiliates. All rights reserved.Oracle Identity Governance 11g R2 PS1 - Skin CustomizationEffective 06/05/12Page 25 of 25CUSTOMRev 1
name of the Oracle Identity Manager server may also be different from oim_server1 depending on how you configured the Oracle Identity Manager server instance for your domain. 2) Restart the Oracle Identity Manager server using whatever technique is applicable to your environment. If using the command line tools, the execute the following