Transcription
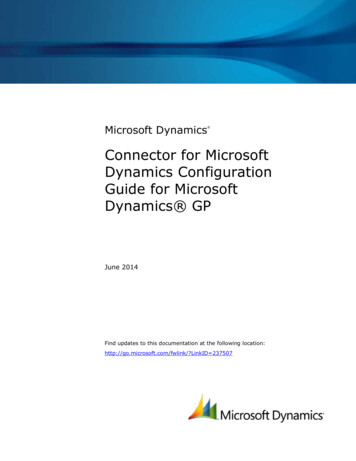
Connecting Microsoft Power BI Service toOracle Autonomous Database and On-premises DatabasePedro Torres, Alex KehUpdated July 2022This step-by-step tutorial guides configuring Microsoft Power BI service connectivity to Oracle AutonomousDatabase (ADB) and on-premises databases. Microsoft Power BI service runs in the Microsoft 365 cloud.Power BI service uses on-premises data gateway, also known as Power BI gateway, to connect the PowerBI service to Oracle databases. The gateway is hosted on Windows that can either be on-premises or in acloud virtual machine, such as in Oracle Cloud Infrastructure or Azure.These instructions use 64-bit unmanaged Oracle Data Provider for .NET (ODP.NET) for data access, asrequired by Power BI service and on-premises gateway. They work for on-premises database and bothdedicated and shared infrastructure ADB. The instructions for on-premises databases setup also apply toOracle Database Cloud Services and Oracle Exadata Cloud Service.OverviewThese are the general steps to setup Oracle database connectivity with Microsoft Power BI service: Provision Oracle database or ADBDownload database credentials to Windows clientCreate Power BI service in Microsoft 365 cloudInstall and configure Power BI gateway on Windows clientInstall and configure ODP.NET on Windows clientValidate Power BI service connects to Oracle database or ADBPrerequisitesThis document assumes that an on-premises Oracle database or ADB, such as Autonomous Data Warehouse(ADW) or Autonomous Transaction Processing (ATP), or Autonomous JSON Database (AJD) has beenprovisioned and Power BI service has also been provisioned on a Windows machine.Connecting to Oracle databases on-premises and ADB are similar. This tutorial will note the differencesbetween them when setting up Power BI service connectivity.If using ADB, you will need access to the Oracle Cloud Console that has access to your ADB instance. Below is ascreenshot from the cloud console to a database named ADWPTR.1
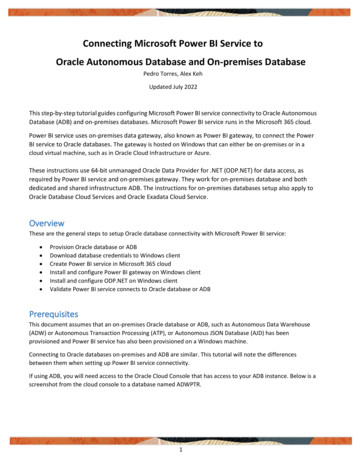
Power BI service and on-premises gateway uses 64-bit unmanaged ODP.NET (Oracle.DataAccess.Client) forOracle database connectivity. This tutorial was validated using ODP.NET, Unmanaged Driver, 19.15.Installation and Setup Steps1. For ADB, go to the cloud console screen for the ADB instance you will connect to. Start your ADB instance.Click on the “DB Connection” button. Download the corresponding ADB credentials zip file. Move thecredential files to the Windows machine that hosts the gateway. These credential files (cwallet.sso,tnsnames.ora, and sqlnet.ora) will be used to connect the gateway and Power BI Desktop to ADB.For on-premises databases, the credential files required depend on your database server setup. Typically,ODP.NET requires tnsnames.ora and sqlnet.ora to be accessible to connect to the database server. Thesefiles can be copied from another Oracle database client that connects to the target database server.Alternatively, an Easy Connect or Easy Connect Plus string can be used in lieu of credential files for onpremises databases. For example, the Power BI gateway “Server” configuration setting can accept an EasyConnect string with the following format: “ DB hostname : Port / Service Name ”. If you use EasyConnect (Plus), you can skip the credential file downloading and setup steps in this tutorial.2. Place the Oracle ADB or DB credentials on the Windows machine into a directory (e.g. C:\data\wallet). Thismachine is where Power BI gateway is or will be installed on. It can be located on-premises or in the cloud,such as on an Oracle Cloud Infrastructure virtual machine, as long as it has network access to Power BIcloud service.2
For ADB, the credentials have been downloaded into a zip file that you will unzip into this directory. Notethe directory location for use in upcoming steps.3. ADB onlyIf you are connecting to one ADB instance, open the sqlnet.ora configuration file in the credentialsdirectory in a text editor. You will see the following line:WALLET LOCATION (SOURCE (METHOD file) (METHOD DATA (DIRECTORY "?/network/admin")))Set the DIRECTORY value to the ADB wallet directory location, such as:WALLET LOCATION (SOURCE (METHOD file) (METHOD DATA (DIRECTORY C:\DATA\WALLET\)))If you are connecting to multiple ADBs from the same machine with a different wallet for each, add theparameter MY WALLET DIRECTORY to each connect descriptor’s specific wallet location in tnsnames.ora.For example:adwptr high (description (retry count 20)(retry delay 3)(address (protocol tcps)(port 1522)(host host name )) (connect data (service name service name ))(security (ssl server cert dn "CN adwc.uscom-east-1.oraclecloud.com, OU Oracle BMCS US, O OracleCorporation, L Redwood City, ST California, C US")(MY WALLET DIRECTORY C:\DATA\WALLET\ADWPTR)))adwbi high (description (retry count 20)(retry delay 3)(address (protocol tcps)(port 1522)3
(host host name ))(connect data (service name service name ))(security (ssl server cert dn "CN adwc.uscom-east-1.oraclecloud.com, OU Oracle BMCS US, O OracleCorporation,L Redwood City, ST California, C US")(MY WALLET DIRECTORY C:\DATA\WALLET\ADWBI)))After making your changes, save the file.4. Since Power BI Gateway is a 64-bit application, we use 64-bit unmanaged ODP.NET to perform databaseaccess. 64-bit unmanaged ODP.NET download is part of the Oracle Data Access Components (ODAC),which can be downloaded for free from the Oracle website.From the XCopy ODAC Packages section on the bottom half of the ODAC Download page, click on the“ODAC 19c (32-bit and 64-bit)” link. Do not use ODAC 21c versions currently.Log on to the Oracle website. In the “Platforms” drop down, select 64-bit Windows, then download 64-bitODAC.5. Now, we install ODP.NET. Unzip the download contents to a staging directory (e.g., C:\xcopy64-install).4
6. Open a Windows command prompt *in administrator mode*. Navigate to the ODAC staging directory,then execute the following command to install and configure ODP.NET:install.bat component name oracle home path oracle home name install dependents machine wide configuration tns admin location To configure ODP.NET for Power BI gateway, use the following values: component name odp.net4 oracle home name ODAC install directory, such as C:\oracle oracle home name unique name for the ORACLE HOME, such as myhome install dependents true machine wide configuration true tns admin location Oracle database credential files directory, such as C:\data\walletA sample execution of install.bat with these arguments looks like:install.bat odp.net4 c:\oracle myhome true true c:\data\wallet7. If you are using tnsnames.ora file with your Oracle database, open the tnsnames.ora file to see which ADBor database net service names you can connect to. Below you see three different ones: “adwptr high”,“adwptr low”, and “adwptr medium”. You will use one of these values for the Power BI gateway “Server”name when configuring your Oracle connection.8. Sign on to the Power BI website with your Microsoft 365 account.5
9. We now download the Power BI gateway to the Windows machine and install it. You can skip steps 9 and10 if you already have created and configured the Power BI gateway.From the Power BI web console, click the “ ” drop down menu in the upper right “Download” “DataGateway”.A web page will open. Click “Download standard mode” to download the gateway install.6
Run “GatewayInstall.exe” file after it downloads. Enter the install directory location and accept the terms.10. We will now complete registration of the Power BI gateway. Start by entering the email address of yourPower BI service account. You will be asked to sign in to register the gateway with your Power BI account.7
Choose to register a new gateway on the computer. Click “Next”.Name the gateway (e.g. Gateway), provide the recovery key, and confirm the key. Click “Configure”. Wewill use the gateway name later when we create a Power BI Data Source.8
The gateway should now be online and ready to use.9
11. Go back to the Power BI website. Switch to a Power BI Premium or Power BI Pro workspace. Click “New” “Dataflow” “Add new tables”12. Select “Oracle database”.10
13. Provide the entries to connect to your data source: Server Enter the database net service name (e.g. “adwptr high”, “adwptr low”) or Easy Connect(Plus) configuration Data gateway Power BI gateway name (e.g. gateway) Authentication kind Basic Username and Password Your ADB or on-premises database user credentialsClick the “Next” button.14. Congratulations! Your Power BI service instance is now connected to Oracle database. You should now beable to view the schema objects available to the Oracle user. In the tree control, select the schema objectsneeded for your Microsoft Power BI application and load the data.11
Performance Tuning for Large Data RetrievalsTypically, BI and ETL applications retrieve large data amounts from a source database for further processing. Tospeed up Oracle data retrieval via Power BI service, the ODP.NET FetchSize can be increased from its default 128Kvalue (131,072 bytes) to as large as int.MaxValue. The FetchSize determines the amount of data ODP.NET fetchesinto its internal cache upon each database round trip. It’s possible to improve performance by an order ofmagnitude by significantly increasing FetchSize when retrieving large result sets.Unmanaged ODP.NET InstructionsTo increase the 64-bit unmanaged ODP.NET’s FetchSize, launch the Windows Registry editor (regedit.exe) and go tothe following Registry key:HKEY LOCAL MACHINE\SOFTWARE\Oracle\ODP.NET\4.122.19.1Add the String Value "FetchSize" and set it to a value larger than the default (131072), such as 4194304 (4 MB).Restart Power BI gateway and run your queries with the new setting.12
This step-by-step tutorial guides configuring Microsoft Power BI service connectivity to Oracle Autonomous Database (ADB) and on-premises databases. Microsoft Power BI service runs in the Microsoft 365 cloud. Power BI service uses on-premises data gateway, also known as Power BI gateway, to connect the Power BI service to Oracle databases.