Transcription
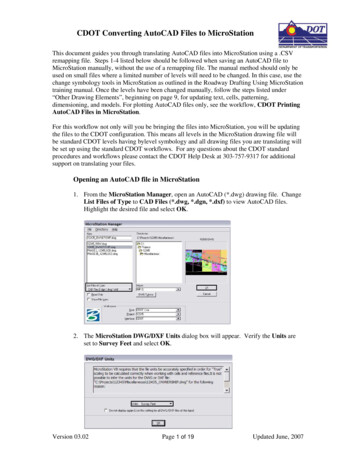
CDOT Converting AutoCAD Files to MicroStationThis document guides you through translating AutoCAD files into MicroStation using a .CSVremapping file. Steps 1-4 listed below should be followed when saving an AutoCAD file toMicroStation manually, without the use of a remapping file. The manual method should only beused on small files where a limited number of levels will need to be changed. In this case, use thechange symbology tools in MicroStation as outlined in the Roadway Drafting Using MicroStationtraining manual. Once the levels have been changed manually, follow the steps listed under“Other Drawing Elements”, beginning on page 9, for updating text, cells, patterning,dimensioning, and models. For plotting AutoCAD files only, see the workflow, CDOT PrintingAutoCAD Files in MicroStation.For this workflow not only will you be bringing the files into MicroStation, you will be updatingthe files to the CDOT configuration. This means all levels in the MicroStation drawing file willbe standard CDOT levels having bylevel symbology and all drawing files you are translating willbe set up using the standard CDOT workflows. For any questions about the CDOT standardprocedures and workflows please contact the CDOT Help Desk at 303-757-9317 for additionalsupport on translating your files.Opening an AutoCAD file in MicroStation1. From the MicroStation Manager, open an AutoCAD (*.dwg) drawing file. ChangeList Files of Type to CAD Files (*.dwg, *.dgn, *.dxf) to view AutoCAD files.Highlight the desired file and select OK.2. The MicroStation DWG/DXF Units dialog box will appear. Verify the Units areset to Survey Feet and select OK.Version 03.02Page 1 of 19Updated June, 2007
CDOT Converting AutoCAD File to MicroStation.pdf3. Select File Save As.4. Change the Select Format to Save to MicroStation V8 DGN Files (*.dgn). andbrowse to the appropriate folder under the Projects directory. The file will beautomatically saved with the same name as the AutoCAD file with a differentextension. You can rename the file at this time if you choose to do so. SelectOptions.Note: Model files are saved to the specialty group’s Reference Files folder. Sheetfiles are saved under the specialty group’s Drawings folder.Version 03.02Page 2 of 19Updated June, 2007
CDOT Converting AutoCAD File to MicroStation.pdfEditing the CSV file5. In the Save As V8 Option dialog box, open the template CSV file that is createdwhen you run the CDOT – Create Project Directory application. The CSV filemaps all of the previous AutoCAD layers to the standard CDOT MicroStation levels.Select the Browse for CSV remapping file icon to edit the CSV file.6. Browse to C:/Projects/12345/Miscellaneous. Select the file 12345.csv and selectOK.Version 03.02Page 3 of 19Updated June, 2007
CDOT Converting AutoCAD File to MicroStation.pdf7. The CSV File field will be populated. In the Save As V8 Options dialog box, selectthe Edit CSV remapping file icon.8. Microsoft Excel will activate. If the Security Warning dialog box appears, selectEnable Macros.Version 03.02Page 4 of 19Updated June, 2007
CDOT Converting AutoCAD File to MicroStation.pdf9. In Excel, the Level tab will be active. Select theLevel cell.Version 03.02Page 5 of 19icon that is embedded in theUpdated June, 2007
CDOT Converting AutoCAD File to MicroStation.pdf10. The fields under Level will be populated with the layers that are defined in theAutoCAD file.Version 03.02Page 6 of 19Updated June, 2007
CDOT Converting AutoCAD File to MicroStation.pdf11. In order to remap to the standard CDOT levels, you will need to manually populatethe V8OutputLevel fields. Use the standard CDOT levels that are located under theAutoCAD layers in the Level column to copy/paste to the V8OutputLevel column.When this is complete, Save the CSV file in Excel and Exit the Excel applicationwindow.Note: Not all levels need to be populated. Blank entries in V8OutputLevel columnwill be ignored when processed and the AutoCAD level (if occupied) will be broughtinto the MicroStation file. Be aware that some of the MicroStation levels are not inalphabetical order. And take care to search the entire list for the desired level.Layers generated in AutoCAD that will be recreated as cells in MicroStation such asthe Border, North Arrow, and Bar Scales do not need to be remapped because theywill automatically come in on the correct levels when the standard CDOT workflowsare followed. Also, the levels used for creating AutoCAD viewports do not need tobe remapped. Items on the Defpoints layer should be remapped to the levelDRAFT INFO No-Plot.Version 03.02Page 7 of 19Updated June, 2007
CDOT Converting AutoCAD File to MicroStation.pdfThe line styles, color, and weight of each level has already been taken into accountthrough the CSV file. The translation variables in the CSV file have been set toremap all levels to bylevel symbology.12. In the Save As V8 Options dialog, select the Filter tab. Select Models.13. From the Select Models dialog, you can isolate the Sheet Layouts from the Modelfile. Sheet Layouts are carried over from the AutoCAD Paper Space functionality.Sheet Layouts are not used in the standard CDOT workflow. However, they maycontain information that will need to be copied to the model file or to the sheet file.If this is the case, the information will also need to be translated to CDOT’s standardsusing the same procedure outlined in this workflow. The CSV file will only run forthe file selected. Highlight the Model file and select OK.Version 03.02Page 8 of 19Updated June, 2007
CDOT Converting AutoCAD File to MicroStation.pdf14. Check on the fields for Apply Level Mapping, Apply Line Style Mapping, ApplyColor Mapping, and Apply Weight Mapping. Select OK.15. Select OK in the Save As dialog box. The CSV file will execute and the AutoCADdrawing file will be converted to a MicroStation file.The file that is now open in MicroStation is the converted file. Running the CSV filechanged the levels in the Model file to the CDOT Standard levels with bylevelsymbology.16. From the MicroStation menu, selected Settings Color Table after the MicroStationdrawing file has been created.Version 03.02Page 9 of 19Updated June, 2007
CDOT Converting AutoCAD File to MicroStation.pdf17. Select File Default.18. In the Color Table dialog, select Attach.19. Verify that the conversion was successful. Select the Level Display icon from theMicroStation Primary toolbar.20. In the Level Display window, Data on the Used tab to sort the levels by those thathave elements. (Note: levels with elements will have a dot in this column. If no usedelements are visible, Data on the tab again. If the triangle on the tab is pointingdown, the used levels are at the top of the window.)Version 03.02Page 10 of 19Updated June, 2007
CDOT Converting AutoCAD File to MicroStation.pdfOther Drawing Elements21. Other updates will need to be made to the files so all drawing elements and sheetsetups conform to the CDOT standards.22. All of the Sheet Layouts will need to be recreated using CDOT standard workflows.This means there can only be one Model for each MicroStation file. All of the sheetborders will need to be placed in their own separate file, called a Sheet File. Then,the Model file will be referenced to the Sheet File. Please refer to the documentsCDOT Sheet File Creation, CDOT Sheet File Creation Multiple Scales, and CDOTCreating Multiple Plan Sheets for additional information about this procedure. Theyare all accessed from the Windows Start menu under All Programs CDOT CADD Information Workflows.23. Recreate all Dimensions and leader lines (placed by AutoCAD) using the standardCDOT dimension styles.24. Erase all hatch patterns generated in AutoCAD recreate using the MicroStationPatterns tools, shown below, or using the CDOT Menus.25. All blocks generated in AutoCAD will need to be replaced with the standard CDOTMicroStation Cells. Cells may be placed using the MicroStation tools or the CDOTmenus.Version 03.02Page 11 of 19Updated June, 2007
CDOT Converting AutoCAD File to MicroStation.pdfUpdating Text26. Text created in AutoCAD with multiple text strings can be converted to a text node inMicroStation. Some multiple text strings created in AutoCAD will be translated intoa text node when the file is converted.To verify this, select the Element Information iconunder the General Tab. Text Nodes will display27. If not, select all text that will be combined into a text node using the ElementSelection tool. While in the Element Selection command, hold down the Ctrl key toselect individual text strings. Highlight them in the order they are to be placed intothe text node. Do not Window around the multiple lines of text because the textstrings may not merge in the desired order.Version 03.02Page 12 of 19Updated June, 2007
CDOT Converting AutoCAD File to MicroStation.pdf28. Select the TXT to Node utility from the CDOT Menus under Add On’s.29. Select the TXT to Node icon30. The following dialog box will appear. The selected text will be anchored to thecursor.Version 03.02Page 13 of 19Updated June, 2007
CDOT Converting AutoCAD File to MicroStation.pdf31. Check on Delete Original, set the Justification, and leave the Line Spacing set to1.00. Place the text in the desired location.Note: If the Justification is set to anything other than Left Bottom, double click onthe text after it is placed. The text will be brought into the Text Editor dialog. Clickagain on the screen to place the text to its proper location and close the dialog.32. Select all text and key-in annotationscale add. The text will now recognize theMicroStation Annotation Scale Factor.33. Update the text style by selecting Change Text Attributes. Select the desiredCDOT Text Style and select the text placed previously in AutoCAD.34. All fractions placed in AutoCAD will need to be re-typed in MicroStation so theformat conforms to CDOT standards.Version 03.02Page 14 of 19Updated June, 2007
CDOT Converting AutoCAD File to MicroStation.pdfCompressing the Model File35. After all changes and updates have been made to update the drawing intoMicroStation using CDOT standards and standard workflows, select File Compress Design. This will remove all AutoCAD information stored in the drawingbuffer. This will ensure that AutoCAD data does not get repopulated into thedrawing.36. Under Compress Options, verify that all options are checked ON.Version 03.02Page 15 of 19Updated June, 2007
CDOT Converting AutoCAD File to MicroStation.pdfBatch Conversion Of AutoCAD FilesEntire directories can be processed at one time using the Batch Converter. Using thisoption, a large number of files can be processed quickly. However, because only one ofthe files can be used to create the csv file (the open file), many AutoCAD levels may betransferred to the MicroStation files. As the user finds MicroStation files with AutoCADlevels, those files can be used to create a new csv file and the Batch Converter can be rerun on all the files. By repeating this process all of the AutoCAD levels will be graduallyeliminated.The steps below describe how to set up and run the Batch Converter.37. Open one of the AutoCAD drawings to be converted with MicroStation as describedin steps 1 and 2 above.38. Select Utilities Batch Converter from the MicroStation menu. The BatchConverter dialog box is displayed.39. Select Edit Add Files from the menu.Version 03.02Page 16 of 19Updated June, 2007
CDOT Converting AutoCAD File to MicroStation.pdf40. From the Select Files and Directories to Convert dialog box, highlight the directorycontaining the files to be converted on the right side of the dialog box. Select the Addicon to add the directory to the Selected Files list at the bottom of the dialog box.Individual files can be selected from the list on the left side of the dialog box. Besure to select the Add button after each Directory or group of files from a directory ishighlighted.41. After all of the desired files and directories have been added, select the Done icon.The Select Files and Directories to Convert is dismissed.Version 03.02Page 17 of 19Updated June, 2007
CDOT Converting AutoCAD File to MicroStation.pdf42. Back on the Batch Converter dialog box, select Edit V8 Save Options from themenu.43. Follow steps 5 through 18 described above to edit the csv file that will be used toremap the levels of the selected files.44. From the Batch Converter dialog box, select the Process Batch Convert Job icon.Version 03.02Page 18 of 19Updated June, 2007
CDOT Converting AutoCAD File to MicroStation.pdf45. The Files To Convert dialog box is displayed. From this dialog, select the Converticon.46. When the processing is complete, select the Done icon to dismiss the dialog box.This will convert all of the levels in the active file (as specified in the csv file) andconvert the same levels in the other specified files.It is possible that the other files processed will have other AutoCAD levels. When theseare discovered, repeat this conversion process on the previously converted MicroStationfiles. This will clean up the file that is currently being used and update the levels in otherspecified files.Version 03.02Page 19 of 19Updated June, 2007
CDOT Converting AutoCAD File to MicroStation.pdf 11. In order to remap to the standard CDOT levels, you will need to manually populate the V8OutputLevel fields. Use the standard CDOT levels that are located under the AutoCAD layers in the Level column to copy/paste to the V8OutputLevel column.

![AutoCAD Free [Updated] 2022 - Só EPI não basta](/img/61/autocad-16.jpg)