Transcription
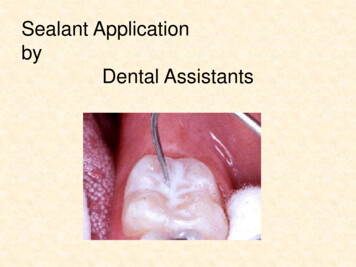
Sealant ApplicationbyDental Assistants
Course ObjectivesAfter the course, you will be able to, Adhere to the rules and regulations as they applyto dental assistants placing sealants, Identify indications and contraindications for theplacement of sealants, Recognize anatomic landmarks on teeth thatinfluence sealant placement, Follow safe practice guidelines when applyingsealants, Determine the armamentarium needed to placesealants,
Compare the various types of sealant material, Educate patients and/or parents with regards tosealants, State the negative aspects of acid etching, Compare the various methods of moisture controlnecessary when applying sealants, Prepare a tooth for a sealant including isolationand acid etching, Seal a tooth following a predetermined regimen, Self evaluate the success of sealant placement.
Rules and Regulations In Tennessee, only assistants who areregistered can apply sealants after taking aBoard approved course, Assistants must receive certification by thestate before they can begin applyingsealants, A dentist must check the patient before andafter a sealant is placed.
Teeth develop from “lobes”(usually 4, sometimes 5)A fissure is formed wheretwo lobes come togetherTooth AnatomyA “pit” is formed whereTwo fissures cross
CuspMesialMarginal RidgeTriangular RidgeDistalMarginal Ridge
Permanent first molars are the top priority for sealing!!PitsLingualGrooveMandibular 1st molarMaxillary 1st molar
Other pits to seal
What is a Sealant? A manmade “resin”, also known as a plastic Most common resin is Bis – GMA, same resinused in composite restorations Sealants were developed in 1960’s by Dr.Bounacore Numerous studies have shown theireffectiveness, 65% reduction in caries after 5years. Sealant material undergoes “polymerization” tobecome hard.
What is polymerization? Sealant material begins assingle molecules so it is softand movable (monomer). A “catalyst” is added whichmakes the single moleculesjoin together to form chains(polymer), The “catalyst” is either achemical or light. The chains intertwine makingthe sealant hard,
Light cure vs Self CureLight activated catalyst(light cure)Chemical catalyst(self cure)
Types of Curing Lights Halogen – curing time approx. 20 seconds LED – curing time varies Xenon, plasma arc – less than 5 seconds Laser – curing time varies Age, contamination can increase curingtime If in doubt, cure longer
What is “Etchant”? Originally 34 – 50% Phosphoric acidin liquid or gel form It creates “micropores” that maketooth structure appear “chalky white”
Micropores from EtchingSealant flows into micropores providing retentionIf micropores not contaminated with saliva!!
Priming/drying agents Primers are “low viscosity”,“hydrophilic” agents apply before the sealantmaterial to drive water frommicropores Consider using if havingadherence problemsUltradent “Primadry”
Etchant/bonding agents Etchant/bonding agents use acidic Bis-GMAmonomers to create micropores Eliminates separate etching step Acidic monomers occupy microporesblocking out moisture Early research says adhesion betterespecially in the presence of moisture
Etchant/bonding agents
Self Etching light cured sealant
Filled vs Unfilled Unfilled sealants are 100%Bis GMA, easily abraded Unfilled sealants are clear,hard to detect, Tinted unfilled sealants aremore easily detected Unfilled sealants self adjustif high
Filled vs Unfilled Filled sealants containquartz, feldspar particles tomake tougher, wear better Filled sealants are opaque,tooth colored The more filler, the moreadjustment necessary ifhigh
Fluoride in Sealants Fluoride placed in sealants to remineralizeincipient caries if present, No studies prove fluoride in sealants iseffective.
Color Change Some sealants changecolor when polymerized Operator knows whenpolymerization iscomplete Operator can see wheresealant is placed
Popular Sealant Brands Clinpro (3M) Helioseal (Vivadent) Delton (Dentsply) Embrace (Pulpdent) Guardian (Kerr) Prismashield / Fluroshield(Dentsply/Caulk) Ultraseal (Ultradent) others
Other Materials Triage (Fuji) Glass Ionomer cement Retention a problem
“To seal or not to seal, that is the question”When to Seal – Absolutely Pits and fissures are deep and “sticky” Patient is caries prone Patient is cooperative
“To seal or not to seal, that is the question”When to Seal – Maybe A “suspicious” or incipient lesionexists, The tooth is partially erupted butcan be kept dry, The patient is susceptible tocaries, regardless of age(xerostomia, deciduous teeth) Retention not quite as good withdeciduous teeth
“To seal or not to seal, that is the question”Don’t Seal if Tooth has obvious occlusal or proximaldecay and needs a restoration, Tooth has a large occlusal filling already, Moisture contamination is likely because ofpatient behavior, partial eruption, etc
Standard Application Technique1.Prepare the tooth2.Isolate the tooth3.Apply etchant4.Rinse and dry the tooth5.Apply sealant and cure6.Floss / Check occlusion7.Educate patient
1. Prepare The Tooth Check pits and fissures fordebris with explorer Clean as necessary with,–Prophy cup and pumice(coronal polishing DA’s only)–Air abrasive system (dentistonly)–Dry toothbrush Rinse with water severalseconds
2. Isolate the Toothand dry itRubber DamGarmer cotton roll holderDri-aid (bibulous pad)
3. Etch the tooth Apply etchant asdirected, Apply to those areaswhere sealant is to beplaced Be careful of tissuecontact Do not use excessiveforce on etchantsyringe,
4. Rinse and Dry The Tooth Place evacuator adjacent to tooth Rinse with water until etchremoved Check for “chalky” appearance,reapply etchant if necessary Place new cotton rolls or dri-aidas necessary Dry tooth and keep dry Use a primer/drying agent asnecessary
Etchant/bonding agent TechniqueSKIP STEPS 3 AND 4Squeeze Red dotFold red dot over yellow dot,Squeeze both dots
Remove red handled brushfrom packageVigorously scrub tooth surfaceFor 15 seconds then air dry
5. Apply Sealant Material Apply SMALL amount ofsealant in center of fissure Drag material into fissureswith applicator Cure with light followinglight manufacturer’sdirections
5. Apply sealant material Check for voids, bubbles, reapplymaterial as needed Check for adherence, try to remove If loose, remove sealant and begin at step2 If bubbles or a void exists, apply moresealant material and cure Floss contacts to check for excessivematerial
6. Check occlusion Check occlusion witharticulating paper, Unfilled material willadjustment naturally Filled material mayrequire adjustment bythe dentist
7. Educate the Patient Sealants should be evaluated every sixmonths, Patient should notify office immediatelyif sealant appears dislodged, If unfilled sealant feels high, informpatient it will feel normal the next day.
Safe Practice Guidelines Follow standard infection controlprecautions Dispose of unit dosed material after use. Avoid tissue contact with sealant materialand etchant (allergic response to sealantmaterial and/or tissue burn with acid apossibility)
Why do Sealants Fail? Improper etching Tooth not properly cleaned There are no pits and fissures The tooth was not dry when sealed
The End
Sealant Application by Dental Assistants. Course Objectives After the course, you will be able to, . Assistants must receive certification by the state before they can begin applying . Teeth develop from "lobes" (usually 4, sometimes 5) A fissure is formed where two lobes come together A "pit" is formed where Two fissures cross .
