Transcription
2019WorkInTexas – MyReports Work AidWORKINTEXAS.COM MY REPORTS (AND AD HOC REPORTS) – DESK AIDTEXAS WORKFORCE COMMISSION
Table of ContentsOverview . 2Sections of the My Reports Main Page . 3Section 1: Report Filters . 3Section 2: My Reports . 3Section 3: Ad Hoc Queries. 4Section 4: Free Form SQL Queries. 5Creating My Reports . 7Creating a Private (Non-Shared) My Report . 7Creating a Scheduled Report . 10Creating a Shared Report . 15Creating an Ad Hoc Report Using the Wizard . 20Using the Data Dictionary . 20Creating a Single Table Ad Hoc Query . 25Creating a Multi-Table Ad Hoc Query . 33Saving a Query to a File . 43Saving a Query to My Reports . 48Creating a Free Form SQL Query . 50Tips on Entry of the Query . 57Additional Information . 611
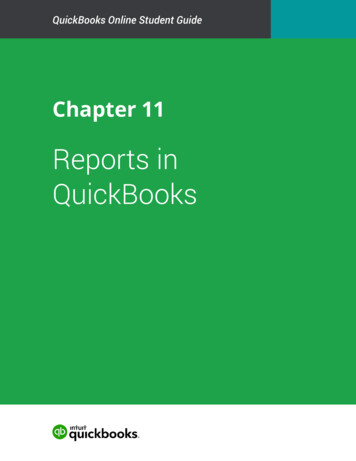
WorkInTexasMy Reports Work AidOverviewThis document is intended to be a desk aid to assist Staff users of theWorkInTexas system to successfully navigate the My Reports area of thesystem. This include the creation, management and execution of queries andsaved reports. The “My Reports” page can be located by using the leftnavigation in WorkInTexas and using the following path: Reports MyReports. This document is focused primarily on the functions that areavailable on and from this page.Figure 1 - Menu Path to My Reports in WorkInTexas.com2
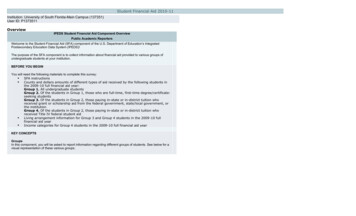
Sections of the My Reports Main PageSection 1: Report FiltersThe reports that are presented on the My Reports page can be filtered downto a specific Region and/or Office. However, if you are a staff user that is notassigned to a Board, such as TWC State Staff, there is not a filter to viewonly State Staff created queries.Figure 2 - Filters on My Reports PageSection 2: My ReportsThis section of the My Reports page displays saved, scheduled, and sharedreports that were created by a user from either the Summary Reports orDetailed Reports areas of the system. After setting the filters for a SummaryReport or Detailed Report, prior to report execution, the user has an optionto save the report and filters to be run again in the future. During the saveprocess, the user will give the report a name and will decide if they want toshare the report with other staff (all staff).3
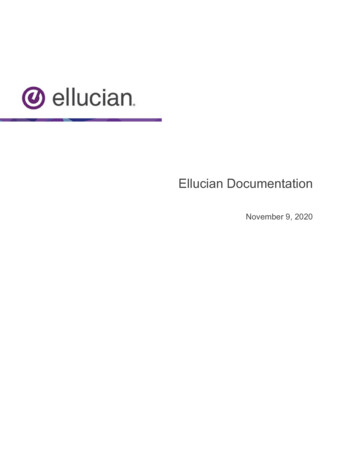
The subsections of the My Reports area are “My Reports”, “Scheduled MyReports”, and “Shared Reports”. Each of these subsections is describedbelow.Figure 3 - My Reports, Scheduled My Reports, and Shared Reports Sectionson My Reports PageSection 3: Ad Hoc QueriesThe next groups of subsections on the “My Reports” main page are the AdHoc Query areas. They include: “My Ad Hoc Queries” and “Shared Ad HocQueries”. The saved reports in these two sections were created and savedfrom the Ad Hoc Query Tool.The “My Ad Hoc Queries” subsection includes reports that the current usersaved from the Ad Hoc Query Tool and left as private reports by notselecting the “Share” checkbox during report save. These reports are visibleonly for the user that created them and only the creator of the report candelete these queries.4
The “Shared Ad Hoc Queries” subsection includes reports from any staff thatwere saved from the Ad Hoc Query Tool and were marked as shared reportsby selecting the “Share” checkbox during report save. These reports areavailable for anyone to execute. These reports can also be deleted by anystaff user. If the user has a report that they want to ensure does not getdeleted, but also wants to share the report with others, the recommendedapproach is to save the report once under “My Ad Hoc Queries” as a privatereport and then save it again under “Shared Ad Hoc Queries” so others canalso make use of the report.Figure 4 - My Ad-Hoc Queries and Shared Ad-Hoc Queries Sections on MyReports PageSection 4: Free Form SQL QueriesThe last set of subsections on the “My Reports” page are the “My Free FormSQL” and “Shared Free Form SQL” subsections. These queries were createdand saved from the Free Form SQL Tool. Similar to the Ad Hoc Queries, anyFree Form Queries that are shared can be viewed, used, and deleted by5
other staff users. If the user would like to ensure that a query doesn’t getdeleted, the query should be saved as a private query under “My Free FormSQL”.Figure 5 - My Free Form SQL and Shared Free Form SQL Sections on MyReports Page6
Creating My ReportsCreating a Private (Non-Shared) My ReportStep 1: Select a Detailed or Summary ReportNavigate to either Summary or Detailed Reports by using the following leftmenu path: Reports My Reports and select either “Summary Reports” or“Detailed Reports”.Figure 6 - Standard Reports using Summary Reports and Detailed ReportsLinksStep 2: Set Desired Filters for the Selected ReportOnce a report has been selected in the step above, the user will bepresented with a page to set filters for the selected report. Set any filtersthat are desired for the report before proceeding to the next step. Eachreport has different filters available for selection.7
Step 3: Select “Save to My Reports” Prior to Executing the ReportBefore selecting the “Finish” button to execute the report with the filters thatwere selected, the user can select the “Save Report” link at the bottom ofthe filters page to start the process of saving the report.Figure 7 - Standard Report Filters Example Page with Save to My ReportsLinkNOTE: It is generally worth the extra steps to execute the report once priorto saving to validate that the filters produced the expected output for the8
report. If the user chooses to validate the report prior to saving the query,they will need to start over and recreate the filters again after they rerun thereport.Step 4: Create Report Name and Set Sharing Preference to not SharedOnce the user selects the “Save Report” link, a popup window will bedisplayed that allows the user to create a title for the report and selectsharing options. Because we want to set this report as a scheduled report,we will select the “Do Not Share:” radio button. Shared Reports do not havea link to set them as scheduled.Figure 8 - Save Report Popup WindowStep 5: View New Report in “My Reports” AreaAfter creating a title and selecting the “OK” button, the user will be takenback to the “My Reports” main page. Look at the “My Reports” section belowthe report filters and the new Report will show up with links available thatwill allow the user to update report filters, display the report, edit the report,or delete the report.9
Figure 9 - Locating New Saved Report on My Reports PageCreating a Scheduled ReportOnce a report has been saved in the “My Reports” subsection of the “MyReports” page, it is available to be scheduled to run in the future as a onetime or recurring report. Once a schedule has been set up for this report, the“Scheduled My Reports” widget on the Staff Dashboard page will show thisreport and the status of the report execution.Step 1: Select a Report from the “My Reports” (private) Query Listing toScheduleIn the “My Reports” subsection of the “My Reports” page, select a report toschedule by selecting the “Schedule” link for the report.10
Figure 10 - Scheduling a Report to Run Automatically in My Reports Sectionof My Reports PageStep 2: Schedule the ReportAfter the schedule link is selected, the system will provide a page that allowsthe user to set several scheduling preferences.11
Figure 11 – Setup and Configuration Criteria for Scheduling a Report to RunAutomaticallySetting 1: Email Address to Send Report To-Email Address(es) for the report to be sent toSetting 2: Frequency to Run the Report-One Time (next day)12
-Weekly (can multi-select Monday, Tuesday, Wednesday, Thursday,Friday)-Monthly (date-picker to pick day of the month that the report will runon)Setting 3: Duration that the Report Will be Generated-No End Date (until the schedule is deleted manually)-End Date (date picker to select last date that the report will beautomatically generated)Setting 4: Format of the Report-PDF-MS ExcelSetting 5: Report Date-Today-Last 2 days-Last 3 days-Last 4 days-Last 5 days-Last 6 days-Last 7 days-Last 10 days-Last 20 days-Last 30 days-Last 90 day-Last 180 days-Last 12 monthsAfter selecting the desired filters for the scheduling of the report, select the“Save” button at the bottom of the screen.13
Step 3: Review the Schedule Report on the My Reports PageAfter selecting the Save button on the filters page, the system will take theuser back to the “My Reports” main page. On that page, scroll down to the“Scheduled Reports” subsection and the schedule for the report will bedisplayed. Options for the report include view and delete.Figure 12 - Locating the New Scheduled Report on My Reports PageStep 4: View the Scheduled Report from the Staff DashboardNavigate to the Staff Dashboard by selecting the “My Dashboard” link on thetop horizontal menu bar in WorkInTexas. If the top menu bar is notdisplayed, you can get to the Staff Dashboard page from the left menu usingthe following path: My Staff Workspace My Staff Dashboard.14
Figure 13 - Finding the New Scheduled Report on the Staff Dashboard Pagein the Scheduled Reports WidgetCreating a Shared ReportStep 1: Select a Detailed or Summary ReportNavigate to either Summary or Detailed Reports by using the following leftmenu path: Reports My Reports and select either “Summary Reports” or“Detailed Reports”.15
Figure 14 - Creating a Shared Report using Standard Reports: SummaryReports and Detailed ReportsStep 2: Set Desired Filters for the Selected ReportOnce a report has been selected in the step above, the user will bepresented with a page to set filters for the selected report. Set any filtersthat are desired for the report before proceeding to the next step. Eachreport has different filters available.Step 3: Select “Save Report” Prior to Executing the ReportBefore selecting the “Finish” button to execute the report with the filters thatwere selected, the user can select the “Save Report” link at the bottom ofthe filters page to start the process of saving the report.NOTE: It is generally worth the extra steps to execute the report once priorto saving to validate that the filters produced the expected output for thereport. If the user chooses to validate the report prior to saving the query,they will need to start over and recreate the filters again after they rerun thereport.16
Figure 15 - Saving a Report Link on Report Criteria Entry PageStep 4: Create Report Name and Set Sharing Preference to SharedOnce the user selects the “Save Report” link, a popup window will bedisplayed that allows the user to create a title for the report and selectsharing options. Select the radio button titled “Share with everyone that hasaccess to this report:” in order to allow other staff users to use this report.Please note that you may want to also create this report separately as aprivate report because other staff users could inadvertently delete the17
shared report that you created. Other users do not see and cannot deleteyour private reports.Figure 16 - Selecting "Share with everyone that has access to this report"during Report SaveStep 5: View New Report in “My Shared Reports” AreaAfter creating a title, checking the checkbox for “Share”, and selecting the“OK” button, the user will be taken back to the “My Reports” main page.Look at the “Shared Reports” section below the report filters and the newReport will show up with links available that will allow the user to display thereport, edit the report, or delete the report.18
Figure 17 - Locating the New Shared Report in Shared Reports Section of MyReports Page19
Creating an Ad Hoc Report Using the WizardThe WorkInTexas system provides a tool to allow users to construct queriesusing a wizard format. This allows users that may not know now to constructSQL statements and may not know the database schema well to still be ableto construct queries to retrieve information from the system.Using the Data DictionaryThe Data Dictionary tool will only allow the display of a single table at atime. There is no function to download a copy of the entire dictionary.Step 1: Navigate to the Ad Hoc Query ToolFigure 18 - Locating the Ad Hoc Query Wizard Menu Item in the ReportsMenu Group20
Step 2: Select Data DictionaryFigure 19 - Select Data Dictionary on Ad Hoc Query PageStep 3: Select Table to ViewThis page allows the user to narrow down the list of tables in the database tothe tables that are related to a major functional area in the system. Sincethere are over 4000 tables in WorkInTexas.com, this function is very helpful.21
Figure 20 - Selecting a Data Dictionary Data CategoryStep 4: Review Data Dictionary for Selected TableThe data dictionary results page will provide a description of the table and alisting of all fields contained in the table. The dictionary also provides lookuptable mappings to facilitate the correct structuring of queries that haveforeign-key relationships.22
Figure 21 - Data Dictionary Results Example (Page 1)23
Figure 22 - Data Dictionary - Example of Identifying a Relationship with aChild Table or Lookup Table24
Creating a Single Table Ad Hoc QueryStep 1: Navigate to Ad Hoc Query ToolFigure 23 - Navigating to the Ad Hoc Query Tool from the Reports MenuGroupStep 2: Select Types of Objects to QueryThe next step is to select the types of tables (objects) you would like toquery. The default value of “Tables and Views” is generally sufficient forqueries. Select the “Next ” button to continue.25
Figure 24 - Selecting Tables and Views to Start the Ad Hoc Query Wizardfrom the Ad Hoc Query PageStep 3: Select Categories of DataSelect one or more categories of tables from the “Select your categories”checkbox listing. This will narrow down the set of tables that are presentedon the next page, making it easier to find the table you need. Select the“Next ” button to continue.26
Figure 25 - Selecting Table Categories for Ad Hoc Query WizardStep 4: Select Primary Table for QuerySelect the table for the query from the “Primary Database Table” dropdownlist. After selecting the primary table, wait for the page to refresh beforecontinuing. If the Next button is selected before the page refreshes, thesystem will display a generic “security error” and the user will need to startthe query over from the beginning. Once the page refreshes with additionalfields, the user can then select the “Next ” button to continue to the nextpage.27
Figure 26 - Selecting the Primary Table for the Ad Hoc Query28
Figure 27 - Review Primary Table Selection and Select Next to ContinueStep 4: Select Fields to Include in ReportThe next page will provide a listing of all fields that are available for thetable that was selected as the Primary Database Table on the previous page.To select fields to be included in the report, use the mouse to select a field(or multiple fields using the Control button) and select the “Move Over ”button to move the selected field(s) from the “Available Columns” box to the“Columns to be used in Select” box.29
Figure 28 - Selecting Fields for the QueryOnce all columns required for the report have been moved to the “Columnsto be used in Select” box, select the “Add” button to add the columns to thereport query. After selecting the Add button, the revised query will be shownin the “Query” box near the bottom of the page.30
Figure 29 - Reviewing Selected Fields for Query and Location of Save Queryand Save to File LinksIf the user would like to save this report to the My Reports page prior toexecuting the report, they can select the “Save Query” link to save thereport. If the user would like to save the report to a text editor for future useor to make offline modifications to the query, the user can select the “Saveto File” link below the query box.Queries that are saved using the “Save Query” link will be displayed in the“Ad Hoc Queries” section of the “My Reports” page. If the query is saved asa private query, it will be displayed in the “My Ad Hoc Queries” subsection. If31
the query is saved as a shared query, it will be displayed in the “Shared AdHoc Queries” subsection.Step 5: Execute ReportOnce the query has been validated, the user should select the “Finish”button to execute the query and display the query results.Figure 30 - Viewing Query Results and Export OptionsIn the example shown in the figure above, the query produced more thanthe 16,500-record limit so WorkInTexas returned only the first 16,500records. On the result page, the user can change the number of recordsshown on the page by selecting a larger value in the “Records per page”dropdown. This will reduce the number of pages to flip through to find aspecific record in the results.The user can navigate to more pages of results by either selecting the greyarrow icon above the export option links or they can go directly to a page ofresults by typing in a page number in the “Enter Page Number” field andselecting the “Go” button.32
Step 6: Export Report ResultsAt the bottom of the Ad Hoc Query report results page are options to exportand download the report results. Please be careful about downloading andsaving information that include Personally Identifiable Information (PII).Follow all Agency rules related to the access, storage, and destruction ofsensitive data.Options for formats to export to include:-Excel-CSV (Comma delimited)-Pipe Delimited-Print (send to printer)-PDFSelect the icon for the appropriate download format to start the process todownload the report results. Follow all prompts on the screen to completethe download process.Creating a Multi-Table Ad Hoc QuerySome queries need to use more than one table to provide meaningfulresults. This is especially relevant for tables that reference lookup tables.Lookup tables are configurable lists of values that generally populatedropdown lists in a web application. An example would be the job orderstable. In the job orders table, there are values such as job order status, howto apply, and employer ID that have little meaning unless you join toadditional tables to obtain the actual values related to the keys in the joborder table.The steps below will describe the process to do an Ad Hoc Query that joinsadditional tables to the primary table.33
Step 1: Navigate to Ad Hoc Query ToolFigure 31 - Navigate to the Ad Hoc Query Wizard from the Reports MenuGroupStep 2: Select Types of Objects to QueryThe next step is to select the types of tables (objects) you would like toquery. The default value of “Tables and Views” is generally sufficient forqueries. Select the “Next ” button to continue.34
Figure 32 - Selecting Tables and Views on Ad Hoc Query PageStep 3: Select Categories of DataSelect one or more categories of tables from the “Select your categories”checkbox listing. This will narrow down the set of tables that are presentedon the next page, making it easier to find the table you need. Select the“Next ” button to continue.35
Figure 33 - Selecting Data Categories for Ad Hoc QueryStep 4: Select Primary Table for QuerySelect the table for the query from the “Primary Database Table” dropdownlist. After selecting the primary table, wait for the page to refresh beforecontinuing. If the Next button is selected before the page refreshes, thesystem will display a generic “security error” and the user will need to startthe query over from the beginning.36
Figure 34 - Selecting Primary Table for Ad Hoc QueryStep 5: Create JoinsOnce the page refreshes with additional fields, the user can use the newfields to define the table(s) that need to be joined with the primary table.Select the table to join by selecting a value from the “Table to join to:”dropdown. Select a field from the joined table that is a foreign key to theprimary table by selecting a value from the “Join to table on:” field. If thereis any doubt about what field links the primary table and the joined table,review the tables in the data dictionary to determine the correct relationship.Select the field from the primary table that links to the joined table byselecting the correct value from the “Join value equals:” dropdown. Thisprocess identifies the column in each of the tables that is the sameequivalent field. Once the three join dropdowns have been set, select the“Add” button to add the join to the query for the report.37
Figure 35 - Using the Join Function on the Select Table Page in Ad Hoc QueryWizardOnce the “Add” button has been selected, review the query in the “Primarytable and Join Preview” box. Add any additional joins that are needed byrepeating Step 5 as many times as necessary. Once the creation of all joinshas been completed and reviewed, select the “Next ” button to continueto the next step.38
Figure 36 - Reviewing Primary Table and Join StatementStep 6: Select Fields to be Included in the ReportThe next page will provide a listing of all fields that are available for thetable that was selected as the Primary Database Table and all Joined Tableson the previous page. To select fields to be included in the report, use themouse to select a field (or multiple fields using the Control button) andselect the “Move Over ” button to move the selected field(s) from the“Available Columns” box to the “Columns to be used in Select” box. Once allthe appropriate columns have been selected, select the “Add” button tomove the selected columns into the Report Query.39
Figure 37 - Select Fields and Review Query in Ad Hoc Query WizardAfter the “Add” button has been selected, the system will show the revisedquery in the “Query” box. Review the query to make sure all desired fieldshave been included.40
Figure 38 - Reviewing Options for Aggregation, Where Clauses, and Order By(Sorting) for QueryOn this page, before selecting the “Finish” button to execute the query,additional report options are available. They include advanced options suchas aggregation, sorting, and filtering. Use caution in use of the filteringfields. If a field selected for filtering contains hundreds or thousands ofpotential values (example: Job Seeker Usernames), this is likely to freezethe page and it may not recover in before the page crashes. It isrecommended to transition the query over to the Free Form Query Tool andadd filters manually using that tool if the filter is not a simple filter.41
Additionally, on this page before selecting the “Finish” button, the user hasthe option to either “Save Query” or “Save to File”. The Save Query functionwill save this query as displayed in the Query box to the My Reports page inthe “Ad Hoc Queries” section. If the user saves the query as a private query,it will be displayed in the “My Ad Hoc Queries” subsection. If the user savesthe query as a shared query, it will display in the “Shared Ad Hoc Queries”subsection.If the user is ready to execute the query, select the “Finish” button at thebottom of the page.Step 7: Review Report ResultsOnce the query has been validated, the user should select the “Finish”button to execute the query and display the query results.Figure 39 - Reviewing Query Results and Export Options for the DataIn the example shown in the figure above, the query produced more thanthe 16,500-record limit so WorkInTexas returned only the first 16,500records. On the result page, the user can change the number of recordsshown on the page by selecting a larger value in the “Records per page”dropdown. This will reduce the number of pages to flip through to find aspecific record in the results.42
The user can navigate to more pages of results by either selecting the greyarrow icon above the export option links or they can go directly to a page ofresults by typing in a page number in the “Enter Page Number” field andselecting the “Go” button.Step 8: Export Report ResultsAt the bottom of the Ad Hoc Query report results page (see the figure inStep 7 above) are options to export and download the report results. Pleasebe careful about downloading and saving information that include PersonallyIdentifiable Information (PII). Follow all Agency rules related to the access,storage, and destruction of sensitive data.Options for formats to export to include:-Excel-CSV (Comma delimited)-Pipe Delimited-Print (send to printer)-PDFSelect the icon for the appropriate download format to start the process todownload the report results. Follow all prompts on the screen to completethe download process.Saving a Query to a FileOn the Ad Hoc Query and Free Form SQL pages that provide a “Finish”button to execute queries, there is an option to save the query to a file priorto selecting the Finish button.43
Figure 40 - Using the Save to File Function to Save Ad Hoc QueryStep 1: Select “Save to File” LinkOnce the “Save to File” link has been clicked, the system will provide aWindows “Open Save Cancel” component at the bottom of the screen.The user can choose to open the file in a text editor by selecting the “Open”option. The user can choose to save the query to a file on their computer byselecting the “Save” or “Save As” selection. User can cancel the Save to Fileaction by selecting the “Cancel” button.44
Figure 41 - Opening a Query in Text EditorStep 2: Selecting the “Open” OptionWhen the user selects the “Open” button, Windows will open the query inthe default text editor configured in your computer’s system settings. In thisexample, the query opened in Windows Notepad. Once the file is opened inthe text editor, the user can use the text editor functions to edit, save, andwork with the document.45
Figure 42 - Viewing Saved Query in Text EditorStep 3: Selecting the “Save” OptionWhen the user selects the “Save” button, Windows will provide the optionsto “Save” or “Save As”. Selecting the Save or Save As options will result inWindows displaying the standard File Save component that will allow theuser to save the file to their computer. Follow the normal steps to save thefile to whatever location is desired.46
Figure 43 - Save or Save As Options for Save to FileFigure 44 - Saving Query to Computer - Windows Save Screen47
Saving a Query to My ReportsSaving the Query allows the user to store the query for later reuse byplacing it on the My Reports page. The source of the query (Ad Hoc QueryTool or Free Form SQL Tool) and the privacy settings selected during save(Private or Shared) will determine which section of the My Reports page thatthe query will be displayed.SourcePrivacyMy Reports DestinationAd Hoc Query ToolPrivateMy Reports My Ad Hoc QueriesAd Hoc Query ToolSharedMy Reports Shared Ad Hoc QueriesFree Form Query ToolPrivateMy Reports My Free Form SQLFree Form Query ToolSharedMy Reports Shared Free Form SQLStep 1: Select “Save Report”On the Ad Hoc Query and Free Form SQL pages that provide a “Finish”button to execute queries, there is an option to save the query prior toselecting the Finish button. Select the “Save Query” link.Figure 45 - Save Query to WorkInTexas.com My Reports – Save Query LinkStep 2: Enter Query Title and Privacy SettingsOn the Save Query popup page, enter a query title in the field titled “Pleaseenter a description for this report” field. If the report is going to be a sharedreport, it would be a best practice to clearly identify the creator of the report48
so the user can easily find their reports amongst the other reports saved inthe system. Select a setting for privacy by selecting either “Do Not Share” or“Share with everyone who has access to this report” radio button. Thenselect the “Save” button.Figure 46 - Saving Ad Hoc Query as a Shared Query - Save Query PopupWindowStep 3: Review Report in Appropriate Area of My ReportsDepending on the source of the report and the privacy settings provided bythe user during the Save Query action, the report will be displayed in one ofthe My Report subsections as described above and as shown in the figurebelow.The “My Reports” sections map to the Summary Reports and DetailedReports menu items.The “Ad Hoc Queries” sections map to the Ad Hoc Query Wizard menu item ifthe user uses the wizard to create the query.The “Free Form SQL” sections map to the Ad Hoc Query Wizard menu item ifthe user uses the Free Form Query tool on the Ad Hoc Query page to createthe query.49
Figure 47 - Mapping of Saved Query Types to Sections on the My ReportsPage and Menu Links in the Reports Menu GroupCreating a Free Form SQL QueryFor those users that have a solid grasp of PL SQL and know the tables andfields needed to construct a query, the Free Form Query Tool can be used tocreate queries from scratch without using the Ad Hoc Query Tool.The Free Form Query Tool can also be used to refine queries that were builtusing the Ad Hoc Query Tool. This allows the setting of filters that aredifficult to set in the Ad Hoc Query Tool.50
One of the best ways for users t
The next groups of subsections on the "My Reports" main page are the Ad Hoc Query areas. They include: "My Ad Hoc Queries" and "Shared Ad Hoc Queries". The saved reports in these two sections were created and saved from the Ad Hoc Query Tool. The "My Ad Hoc Queries" subsection includes reports that the current user