Transcription
Organizational ReportsUser GuideAccountability ReportAd Hoc ReportsAssessment ReportsBenchmark ReportsGroup Patients ReportReminder RecallRevised: 9/1/2016For additional support, the following resources are available:CAIR Help DeskHours: Monday - Friday 8:00AM - 5:00PMPhone: 800-578-7889Fax: 888-436-8320Email: CAIRHelpDesk@cdph.ca.govLocal CAIR Representatives (LCRs): http://cairweb.org/lcrs/CAIR Website: www.cairweb.org
Table of ContentsAccountability Report . 3Ad Hoc Reports . 4Ad Hoc List Report . 4Ad Hoc Count Report . 7Ad Hoc Report Status . 8Assessment Reports . 9Benchamark Reports . 13Group Patients Report . 15Reminder/Recall . 17Reminder/Recall Requests . 17Summary Screen . 19Managing Custom Letters . 20Generating Custom Letters . 21Reminder Card . 24Mailing Labels . 254-up Card . 25Patient Query Listing . 26Last Notice Date Options. 27Creating Custom Letters. 27Page 2 of 30
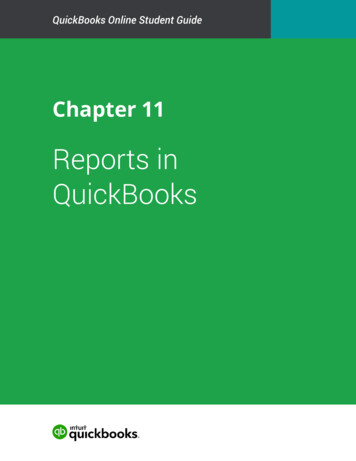
I.Accountability ReportThe Vaccine Accountability Report provides information about inventory transactions entered into CAIRfor selected quarterly time periods. The report is available to designated user roles only. The VaccineAccountability Report can be generated for a single organization or multiple organizations depending onyour role. When the Vaccine Accountability Report is generated for a single organization, both aSummary report and a Detail report will be created. When the Vaccine Accountability Report isgenerated for multiple organizations, only a Summary report will be created. The accountability reportcan be generated by Type of Vaccine Funding to show both summary accountability by vaccine group ordetailed report showing accountability at the individual lot number sorted by vaccine group. To generate aVaccine Accountability Report:1. Click Accountability Report Request under the Reports section of the menu panel.2. Select the Begin Date and End Date from the drop-down list.3. Select Organizations from the Select screen if available. Otherwise will default to primaryorganization.4. Select Type of Vaccine.5. Enter a report name in the Report Name field.6. Click the Generate Report button.7. Your report will be listed on the Accountability Report Status screen. Click the Refresh button ifthe report is not shown.8. Select the Summary or Detail Report blue hyperlink to view the report.Page 3 of 30
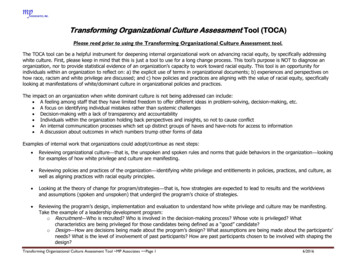
9. Once the status displays as Ready and the report name becomes a hyperlink, your reports areready to be viewed. These reports are generated as .xls. Click the report name to open in Excel 10. To print the letters, click the printer icon on the Excel toolbar. Click the OK button in the Printdialog box.II.Ad Hoc ReportsThe Ad Hoc reports function in CAIR2 allows the user to create one time use customized reports. Filterswithin the Ad Hoc reporting function help to narrow a search by date, vaccine group, ethnicity, and otherfactors. The Ad Hoc reporting function produces two types of reports; one type produces lists withinformation about selected patients, the other type produces counts, either of patients or of immunizations.Notes:Patients whose information is added or changed on the day the report is run will appearin the results at most 30 minutes after the addition/change.Ad Hoc reports run against all patients associated with your organization. To disassociatea patient from your organization you must change their status in the organizationinformation section of the patient’s record.Ad Hoc List ReportsTo produce a list of information about selected patients:1. Click Ad Hoc List Report under the Reports section of the menu panel.2. Select the items that you would like to display on the report by double-clicking the desired itemsfrom the left column (for example, Patient Last Name) or by highlighting the item and clicking Add.This will copy the item to the right column and add it to your report.Page 4 of 30
3. Select the single item by which you would like to have the report sorted and click the sort order(first-to-last or last-to-first). Note: Sorting the report will increase the time it takes to process it.Page 5 of 30
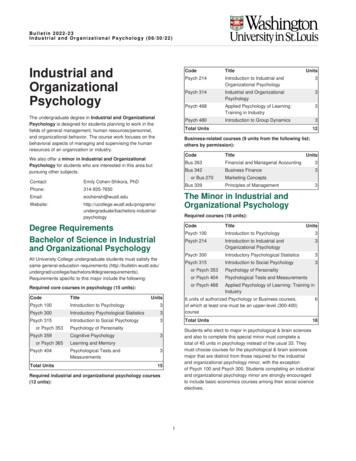
4. Under Item to filter on, select an item that you would like to add as a filter using the drop down list.For example, Birth Date Range could be an item used as a filter.5. Filters in CAIR2 are used to narrow information down so that it answers a user’s query. UnderComparison, select a word from the drop down list that best describes the type of comparison youwish to make; for example, Between. 6. Under Value to compare to, either choose a value from the drop down list in the left field and/orenter a date in the right field.7. Under And, select another value from the drop down list in the left field or enter the ending date inthe right field, if applicable.8. Click the Add/Save Edit button. Repeat steps 4-8 for each item you wish to filter.Page 6 of 30
9. When finished adding filter items:a. Within the Selected Filters section, to change AND to OR, highlight ‘AND’ and click the‘And/Or’ button. Alternatively, can also be switched to AND by following the sameprocess.b. Group them together by highlighting two filter statements and clicking the Group button.This groups the filters together in the report.c. Highlight a grouped statement and click the Ungroup button to ungroup it. This removesthe filters from being grouped together in the report.d. Highlight a statement and click the Remove button to remove it from the selected filters.e. Highlight a statement and click the Edit button to make changes to a statement. Makethe necessary changes to the statement in the filtering section of the screen and click theAdd/Save Edit button.10. Click the Generate button. The Ad Hoc Report Status page will display; see the Ad Hoc ReportStatus section of this chapter for more information.Ad Hoc Count ReportTo produce a count of selected patients or immunizations:1. Click Ad Hoc Count Report under the Reports section of the menu panel.2. Select whether Patients or Immunizations will be counted by clicking the appropriate radio buttonat the top of the screen.Page 7 of 30
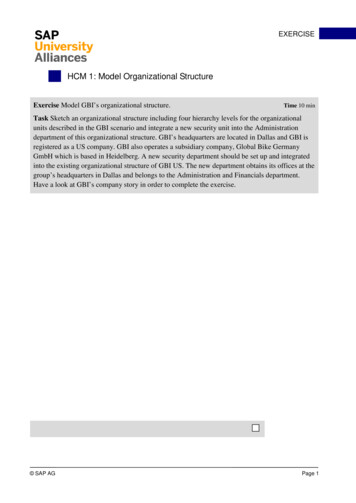
3. Select the factors you would like to use to group the counts on the report by double-clicking onthe desired item from the left column (for example, Vaccine Group) or by highlighting the item andclicking the Add button. This will copy the item to the right column so that it can be used in yourreport. You can choose a maximum of three factors.4. Under Item to filter on select an item that you would like to add as a filter using the drop down list.For example, Birth Date Range could be an item used as a filter.5. Under Comparison, select a word from the drop down list that best describes the type ofcomparison you wish to make. For example, between is one comparison operator.6. Under Value to compare to, either choose a value from the drop down list in the left field or enter abeginning date in the right field.7. Under and, select another value from the drop down list in the left field or enter the ending date inthe right field, if applicable.8. Click on Add/Save. Repeat Steps 4-8 for each item you wish to filter.9. When finished adding filter items, you may do the following:a. Group them together by highlighting two filter statements and click Group.b. Change AND to OR by highlighting ‘AND’ and clicking the And/Or button. OR can alsobe switched to AND by following the same process.c. Highlight a grouped statement and click on Ungroup to ungroup it.d. Highlight a statement and click on Remove to remove it from the selected filters.e. Highlight a statement and click on Edit to make changes to a statement. Make thenecessary changes to the statement in the filtering section of the screen and click onAdd/Save10. Click Generate. The Ad Hoc Report Status page will display; see the Ad Hoc Report Status sectionof this section for more information.Ad Hoc Report Status1. The Ad Hoc Report Status screen will display after you click Generate on the Ad Hoc Count or AdHoc List Report screens. You may also access the status screen by clicking on Ad Hoc ReportStatus under the Reports section of the menu panel.Page 8 of 30
2. Click Refresh occasionally to check the status of the report. Once the report type converts tounderlined report type in blue, click it. The report will display directly on this screen.3. Export the data as a text file, spreadsheet, or PDF by selecting the appropriate link.4. If you wish to print the report, click Print under the File menu within the application (text file,spreadsheet, or Adobe Reader). In the print dialog box, adjust the print options as necessary,and then click either Print or OK, depending on the application.Note: Ad hoc reports are retained for 72 hours per organization. CAIR2 will retain one count report andone list report for that period. If a new report of the same type is generated, the new report will replace theexisting report.III.Assessment ReportsThe Assessment Report feature in CAIR2 provides an analysis of an organization’s immunizationcoverage rates. The following is a brief overview of the data that are returned on each table within theAssessment Report. Routinely reviewing patient records and assessing vaccination coverage rates areproven strategies to improve vaccination coverage in your organization.1. Click Assessment Report under the Reports section of the menu panel.Page 9 of 30
2. Select the patient population to be assessed by clicking one of the following:3. All Patients Associated with Organization Name : Choose this option to view immunization dataon all patients associated with your organization.4. Select the age, birth date range, or age range of the patients by choosing one of the following:a. Less than 72 months old: Choose this option to return all patients who are 72 months oryounger.b. Birth date range: Choose this option to enter a range of birth dates. Enter the earliestbirth date in the first field and the latest birth date in the second field. Alternatively, usethe calendar icons beside each field to enter the dates.c. Age range: Choose this option to enter an age range. Enter the youngest age range inthe first field; use the drop down list next to it to choose days, months, or years. In theOldest Age field, enter an age and use the drop down list to choose days, months, oryears. You cannot search for patients older than 72 months.d. Select either the Standard Assessment or the Assess Patients with Sufficient Refusalhistory as Covered option for the report by choosing the appropriate radio button.Selecting the second option will return an assessment report that counts patients withsufficient refusal comments as being up-to-date.e. Select the assessment report evaluation date by entering the date in the field provided orby using the calendar icon to enter the date. No immunizations administered after theassessment criteria date will be included in the report.Page 10 of 30
5. Click Generate.6. The Assessment Report Status screen will display. Some reports will automatically generate andwill appear in the Job Name – Evaluation Date and Age Range – Evaluation Date Sections. Thenumber of reports that will automatically generate will vary based on the age range of patientsassessed.7. Click Refresh occasionally to check on the progress of the reports. When the reports are ready,the job name will appear underlined and in blue text and the status will display as Complete.8. Once reports are complete, you may view the reports that automatically generated, or you mayrun additional reports. To view generated reports.9. Click the underlined job name.10. The report listing patients by benchmark age will have a job name of: (Benchmark Patient Listing) Organization Name - Benchmark Age .11. The assessment report will be called: (Assessment Report) Organization Name - Date .12. A report listing all patients who have missed a vaccination opportunity will have a job name of:(Missed Opps Patients) Organization Name - Date .Page 11 of 30
13. Click an underlined age range to view a listing of patients returned that fall within the specifiedrange. This list will give the name, address, and telephone number for all patients meeting therecord criteria. To view patients for all age ranges that meet the criteria, click the All Age Rangeslink.14. To generate additional reports you may do the following:a. Select an age from the drop down list provided and click on Generate (to the right of theage drop down list).b. Create an assessment report listing patients for an age-specific benchmark by selectingan age from the drop down list and clicking Generate. This report lists the patient’s name,address, telephone number, and the vaccinations that they did or did not complete orrefused by the benchmark age. A patient will show on the report if they missed at leastone age-specific benchmark.15. The report displays in Adobe Reader if you clicked one of the report or age range links. To printone of the reports, click on the printer icon on the Adobe toolbar.16. Click OK in the Print Dialog box17. To return to the Assessment Report Status screen, click the Check Assessment link in the menubar.Note: Patients with RefusalsIf the option to Assess Patients with Sufficient Refusal History as Covered is selected when theassessment report is run, patients who fall short of needed, valid doses but have sufficient refusals tomeet the benchmark are included within the count as if they received the needed doses.Page 12 of 30
IV.Benchmark ReportsBenchmark reports allow CAIR2 users to retrieve a list and count of patients who have met animmunization benchmark or predefined series of benchmarks. The resulting report may be viewed inCAIR2 , exported as a text file, exported as a spreadsheet, or exported as a PDF file.To generate a Benchmark report:1. Click Benchmark Report under the Reports section of the menu panel.2. Select the patient population to be assessed by clicking on one of the following:a. Patients Associated with Selected Site: immunization data on all patients associated withthe site selected from the drop down list at the right.b. All Patients Associated with Organization Name : immunization data on all patientsassociated with your organization.3. Click one of the following to specify the patients to return on the report:a. Patients who did NOT meet the benchmark: a list of patients who did not meet thebenchmark(s) defined in the table.Page 13 of 30
b. Patients who DID meet the benchmark: a list of patients who met the benchmark(s)defined in the table.c. All patients, regardless of whether they met the benchmark or not: a list of all patientsmeeting the criteria defined in the table.4. Select the age, birth date range, or age range of the patients by choosing one of the following.You may only enter up to age six years.a. Less than or equal to 72 months old: all patients who are 72 months old or younger.b. Birth date range: a range of birth dates. Enter the earliest birth date in the first field andthe latest birth date in the second field that you wish included on the report or use thecalendar icons beside each field to enter the dates.c. Age range: an age range. In the Youngest Age field, use the drop down list next to it tochoose days, months, or years. In the Oldest Age field, enter an age and use the dropdown list to choose days, months, or years.5. Select either the Standard Assessment or the Assess Patients with Sufficient Refusal History asCovered option for the report by choosing the appropriate radio button. Selecting the secondoption will return a benchmark report that counts patients with sufficient refusal comments asbeing up-to-date.Note: Refusals of VaccineIn order for patient refusals of vaccine to be calculated correctly on assessment and benchmark reports,an appropriate Start Date must be entered for refusal comments on the Patient Comments tab. Refer tothe Managing Patients Chapter 8 of this manual for more information.6. Select the report evaluation date by entering the date in the field provided or by using thecalendar icon to enter the date. No immunizations administered after the evaluation date will beincluded in the report.7. Select the benchmark(s) to be used on the report:8. To select one or more single vaccine benchmarks within a single row, click on the box where thevaccine and the number of months intersect. For example, clicking on the box with 4 in it whereDTaP and @ 19 months intersect will result in a report with this benchmark included.9. To select all benchmarks in a row, you may click on the first box in the row that indicates @ Xmonths.10. To select benchmarks in a predefined series, select one of the 431, 43133, or 431331combinations at the bottom of the table.Page 14 of 30
11.12.13.14.Click the Generate button.The Benchmark Report Status screen will display.Click on Refresh occasionally to check on the progress of the report.When the report is ready, click on the blue Benchmark hyperlink. Once this link is clicked, CAIR2will display the Benchmark report at the bottom of the Benchmark Report Status screen. Inaddition, you may do one of the following:15. Click the Export as Text link to display the report in text file format.16. Click the Export as a Spreadsheet link to display the report in a spreadsheet format.17. Click the Display as a PDF link to display the report in Adobe Reader.The Benchmark Report shows a list of all patients who met the filter criteria specified when youset up the report. The report gives you a count and percent of how many patients met thespecified criteria. It lists patients by first and last name, date of birth, phone number, and address.The Y or N in the columns after each patient’s demographic information indicates whether thepatient met the criteria for that vaccine and benchmark age.V.Group Patients ReportThe purpose of Group patients is to run the Immunization History Report for a group of selected patients.To run one of these reports, complete the following steps:Page 15 of 30
1. Click Group Patients under the Reports section of the menu panel.2. To run a report for patients in a specific birth date range, click on the check box on the first line.Enter a from birth date and to birth date in MM/DD/YYYY format.3. To run a report for patients who have immunizations administered by one of your sites, click onthe check box on the second line. Choose a site from the drop down list. By selecting this option,you will limit this report to immunizations administered at your site.4. To run a report for patients who have an immunization in a specific date range, click on the checkbox on the third line. Enter a from and to date in MM/DD/YYYY format.Note: You may combine any of the criteria in the above steps. The system only selects patientswho fulfill all the criteria you specify.5. You may choose a sort order. Your two options are either by Last Name then Age or by Age, thenLast Name.6. If you wish to start over, click the Reset button. The system erases all the criteria you enteredand starts with a fresh page. You may proceed to enter your criteria again.7. When criteria are completed, click the Generate button. Click the Refresh button periodically(use same language used in assessment reports section) The system starts to generate thereport and takes you to the Group Patient Reports Request Status screen.8. After the report finishes generating, the top line on the Group Patient Reports Request Statusscreen becomes a hyperlink. Click the hyperlink.Page 16 of 30
9. The system displays the report output in PDF.VI.Reminder/RecallFrom the Reports menu option, you may generate reminder and recall notices, which include letters,mailing labels, and patient listings.Reminder/Recall allows users to create listings, letters, and mailing labels for patients that are due oroverdue for immunizations. Reminder and recall notices can be generated for each patient, provided thatthe following conditions are met: The status is “Active” in the Patient Information section for your organization.The “Allow Reminder and Recall Contact?” indicator in the Patient Information section is “Yes”.The patient has complete address information is listed in the Address Information section.Reminder/Recall RequestsTo generate a reminder/recall request:1. Click Reminder/Recall underneath “Reports” from the menu panel.On the new page, you can select the following criteria:2. Create New List: Allows you to create a name for the new list or use previous Reminder/RecallRequest Criteria.3. Tracking Schedule: CAIR2 only uses the tracking schedule recommended by the AdvisoryCommittee on Immunization Practices (ACIP). You can choose to use a tracking scheduleassociated with each patient or to use a tracking schedule selected for all patients.Page 17 of 30
4. Vaccine Groups: Allows you to indicate which vaccine groups to report on.5. Subpotent Recall: Selecting the Use Subpotent Vaccinations check box includes partiallyadministered vaccinations.6. School/Primary Care Providers: This is not currently available.7. Additional Demographic Criteria: Entering a city and/or ZIP code narrows your search to only thepatients associated with the entered geographical area. Clicking only a county will allow you tosearch for all patients residing in the selected county.8. Date Criteria:a. Target Date Range: When a target date range is specified, the report will include thosepatients that are due/overdue for immunizations within the date range. To choose atarget date range, enter a From and To date in MM/DD/YYYY format.b. Birth Date Range: when a birth date range is specified, the report will return thosepatients who have a birth date that falls within the range entered. To choose a birth daterange, enter the beginning date in the From and To date in MM/DD/YYYY format.9. Vaccine Groups to Display: “Use All Vaccine Groups” will be the default. However, users havethe options to select specific Vaccine Groups to be displayed in the report. Click the “UseVaccine Group Selected” radio button to select specific Vaccine Groups to display in your report.10. Sorting Criteria: This selection allows you to specify how the data will be sorted. If a sort order isnot specified, CAIR2 will sort the report results first by the patient’s last name in ascending orderPage 18 of 30
(A to Z), then by the first name in ascending order.11. Generating the Report: Click the Generate button.Depending upon the number of patients associated with your provider organization, it may take fiveminutes or more to generate the data for the various reports. While the data is being generated, heRequest and Output status page indicates the percentage of completion.Once you reach the Reminder Request Status screen, it is not necessary to stay at this screen while yourreport is being created. You may go anywhere in CAIR2 while the report is generating and may return tothe status screen by clicking on the Check Reminder Status link under Reports on the menu panel.Likewise, you may close out of CAIR2 and return to the status screen by clicking on the CheckReminder Status link after logging in again.Summary ScreenWhen the report is complete, click the hyperlink to go to the Reminder Request Process Summary screen.The Summary screen lists the number of patients involved in the search and the criteria that were used todefine the search. From the Summary screen, you may create various reminder output options.Additional information:Page 19 of 30
If either the From date or To date is unspecified from the Target date Range, the system will usethe date that you ran the report for that field. If they are both left blank, the system will find thosepatients who are due or overdue as of the date that you run the report.If the From date is unspecified for the Birth Date Range, the report will include the oldest patientsin the system.If the To date is unspecified from the Birth Date Range, the system will use the date that you runthe report for that field.Managing Custom LettersManaging Custom Letters—use this option to create up to three custom letter templates for yourreminder/recall report.To manage custom letters:1. Click Manage Custom letter underneath “Reports” from the menu panel.2. Click New Custom Letter.3. Top Margin: Click the number of blank lines you would like at the top of the letter from the dropdown menu. The margin is used to leave room for your office letterhead to display on each lettergenerated from this report.4. Include Patient Address: Check the box to include the patient’s address at the top of the letter.5. Salutation: Enter a greeting and then click the name from the drop-down menu.6. Paragraph 1: Enter desired text in the field titled “First Part”. If you wish to include a name withinthe paragraph, enter text up to the mention of the name ending with a space. Next, choose thename you would like to appear. In the field titled “Second Part”, continue to enter the rest of thetext.7. Immunization History: Check the box to include the patient’s immunization history in the letter.8. Paragraph 2: Enter the desired text, if any.9. Immunization Recommendations: Check this box to include the immunizations recommended forthe patient in the letter.Page 20 of 30
10. Paragraph 3: Enter the desired text, if any.11. Closing: enter a closing word or statement in this field. If you wish to included your providerorganization’s name and/or telephone number after the closing, click the corresponding checkbox(es).12. Name and Save the Custom Letter: Enter a name for the letter in the field provided.13. Click the Save button.Generating Custom LettersThe custom letter output option allows you to generate a customized letter for each patient returned onyour query. To generate a custom letter from the Reminder Request Process Summary screen:1. Click the link with the name of the custom letter. The letter will begin generating immediately.2. Your report will be listed on the Reminder Request Status screen; the bottom table shows thename of the request, the date and time it was started, and the status of the request.3. Once the report name becomes a hyperlink, the letter is ready. Click the report name to view orprint the letters in Adobe Acrobat Reader Page 21 of 30
Note: Generation of reminder and recall noticesReminder and recall notices can be generated for each patient, if the following conditions are met: The status is Active in the Patient Information Section for your organization. The Allow Reminder and Recall Contact? indicator in the Patient Information Section is Yes. The patient has complete address information listed in the Address Information Section.Reminder Request Status screenDepending upon the number of patients associated with your provider organization, it may take fiveminutes or more to generate the data for the various reports. While the data is being generated, theReminder Request Status screen indicates the percentage of completion. Periodically click on Refresh toupdate the status.Note: Once you reach the Reminder Request Status screen, it is not necessary to stay at this screenwhile your report is being created. You may go anywhere in CAIR2 while the report is generating and mayreturn to the status screen by clicking on the Check Reminder Status link under Reports on the menupanel. Likewise, you may close out of CAIR2 and return to the status screen by clicking on the CheckReminder Status link after logging in again.Summary ScreenWhen the report is complete, you may click on the blue date hyperlink to go to the Reminder RequestProcess Summary screen. The Summary screen lists the number of patients involved in the search andthe criteria that were used to define the search. From the Summary screen, you may create variousreminder output options.22
Reminder/Recall Output OptionsThe Reminder Request Output Options table, found on the Reminder Request Process Summary screen,allows you to choose how you would like to use the data from your query.Reminder LettersThe letter output option allows you to generate a standard form letter for the parent/guardian for eachpatient returned on your query. The letter allows room at the top for your organization’s letterhead. Thebody of the letter includes the patient’s immunization history, recommended immunizations and due dates.There are up to two lines for free text and/or a telephone number. To generate Reminder Letters:1. Under the Additional Input column or the Letter section of the table, you have the option ofentering:a. If a Report Name is not indicated, the report will simply be named Reminder Letter on theReminder Report Status screen.b. You may include a maximum of 400 characters in additional information in the Free Textfield. Any information entered in this text box will be presented a
ready to be viewed. These reports are generated as .xls. Click the report name to open in Excel 10. To print the letters, click the printer icon on the Excel toolbar. Click the OK button in the Print dialog box. II. Ad Hoc Reports The Ad Hoc reports function in CAIR2 allows the user to create one time use customized reports. Filters