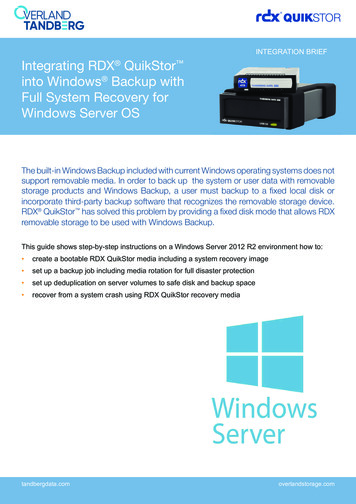
Transcription
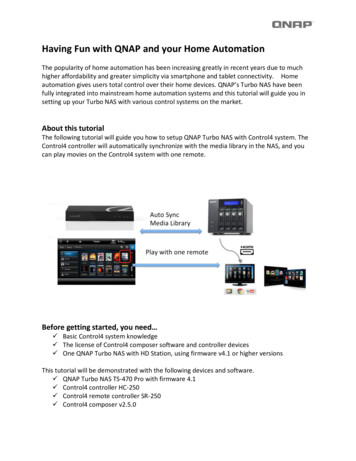
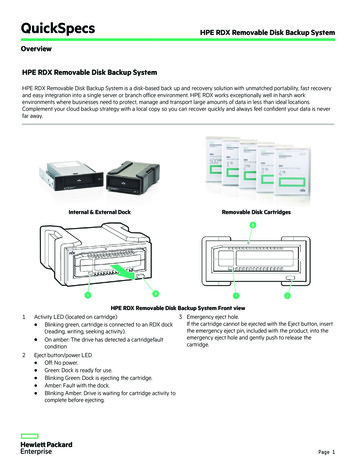
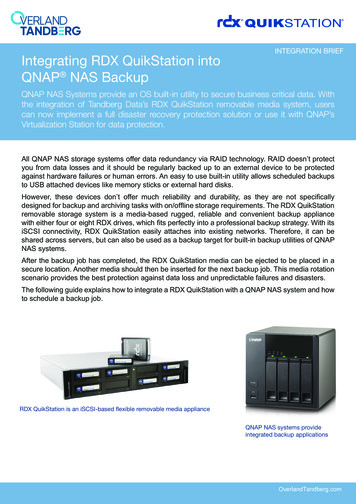
Integrating RDX QuikStation intoQNAP NAS BackupINTEGRATION BRIEFQNAP NAS Systems provide an OS built-in utility to secure business critical data. Withthe integration of Tandberg Data’s RDX QuikStation removable media system, userscan now implement a full disaster recovery protection solution or use it with QNAP’sVirtualization Station for data protection.All QNAP NAS storage systems offer data redundancy via RAID technology. RAID doesn’t protectyou from data losses and it should be regularly backed up to an external device to be protectedagainst hardware failures or human errors. An easy to use built-in utility allows scheduled backupsto USB attached devices like memory sticks or external hard disks.However, these devices don’t offer much reliability and durability, as they are not specificallydesigned for backup and archiving tasks with on/offline storage requirements. The RDX QuikStation removable storage system is a media-based rugged, reliable and convenient backup appliancewith either four or eight RDX drives, which fits perfectly into a professional backup strategy. With itsiSCSI connectivity, RDX QuikStation easily attaches into existing networks. Therefore, it can beshared across servers, but can also be used as a backup target for built-in backup utilities of QNAPNAS systems.After the backup job has completed, the RDX QuikStation media can be ejected to be placed in asecure location. Another media should then be inserted for the next backup job. This media rotationscenario provides the best protection against data loss and unpredictable failures and disasters.The following guide explains how to integrate a RDX QuikStation with a QNAP NAS system and howto schedule a backup job.RDX QuikStation is an iSCSI-based flexible removable media applianceQNAP NAS systems provideintegrated backup applicationsOverlandTandberg.com
Create an RDX Protected VolumeConfigure your QuikStation 8with two Removable Disk RDXProtected Volumes (top row andbottom row).In this example, the top row(Volume 1) has three cartridges.From the Logical Device iSCSI Devices list, select RDXProtected Volume 1.Click Create on the tab bar toconfigure a Protected Volume.Select all three docks listed andclick Create at the bottom.OverlandTandberg.com
The Properties tab now showsa Protected Volume made up ofthree devices.Continue with the QNAPConfiguration, Backup andRestore section.Create an RDX Logical VolumeConfigure your QuikStation 8 withtwo Removable Disk RDX LogicalVolumes (top row and bottomrow).In this example, the top row(Volume 1) has three cartridges.From the Logical Device iSCSIDevices list, select RDX LogicalVolume 1.Click Create on the tab bar toconfigure a Logical Volume.OverlandTandberg.com
Select all three docks listed andclick Create at the bottom.The Properties tab now shows aLogical Volume made up of threedevices.Continue with the QNAPConfiguration, Backup andRestore section.OverlandTandberg.com
QNAP Configuration, Backup and RestoreIntroduce RDX to QNAP NASStart your NAS system andconnect your RDX QuikStationappliance to your network.Insert RDX media into theQuikStation.From the main QNAP menu,choose Storage & Snapshots.From the left-hand panel, chooseRemote Disk.At the top, click Add Virtual Disk.At Step 1, enter the IP addressof the QuikStation in the TargetServer IP/Name field and clickGet Remote Disk.OverlandTandberg.com
The QNAP system discovers alliSCSI targets of the QuikStation.NOTE: Some targets might alreadybe connected to other systems.Click the arrow to open the dropdown list and select the desireddrive.Click Next.At Step 2, you can overwritethe default. We have used RDXQuikStation LV 1.You might want to format themedia. If that is the case, checkthe Format virtual disk now boxand select NTFS.Click Next.A summary screen is displayed.Click Finish.The disk is now ready to use.OverlandTandberg.com
The disk is now ready to use.OverlandTandberg.com
Create a Backup Job to RDXFrom the main menu, startHybrid Backup Sync.At the Hybrid Backup Sync screen,choose Backup.As we want to backup to thelocally attached RDX, chooseLocal Backup.OverlandTandberg.com
The job name is automaticallyassigned. (You can change it.)Select the source location (Public)of the files you want to back up.On the right, using the drop-downlist, select the backup destination.Initially, a local storage spaceneeds to be added. Select AddLocal Storage Space.Select the desired storage space.In our case, we will chooseRDX QuikStation LV 1 for theQuikStation RDX drive.Click Apply.OverlandTandberg.com
The storage space is nowassigned as the backup target.Hybrid Backup Sync is able tokeep multiple versions of yourbackup if you check the Enablemulti-version backup box.Select Advanced Settings toadjust the parameters of thisbackup job according to yourneeds.There are five options on theAdvanced Settings screen.Schedule lets you choosebetween minutely, hourly, daily,weekly, monthly or one-timebackups.Select your desired schedule, ifany.Then click Policy.Policy lets you choose fromseveral backup options.NOTE: Hover over the information(i) symbol to get a briefdescription of an option.Then click Filter.OverlandTandberg.com
Filter lets you filter the files beingbacked up according to their size,date or type.Select your desired filters.Then click Versions.If you checked the Enablemulti-version backup box onthe Basic screen, you are ableto specify the number of backupversions you want to keep andthe retention time.Then click Events.Events lets you set the maximumsize for log files and enablesemail notification.When done, click Apply.OverlandTandberg.com
The backup job has been definedand will start according to thedefined schedule.To set up another job, clickCreate Job.Perform a Restore from RDX MediaFrom the main menu, startHybrid Backup Sync.From the Overview menu, inthe Create Job section, selectRestore.OverlandTandberg.com
At the Create Restore Job screen,select the option Local NAS andthe source Backup Jobs.From the list of jobs, choose thebackup job you want to restore.Click Next.If you enabled multi-versionbackups, select the version ofyour backup; otherwise, select thelatest version.Select the folders you want torestore.Then select the destination folderwhere you want the restore to go.Click Apply.The restore job will be displayedin the All Jobs overview window.Further jobs can be created byselecting Create Job.20400002Sales and support for Overland-Tandberg products and solutions are available in over 90 countries.Contact us today at salesemea@overlandtandberg.comIB v2 Jun 10 2019 2019 Overland-Tandberg. All trademarks and registered trademarks are the property of their respective owners. The information contained herein is subject to changewithout notice and is provided “as is” without warranty of any kind. Overland-Tandberg shall not be liable for technical or editorial errors or omissions contained herein.OverlandTandberg.com
QNAP NAS Backup QNAP NAS Systems provide an OS built-in utility to secure business critical data. With the integration of Tandberg Data's RDX QuikStation removable media system, users can now implement a full disaster recovery protection solution or use it with QNAP's Virtualization Station for data protection.