Transcription
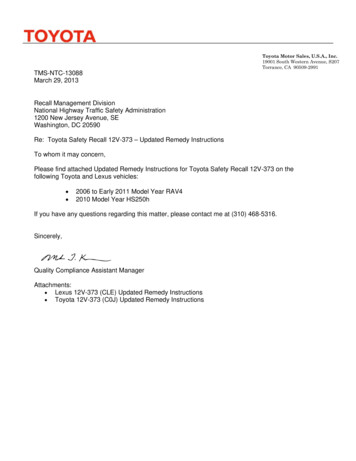
Toyota Motor Sales, U.S.A., Inc.19001 South Western Avenue, S207Torrance, CA 90509-2991TMS-NTC-13088March 29, 2013Recall Management DivisionNational Highway Traffic Safety Administration1200 New Jersey Avenue, SEWashington, DC 20590Re: Toyota Safety Recall 12V-373 – Updated Remedy InstructionsTo whom it may concern,Please find attached Updated Remedy Instructions for Toyota Safety Recall 12V-373 on thefollowing Toyota and Lexus vehicles: 2006 to Early 2011 Model Year RAV42010 Model Year HS250hIf you have any questions regarding this matter, please contact me at (310) 468-5316.Sincerely,Quality Compliance Assistant ManagerAttachments: Lexus 12V-373 (CLE) Updated Remedy Instructions Toyota 12V-373 (C0J) Updated Remedy Instructions
Original sent to Dealers11/19/12, updated 3/28/13IMPORTANT UPDATE MARCH 28, 2013TECHNICAL INSTRUCTIONSFORSAFETY RECALL C0JREAR LOWER SUSPENSION ARM No.12006 – EARLY 2011 MODEL YEAR RAV4Complete C0J Technical Video SupplementUPDATED MARCH 28, 2013Updated 3/28/13 The entire inspection process has been updated to clarify existing inspection points (SECTION VI) The parts section has been updated to include detailed kit part contents (SECTION II)Previous versions of these Technical Instructions should be discarded
I.OPERATION FLOW CHART2
II. PREPARATIONA. PARTSPart Number04002-60142or04002-60242Part DescriptionQuantityClip and label kit*1*The kit above includes the following parts.04002-50142or04002-50342 Clip with label forRear lower suspension arm No.1**2Label for rear lower suspension arm No.24**The clips are produced by two suppliers; therefore, there is two part numbers for the clip kits. Thekit part numbers are interchangeable. These parts cannot be ordered separately.Part Number04002-22142Part DescriptionRear Suspension Arm No.1 Kit*Quantity1*The kit above includes the following parts.48710-0R01090179-12027Rear Lower Suspension Arm No.1Nut11*Parts will be placed on DOS, refer to the dealer letter for more information.B. TOOLS & EQUIPMENT Standard hand tools Torque wrench 22mm crowfoot 4 Wheel alignment machineSST – This is an essential special service tool that the dealership should have.Part NumberPart NameQuantity09960-20010Ball Joint Puller Set1III. BACKGROUNDIn the Rear Suspension Arm No.1 Assembly (”arm”), if the nuts for adjusting the rear wheel alignment are nottightened following the proper procedure and torque specification when vehicle alignment service is performed,backlash may develop at the thread portion of the arm (shaft and turn-buckle), followed by formation of rust. Ifthis occurs, threads may wear, causing the arm to separate, which could result in the loss of vehicle control.3
IV. IDENTIFICATION OF AFFECTED VEHICLESA. COVERED VIN VVDS VVDS 810564
COVERED VIN RANGE CONTINUED VDS 4DVXF4DVYF4DVYK4DVZF4DVZK4DVVDS 77-D0047975032172-D0294705027376-D004782NOTE: Check the TIS Vehicle Inquiry System to confirm the VIN is involved in this Safety Recall, and that thecampaign has not already been completed prior to dealer shipment or by another dealer. TMS warranty will not reimburse dealers for repairs conducted on vehicles that are not affected or werecompleted by another dealer.5
V. COMPONENTSVI. REAR LOWER SUSPENSION ARM No.1 INSPECTION1. CHECK THE SUSPENSION ARM DESIGNADJUSTING TUBE DESIGNARM DESIGNAdjusting TubeAdjusting CamADJUSTING CAM DESIGNACTION REQUIREDProceed to STEP 2. CHECK FOR LOOSENESS VISUALLY AND BY HANDNo further action required. Campaign complete.6
Replace the suspension arm(s) if: Looseness is found. A gap is visible between the lock nut(s) and adjusting tube.The arm(s) that do not exhibit the above conditions MUST also be checked using a torquewrench as described in steps 3-5 and the video link below.Video supplement: Introduction & Suspension Arm Inspection steps2. CHECK FOR LOOSENESS VISUALLY AND BY HANDa) Check visually and by hand to determine if any looseness is seen or felt in the suspension arm lock nuts oradjusting tube. Check the LH and RH arms.b) Inspect for a gap between the lock nuts and the adjusting tube.CONDITIONLooseORGapNOT LooseANDNO GapACTION REQUIREDReplace the suspension arm(s) with looseness OR if a gap is found between the lock nut(s)and adjusting tube. Refer to TIS for instructions on suspension arm replacement.NOTE: To prevent stress on the new suspension arm bushing, apply a load to thesuspension system to confirm the suspension arm bushing is aligned correctlywhen tightening by confirming that rear suspension arm No.1 is level with theground. Suspension arm adjustment and tightening procedure is critical. After replacing thearm, refer to SECTION VII. in these instructions for this procedure.Proceed to STEP 3. PLACE MATCHMARKS ON SUSPENSION ARM7
3. PLACE MATCH-MARKS ON SUSPENSION ARMa) Place match-marks across the suspension arms as shown. Mark the arms that were not found loose duringSTEP 2.b) Use these match-marks to determine if looseness is found in steps 4 and 5 when applying torque. Match mark application is CRITICAL, confirm match marks extend from the suspension armthreads – over the lock nut – and onto the adjusting tube.Even slight movement of the match marks could be a sign of looseness, confirm the matchmarks are precise enough to allow for the inspection of slight movements in the components.8
4. CHECK THE ADJUSTING TUBE FOR LOOSENESS WITH TORQUE WRENCH(This checks inboard lock nut for looseness)a) Check for looseness in the adjusting tube using a torque wrench.b) Apply the specified torque to the adjusting tube in both directions. Check the arms that were not previouslyfound loose during STEP 2. Inspect INBOARD AND OUTBOARD match-marks to see if they becomemisaligned.Torque: 15ft. lbf (20N·m) Use a 22mm crowfoot attached to a 15 inch torque wrench. If a tool setup other than specified isused, refer to TIS for torque wrench calculation. Confirm the torque wrench is set correctly and that only the specified torque is being applied tothe adjusting tube in both directions. NEVER apply torque to the inboard lock nut during inspection, inboard lock nut inspection isdone by applying torque to the adjusting tube. Replace the suspension arm(s) if: Looseness is found. A gap is visible between the lock nut(s) and adjusting tube.CONDITIONLooseNOT LooseACTION REQUIREDReplace the suspension arm(s) with looseness. Refer to TIS for instructions on suspensionarm replacement.NOTE: To prevent stress on the new suspension arm bushing, apply a load to thesuspension system to confirm the suspension arm bushing is aligned correctly whentightening by confirming that rear suspension arm No.1 is level with the ground. Suspension arm adjustment and tightening procedure is critical. After replacing thearm, refer to SECTION VII. in these instructions for this procedure.Proceed to STEP 5. CHECK THE OUTBOARD LOCK NUT FOR LOOSENESS9
5. CHECK THE OUTBOARD LOCK NUT FOR LOOSENESS (lock nut closest to ball joint)a) While holding the adjusting tube with a wrench, check for looseness in the outboard lock nut using a torquewrench with a 22mm crowfoot attached.b) Apply the specified torque to the lock nut in both directions. Check the arms that were not previously foundloose during STEPS 2-4. Inspect INBOARD AND OUTBOARD match-marks to see if they becomemisaligned.Torque: 15ft. lbf (20N·m) Use a 22mm crowfoot attached to a 15 inch torque wrench. If a tool setup other than specified isused, refer to TIS for torque wrench calculation. Confirm the torque wrench is set correctly and that only the specified torque is being applied tothe outboard lock nut in both directions. You MUST use a wrench to hold the adjusting tube when applying torque to the outboard locknut. Replace the suspension arm(s) if: Looseness is found. A gap is visible between the lock nut(s) and adjusting tube.CONDITIONLooseNOT LooseACTION REQUIREDReplace the suspension arm(s) with looseness. Refer to TIS for instructions on suspensionarm replacement.NOTE: To prevent stress on the new suspension arm bushing, apply a load to thesuspension system to confirm the suspension arm bushing is aligned correctly whentightening by confirming that rear suspension arm No.1 is level with the ground. Suspension arm adjustment and tightening procedure is critical. After replacing thearm, refer to SECTION VII. in these instructions for this procedure.Proceed to SECTION VIII.SUSPENSION ARM CLIP AND CAUTION LABEL INSTALLATION10
Only perform this section if the suspension arm was found loose and replaced. If no suspensionarm was found loose and replaced, proceed to SECTION VIII. SUSPENSION ARM CLIP ANDCAUTION LABEL INSTALLATIONVII. SUSPENSION ARM ADJUSTMENT AND LOCK NUT TIGHTENINGVideo Supplement: Suspension Arm Adjustment and Lock Nut Tightening steps1. ADJUST REAR TOEa) Adjust the rear wheel toe using an alignment machine.Specification:A B: 0 10’ /- 0 05’ (0.17 /- 0.09 )C-D: 2.0 /- 1.0mm (0.08 /- 0.04in.) The tightening procedure for these lock nuts is critical, failure to tighten them in the correctorder could cause them to become loose. Confirm the alignment machine has been updated with the latest software.VITAL STEPS2. TIGHTEN THE LOCK NUTS EXACTLY AS DESCRIBED BELOWUse a 22mm combination wrench and a 22mm crowfoot attached to a torque wrenchTightening Sequence: 1. Inboard 2. Outboard 3. Inboard AgainTorque: 41ft. lbf (56N·m)a) Tighten the inboard lock nut. Hold the adjusting tube steady and tighten the inboard lock nut to thespecified torque.b) Tighten the outboard lock nut. Hold the adjusting tube steady and tighten the outboard lock nut to thespecified torque.c) Tighten the inboard lock nut again. Hold the adjusting tube steady and tighten the inboard lock nut to thespecified torque.11
VIII. SUSPENSION ARM CLIP AND CAUTION LABEL INSTALLATIONVideo Supplement: Clip and Label Installation steps To confirm the caution labels adhere properly, clean the surfaces of suspension arm No.2 beforeapplying the labels. It may be necessary to use steel wool and cleaning solution to clean the armsufficiently. Confirm the label on the clip is facing toward the rear of the vehicle.1. INSTALL CAUTION LABEL TO THE FRONT SIDE OF SUSPENSION ARM No.2a) Clean the front side of the LH and RH suspension arm.b) Apply caution label on the LH and RH suspension arm.2. INSTALL CAUTION LABEL TO THE BACK SIDE OF SUSPENSION ARM No.2a) Clean the back side of the LH and RH suspension arm.b) Apply caution label on the LH and RH suspension arm.3. INSTALL CLIP ON SUSPENSION ARM No.1a) Install clip on the LH and RH suspension arm.b) Confirm the label on the clip is facing toward the rear of the vehicle.4. TEST DRIVE THE VEHICLENOTE: TEST DRIVE IS ONLY REQUIRED IF THE SUSPENSION ARM WAS REPLACED.5. CAMPAIGN COMPLETE VERIFY REPAIR QUALITY Confirm ALL inspection steps are followed EXACTLY as described in these instructionsConfirm the suspension arm clips and caution labels are installed securelyIf a suspension arm is replaced, confirm the lock nut tightening procedure is followed EXACTLY asdescribed in these instructionsConfirm the owner’s manual supplement is in the gloveboxIf you have any questions regarding this update, please contact your regional representative.12
IX. APPENDIXA. CAMPAIGN DESIGNATION DECODERExamples:A0D Launched in 2010, Remedy Phase, 4th Campaign Launched in 2010rdB1E Launched in 2011, Interim Phase, 5 Campaign Launched in 2011C1C Launched in 2012, Interim Phase, 3rd Campaign Launched in 2012B. CAMPAIGN PARTS DISPOSALAs required by Federal Regulations, please make sure all campaign parts (original parts) removed from thevehicle are disposed of in a manner in which they will not be reused, unless requested for parts recoveryreturn.13
SAFETY RECALL C0J (Inspection Process)RAV4 Rear Lower Suspension Arm No.11 CHECK VISUALLY AND BY HANDOVERVIEW Why is this campaign being performed?In the Rear Suspension Arm No.1 Assembly (”arm”), if the nuts foradjusting the rear wheel alignment are not tightened following theproper procedure and torque specification when vehicle alignmentservice is performed, backlash may develop at the thread portion of thearm (shaft and turn-buckle), followed by formation of rust. If thisoccurs, threads may wear, causing the arm to separate, which couldresult in the loss of vehicle control. Check visually and by hand to determine if any looseness is seen orfelt in the suspension arm.Check for the presence of a gap between the lock nuts and adjustingsleeve.DRAFT2 PLACE MATCH MARKS ON ARM Place match marks that extend from the suspension arm threads –over the lock nut – and onto the adjusting tube. The marks MUST be precise enough to notice slight movements inthe components.Why is the inspection so detailed?The inspection MUST be performed exactly as described in order toconfirm the lock nuts are tight, and to confirm the lock nuts do notbecome loose during the inspection. Even slight movement in thecomponents can lead to arm replacement.3 CHECK INBOARD LOCK NUTS Using a 15” torque wrench set to 15ft. lbf with a 22mm crowfoot,attempt to move the adjusting tube IN BOTH DIRECTIONS.Inspect the match marks on the INBOARD and OUTBOARD locknuts, adjusting tube, and threads for any movement.4 CHECK OUTBOARD LOCK NUTS Hold the adjusting tube using a 22mm wrench and use a 15” torquewrench set to 15ft. lbf with a 22mm crowfoot to attempt to move theoutboard (ball joint side) lock nut.Inspect the match marks on the INBOARD and OUTBOARD lock nuts,adjusting tube, and threads for any movement.REPLACEMENT CRITERIACONDITION1. Looseness or movement isobserved.OR2. Match marks aremisaligned, even slightly.OR3. Visible gap between thelock nut(s) and theadjusting tube.This document is intended as a technician aid. Carefully follow the complete C0J instructions found on TIS when performing this repair.ACTION REQUIRED Replace the suspensionarm(s). Install the arm clips andinstall the caution labels. Follow the CRITICAL locknut tightening procedure inthe full C0J technicalinstructions whenadjusting rear toe.
SAFETY RECALL C0JRAV4 Rear Lower Suspension Arm No.1WORK FLOWINSPECTION EXAMPLES1.OKNGNO gap, NO looseness.Nut(s) loose OR gapbetween nut(s) andadjusting tube.1.DRAFTLOCK NUT TIGHTENINGThe tightening procedure for these lock nuts is CRITICAL, failure totighten then in the correct order could cause them to become loose.Tools: 22mm combination wrench 22mm crowfoot attached to torque wrenchTorque 41ft. lbf (56N·m)Tighten the lock nuts in the following order:1. Inboard 2. Outboard 3. Inboard2.Match marks extend fromthreads, over nut, to tube.2.Match marks NOTcorrect.3.Torque wrench onADJUSTING TUBE.3.Torque wrench SHOULDNOT be on inboard nut.4.HOLD adjustingtube, use torque wrench onOUTBOARD NUT.4.This inspection CANNOTbe performed with only onewrench.This document is intended as a technician aid. Carefully follow the complete C0J instructions found on TIS when performing this repair.
JTM 2010 BF4DV 5017206-D039942 JTM 2011 YK4DV 5027377-D004797 JTM 2010 BK4DV 5084190-D017766 JTM 2011 ZF4DV 5032172-D029470 JTM 2010 DF4DV 5017212-D039591 JTM 2011 ZK4DV 5027376-D004782 . NOTE: Check the TIS Vehicle Inquiry System to confirm the VIN is involved in this Safety Recall, and that the campaign has not already been completed .