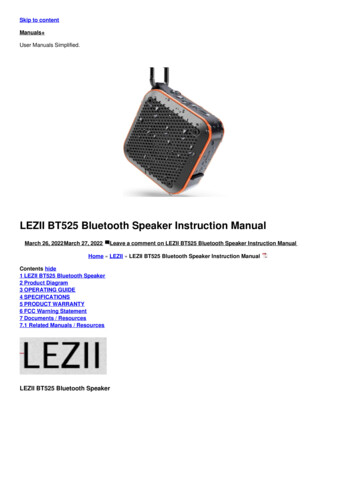
Transcription
Bluetooth Operation ManualforEasyStartTM Soft-Starters
EasyStart Bluetooth Diagnostic ManualTable Of ContentsWARNING . 2Introduction . 2Is my EasyStart a Bluetooth Model? . 2Connecting to EasyStart . 3Download the App . 3Prepare EasyStart for a Connection . 3Open the App and Connect. 3Connection Troubleshooting . 4Status Tab. 5Status . 5Live Current . 5Last Start Peak. 5SCPT Delay. 5Re-learn Tab . 6Diagnose Tab . 7Faults Tab . 7Update Tab. 8Re-Learn (Factory Reset) Procedure . 9Apply the Re-Learn Setting . 9Complete the 5 Learning Starts . 9Setting No Power Up Delay . 10Apply the Timer Bypass Settings . 10Appendix A: Additional Resources . 111 2022 Micro-Air CorpApril 22, 2022, revision 2.0
EasyStart Bluetooth Diagnostic ManualWARNINGBluetooth operation with EasyStart is designed to provide diagnostic feedback when troubleshooting anA/C system. It should be used only by qualified HVAC technicians and HVAC engineers with a goodunderstanding of the system. Changing fault detection, limits, and values in the Bluetooth application forEasyStart can damage the connected compressor or EasyStart under some circumstances. Please use ourEasyStart Knowledge Bank or contact us using the Micro-Air Contact Us Page for more assistance.IntroductionThis document provides instruction on how to operate the Bluetooth interface of Bluetooth EasyStartmodels. Bluetooth operation is a diagnostic aid to monitor and modify EasyStart and does not controlyour A/C like a thermostat. Ideally, the Bluetooth interface will not be needed, however there are somecircumstances for its use. It only communicates with a smart device through the official EasyStart App.These instructions are only valid for Bluetooth capable models. Non-Bluetooth models cannot beupgraded in the field or at the factory to Bluetooth models.Warning: The Bluetooth interface means there is no need at any point for any reason to remove theEasyStart lid for these models. Doing so without instruction may void the warranty.Is my EasyStart a Bluetooth Model?There are a few ways to identify if an EasyStart is a Bluetooth model. Model numbers with a -BLUE suffix are Bluetooth models, for example: ASY-368-X48-BLUEInspect the lid of EasyStart and there should be a Bluetooth sticker as shown belowModels with opaque lids are not Bluetooth modelsInspect the long edges of the EasyStart circuit board for the Bluetooth chip as shown below. Itmay be obscured by the large black start capacitor in the boxBluetooth ChipBluetooth Sticker2 2022 Micro-Air CorpApril 22, 2022, revision 2.0
EasyStart Bluetooth Diagnostic ManualConnecting to EasyStartA smart device with the EasyStart app downloaded to it is required to use EasyStart’s Bluetooth interface.EasyStart itself must be powered to establish a connection. Typically, this is when a cooling or heatingcycle is called for by the thermostat. Note: Some A/C systems will shut down if a fault occurs and removepower. You must move the EasyStart black and white wires to the input side of power so that you canconnect to EasyStart if needed in these circumstances.Download the AppThe app can be downloaded from the App Store or the Google Play Store. It iscalled “EasyStart” by CseaTec LLC. Allow any permissions asked for by the app sothat the app has access to the smart device’s Bluetooth functionality.EasyStart App IconAndroid usersSome versions of Android have Bluetooth permissions asa subset of location services permissions. These versionsof Android mean that location services must be allowedfor the app to function. If you have difficulty connecting,please verify this permission in:2. Tap “Connect toEasyStart”Settings- Apps- EasyStart- PermissionsPermissions should be set for “When using the app”.Prepare EasyStart for a Connection1. Enter “EasyStart “into the fieldEasyStart must be powered to communicate with it.Determine if EasyStart is powered by looking for thegreen POWER LED located near the wire entry to thebox. This LED is easily visible through the clear coverwhen lit.Open the App and ConnectWhen the app opens it will start on the Connect tab,shown in Figure 1. This page is used to establish theconnection to the EasyStart. The other tabs willbecome available once a successful connection ismade.Enter the full unique Bluetooth ID of your EasyStartinto the appropriate field. You can also scan for theEasyStart by entering “EasyStart ” into the field. Thisis shown in Figure 1. Tap the “Connect to EasyStart”button to attempt a connection. If you are scanningand have more than one EasyStart then ensure onlythe one you want to connect to is powered.Figure 1 - Connect Tab3 2022 Micro-Air CorpApril 22, 2022, revision 2.0
EasyStart Bluetooth Diagnostic ManualA successful connection is shown in Figure 2. “Connected” isshown in the status box with a green circle and the other tabsalong the bottom become available.If you used the scanning feature, the Bluetooth ID field will beupdated with the full unique Bluetooth ID for the EasyStart it isconnected to. Future connections can use this ID instead ofscanning. The ID should be noted and used if more than onelocal EasyStart can be powered at one time.Tap the “Disconnect from EasyStart” button to terminate theconnection and prepare for a new one. Closing the app will alsoclose the connection. Only one EasyStart connection at a time.Connection TroubleshootingIs my EasyStart Bluetooth?See section Is my EasyStart a Bluetooth Model? to verify.Is the EasyStart Powered?Ensure that the POWER LED is solid green on the EasyStartcircuit board. If it is off then EasyStart is not powered. Verifythat line voltage is across the EasyStart white and black wires.Is the Correct App Installed?Micro-Air has a few apps for our products. Use the Downloadthe App section and other app screenshots for reference toensure you have the correct one.Is the Bluetooth ID Field Entry Formatted Correctly?Figure 2 - Connect Tab with a Successful ConnectionAll Bluetooth ID field entries are case sensitive. When scanning,“EasyStart ” must be used as shown in Figure 1. When using a unique EasyStart ID, it has a capitalized 4character suffix. Figure 2 shows the example “EasyStart CFFA”.Are the Required Permissions Given to the App? Is Bluetooth Turned-On in General?The app requires Bluetooth permissions from the smart device to use Bluetooth. This is done slightlydifferently between Android and iOS, then can differ further across their own versions. This is typicallydone from the main phone settings for all downloaded apps. Android users can see the Download the Appsection for some additional potential changes.Ensure that Bluetooth is enabled from the main Bluetooth settings of the smart device.Android users can the system’s built-in Bluetooth scanner to see if the EasyStart is broadcasting. If yousee the EasyStart’s Bluetooth ID in the list of devices the scanner can hear, but the EasyStart app does notfind it, then it is likely a permission issue after checking the other recommendations. If it is not in the listthen EasyStart may not be powered. iOS does not natively allow viewing these connections.4 2022 Micro-Air CorpApril 22, 2022, revision 2.0
EasyStart Bluetooth Diagnostic ManualStatus TabOnce connected, tap the status tab along the bottom to switchto the Status & Live Data page, shown in Figure 3. This pagewill show the current state of EasyStart and some basicdiagnostic information.StatusThis shows the current status of the EasyStart. These mirrorthe LED code shown on the EasyStart circuit board. Visit ourEasyStart Knowledge Bank for the latest information on whatthese statuses mean, as well as troubleshooting steps to take.Live CurrentThis is a measurement of the amperage passing throughEasyStart’s white wire, moment to moment. Measurementsbelow 2 amps are effectively no current. EasyStart is veryaccurate in its operating range.This is the bulk of a system’s current draw but you must useother techniques if you want to know the total draw of thesystem, for example the motor start winding, fans, and pumps.Last Start PeakThis is a measurement of the instantaneous peak current seenduring the last start. This can vary over the learning starts andshould not be considered “final” until 5 Learned Starts arecompleted. You can see this just under the Last Start Peakmeasurement.Figure 3 - Status TabThis is not the measurement to use when attempting to size agenerator or determine generator compatibility. Please visit ourEasyStart Knowledge Bank for the latest information on sizing a generator with EasyStart.Note: Large variances in Last Start Peak current may indicate that the system is not equalizing refrigerantpressures between starts. This is a requirement for low current starts. Try extending the SCPT delay if thisis occurring. See section SCPT Delay for more about SCPT and section SCPT (minutes) for its modification.SCPT DelaySCPT stands for Short-Cycle Prevention Timer. Power to EasyStart and the compressor will be regularlycycled during normal operation. This delay is (typically) set to 3 minutes when a cycle terminates andcounts down to 0, where only then is a new cycle allowed to start if called for. The time left for this delayis shown here. EasyStart does not need to be actively powered for this logic to operate correctly.5 2022 Micro-Air CorpApril 22, 2022, revision 2.0
EasyStart Bluetooth Diagnostic ManualRe-learn TabOnce connected, tap the Re-learn tab along the bottom toswitch to the Re-learn / Power-Up page, shown in Figure 4.This page allows for modifying EasyStart behavior for certainsituations that call for it. Tap “Refresh Data from EasyStart”at the top to get the latest settings stored in the connectedEasyStart. If you make a change, tap “Send Settings toEasyStart” at the bottom to save the new settings to theconnected EasyStart.Normal OperationThis is the switch set to let EasyStart operate as advertised. Ifnot yet learned (just installed), it will go through its 5 learningstarts and use that information to deliver the most currentreduction possible for every subsequent start.ReLearnThis switch is used to Re-learn (Factory Reset) the device anderase and previously learned data. See section Re-Learn(Factory Reset) Procedure for details on how and when toappropriately use this switch.Use Default RampThis switch should only be used as a diagnostic tool, as itbypasses any learned data and applies fixed settings to startthe motor every time. This could be useful to rule out badlearned data or just see the compressor start. Even then, it isbest to not use this setting unless otherwise directed byMicro-Air.Figure 4 - ReLearn TabNo Pwr-Up DelayThis switch is used to bypass EasyStart’s fan delay. See section Setting No Power Up Delay for details onhow and when to appropriately use this switch. The default setting of off is appropriate for mostapplications. This switch is enabled/disabled independently from the other switches.SCPT (minutes)This field allows modifying the length of the SCPT. The default time is 3 minutes and ranges are validbetween 1 and 10 minutes. See section SCPT Delay for more information on what SCPT is.Note: This may be increased in some circumstances as described in the Status Tab section. It shouldnever be less-than 3 minutes unless your application requires it. See section Setting No Power Up Delayfor more details on appropriate use.6 2022 Micro-Air CorpApril 22, 2022, revision 2.0
EasyStart Bluetooth Diagnostic ManualDiagnose TabOnce connected, tap the Diagnose tab along the bottom to switch to the Diagnose and Upload page,shown in Figure 5. Using this page will upload data from memory inside EasyStart to Micro-Air forevaluation. An internet connection on the smart device is required for this feature. The upload should befollowed up with a report using the Micro-Air Contact Us Page on our website if you are not alreadyworking with a Micro-Air service technician. It should describe any issues you are having and what youhave done so far.Fill out the fields appropriately to enable sending the data. Wait until the unit has run (or been stoppedon a fault) for a minute or so. Tap the “Refresh Data from EasyStart” button to put the latest informationinto the app. Tap “Send Data to Micro-Air” to upload the data, then follow-up as described above.Faults TabOnce connected, tap the Faults tab along the bottom to switch to the Fault Control page, shown in Figure6. A green switch means the fault detection for that fault is active. These faults should never be disabledunless expressly directed to by a Micro-Air service technician. Disabling these faults can damage theconnected motor or EasyStart under some circumstances.Figure 5 - Diagnose TabFigure 6 - Faults Tab7 2022 Micro-Air CorpApril 22, 2022, revision 2.0
EasyStart Bluetooth Diagnostic ManualUpdate TabOnce connected, tap the Update tab along the bottom toswitch to the Firmware Update page, shown in Figure 7. Thispage is used to get any updates that may become availableover time. Tap the “Check for Updates” button at the top andfollow the prompts to see if your EasyStart is the latest revisionor to update EasyStart.EasyStart is a mature product so there will not be manyupdates. Updates that may become available will likely besmall tweaks really intended for newly produced units. Shouldany updates be recommended or required they will be postedto our social media and website pages. Minor updates will nothave public release notes associated with them.Figure 7 - Update Tab8 2022 Micro-Air CorpApril 22, 2022, revision 2.0
EasyStart Bluetooth Diagnostic ManualRe-Learn (Factory Reset) ProcedureEasyStart is ready to learn out of the box and is completed on the first 5 successful cycles after installation.The learned data is then locked in for the life of EasyStart. Typically, there is no reason to re-learn (factoryreset) this data, however some circumstances will call for it. This section provides step-by-stepinstructions on how to perform a re-learn on your EasyStart.Mandatory cause for a re-learn Compressor run capacitor has been replacedEasyStart is going to be connected to a different motor than originally learned onEasyStart was at one-point mis-wired, then fixed, and is now throwing faultsInitial learning was done on a power source that could not provide a good learning environmentContact Micro-Air if you are not sure using the Micro-Air Contact Us PageWarning: There is no need at any point for any reason to remove the EasyStart lid for Bluetooth models.Doing so without instruction may void the warranty. If your system is non-Bluetooth, then you shouldnavigate to the non-Bluetooth re-learn instructions in our EasyStart Knowledge Bank.Apply the Re-Learn SettingFirst, apply power to EasyStart and connect to it using the app. Use section Connecting to EasyStart to doso if you are not familiar with this process. Heat pump or cooling operation can be used to learn but thesame operation should be used throughout the process.Next, navigate to the Re-learn Tab. Tap the “ReLearn” switch to green. Tapthe “Send Settings to EasyStart” button. A successful change is shown inFigure 8. You can then disconnect from EasyStart or close the app.Complete the 5 Learning StartsNOTE: We recommend learning be done on shore or utility power with acircuit that would normally run the compressor without EasyStart. Agenerator or inverter may be used if that is all that is available. Be sureany generator economy mode is off during learning.Power down the system after saving the change. The next power cycle willbe the first learning start. Restore power and let the compressor run (notjust the fan!) for at least 30 seconds. This learning cycle is then complete.Power the unit down and repeat this process four more times to completethe learning process. EasyStart is then ready for your limited power source.If the first learning start is successful then very likely the rest will be as well.After the first start it is fine to walk away and let the unit cycle on and offnaturally to complete learning. A fault in the first 15 seconds will discardthe learning data for that start and not increment the Learned StartsFigure 8 - Successful Re-Learn Savedcounter.9 2022 Micro-Air CorpApril 22, 2022, revision 2.0
EasyStart Bluetooth Diagnostic ManualSetting No Power Up DelayEasyStart delays the start for several reasons including faults and pressure equalization. Some applicationshowever need to have the compressor immediately start so EasyStart can be integrated into the system.These systems must manage the start and fault delays if the start delay is disabled. This section providesstep-by-step instructions for bypassing the start delay.Compressor Monitoring SystemsSome home A/C units may have a compressor monitoring system (CMS). A CMS is part of the A/C controlsystem and wants to see that the compressor immediately starts when told to. EasyStart interferes withthis operation and so both EasyStart timers should be bypassed for CMS integration as described below.NOTE: Part of CMS operation is that the A/C will shut down as a fault when it detects the EasyStartdelays. This is typically not enough time to establish an EasyStart connection and make the changes.You will have to temporarily connect the EasyStart black and white wires to active line voltage so youcan make these changes. This document does not describe other considerations such as identifying aCMS or special CMS wiring instructions during installation. These are described in our EasyStart GenericHome Installation Guide on our EasyStart Knowledge Bank.Apply the Timer Bypass SettingsWarning: These changes should never be performed unless required to do so by your application.Removing these delays inappropriately can damage the motor or EasyStart. Use the EasyStart GenericHome Installation Guide or Micro-Air Contact Us Page to be sure.First, apply power to EasyStart and connect to it using the app. Usesection Connecting to EasyStart to do so if you are not familiar.Setting to Bypass the Fan DelayEasyStart will have a 5 second or so delay between when it is poweredand when it starts the compressor to allow a fan to power up first.Navigate to the Re-learn Tab. Tap the “No-Pwr-Up Delay” switch togreen. This will start the compressor as soon as EasyStart is powered.Setting to Bypass the Short-Cycle Timer DelayEasyStart will not allow a new cycle to occur for the entered number ofminutes after a previous cycle has ended. Tap the SCPT (minutes) fieldand modify it to the number “1”. This is as short as allowed a delay butis short enough to prevent interference.Save the Changes to EasyStartTap the “Send Settings to EasyStart” button. A successful change isshown in Figure 9. EasyStart will use these settings for each new cycle.If you had to make temporary wiring changes to power EasyStart, returnFigure 9 - Timers Successfully Defeatedthem now to the appropriate permanent wiring configuration.10 2022 Micro-Air CorpApril 22, 2022, revision 2.0
EasyStart Bluetooth Diagnostic ManualAppendix A: Additional ResourcesThis document references various other Micro-Air resources and are listed here.EasyStart Knowledge BankWhere all EasyStart resources are saved, including FAQs, articles, procedures, and troubleshooting guides.http://www.micro-air.com/kb easystart.cfmEasyStart Generic Home Installation GuideA guide for installing in any home system with notes on adapting to a compressor monitoring les installation/easystart Home AC Wiring Guide.cfmMicro-Air Contact Us PageUse this page for sending specific inquiries about any of our productshttps://www.micro-air.com/contact microair.cfmMicro-Air Main Websitehttps://micro-air.com/11 2022 Micro-Air CorpApril 22, 2022, revision 2.0
Open the App and Connect When the app opens it will start on the Connect tab, shown in Figure 1. This page is used to establish the connection to the EasyStart. The other tabs will become available once a successful connection is made. Enter the full unique Bluetooth ID of your EasyStart into the appropriate field.


![[MS-CDP-Diff]: Connected Devices Platform Protocol Version 3](/img/35/5bms-cdp-5d-220429-diff.jpg)