Transcription
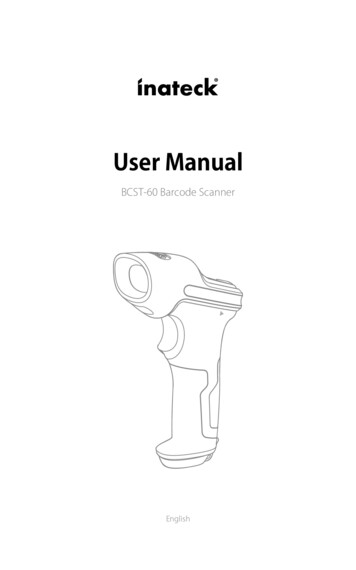
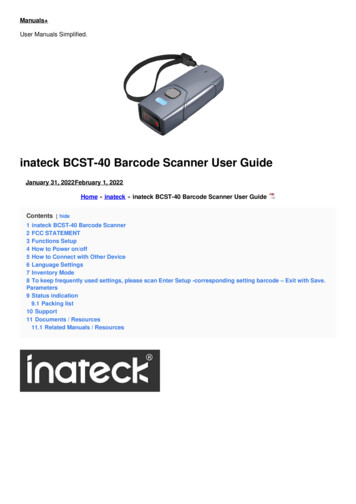
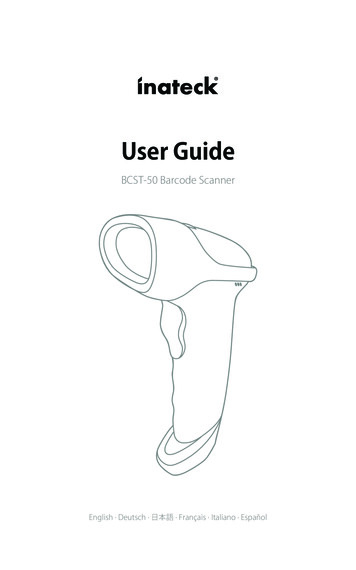
User GuideBCST-50 Barcode ScannerEnglish · Deutsch · 日本語 · Français · Italiano · Español
EnglishThis is a brief version of BCST-50 manual instruction. For more detailed functionillustration, please go to www.inateck.com to download the detailed user manual orcontact us via support@inateck.com. We’ll try our best to help solve your problem intime.If you have any problem or suggestion with our product, please contact us viasupport@inateck.com.1. Use of BCST-50When using BSCT-50 to scan the barcode, please focus the red light on the barcodeto scan. The red light is to help the user to aim at the bar code; The white light is tohelp the user to scan barcodes under the condition of insufficient light.Red aiming beam settingThe red aiming beam that comes out the scanner locates barcode during scanning.Just target the red aiming beam on the barcode you want to read. Users can opt toany mode according to their varied working environments.Normal: Press Scan button, and the scanner gives off red aiming beam.Aiming beam lit: When the scanner is connected to power, the red aiming beamwould be lit.No aiming beam: Aiming beam is off under any working mode.Normal (default setting)No Aiming beamAiming beam litLuminous light settingWhite luminous light can illuminate barcode for scanning. Recognition performanceand adaptability under dim light of the scanner would be improved with whitelight focusing on target barcode. Users can adapt the scanner to either of the belowmodes according to their varied working environments.Normal: Press Scan button, and scanner gives off white luminous lightLuminous light lit: When the scanner connects power, scanner is lit white.No luminous light: No luminous light under any circumstances.1
Normal (default setting)How to ChargeNo luminous lightLuminous light litThe scanner enters low-battery mode after long-beeping for 3 times, which means itrequires charging.The required voltage for charging the scanner is 5V, and current below 500mA.Current controller chip is set inside the scanner to filter excessive current - for anycurrent above 500mA, it filters the excessive current and inputs 500mA for charging.As long as the charging voltage is at 5V, the scanner should function without issue.You can charge the scanner with a regular phone charger for the voltage output of aregular phone charger or a laptop USB port is also 5V.How to StartYou can power on the scanner by pushing the scan button. The indicator will flashgreen when the scanner is switched on with a beep.How to Power OffLong press the scan button if you want to power off the scanner immediately.How to UseNote: When the scanner is connected both via cable and wirelessly, it transmits datathrough cable by defaultWired Mode:1. Connect the barcode scanner with computer via USB cable2. Open a file on computer and move cursor to the blank where scanning outputshould be placed. Scanning results can be displayed on computer then.Wireless Dongle ModeThe dongle is paired with the scanner automatically when leaves factory.1. Connect the wireless dongle to the USB port on your laptop, and the laptop willbegin installing the drive for scanner automatically.2. Press the power button on the scanner, and the scanner is paired successfully withthe dongle with the blue LED lit.2
Note: If you can’t upload data via the dongle, please first unplug the dongle fromyour laptop, and then scan the “dongle mode” and “Match” barcodes in turn till theLED flashes green which represents that the scanner is under pairing mode. Then,plug the dongle into the USB port again when you could hear two beeps fromthe scanner with the LED flashing blue. At the time, the dongle has been pairedsuccessfully with the scanner and the scanner is ready for data input. If there’s still aproblem, please contact our customer service via support@inateck.com.Dongle ModeMatchWireless Bluetooth Mode(HID)1. Scan “Bluetooth Mode (HID)” barcode, and then “Match” barcode to notice theindicator flashes blue and green alternately. The scanner enters Bluetooth pairingmode.Bluetooth Mode(HID)Match2. Enable the Bluetooth of the device to be connected, e.g. PC, cellphone or tablet.3. You can do that like below.Windows XP: Click Control Panel- Printers and Other Hardware- Add BluetoothDeviceWindows 7/8/8.1: Click Control Panel- Add DevicesWindows 10: Click Setting- Devices- BluetoothmacOS: Click System Preference- BluetoothiOS: Click Setting- Bluetoothandroid: Click Setting- Bluetooth4. Enable the Bluetooth on host device and it will automatically search for BCST-50.5. After a few seconds ‘Inateck BCST-50’ will appear in the list of available devices. Pairthe two devices. The blue LED is lit when the scanner is paired successfully.3
2. Language SettingsEnglish (default setting)GermanJapaneseFrenchItalianSpanishNote: BCST-50 should set up the language in accordance with the PC language,otherwise error may occur.3. Setting for Prefix/SuffixUsers can add prefix/suffix to scanning result. The prefix/suffix can have 1 to 32 digits.More details are as below.1. Scan “Prefix Setting” or “Suffix Setting”Prefix SettingSuffix Setting2. Scan the character barcode you need as prefixes or suffixes (32 characters at themost). Please refer to Appendix I for prefixes/suffixes barcodes.4
4. HID Keyboard Display /Hide(iOS)4.1 Activate HID keyboardScan the below barcode once to activate the virtual keyboard on iOS devices, andscan for another time to hide it.Activate/Hide virtual keyboard on iOS device(iPhone or iPad)4.2 Double-click to activate HID keyboardScan the below barcode, and then press the scan button on the scanner for twicequick to activate HID keyboard on iOS devices. Press for another twice to hide it.Enable the function of Double-click Activate/Hide HIDKeyboard on iOS device (default setting)Please scan the below barcode to disable the function of Double-click Activate/HideHID Keyboard on iOS devices.Switch Off Double-click Activate/hide HIDkeyboard on iOS devices.5. Transmission Speed SettingHigh Speed (default setting)Medium SpeedLow SpeedUltra-low Speed5
Note: When there’s a partial data loss during transmission to iPad or iPhone, pleaseadapt the transmission speed to Ultra-Low Speed.6. Delete Character(s) on Output ResultThe barcode scanner can help users delete character(s) on output result, eitherbeginning characters or the ending ones. 0 to 4 digits can be deleted. As defaultsetting, no character is deleted as output result. More details are as below.1. Scan “Delete Beginning Character(s)” Barcode or “Delete Ending Character(s)”BarcodeDelete Beginning Character(s)Delete Ending Character(s)2. Scan the numbers you want to delete,and the maximum is 4 bytes1 byte2 bytes3 bytes4 bytes6
7. Frequently Used BarcodesRestore Factory SettingOutput Software VersionCR SuffixLF SuffixCRLF SuffixNo SuffixManual Scan (default setting)Continuous ScanAuto-sensing Scan8. Powers Off automatically Time settingTo prolong battery life, the scanner powers off automatically after left unused for 10minutes. You can adjust the time period by scanning the below barcodes.30 Seconds7
1 Minute2 Minutes5 Minutes10 Minutes (default setting)30 MinutesNO Powers Off automatically(means thescanner never goes off automatically)9. BeepMuteLow volumeMedium volume8High volume (default setting)
10. Status indicationBuzzer IndicationBeepingMeaningThree long beepsLow battery, requires chargingLong beep for 0.4s(low)Bluetooth connection unsuccessfulShort beep onceSuccessful uploadEnter settingsSuccessful Bluetooth reconnectionLED IndicationIndicator colorMeaningLED lit blueSuccessful connectionLED lit redCharging, lights out upon full batteryFlashes green and blueBluetooth waiting for pairingFlashes green intermittentlyDongle is waiting for pairing11. Product SpecificationModelBCST-50MaterialABS PC PVCPower SupplyDC 5V 5%Battery3.7V 2000mAh 18650 lithium batteryCharging Time3.5hWeight170g 5gDongle Effective Distance30mBluetooth Effective Distance10mLEDRed LED focus White LED lightingMemory2MSupported Barcode EAN128,InterLeaved2of5,Matrix2of5,MSI CODE,Standard2of5.QR CODE,DATA MATRIX,PDF417, Aztec, Hanxin, Micro QR, Micro PDF417, MaxicodeDecode Speed200 opsScan ModesManual Scan, Auto-sensingScan Area5 * 5 cm² -- 30 * 30 cm²Print ContrastAbove 35%Scan AngleTurning 0-360 , elevation 65 , deflection 60 Bluetooth transmission band(Bluetooth Mode)2402MHz - 2480MHzBluetooth transmission power(Bluetooth Mode)0dBmWireless transmission band(Wireless Adapter Mode)2407MHz - 2473 MHzWireless transmission power(Wireless Adapter Mode)0dBm9
12. Packing listInateck BCST-50*1USB Cable*1Dongle*1Instruction Manual*113. FAQ1. Why part of data input to certain software is lost when connect the scanner withiPhone or iPad via Bluetooth? How to fix it?A: Please refer to the 5th point “Transmission Speed Setting”, and adapt thetransmission speed to Ultra Low Speed.2. Why the scanner fails to upload data to or reconnect devices that have been pairedpreviously? What should I do?A:1)Delete the pairing history and turn off the Bluetooth on your device.2)Restore factory settings for the scanner.3)Pair the scanner with your device for another time according to the instruction.3. How to activate virtual keyboard on iPad or iPhone?A: Please refer to the 4th point “HID Keyboard Display/Hide (iOS)” to activate thekeyboard.SupportPlease feel free to email support@inateck.com if you have any query regardingInateck BCST-50 barcode scanner. We will gladly assist you.10
DeutschDie ist die Kurzfassung der BCST-50 Bedienungsanleitung. Für eine detaillierteBeschreibung laden Sie die Vollanleitung von unserer Seite www.inateck.de herunteroder nehmen unter support@inateck.com Kontakt zu uns auf. Wir helfen Ihnenschnellstmöglich weiter.Bei Fragen und Problemen nehmen Sie bitte Kontakt zu uns auf via support@inateck.com.1. Verwendung des BCST-50Wenn Sie den Barcode mit BSCT-50 scannen, fokussieren Sie bitte das rote Lichtauf den zu scannenden Barcode. Das rote Licht wird dem Benutzer helfen, auf denBarcode zu richten; das weiße Licht wird dem Benutzer helfen, Barcodes unter derBedingung von unzureichendem Licht zu scannen.Einstellung des roten ZielstrahlsDer rote Zielstrahl, der aus dem Scanner kommt, peilt den Barcode während desScannens an. Richten Sie einfach den roten Zielstrahl auf den Barcode, den Sie lesenmöchten. Je nach unterschiedlicher Arbeitsumgebung können Sie sich für einenentsprechenden Modus entscheiden.Normal: Drücken Sie den Scan-Knopf und der Scanner gibt den roten Zielstrahl ab.Zielstrahl leuchtet: Auch wenn der Scanner an die Stromversorgung angeschlossenwird, leuchtet der rote Zielstrahl auf.Kein Zielstrahl: Der Zielstrahl ist für jeden Modus ausgeschaltet.Normal (Standardeinstellung)Kein ZielstrahlZielstrahl leuchtetLichteinstellungEin weiß leuchtendes Licht kann den Barcode für das Scannen beleuchten. DieErkennungsleistung und Anpassungsfähigkeit des Scanners können damit auchbei schwachem Licht verbessert werden durch weißes Licht, das sich auf den ZielBarcode richtet. Je nach unterschiedlicher Arbeitsumgebung können Sie denScanner an einen entsprechenden Modus anpassen.11
Normal: Drücken Sie den Scan-Knopf und der Scanner gibt ein weißes, hellstrahlendes Licht abHelles Licht leuchtet: Wenn der Scanner an die Stromversorgung angeschlossen wird,leuchtet der Scanner weiß.Kein leuchtendes Licht: Das helle Licht leuchtet in keinem Modus mehrNormal (Standardeinstellung)Kein helles LichtHelles Licht leuchtetAufladen des ScannersMit drei Pfeiftönen signalisiert der Scanner, dass er in den Batteriesparmodus gehtund aufgeladen werden muss.Es werden eine Ladespannung von 5 V und ein Ladestrom von maximal 500mAbenötigt. Der Controller-Chip im Scanner verhindert eine Überladung undFehlströme von über 500mA, so dass effektiv der benötigte Strom auf 500mA gefiltertwird. Solange die Ladespannung bei 5 V liegt, sollten sich keine Probleme beimLaden ergeben. Somit lassen sich handelsübliche USB-Ladenetzteile für Telefoneoder USB-Ausgänge am Rechner ohne Probleme verwenden, um den Scanner mit 5V aufzuladen.EinschaltenDrücken Sie einfach den Abzug, um den Scanner einzuschalten. Die LED leuchtetdann grün und ein langes Pfeifsignal ertönt.AusschaltenDrücken Sie den Abzug lang, wenn Sie den Scanner sofort ausschalten möchten.Verwendung des ScannersAchtung: Bei simultaner Kabel- und Drahtlosverbindung wird vom Scanner dieÜbertragung per Kabel priorisiert.Kabelverbindung:1. Verbinden Sie den Scanner mit dem PC per USB-Kabel.2. Öffnen Sie eine Datei oder ein Textprogramm auf dem PC und setzen den Cursordorthin, wo die Ausgabe der Codes erfolgen soll.12
Dongle-ModusVerbindenDrahtlosverbindung über USB-AdapterDer USB-Dongle ist bereits ab Werk mit dem Scanner gekoppelt.1. Stecken Sie den Dongle an Ihrem PC an, das System installiert den Treiberautomatisch.2. Drücken Sie den Abzug am Scanner, um ihn einzuschalten. Bei erfolgreicherVerbindung des Scanners mit dem Dongle leuchtet die LED blau auf.Achtung: Wenn keine Daten über den Dongle übertragen werden, ziehen Sie denUSB-Dongle bitte vom PC ab und scannen die beiden Codes “Dongle-Modus” und“Verbinden” hintereinander, bis die LED grün blinkt, um den Kopplungsmodusanzuzeigen. Binden Sie nun den USB-Dongle wieder an den PC an. Wenn Sie nunzwei Pfeiftöne vom Scanner hören und die LED blau blinkt, ist der Scanner wiedermit dem Dongle verbunden und wartet auf Eingaben. Bei anhaltenden Problemennehmen Sie bitte Kontakt mit uns auf über support@inateck.com.Bluetooth-Verbindung (HID)1. Scannen Sie den Barcode “Bluetooth-Modus (HID)” und danach “Verbinden”, bisdie LED am Scanner abwechselnd blau und grün blinkt. Der Scanner ist nun imBluetooth-Kopplungsmodus.2. Aktivieren Sie nun Bluetooth am Stammgerät (PC, Tablet, Smartphone o.ä.).3. Folgende Schritte können je nach System verwendet werden:Windows XP: Klick auf “Systemsteuerung” - “Drucker und andere Hardware” - “Bluetooth-Gerät hinzufügen”Windows 7/ 8/ 8.1: Klick auf “Systemsteuerung” - “Geräte hinzufügen”Windows 10: Klick auf “Einstellungen” - “Geräte” - “Bluetooth”Mac OS: Klick auf “Systemberichte” - “Bluetooth”iOS: Klick auf “Einstellungen” - “Bluetooth”Android: Klick auf “Einstellungen” - “Bluetooth”4. Aktivieren Sie Bluetooth am Stammgerät, damit es automatisch nach BCST-50suchen kann.5. Nach einigen Sekunden sollte der “Inateck BCST-50” in den verfügbaren Gerätenauftauchen. Führen Sie nun die Kopplung über diesen Eintrag durch. Nach einererfolgreichen Kopplung leuchtet die LED blau auf.Bluetooth-Modus (HID)Verbinden13
2. SpracheinstellungenEnglisch chSpanischBitte beachten: Die Tastaturbelegung BCST-50 sollte gemäß der auf dem Rechnerverwendeten Eingabemethode eingerichtet werden, um Ausgabefehler zuvermeiden.3. Einstellung von Prä- und SuffixenNutzer können Prä- und Suffixe einrichten, die bei der Ausgabe mit ausgegebenwerden. Die Prä- und Suffixe können jeweils 1-32 Stellen haben. Mehr Details sieheunten.1. Scannen Sie “Präfix-Einrichtung” oder -Einrichtung142. Scannen Sie nun die Codes für die gewünschten Zeichen der Prä- oder Suffixe(maximal jeweils 32 Zeichen). Die Zeichencodes entnehmen Sie bitte dem Anhang I.
4. HID-Tastatur aufrufen/ verbergen (iOS)4.1 Aktivierung der HID-TastaturScannen Sie den folgenden Code einmal zum Aufrufen der virtuellen Tastatur unteriOS-Scan und noch einmal, wenn Sie die Tastatur wieder verbergen möchten.Aufrufen/ Verbergen der virtuellen Tastatur(iPhone oder iPad)4.2 Aktivieren der Doppelklickfunktion zum Aufrufen/ Verbergen der HID-Tastaturunter iOSScannen Sie den folgenden Code, um dann auf Wunsch die virtuelle Tastatur unteriOS mittels schnellen Doppelklicks auf den Abzug des Scanners zu aktivieren oder zudeaktivieren.Aktivieren der Doppelklickfunktion zum Aufrufen/Verbergen der iOS-Tastatur (Normalmodus)Bitte scannen Sie den folgenden Code, um die Doppelklickfunktion zu deaktivieren.Deaktivieren der Doppelklickfunktion zumAufrufen/ Verbergen der iOS-Tastatur.5. Einstellung der AusgabegeschwindigkeitSchnell (Normalmodus)MittelLangsamExtrem langsam15
Achtung: Sollte es zu Ausgabefehlern bei iPad oder iPhone kommen, stellen Sie dieAusgabegeschwindigkeit über den obigen Code auf “Extrem langsam” ein.6. Zeichen bei Ausgabe löschenDer Scanner kann auf Wunsch auch Zeichen bei der Ausgabe der Codes löschen,sowohl Zeichen am Anfang oder Ende des Codes. Es können jeweils 0-4 Zeichenverborgen werden. In den Werkseinstellungen werden keine Zeichen verborgen.Weitere Details siehe unten.1. Scannen Sie den Barcode “löschen von Anfangszeichen” oder “löschen vonEndzeichen”.löschen von Anfangszeichenlöschen von Endzeichen2. Scannen Sie nun die Anzahl der zu löschenden Zeichen, maximal vier ZeichenEin ZeichenZwei ZeichenDrei ZeichenVier Zeichen16
7. Häufig verwendete EinrichtungscodesAuf Werkseinstellungen zurücksetzenAusgabe der Firmware-VersionCR SuffixLF SuffixCRLF SuffixKein SuffixManueller Scan (Normalmodus)Kontinuierlicher ScanAutomatische Codeerkennung8. Einstellung automatisches AusschaltenUm den Akku zu schonen, schaltet sich der Scanner nach zehn Minuten Inaktivitätautomatisch aus. Mittels der folgenden Codes können Sie die Zeit bis zumAusschalten einstellen.30 Sekunden17
1 Minute2 Minuten5 Minuten10 Minuten (Normalmodus)30 MinutenAusschalten deaktiviert (Der Scanner bleibtpermanent eingeschaltet)9. PfeiftongeberStummGeringe LautstärkeMittlere Lautstärke18Hohe Lautstärke (Werkseinstellung)
10. StatusanzeigenTongeberPfeifsignalBedeutungDrei lange PfeiftöneNiedriger Ladestand, Aufladen erforderlichLanger Ton für 0,4 s (tief)Bluetooth-Kopplung fehlgeschlagenKurzer TonUpload erfolgreichEinstellungen vornehmenErfolgreiche deutungLED leuchtet BlauErfolgreiche VerbindungLED leuchtet RotLadevorgang, LED erlischt bei voller LadungLED blinkt Grün und BlauBluetooth-KopplungsmodusLED blinkt sporadisch GrünUSB-Dongle auf die Kopplung warten11. ProduktspezifikationModellBCST-50MaterialienABS, PC, PVCStromeingangDC 5 V 5%Akkumulator3,7 V 2000 mAh 18650 Li-Ion-AkkuLadedauer3,5 hGewicht170 g 5 gFunkreichweite DongleBis zu 30 mFunkreichweite BluetoothBis zu 10 mLEDRote LED zum Anvisieren, weiße LED als BeleuchtungSpeicher2 MBUnterstützte BarcodetypenCodabar, Code11, Code39/ Code93, UPC/ EAN, Code 128/ EAN 128, InterLeaved 2 of5, Matrix 2 of 5, MSI CODE, Standard 2 of 5, QR CODE, DATA MATRIX, PDF417, Aztec,Hanxin, Micro QR, Micro PDF417, MaxicodeDekodierungsgeschwindigkeit200 Vorgänge pro SekundeScanmodiManueller Scan, automatische CodeerkennungScan-Bereich5 x 5 cm² -- 30 x 30 cm²DruckkontrastÜber 35 %Scan-WinkelDrehung des Einlasses 0-360 , Neigung 65 , Seitliche Drehung um Griffachse 60 Bluetooth Übertragungsband(Bluetooth-Modus)2402MHz - 2480MHzBluetooth Sendeleistung(Bluetooth-Modus)0dBmKabelloses Übertragungsband(kabelloser Modus)2407MHz - 2473 MHzKabellose Sendeleistung(kabelloser Modus)0dBm19
12. Lieferumfang1x Inateck BCST-501x USB-Kabel1x USB-Dongle1x Bedienungsanleitung13. FAQ1. Warum gehen bei der Ausgabe einige Daten oder Zeichen verloren, wenn ichbestimmte Programme auf dem iPad oder iPhone verwende (z. B. Safari)? Gibt eseine Lösung?A: In diesem Fall ist die Ausgabegeschwindigkeit noch zu hoch und dasProgramm kommt nicht hinterher. Bitte entnehmen Sie dem Abschnitt 5, wieSie die Geschwindigkeit der Ausgabe reduzieren, bei iOS wird „Extrem langsam“empfohlen.2. Wieso kann der Scanner keine Daten übertragen oder keine Wiederverbindungmit bereits früher verbundenen Geräten herstellen? Wie kann das Problem gelöstwerden?A:1) Löschen Sie die Bluetooth-Einträge auf Ihrem Stammgerät und deaktivierendessen Bluetooth.2) Setzen Sie den Scanner auf Werkseinstellungen zurück (Abschnitt 7).3) Führen Sie eine Neukopplung nach Anleitung durch (Abschnitt 1).3. Wie kann das virtuelle Keyboard auf dem iPad aktiviert werden?A: Bitte entnehmen Sie dessen Aktivierung dem Abschnitt 4: “Aufrufen/ VerbergenHID-Tastatur (iOS)”.KundendienstBezüglich Fragen oder Anregungen zum Produkt können Sie uns jederzeit eineNachricht an support@inateck.com schreiben. Wir werden Ihnen so schnell wiemöglich antworten20
日本語ご注意:本書は BCST-50 �い情報については、www.Inateck.com �てください。ご問題がある場合は support@inateck.com �ましたら、support@inateck.com までご連絡ください。1. 使用方法BSCT-50 �せるのに役立ちます。 ��ちます。1) �も消灯します。ノーマル ( デフォルト設定 ) �すことができます。 なる状況下でも発光しません。21
ノーマル ( デフォルト設定 )白色照明なし白色照明点灯充電方法3 電用電圧は 5V で、電流は 500mA 未満です。 ��します。500mA �流をフィルタし、500mA 電流で充電します。 充電電圧が 5V ��ラップトップの USB �源を入れます。 �キャンする方法ご注意 : 有線モード :1. USB ケーブル経由にて Inateck BCST-50 をコンピュータと接続します。2. されます。1. � USB �22
�ルを自動的に開始します。2. �の LED �と正常にペア設定されます。ご注意 : ��モードに移行して、緑色の LED が点滅します。青色の LED が点滅して 2 � USB �しない場合は、support@inateck.com �マッチワイヤレス Bluetooth モード(HID)1.「Bluetooth ��ドをスキャンして、スキャナは Bluetooth ��ことを確認します。Bluetooth モード(HID)マッチ2. ホストデバイスの Bluetooth 機能を有効にします。例えば 。3 各デバイスの Bluetooth �ください。Windows XP: コ ン ト ロ ー ル パ ネ ル プ リ ン タ と そ の 他 の ハ ー ド ウ ェ ア Bluetooth ndows 7/8 / 8.1:「コントロールパネル」 �。Windows 10:設定 デバイス Bluetooth 環境設定」 �定 Bluetooth をクリックします。android:設定 Bluetooth をクリックします。4. ホストデバイスの Bluetooth を有効にすると、自動的に BCST-50 が検索されます。5. �に「Inateck BCST-50」が表示されます。 2つのデバイスをペアにします。 �青色の LEDが点灯します。23
2. ��イン語ご注意 : 必 ず お 使 い P C と 一 致 の キ ー ボ ー ド タ イ プ を 設 置 必 要 で す 。そう し な い �3. プレフィックス / �ドデータにプレフィックス / �ィックス / サフィックスには、1 〜 32 桁の文字を付加できます。 詳細は以下の通りです。1. ��クス設定サフィックス設定242. ��大 �、付録 Iを参照してください。
4. HID キーボードの表示 / 非表示(iOS)4.1 HID �ードを 1 回スキャンして、iOS デバイスの HID �ャンして非表示にします。iOS デバイスの HID キーボードの有効化 / 非表示(iPhone or iPad)4.2 ダブルクリックして HID keyboard �ャンして、スキャンボタンを 2 回すばやく押して、iOS デバイスの HID キーボードを有効にします。 もう一度 2 回押すと、HID S デバイスでダブルクリックして HID キーボードを有効 / ��ブルクリックして HID キーボードを有効 / 無効にする機能を無効にする。iOS デバイスでダブルクリックして HID キーボードを有効 / 無効にする機能オフ5. �中速低速超低速25
ご注意 : iPad または iPhone ��してください。6. �削除するInateck BCST-50 �頭 / 接尾の(0 〜 4 �出力されたバーコードデータの接頭 / 接尾の文字が削除されません。1. る2. 削除する文字数(0 4 ��2桁3桁4桁26
7. ��ョンCR SuffixLF SuffixCRLF SuffixNo �連続スキャン自動検出8. �ばすために、スキャナは 10 �ます。 ��す。30 秒27
1分2分5分10 分(デフォルト設定)30 �能が無効にします。)9. (デフォルト設定)
10. �ビープ音を 3 �ビープ音を 1 回鳴る(0.4S)Bluetooth 接続が失敗した。短いビープ音を 1 ��設定モードに移行した。Bluetooth 接続ができた。LED 表示LED インジケーター状態ブルーの LED が点灯うまく接続しました赤の LED �る。緑と青の Bluetooth が点滅接続待ち緑の LED が点滅ドングル接続待ち11. 製品仕様商品型番Inateck BCST-50材質ABS PC PVC電源DC 5V 5%電池容量3.7V 2000mAh 18650 リチウム電池充電時間3.5h重量170g 5gドングル実効距離30mBluetooth 有効距離10 mLED赤色 LED フォーカス 白色 LED nterLeaved2of5,Matrix2of5,MSI CODE,Standard2of5.QR CODE,DATA MATRIX,PDF417, Aztec, Hanxin, Micro QR, Micro PDF417, Maxicodeデコード速度200 �キャンモードスキャン範囲5 * 5 cm² -- 30 * 30 cm²印刷コントラスト35% 以上デコードアングルロール 0 360 、ピッチ 65 、ヨー 60 Bluetooth 伝送帯域(Bluetooth モード )2402MHz-2480MHzBluetooth 送信電力(Bluetooth モード )0dBmワイヤレス伝送帯域( ワイヤレスアダプターモード )2407MHz - 2473 MHzワイヤレス送信電力( ワイヤレスアダプターモード )0dBm29
12. パッケージ内容Inateck BCST-50*1USB ケーブル *1ドングル *1取扱説明書 *113. FAQ1. Bluetooth 経由にて iPhone または iPad ��れるのはなぜですか? ��」 ��度を超低速に設定してください。2. 履歴を削除し、デバイス側の Bluetooth ��す。3. iPad または iPhone 「取扱説明書」 4、「HID キーボードの表示/ �サポート本 製 品 に 対 して 何 か 疑 問 や アド バ イ ス が ご ざ い ま し た ら 、 s u p p o r t @ i n a t e c k . c o mま で に ご 連 絡 し てく だ さ い 。30
FrançaisC’est une version brève du mode d’emploi de BCST-50. Pour plus de détails, veuillezvisiter www.inateck.com pour télécharger une version complète ou nous contacterpar support@inateck.com.En cas de moindre problème, vous pouvez facilement nous trouver par support@inateck.com, et nous sommes toujours à votre disposition.1. L’usage de BCST-50Quand vous scannez le code-barres avec BCST-50, veuillez bien viser le code-barrespar la lumière rouge. Celle-ci est dédiée à viser le code-barres, alors que la lumièreblanche est pour éclairer le code-barres en cas d'insuffisance lumineuse.Configuration de faisceau de visée rougeLe faisceau de visée rouge est pour viser le code-barres lors du scan. Il faut bien viserle code-barres pour réaliser un bon scan. Vous pouvez changer de mode du faisceaucomme vous voulez.Normal : Appuyez sur le bouton du scan, et le scanner va émettre le faisceau de viséerouge.Faisceau toujours activé : Quand le scanner est lié à l’appareil, le faisceau de viséerouge sera toujours allumé.Faisceau désactivé : Pas de faisceau de visée rouge.Normal (Par défaut)Faisceau désactivéFaisceau toujours activéConfiguration de lumière d’éclairageLa lumière blanche est pour éclairer le code-barres lors du scan. Cette fonctionfacilitera votre travail dans un endroit sombre. Vous pouvez changer de mode de lalumière comme vous voulez.Normal : Appuyez sur le bouton du scan, le scanner va émettre une lumière blanche.Lumière toujours activée : Quand le scanner est lié à l’appareil, la lumière blanchesera toujours allumée.Lumière désactivée : Pas de lumière d’éclairage.31
Normal (Par défaut)Lumière désactivéeLumière toujours activéeComment le chargerQuand l’autonomie du scanner est faible, le buzzer va émettre 3 bips longs.La tension pour charger le scanner est de 5 V, et le courant ne doit pas dépasser500mA. Il y a une puce pour limiter et filtrer le courant excessif - pour un courantde plus de 500mA, elle ne laisse entrer que 500mA pour la charge. Généralement latension du chargeur de téléphone portable ou du port USB du PC portable est de5V, vous pouvez donc également profiter du chargeur de téléphone portable pourcharger le scanner. Veuillez bien respecter cette limite de tension pour un bon usagedu produit.Comment démarrer le scannerVous pouvez démarrer le scanner en appuyant sur le bouton de scan. L’indicateurvert va clignoter avec un bip quand le scanner est démarré.Comment éteindre le scannerAppuyez longuement sur le bouton de scan si vous voulez directement éteindre lescanner.Comment l’utiliserN.B.: Quand le scanner est lié à l’ordinateur à la fois par le câble et de manière sans fil,il transmettra les données de moyen filaire par défaut.Mode Filaire:1. Connectez le scanner à l’ordinateur par le câble USB2. Ouvrez un fichier (excel ou word par exemple), et mettez le curseur de la souris oùvous voulez faire entrer les données du scan. Ces dernières seront transmises dansce fichier du PC.Mode Sans Fil avec Dongle32Le dongle est lié au scanner à la sortie de l’usine.1. Connectez le dongle au port USB de votre PC, et puis le PC installeraautomatiquement le pilote du scanner.
2. Appuyez sur le bouton d’alimentation du scanner, et le jumelage seraautomatiquement fait avec le LED bleu allumé.N.B.: Si vous ne pouvez pas transmettre des données au PC par le dongle, veuillezretirer ce dernier et puis scanner par ordre « Mode Dongle » et « Jumelage ». Lescanner sera mis en mode de jumelage et le LED vert clignotera. Quand vousentendez deux bips sonore du scanner et quand le LED bleu commence àclignoter, vous pouvez relier le dongle au port USB de votre PC. Maintenant ledongle est relié au scanner avec succès, et la transmission des données est prête.Si votre problème n’est pas encore résolu, veuillez svp contacter notre service clientpar support@inateck.com.Mode DongleJumelageMode Bluetooth Sans Fil (HID)1. Scannez « Mode Bluetooth (HID) », et puis « Jumelage ». L’indicateurs vert et bleuclignote alternativement quand le mode de jumelage est activé.Mode Bluetooth (HID)Jumelage2. Activez la fonction Bluetooth de votre appareil à lier au scanner : PC, téléphoneportable ou tablette, etc.3. Vous pouvez suivre les étapes suivantes :Windows XP:Cliquez sur Démarrer Panneau de configuration Imprimantes etmatériel Périphériques Bluetooth.Windows 7/8/8.1: Cliquez sur Démarrer P
The barcode scanner can help users delete character(s) on output result, either beginning characters or the ending ones. 0 to 4 digits can be deleted. As default setting, no character is deleted as output result. More details are as below. 1. Scan "Delete Beginning Character(s)" Barcode or "Delete Ending Character(s)" Barcode 1 byte 3 bytes
