Transcription
NVIDIA CloudXR Introductory OfferQuick Start Guide on AzureThis guide walks through getting started using the NVIDIA CloudXR Introductory Offer WinServer 2019 offering available from the Azure Marketplace.What's includedUsing the NVIDIA CloudXR Introductory Offer - WinServer 2019 eases installation and deliveryof NVIDIA CloudXR to developers. Deploying the Marketplace offering provides the followingsoftware and Azure instance configurations:An Azure instance configured with an NVIDIA-supported GPUCloudXR Server installer and documentationAzure Firewall settings for the instance.NVIDIA vGPU v13.0 driversWhat's excludedThe post-deployment applications and configurations that are required but not included are:Steam & SteamVRA remote desktop solution besides RDPCloudXR clientsOpenVR applications to stream.Steam and SteamVRCloudXR uses StreamVR's OpenVR SDK as an interface between head-mounted displays and VRsoftware by installing a plugin to SteamVR. Steam and SteamVR are not distributed with the imageand must be downloaded directly from Valve and installed manually after the instance launches.CloudXR test/sample clientsBecause devices and clients continue to evolve, visit the developer portal /solutions/cloud-xr/) for the latest clients, information, and support.Remote Desktop Solution besides RDPUsing Windows RDP is the only option for intial configuration steps after deployment, but usingRDP during CloudXR Streaming sessions will display a green screen to the VR device. This is aknown problem with Windows RDP unable to release the Microsoft Basic Display Driver usedduring the remote session. You must install an alternative remote desktop solution (some optionsinclude VNC, PCoIP from Teradici, or DCV from NICE) and use this whenever logging into theremote instance.Azure Configuration Prerequisites
Before getting started, you must have a Azure Account that meets the following prerequisites:Deployment rights for Azure instancesThe rights to create firewalls and attach to networks used by the instance.Access to Microsoft RDP for post-deployment initialization stepsYou also should be comfortable operating within the Azure Console.Marketplace Deployment StepsThe steps described below are for launching an instance within the Azure Marketplace. Advancedcustomizations such as VPC networking specifics and public/private subnetting placement arebeyond the scope of this document.1. Navigate to Azure Marketplace etplace/apps/nvidia.nvidia-cloudxr-win2019?tab Overview) and search for CloudXR to find thelatest listing. Review the details and make a note of the instance size, pricing, usage, andother details. Select Get It Now. Then select Create on the next page.2. Within the Create a virutal machine page review the options for your instance. TheMarketplace image comes completed with default options for most installations. Review thesections and make any desired changes. Select the region closest to your client users (whereGPUs are available). If you're not sure which region that is, use a 3rd party Azure region pingtest to verify.3. Ensure the Image remains selected with CloudXR 3.0 - Gen1 and Size includes the NCas T4 v3type. Enter a Username and Password to connect to the deployed instance. SelectReview Create or if you'd like to review more options step through each step within thewizard.Note: The deployment template will create a new Public IP and network security groupconfigured with proper firewall settings. It is advised post dpeloyment to update the NSG with
IP ranges for only allowed networks.4. On the final page, confirm your settings and charges for use and select Create.Note: Azure instances are billed based on usage. It is advised to shut down yourinstance when no longer in use.Connecting to the GPU-Accelerated CloudXRWorkstation1. Locate the public IP address for your new instance and use RDP to initially connect.2. Use the Username and Password you created within the the deployment wizard.Installing and using CloudXR on the Azure instance
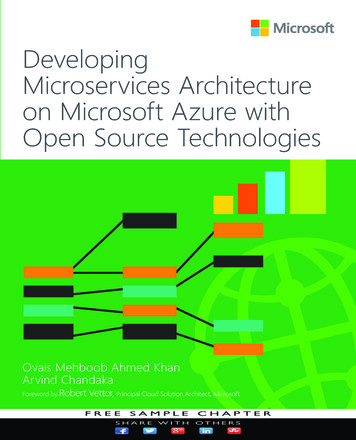
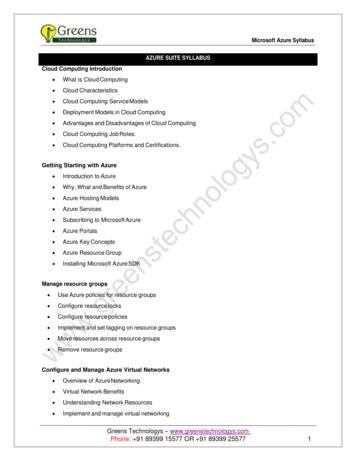
At this point, you should be connected to the remote instance with RDP. The instance comesconfigured with (most) Windows firewall settings, CloudXR server installer, and SDKdocumentation. It does not come with an OpenVR SDK (Steam and SteamVR), Virtual Audio driver,and an alternative to RDP that you'll need to download and install manually.1. Open the Windows File Explorer and navigate to C:\CloudXR Docs2. Open the README azure file to review.3. The instance comes with a license for NVIDIA vGPU, but the driver must be installedmanually. Open the shortcut within the CloudXR Docs folder to navigate to driver or browseto ivers. Download and install.4. Open a web-browser on the instance. Navigate to https://www.steamvr.com to first installSteam followed by SteamVR.5. After SteamVR has been installed, open the folder CloudXR 3.0 folder. Navigate to Installerand run CloudXR-Setup.exe6. Ensure all CloudXR Server options remain selected and client options are NOT selected.Select Install. (Note: SteamVR must be already installed else the CloudXR installer will NOTcomplete successfully.)7. Once completed, select Launch SteamVR from the Windows Desktop. If not done already,you will be prompted to log into Steam.8. SteamVR will launch and display a messaging asking you to connect a headset. This can beignored. If you also see a notice regarding App Container permissions, select UpdatePermissions.9. Validate CloudXR's plugin is installed by opening SteamVR's settings panel. EnableAdvanced Setting and select Manage Add-ons. The addon CloudXRRemoteHMD should
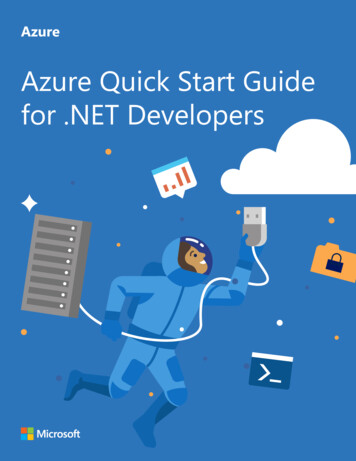
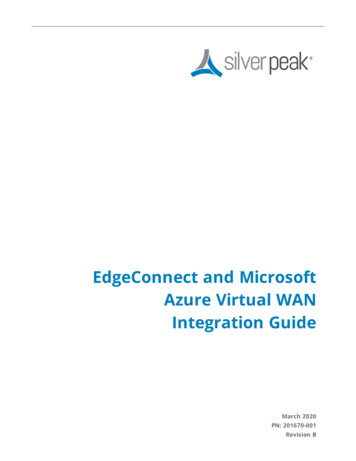
be listed and On selected.10. On the Desktop, double-click vrserverallowadd.bat to add a Windows Firewall rule to allowVRServer.exe to send and receive network traffic.
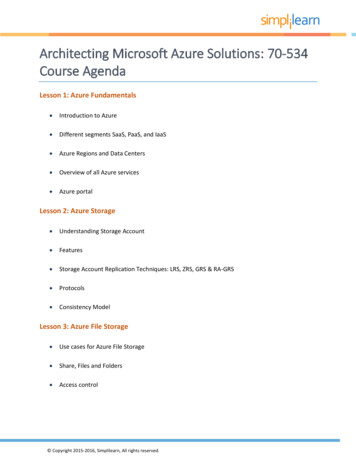
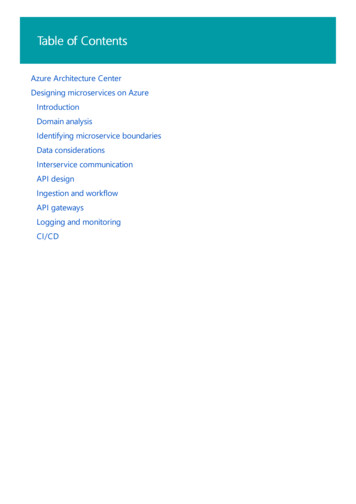
11. Verify the rule has been added by launching Run wf.msc to open Windows DefenderFirewall with Advanced Security. Look for a rule named CloudXR VR Server Path. (Alsonote the CLOUDXR RTSP TCP entries that were added by the CloudXR Server installer).12. Install an alternative remote desktop connection tool. Popular options include VNC, PCoIPfrom Teradici, or DCV from NICE. Use this from now on when connecting to your instance.RDP will produce a green screen within the CloudXR Stream when connected to theworkstation.13. (Optional) Install a virtual audio device if sound is required. A popular option can be found athttps://vb-audio.com/Cable/14. Server installation and configuration is now complete.Note: Azure instances are billed based on usage. Consider shutting down your instancewhen no longer in use to prevent unnecessary charges.Connecting to CloudXR Server from CloudXR ClientThe latest CloudXR sample/test clients help developers learn how to develop their own clientapplications. These have been omitted from the image to ensure the latest versions are usedwhen developing. These can be acquired from the NVIDIA Developer portal at https://developer.nvidia.com/nvidia-cloudxr-sdk. The instructions below may change at any time and do not discussmethods of loading and launching client applications on HMD devices. For these details, consultthe CloudXR documentation. https://docs.nvidia.com/cloudxr-sdk/index.html1. Ensure firewalls are configured to allow access for the specified ports for CloudXR. Theseinclude your local network firewall and remote Azure Network and Firewall ettings. Specificports and their values are located with the CloudXR documentation.2. Launch SteamVR. It may display warning about a disconnected headset which can beignored.3. Launch the CloudXR Client application on your client device and use the public IP address ofyour instance for its connection endpoint. Once connected, SteamVR will display iconsindicating a device is connected. You will also see the SteamVR "void" within the headset. Youcan also open the VR view within SteamVR and validate images between the server andheadset.
4. Launch any OpenVR application and use it as you normally would.5. Shut down / STOP the instance when your session is over else Azure charges willcontinue to accumulate.
Remote Desktop Solution besides RDP Using Windows RDP is the only option for intial configuration steps after deployment, but using RDP during CloudXR Streaming sessions will display a green screen to the VR device. This is a known problem with Windows RDP unable to release the Microsoft Basic Display Driver used during the remote session.