Transcription
SMS for EloquaUser Guide
Marketing DecisionsEloqua SMS Connector User GuideContents1Overview . 31.1 What is SMS for Eloqua? . 31.2 Common terminology . 42 Provisioning . 52.1 Step 1 - Signup . 52.2 Step 2 – Adding the Marketing Decisions SMS Tool . 52.2.1 Setup a user . 52.2.2Add the SMS Connector using the App Cloud . 62.2.3Add the SMS Connector Cloud Connector . 72.3 Step 3 – Adding Data Cards . 92.4 Step 4 – Adding SMS opt-in . 132.5 Step 5 – Adding a Delivery Receipt capture field . 142.6 Step 6 – Other Considerations . 153 Service Operation . 163.1 Account types . 163.2 Setting up your account for the first time. 163.3 Sending a message . 253.4 Polling . 333.5 Reporting. 334 Support . 384.1 Marketing Decisions SMS for Eloqua . 384.2 Eloqua . 385 FAQs . 395.1 Questions when using the service . 395.2 Troubleshooting . 39Commercial-In-ConfidencePage 2 of 39
Marketing DecisionsEloqua SMS Connector User Guide11.1OverviewWhat is SMS for Eloqua?SMS for Eloqua extends the reach of the powerful Eloqua platform by introducing an additional medium tocommunicate with your customer base. SMS is a fantastic way to reach customers with timely information SMS is personalized and private SMS is flexible and timely It provides significant cost savings versus traditional marketing methods It’s easy to broadcast to large numbers of recipients (special events announcements, tailor mademessages with “names addressed” etc) 97% of SMS messages are opened (mostly within a few minutes)The SMS functionality is integrated with the Eloqua platform via a Cloud Action connector. It can beaccessed either via Campaign Canvas (E10) or Program Builder (E9 or E10). This makes it easy toincorporate and automate SMS into your workflow.Commercial-In-ConfidencePage 3 of 39
Marketing DecisionsEloqua SMS Connector User Guide1.2Common terminologyBulk SMSThe sending of large numbers of SMS messages fordelivery to mobile phone terminals. This is what the SMS forEloqua service is based around.MSISDNMobile / Cell phone number.MOMobile Originating. A message which is sent from thehandset into the service.MTMobile Terminating. A message which is sent from theservice and is received on the handset.OAOriginating Address. This is what is displayed on thehandset to indicate who the message is from. There are 3types of OA:Long number - This is the standard mobile number formatand is used by the SMS for Eloqua service and is referredto as Automatic within the application and the rest of thisguide.Short code - For example 80010. These are often used insituations where you want the consumer to be able to easilyremember the number, for example, competitions andmarketing material.Alpha-numeric- This is usually a word but can be any set ofletters and numbers. The limitation here is that it does notsupport 2-way messaging. This is referred to as UserDefined within the application and the rest of this guide.Commercial-In-ConfidencePage 4 of 39
Marketing DecisionsEloqua SMS Connector User Guide2 Provisioning2.1Step 1 - SignupIf you haven’t already signed up to Marketing Decisions SMS for Eloqua, simply visit:http://www.marketingdecisions.com.au and select “SMS Cloud Connector” as your Service of Interest. Addany comments and submit. We will get right back to you to set up an account for you.2.2Step 2 – Adding the Marketing Decisions SMS ToolFollowing signup you will need to add the SMS connector to your Eloqua instance. There are two ways to dothis. The most common way is by adding it via the App Cloud. This will setup the SMS Connector as aCloud Action inside campaign canvas. If you want to use the SMS Connector via Program Builder thenplease also make sure that step is followed.2.2.1Setup a userFirst you need to have your account set up correctly. Please ensure that your company is enabled for APIusage, and that the user account you plan on using is enabled as an API user.If you are a customer administrator for Eloqua you can go to the user management tab and ensure that theuser has the API User role enabled as well as one of Advanced User - Marketing or Basic User - MarketingUser Role.It may be appropriate to create a new generic API user specifically for this service. This reduces thelikelihood of changes being needed following staff turnover.Please feel free to contact Marketing Decisions if you require assistance setting up an account.Commercial-In-ConfidencePage 5 of 39
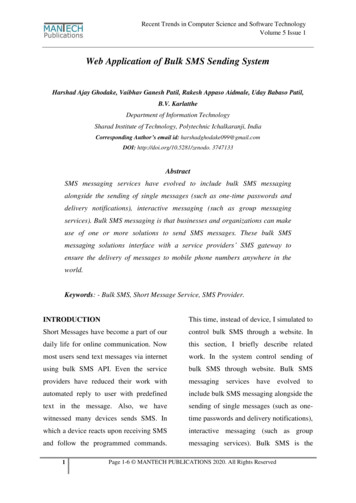
Marketing DecisionsEloqua SMS Connector User GuideWith an API-enabled account, you're now ready to set up a connector.2.2.2 Add the SMS Connector using the App CloudTo add the Marketing Decisions SMS Connector to your App Catalog, go to this D0-CB-F3-C4-DE-B7-12-A1-93-36-3E-00-59-6BWhen the verification screen appears, click Accept.At this point the SMS Connector app is not setup in the app cloud. Check your status – if it doesn’t say“Ready” then you may need to perform a management step to re-install the app.Commercial-In-ConfidencePage 6 of 39
Marketing DecisionsEloqua SMS Connector User GuidePlease note – this can also happen if you are installing the app prior to having an account setup for you. Ifyou haven’t already got an account in our SMS Connector then please contact us as soon as possible.To confirm everything is working, click the Status button on the end of the SMS Connector line. Theresponse you should receive is:At this point your Cloud Action is setup and ready to use.2.2.3 Add the SMS Connector Cloud ConnectorPlease note – this step is only required should you wish to run the SMS Connector from Program Builder. Ifyou will only be using Campaign Canvas to process SMS messages, then this step is not required.Each connector is identified by a Service Name, a URL and a Unique ID. For Marketing Decisions SMS forEloqua these details are:Service Name : Marketing Decisions SMS ConnectorURL: ration?StepID {STEP ID}&Company {COMPANY}Unique ID : MarketingDecisionsSMSYou will need to copy each of these details into Eloqua.To install this Cloud Connector in Eloqua E9, go to System Management and you will see the CloudConnector Manager on the left side.(Setup - Management - System Management - Cloud Connector Manager)Commercial-In-ConfidencePage 7 of 39
Marketing DecisionsEloqua SMS Connector User GuideIn E10 go to Setup and choose Cloud Connector:Commercial-In-ConfidencePage 8 of 39
Marketing DecisionsEloqua SMS Connector User GuideThe values listed above should be entered as they are laid out above. This includes the URL (no editing ofthe URL is required). Once entered click ‘Add’.With this Cloud Connector installed, it will now be an available option within a step in Program Builder orCampaign Canvas (E10). You can use it once, twice, or as many times as you like, as you would a normalProgram Builder or Campaign Canvas step.2.3Step 3 – Adding Data CardsData Cards are used within the Eloqua system to store additional information about a contact. These areimportant if you would like to record any outgoing or incoming messages associated with a contact.The SMS for Eloqua service allows you to either have these switched on or off across your entire contactbase. For details of how to switch these on or off please see section 3.2 ‘Setting up your account for the firsttime’.If you do not want to use SMS Data Cards you can skip this step. SMS Data Cards can always be added at alater stage.To add SMS Data Cards it is important to follow the steps below closely as the actual name of the DataCards is critical in their correct operation.1. We need to add a new custom data objectE9:Within the Eloqua system navigate: Evaluate - Database Management - Custom Objects - Data Card Set- New Custom Data ObjectCommercial-In-ConfidencePage 9 of 39
Marketing DecisionsEloqua SMS Connector User GuideE10:Within the Eloqua system navigate: Contacts - Custom ObjectsEnter the following details:Display Name Marketing Decisions SMSAll other settings can be left to their default or set according to your own specifications.Click ‘Next’ at the bottom right to continue.2. Although the next page looks blank, select Data Card Fields from the top right, followed by Add New FieldCommercial-In-ConfidencePage 10 of 39
Marketing DecisionsEloqua SMS Connector User Guide3. Within the Field Name box enter Content and set Data Type to Large Text. Leave all other options to theirdefault settings.Click Save and Close (this is important rather than just clicking Save). You will now see the new field listed.4. Repeat steps 2 and 3 to add the following fields as standard text (not large text) entitled:FromDirectionStep IDEmail AddressCommercial-In-ConfidencePage 11 of 39
Marketing DecisionsEloqua SMS Connector User GuideFailure ReasonTime Stamp (save as a date/time field)Message IDThe following 2 fields need to be added, but will only be populated if you choose to report on the Labelsfunctionality discussed later in this guide:UserTag LabelUserKey LabelThe following 2 fields also need to be added, but will only be populated if you chose to report on the DeliveryReceipt functionality discussed later in this guide:DR Status CodeDR DescriptionHowever, in all the above instances leave the Data Type field as Text (except for Time Stamp) and all othersettings to their default values. Once again click Save and Close after each one.An example for the first one in the list is shown below:At the end of the process you should have the fields below (the example provided is where all the abovefields have been added):Commercial-In-ConfidencePage 12 of 39
Marketing DecisionsEloqua SMS Connector User GuideYour Data Card is now setup.2.4Step 4 – Adding SMS opt-inAs with other types of electronic communication it is critical that your customers can opt-out from receivingfuture communications.To facilitate this it is recommended that you set up an SMS opt-in option against your contact records. Thiswill typically take the form of a specific SMS opt-in field.To add a specific SMS opt-in field:E9:1. Within the Eloqua system navigate: Evaluate - Database Management - Database Setup - Contacts - New Contact Field2. Create a new contact field called “SMS Opt-in” as a standard text/textbox fieldE10:Commercial-In-ConfidencePage 13 of 39
Marketing DecisionsEloqua SMS Connector User Guide1. Within the Eloqua system navigate: Setup - Fields & Views - Fields - for new field (bottom of window)- Add Contact Field2. Create a new contact field called “SMS Opt-in” as a standard text/textboxThe SMS for Eloqua service will automatically opt-out contacts who reply ‘STOP’ to an MT SMS with an OAset to Automatic.If you receive an opt-out request via any other means (including but not limited to, over the phone, email or inwriting) then you should manually opt the contact out of future SMS communications.2.5Step 5 – Adding a Delivery Receipt capture fieldA SMS Delivery Receipt may be issued by the network operator to provide status information. Whether aDelivery Receipt is issued is dependent on the country and operator in question; however, in the largemajority of cases they are issued.Delivery Receipts are not always reported back instantly by the network operators and factors such aswhether the phone is within coverage also play a part. As such, the timing and order in which the DeliveryReceipt information is reported back may vary.In the section Adding Data Cards we discussed adding field names to the Data Card which capture thisinformation. However, you may decide not to use Data Cards or have a further requirement to track DeliveryReceipts in an alternative manner. This can be facilitated by adding a Delivery Receipt capture field againsteach Contact.This is not a mandatory step, so as with Data Cards, if you do not wish to use this functionality you can jumpto the next section of the guide.The Delivery Receipt capture field works by storing a letter to represent the status of the most recent 10 SMSsent. Once the field has 10 values and further SMS are sent, each new status code is added to the end ofthe list and the first is removed.Example:DSDDDDSDDD Swill result in SDDDDSDDDSThe following three letters are represented:D - Successfully delivered.S - Soft Failure: Marketing Decisions has tried to deliver the message (including our standard retrymechanisms), but has not been able to. The user can try sending the message again.F - Hard Failure: Marketing Decisions is unable to deliver the message, due to issues outside of MarketingDecisions’ control. Trying to re-submit the message will result in the same hard failure.P – Message Pending: At the time of sending, Marketing Decisions was unable to determine if the messagewas delivered or not, and will keep trying. Please note, this value will not be updated once the message issent.To add a specific Delivery Receipt capture field repeat the above process for addition of a field and name it“SMS Delivery Receipts”Commercial-In-ConfidencePage 14 of 39
Marketing DecisionsEloqua SMS Connector User Guide2.6Step 6 – Other ConsiderationsWe would suggest at this point that you consider the following:Which Eloqua contact field are you using to record the contact’s phone number? This is importantinformation for when we move onto section 3.2 ‘Setting up your account for the first time’.Are your contact’s phone numbers stored in international format?In order to send SMS it is important we know the country the phone number is associated with (ie, the homenetwork – it may be that the user is roaming abroad). Ideally your contact’s numbers should be stored ininternational format; however, we do supply a tool to assist normalising your numbers, which is discussed insection 3 ‘Service Operation’. An example of international format is 0044797XXXX or 44797XXXXCommercial-In-ConfidencePage 15 of 39
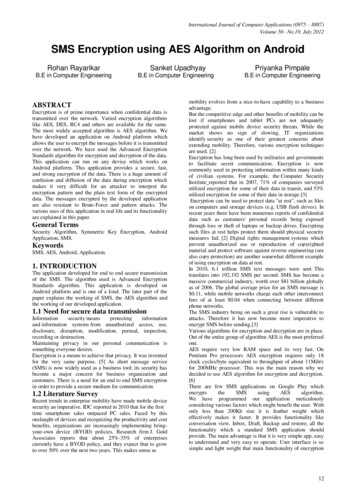
Marketing DecisionsEloqua SMS Connector User Guide3 Service Operation3.1Account typesFollowing signup to the product you will be issued with two sets of credentials being:a) Access to the connectorb) Access to the SMS Gateway3.2Setting up your account for the first timeThe first time you login to configure the Marketing Decisions SMS for Eloqua cloud connector you will betaken automatically to a welcome page, and be asked to begin setup of the Cloud connector.You will be walked through a workflow, completed by setting all fields in the Global Settings. Your detailsentered along the way will be verified and checked for consistency. Click Begin Setup to start configuringyour cloud connector instance.Without completing this initial configuration of the Global Settings you will not be able to access the othertabs.Global Settings record the key details associated with your account; such as, the appropriate credentialsused in message submission. It also sets the default behaviour for every time you go in to configure thecloud connector for a particular step.Commercial-In-ConfidencePage 16 of 39
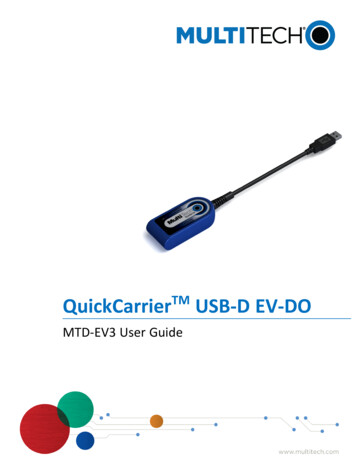
Marketing DecisionsEloqua SMS Connector User GuideWe will discuss each of the options one by one:Eloqua credentialsIn this section you should enter a set of Eloqua API enabled account credentials. These are used whencalling your Eloqua account to enable retrieval of contact information and access the Program Builder orCampaign Canvas steps.This global set of API details will be used across your instance of Eloqua, so it may be appropriate to set upa specific API access account on the Eloqua platform for this service. This will reduce the likelihood ofproblems associated with password changes or staff turnover. It is important to note that if the Eloquasystem requests you update the password for this account, you will also need to revisit this section to updatehere as well.Once entered click Next to move to the next step in the workflow.SMS API credentialsOnce the Eloqua credentials are supplied, the next step is entering the Dialogue API Credentials. If youhave a direct account with Dialogue, you would have been supplied the API credentials required to beentered into here. Otherwise, please use the API settings we have provided in your welcome email.There are two sections to this form:1. SMS API Credentials – this is where you need to supply your API credentials as supplied by us, or ifCommercial-In-ConfidencePage 17 of 39
Marketing DecisionsEloqua SMS Connector User Guideyou are billed directly through Dialogue – the credentials supplied by Dialogue.2. Validation of API Credential – this section allows you to provide your mobile phone number, andverify that you have the SMS API credentials setup correctly. If the “Validate My Credentials” box isticked, when you click Validate and save, the connector will verify you have the correct credentials byattempting to send a test message.If the test message works, then your credentials are valid and will save – and the connector willmove onto the next screen. If it didn’t work – an error will appear advising as such and you will needto re-identify your credentials.Please note this test message if successful will be added to your billing. This is the only way at this stage weCommercial-In-ConfidencePage 18 of 39
Marketing DecisionsEloqua SMS Connector User Guidehave of verifying that the correct API details have been entered. It is important to have this right, as it cancause a great deal of problems down the line if incorrect.Once the API credentials have been validated, you will be taken to the Global Configuration page. There area number of sections to this page. We will describe each individually.Eloqua and SMS API CredentialsHere you can update the credentials as described in the above functions.In the Regional settings you are able to select your country and time zone.Country – This is the default country you are sending messages from (this can be overwritten per message).This affects how the Phone Number Normalisation works.Phone number normalisation - if your contact’s phone numbers are stored in a local format (rather thaninternational format), you can set default normalization behaviour by checking this box. Based on the countryselected the system will automatically attempt to put the number into the appropriate international format formessage submission. It is recommended that all contact’s phone numbers are stored within internationalformat as standard.If a contact is already in international format (including ones which do not match the rule set here) the systemwill ignore it.Commercial-In-ConfidencePage 19 of 39
Marketing DecisionsEloqua SMS Connector User GuideTimezone - this timezone setting will determine how the messages sent are displayed on the Step Activity(Reports) tab. Also if you have Eloqua Data Cards or SMS Forwarding turned on, this timezone setting willconvert the message date/time into the appropriate timezone for you.Originating address typeUser Defined - MT SMS are sent with an alphanumeric originating address specified by you in thefield below. If you use letters or a fake number; 2-way communication will not function as the replieswill not be routable by the network operators. You could however, use a specific MSISDN in this fieldif you wanted replies to go direct to that MSISDN.Automatic – You are assigned a default number from the gateway, which could be different on eachuse of the Connector. This allows 2-way communication.Originating address - this field allows you to set the originating address of MT SMS when selecting UserDefined in the Originating address type dropdown.Phone number field - this is the field within the Eloqua system that you use to store MSISDNs. We use thisfield to retrieve the MSISDN when a contact appears in a step.This section allows you to impose a restriction on your account to ensure you don’t exceed a certain numberof SMS. An example use case of this is where you are sending an SMS to a segment, and a team memberaccidentally gets your Segment Criteria incorrect and sends the SMS to your entire marketing database.While for many clients this may not be the end of the world, those with 100,000 clients may be hit with ahefty invoice at the end of the month.Commercial-In-ConfidencePage 20 of 39
Marketing DecisionsEloqua SMS Connector User GuidePlease note these values are chargeable blocks, not messages – therefore a message consisting of 200standard characters would be treated as 2 chargeable blocks.Override Monthly SMS Limit – This is the number of chargeable SMS blocks we have limited your account to.If you are billed for your SMS directly through Dialogue, then most likely this will not be set (No Limit),otherwise if we may impose a cap on your account.My Monthly SMS Limit – This is a limit you have imposed on yourself. You are free to cap your SMS usageto any number of chargeable blocks.If you sending out a batch of SMS messages, the Connector will first check to make sure sending this batchwill not exceed your limits. If it does, the SMS will not be sent, and you’ll receive an email indicating that youare about to exceed your SMS limitations.Opt In Field - the requirement for SMS opt-in is discussed in an earlier section (2.4) of this guide. Thisdropdown allows you to select the appropriate opt-in field from those you have set up on the Eloqua system.Once again your Eloqua API credentials must be validated before the dropdown is populated.Opted-in value - this is the value you have set within the Eloqua system to indicate the contact is opted-in toreceive SMS.If you have set up a specific SMS Opt-in field as per this guide you should enter ‘yes’.Opted-out value - this is the value you have set within the Eloqua system to indicate the contact is not optedin to receive SMS.If you have set up a specific SMS Opt-in field as per this guide you should enter ‘no’.Commercial-In-ConfidencePage 21 of 39
Marketing DecisionsEloqua SMS Connector User GuideUser Contact Field for Delivery Receipts – as discussed earlier in this guide, if you have opted to use a fieldfor capturing Delivery Receipt information, you can enable and select this field from here.Delivery Receipt Contact Field Name – If yes is chosen in the field above, please select the appropriate fieldfrom the list.Use Eloqua Data Cards – This option allows you to indicate whether or not SMS details will be recorded inEloqua Data Cards inside your Eloqua Instance. It is recommended this is set to Yes. However if you don’thave Eloqua Data Cards on your Eloqua instance, please select No.Use Data Cards for Delivery Receipts – This field allows delivery information to be applied to Eloqua DataCards. If data cards are used, this should always be set to yes.SMS reply forwarding - you can enter a catch all email address for MO SMS (replies to outgoing messages).You could set up a mailing list and add that address into this field if a group of people would like to seeresponses over email.If you have Data Cards set up, MO SMS will also be logged against each contact.Commercial-In-ConfidencePage 22 of 39
Marketing DecisionsEloqua SMS Connector User GuideThe SMS Help Response is an auto-response sent to recipients who reply STOP to an MT SMS. This is aregulatory requirement in some countries.If you are using Automatic as your originating address and someone replies STOP this auto- response istriggered and the recipient is opted-out based on the Opt-in logic discussed in the preceding sections.Keywords – This field allows you to specify which keywords you want to search for in their response. Entereach keyword, then press the TAB key or comma to move onto the next word. You can enter as many asyou want here. The connector will always search for STOP as a backup.Company name - Should be your company name.Customer Support Info - Should include a non premium rate phone number the recipient can contact if theyhave any questions. E.g 0409 XXX XXXXDiscontinuation Message – The information relating to what has happened to their account if required.Other info - any further info you want to include.STOP response preview - this is populated automatically based on the information you enter in the fieldsabove. What you see here will be sent out to message recipients if they choose to send a STOP reply to youroriginal message.Commercial-In-ConfidencePage 23 of 39
Marketing DecisionsEloqua SMS Connector User GuideSMS HELP response - This is an auto-response sent to recipients who reply HELP to an MT SMS. This is aregulatory requirement in some countries.If you are using Automatic as your originating address and someone replies HELP this auto- response istriggered.Keywords – This field allows you to specify which keywords you want to search for in their response. Entereach keyword, then press the TAB key or comma to move onto the next word. You can enter as many asyou want here. The connector will always search for HELP as a backup.Customer support infoCompany nameCommercial-In-ConfidencePage 24 of 39
Marketing DecisionsEloqua SMS Connector User GuideService descriptionAdditional carrier costsFrequency for your service.Opt-out info - provides details of how the recipient can opt-out of future SMS communications. The defaultmessage will be sufficient.Other info - any further info you want to include.HELP response preview - this is populated automatically based on the information you enter in the fieldsabove. This will give you an idea of the final message size.-Should be your company name.- should include a short overview of the service.- the defaultmessage will be sufficient.- should give an idea of the frequency of the MT SMS-Should include a non premium rate phone number the recipient can contact if they have anyquestions. E.g. 0409 XXX XXXCustomer support infoLabels - labels can be used to create additional identifiers for outbound messages – very useful foridentifying the messages sent as part of a campaign or event. For customers using the MIS application, UserTag and User Key are fields associated with an MT SMS.To add new labels or Tags, click the Add New button and enter in the details of the Label / Tag you want tocreate.3.3Sending a messageTo add the cloud action to a campaign, in Campaign Canvas click on the purple Actions header:Commercial-In-ConfidencePage 25 of 39
Marketing DecisionsEloqua SMS Connector User GuideThen when the next menu level appears, drag the Marketing Decisions SMS Connector onto the canvas.Commercial-In-ConfidencePage 26 of 39
Marketing DecisionsEloqua SMS Connector User GuideThis will take a second or two while your step is initiated, Once done you can right click the cloud action andconfigure it. This will take you to the SMS Connector login screen (or the Step Configuration page if youhave already logged into the SMS Connector).The Step Configuration tab allows you to configure an outbound (MT) message associated with a step in theEloqua Program Builder.When you select this tab you will notice that some options have automatically been set for you based uponthe default behaviour set within Global Settings.The Connector allows you to pull information from either Contact fields, or a Custom Data Object of yourchoice.The first screen you see is this option:Choose your source of Data: Contact Fields – this will allow you to pull all your merge data from Contact Fields.Commercial-In-ConfidencePage 27 of 39
Marketing DecisionsEloqua SMS Connector User Guide Custom Data Objects – This allows you to merge data from Custom Data Objects (also known asData Cards). Once chosen you’ll be asked to choose your Custom Data Object to retrieve data from.Merging from Custom Data Objects also allows you to schedule your SMS message at a certaintime.Notes o
1. Within the Eloqua system navigate: Setup - Fields & Views - Fields - for new field (bottom of window) - Add Contact Field 2. Create a new contact field called "SMS Opt-in" as a standard text/textbox The SMS for Eloqua service will automatically opt-out contacts who reply 'STOP' to an MT SMS with an OA set to Automatic.